How to Use Power Drills and Drill Bits: A Beginner’s Guide
Today, I’m covering the basics of how to use a cordless power drill and drill bits. This might seem simple, but since a power drill is a necessity for any home DIY projects, it’s important to fully understand how to use one. It is truly a tool that you will use often (if not every project) when you’re building DIY furniture or home improvement projects.
I’m often asked how to get started with building and woodworking. I always tell people that it might seem daunting from the outside, but something I love about building my own furniture is how accessible it is. With just 3 tools (a miter saw, a Kreg Pocket Hole Jig, and a power drill), you can make so many quality pieces of custom furniture!
I have created in-depth tutorials for how to use both the miter saw and Kreg Pocket Hole Jig, so today, we will learn the basics of how to properly use a power drill. This will be a power drill guide for beginners; for those just getting started with DIY home projects and furniture building. While you are learning the basics, focus on one tool at a time, take the time to learn it, and you will be making your own furniture in no time!
Table of Contents
- How to Use a Cordless Power Drill
- Drill Bits
- Extra Tips and Tricks for Using a Power Drill for Beginners
This post is part of a series about how to get started with furniture building and home DIY projects.
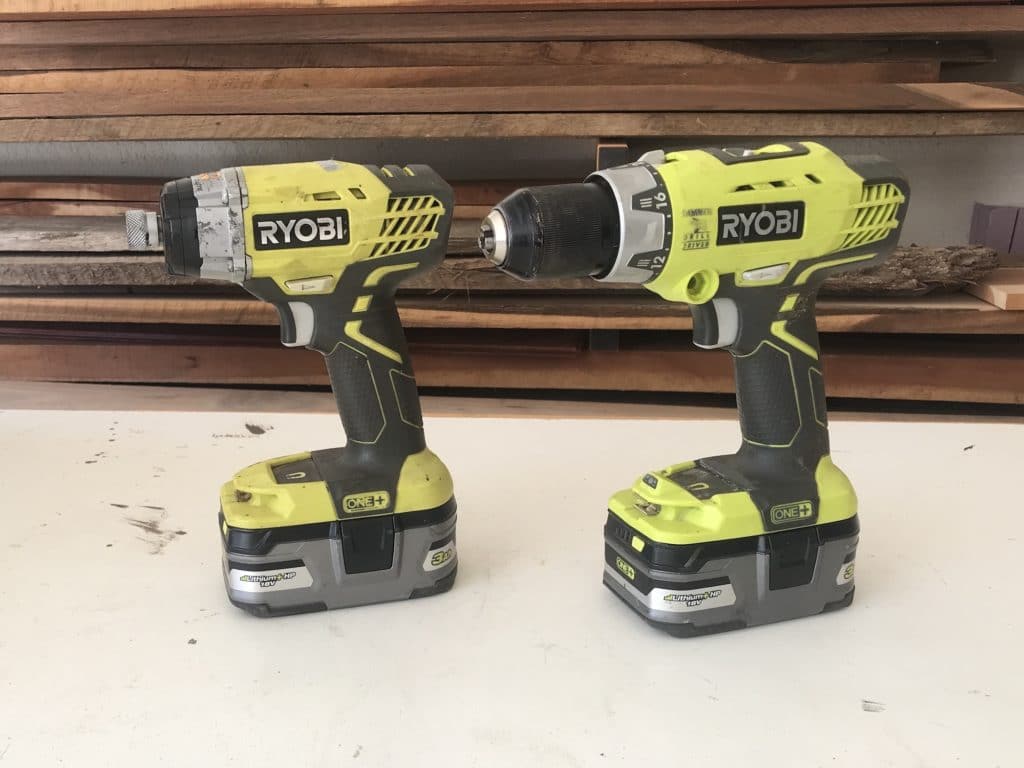
In this post, I will be focusing on cordless power drills. This means that the power source for the drill is a battery, instead of plugged into a power source. So, what batteries and chargers you might already have is something to consider, as that will affect the bottom-line price.
I use Ryobi tools often, because I already have all of the batteries and chargers, which can be used on all of the Ryobi ONE+ tools.
The most recent examples of projects I have made with my power drill are outdoor wooden doormat, wooden light-up star, shoe storage bench with a drawer, picture ledge shelf, wood slat bed, barn door, vent hood, fireplace surround, custom closet, adding hardware to kitchen cabinets, and custom built-ins around a french door. Although, I feel a little funny linking to just those, since the power drill is a tool I use for pretty much every project!
What is a Power Drill Used for?
There are two main purposes of a power drill. They are drilling and driving. Drilling refers to using a drill bit to bore a hole that will eventually be where you insert a screw or nail. Driving is when you actually insert the screw into the wood.
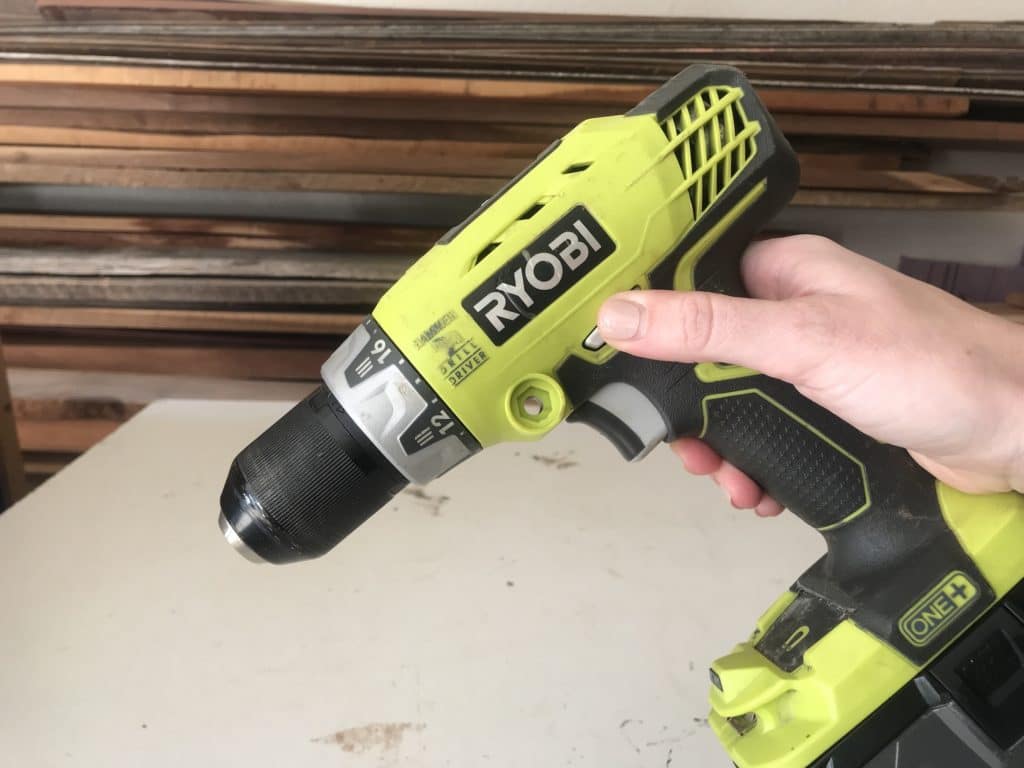
Parts and Terms for a Power Drill
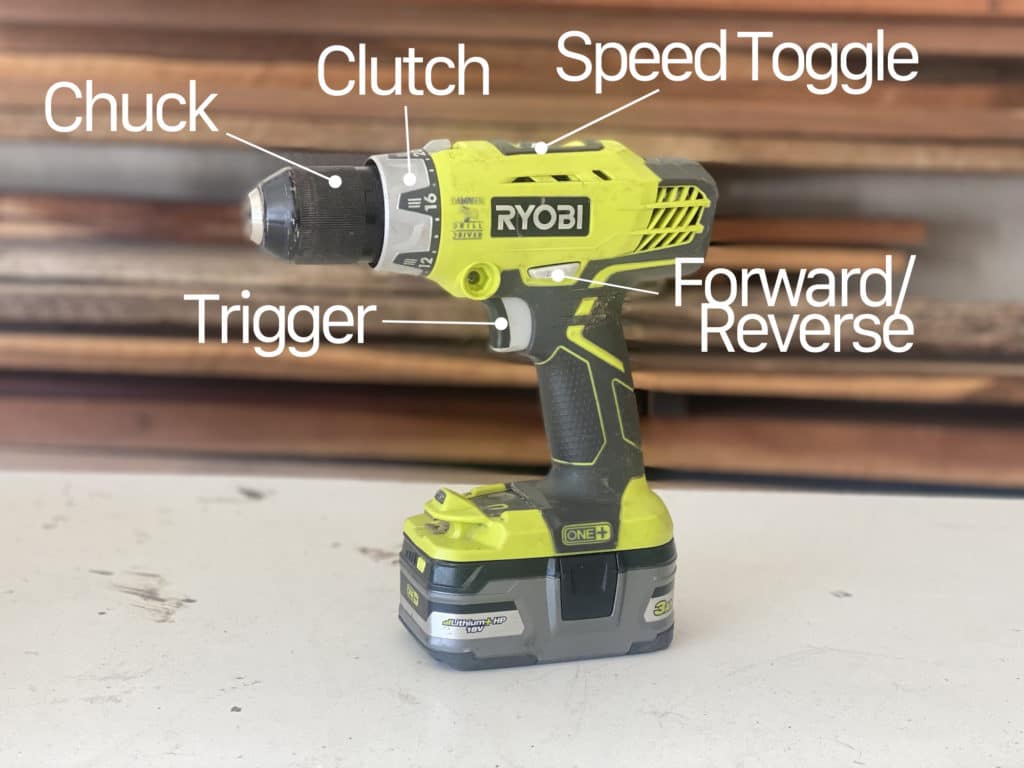
Chuck – the part that opens and closes the “jaws” and will house your drill bit. The most common opening is ⅜”, which is fine for beginners, although some go up to 1/2″
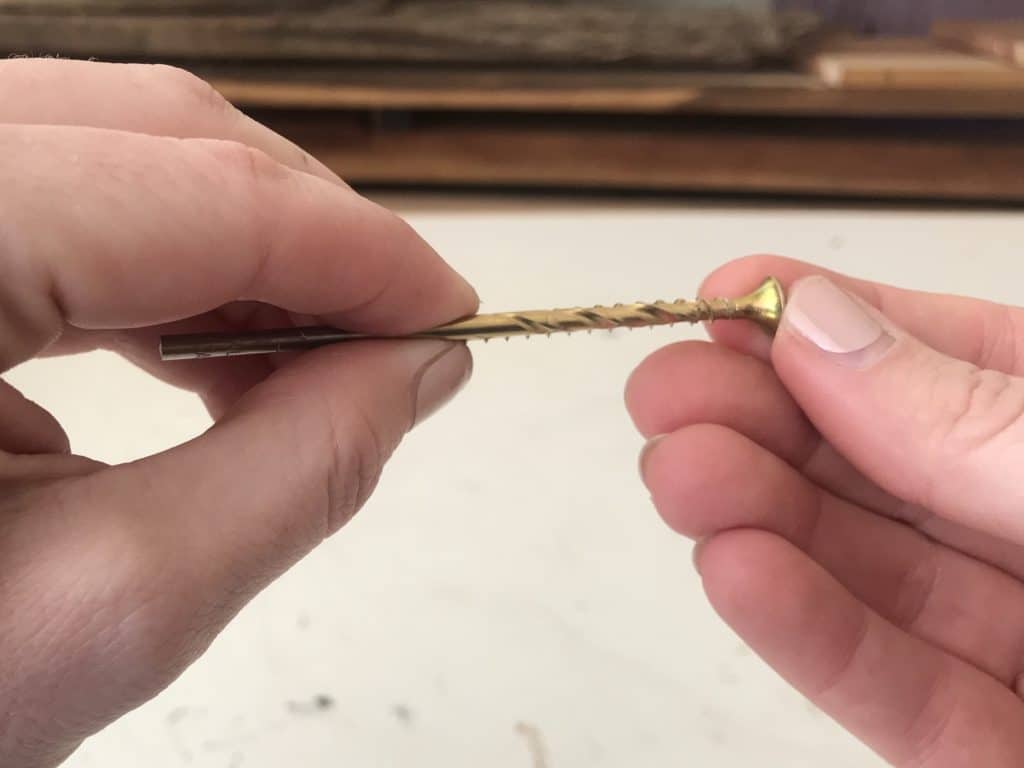
Drill Bit Shank – the part of the drill bit that goes into the chuck
Clutch – controls how much torque is exerted when drilling or driving. The higher the number, the more the torque.
Torque – the force that is exerted on the drill bit or screw. Typically, higher torque is for drilling and lower torque is for driving.
Trigger – Initiates the drilling or driving, usually variable speed
Speed – Speed is important because it gives you more control, depending on the job you are doing. Typically, higher speed is for drilling, and a lower speed is for driving. There is often a speed toggle on the top of drills that further control speed.
Forward/Reverse Setting – controls which way the drill bit spins. Counter clockwise = forward (inserts the screw into the wood) and counter clockwise = backwards (removes the screw from the wood)
Voltage – most drills come rated for voltage. A common rating is 18 volt, which is the one I have, and should be enough for most household projects and DIY furniture building.
Safety Gear for a Power Drill
Disclaimer: This site contains product affiliate links. We may receive a commission if you make a purchase after clicking on one of these links.
As with any projects that uses power tools, safety should be the first thing you think about before you use your tool. The 3 basic items I use when I’m building anything is to protect my eyes, ears, and lungs. These are my favorite safety glasses (they don’t fog!), these are the most comfortable masks I’ve found, and I use these 3M Worktunes all the time to protect my hearing. They are especially great because they are not just noise cancelling, but they also allow me to listen to music while I’m working.
Your best source for proper safety is your instruction manual, so be sure to read it before you use your power drill.
How to Use a Cordless Power Drill
Alright, now that we have talked about parts and safety for a power drill, let’s get talk about how to actually use it!
Step 1: Make sure your battery is fully charged and insert it to the drill
Since I am focusing on cordless power drills in this post, make sure you have the battery fully charged before using it for a project.
Step 2: Adjust the clutch to fit the torque you need.
Remember, higher torque is typically used for drilling and lower torque is typically used for driving.
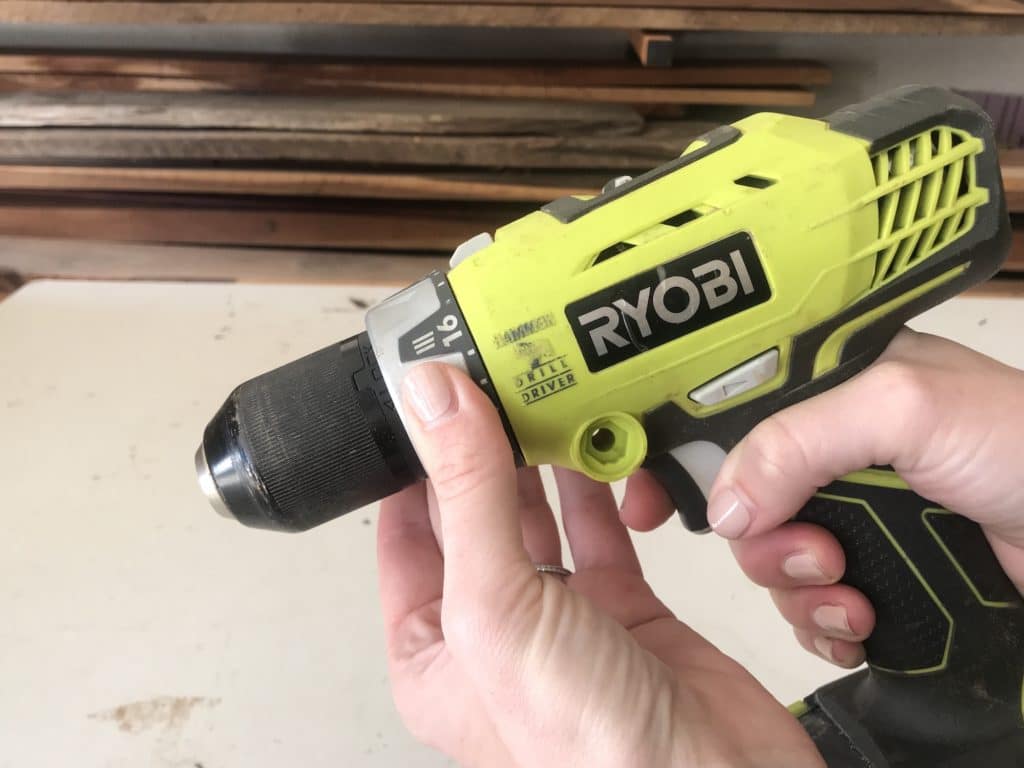
TIP: when you’re drilling or driving into hardwoods or a harder surface, more torque is required
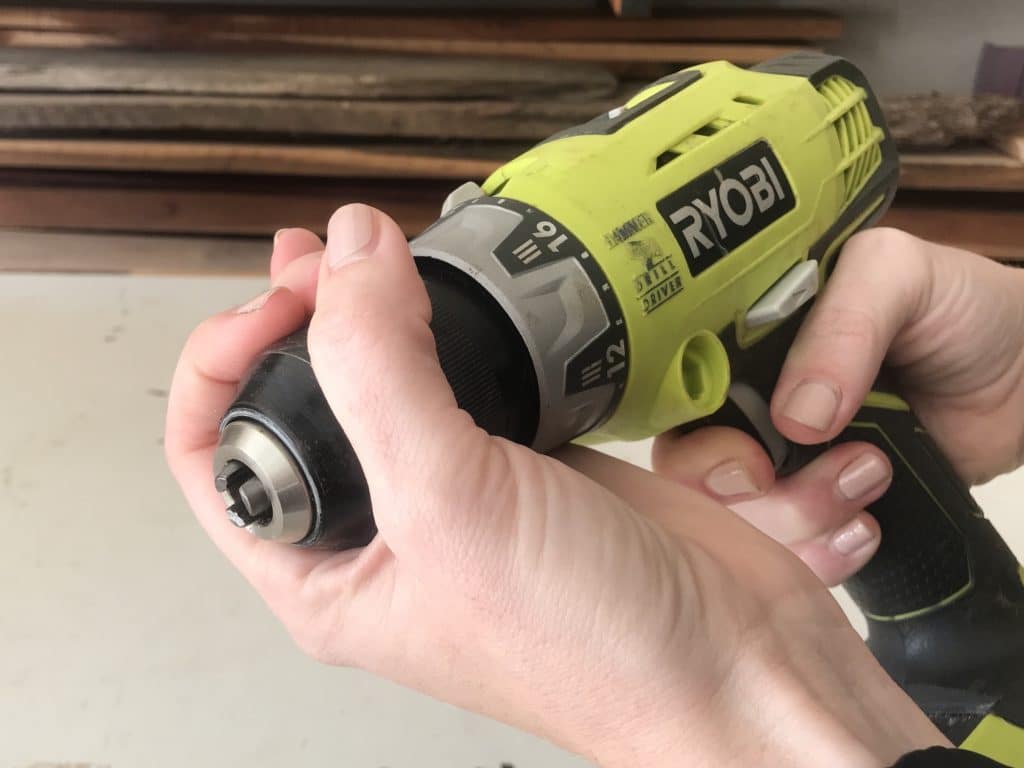
Step 3: Open the Chuck
Most cordless drill have a keyless chuck, which means that you can open and close the chuck by hand, without the use of a “key”.
To open the chuck by hand, hold the chuck with one hand. Place the toggle into reverse, and engage the trigger. The chuck will open. Insert your bit. Hold the chuck again. Adjust the toggle to forward. Engage the trigger until fully tightened.
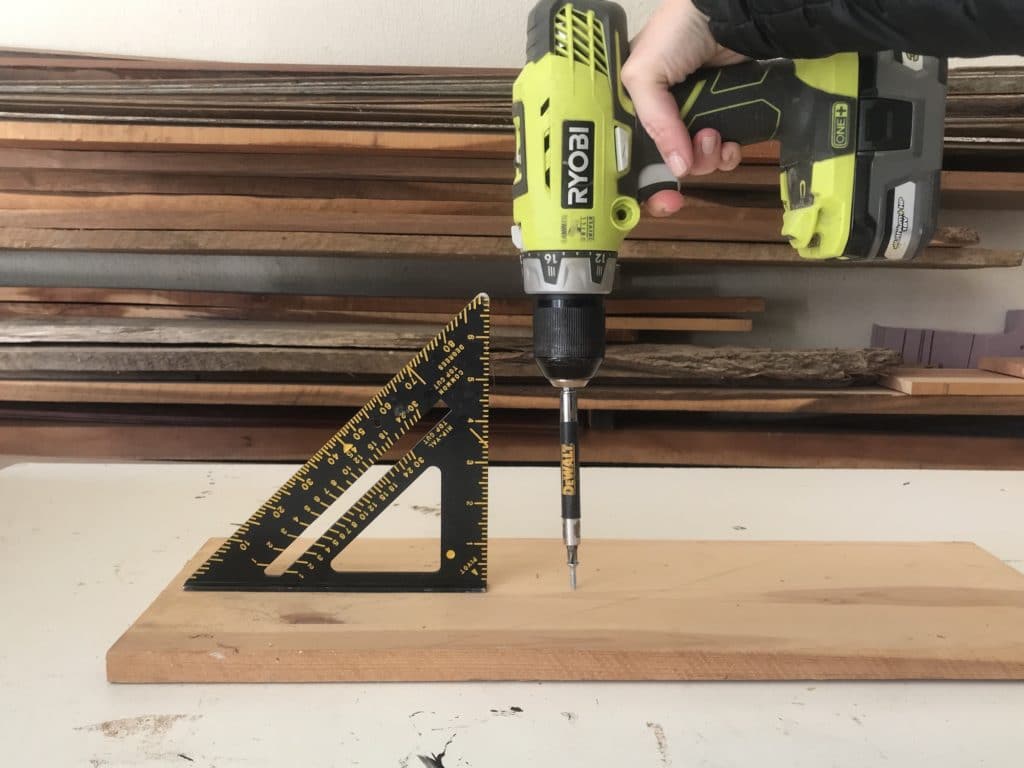
Step 4: Position the drill perpendicular to the piece
Use a speed square if needed. There are occasional times your drill won’t be perpendicular, like when using Kreg pocket hole screws.
Step 5: Engage the Trigger
Adjust the speed as necessary, as most triggers have speed control. Additionally, you can adjust the speed on the top of the drill with an additional speed toggle (on most power drill models). Remember: higher speed is for drilling, and a lower speed is for driving.
Start at a slow and steady pace, then increase speed as you drill further into the piece.
Step 6: Put the Drill in Reverse to Remove the Drill Bit
Once you have reached the desired depth, adjust the forward/reverse setting to reverse. Engage the trigger and remove your bit from the piece.
Drill Bits
There are a lot of different types of drill bits you can choose from for whatever project you are working on. You can use a masonry bit for things like tile, cement, concrete or brick.
I own this Dewalt Drill Bit Set and I highly recommend it. It has a pilot point, which allows for more accurate drilling.
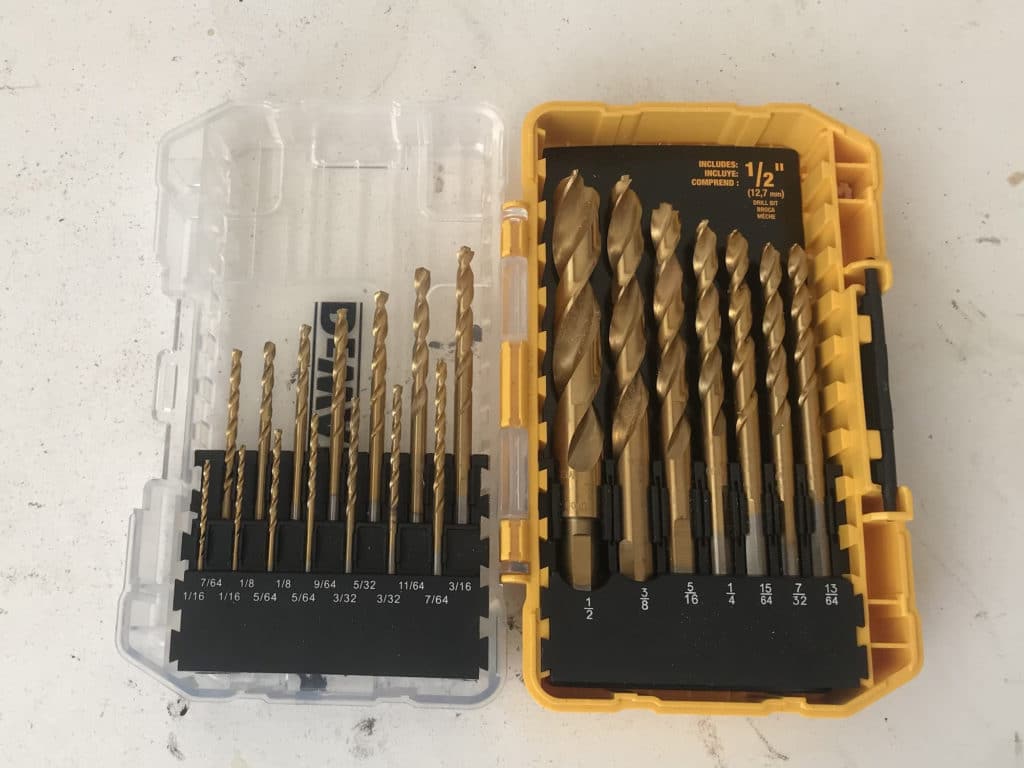
You can also use a large hole cutter to cut larger holes for things like cornhole boards. I used many bits when I built a mudroom hall tree storage cabinet and bench. I also used similar bits when I installed drawer slides on face framed cabinets, install euro hinges on face frame cabinets, added pull out drawers to kitchen cabinets, and installed shelf pins. I even used pocket hole bits on the DIY large square coffee table build and this upholstered sitting bench. All of those projects needed drill bits and power drills!
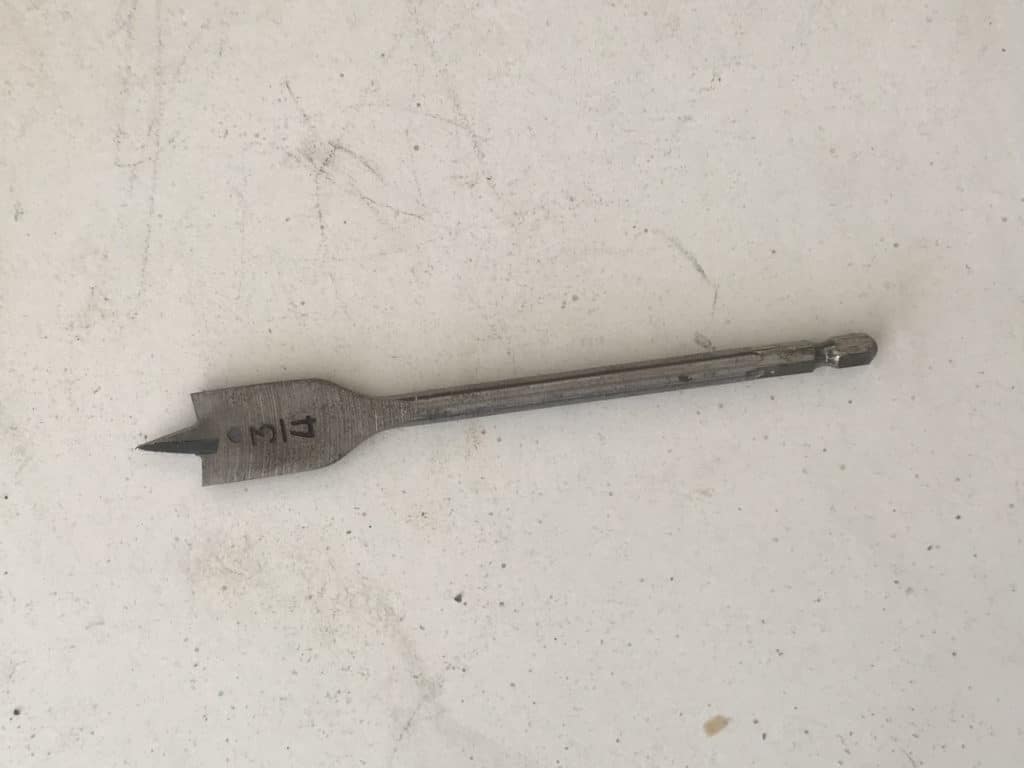
Spade bits are great for cutting smaller holes than the previously mentioned large hole cutter bit. I often use a spade bit to attach figure 8 fasteners in order to attach a tabletop to the base like in these modular dining tables.
Countersink drill bits are used to make the head of the screw flush (or below) the surface of the wood. This is especially helpful when you’re trying to hide the screw. You can cover it with wood filler and paint or stain over it. I took a deep dive into how how to hide screw heads in wood with countersink drill bits here.
Extra Tips and Tricks for Using a Power Drill for Beginners
Use an Awl
An awl is a tool used to create a small dent in the wood before you begin drilling or driving. It will help ensure that the drill bit won’t jump when you begin to drill. This is especially useful if you don’t have a drill bit with a pilot point.
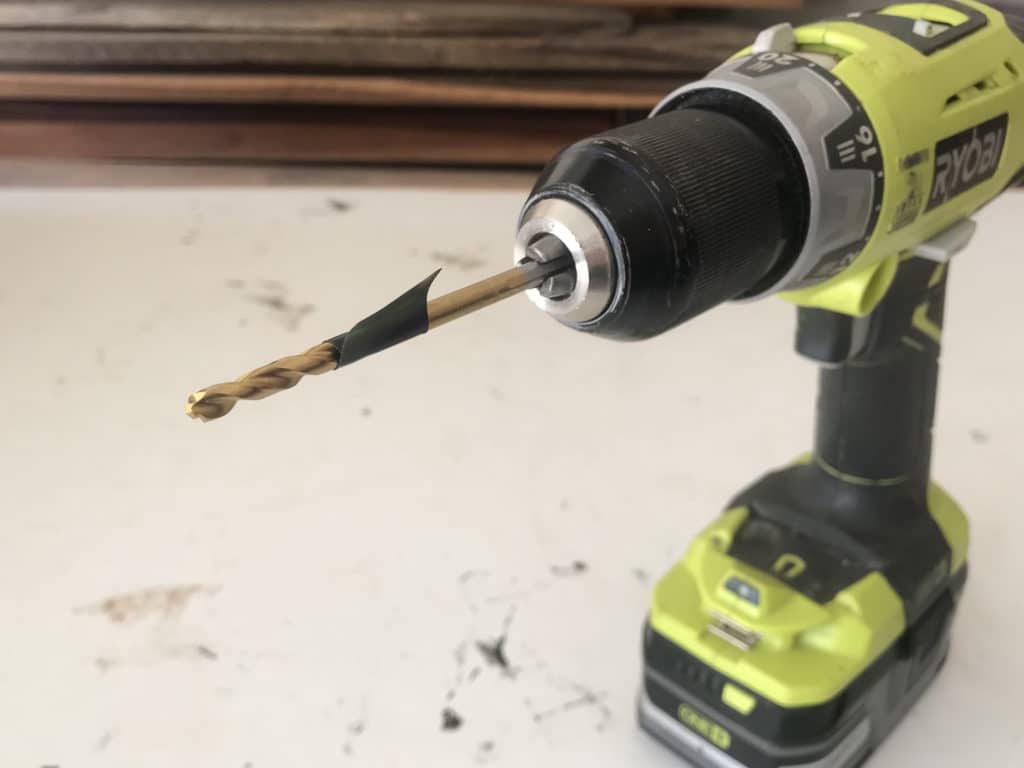
Drilling to a Certain Depth
If you are wanting to drill to a certain depth, a quick way to do this is to wrap tape around the drill bit at your desired depth to create a flag. Then, simply drill until the “flag” hits the surface of the wood.
Pre-Drill
Pre-drilling your holes (also called a pilot hole) before adding the screw is very important in order to protect against the wood splitting. To pick the correct size drill bit for this, choose one that is the same size as the inner diameter of the screw (not including the threads). You can do this by holding drill bit over the screw. Make sure you can’t see the inner diameter of the screw, but you can still see the threads.
How to Avoid Tear Out When Drilling
There are also a couple methods to avoid tear out when you are drilling or driving into wood. Tear out is when the wood splits or “tear” where the drill bit cut through the wood. To get a cleaner edge on your drilled holes, clamp a piece of wood under the piece you are drilling. You will drill straight into this, so make sure it is a scrap piece. This will give you a cleaner cut when drilling.
What is the difference between a power drill and an impact driver?
A: The main difference between a power drill and an impact driver is that the impact driver has more torque. Impact drivers have intermittent bursts of power to help with driving. As far as design, impact drivers are typically more compact than drills, and they also have a quick change collet instead of a chuck. Drills accept more types of bits, because impact drivers require a hex bit to fit the hex collet. So, in a nutshell – impact drivers create more power and power drills are less expensive, but less power.
So, there it is! All you need to know about cordless power drills.
Check out the web story for how to use a power drill here!
Happy building!

Suzie Wible
Suzie has shared her knowledge for over 10 years about building furniture, painting techniques, how to build your dream home, and basic to advanced woodworking skills. Through this blog, readers will feel empowered to create a home and products they love too.
10 Comments
Comments are closed.