The Easy Way I Add Hardware to Cabinets
Drilling holes in order to install hardware in brand new cabinetry sometimes be intimidating for a typical homeowner. Thankfully, there is a simple way for anyone to accurately install new hardware on kitchen cabinets and drawers. It is also a great tool for updating the look of old hardware in a kitchen renovation.
That simple way is with a handy tool called the HardwareJig made by Milescraft. This post isn’t sponsored in any way, I just enjoy telling my readers about tools that I love.

The HardwareJig is the easiest and quickest way I have found to drill screw holes in cabinetry in order to install the hardware. It can be used for drawers and cabinets alike. Aside from a drill and a measuring tape, the package comes with everything you need to accurately install the hardware.
Jig for Installing Kitchen Cabinet Hardware
I have used this tool for many different projects. I love the simplicity of it. It is a tool that I continually come back to due to its ease of use and accuracy, making it a great choice for home DIYers.
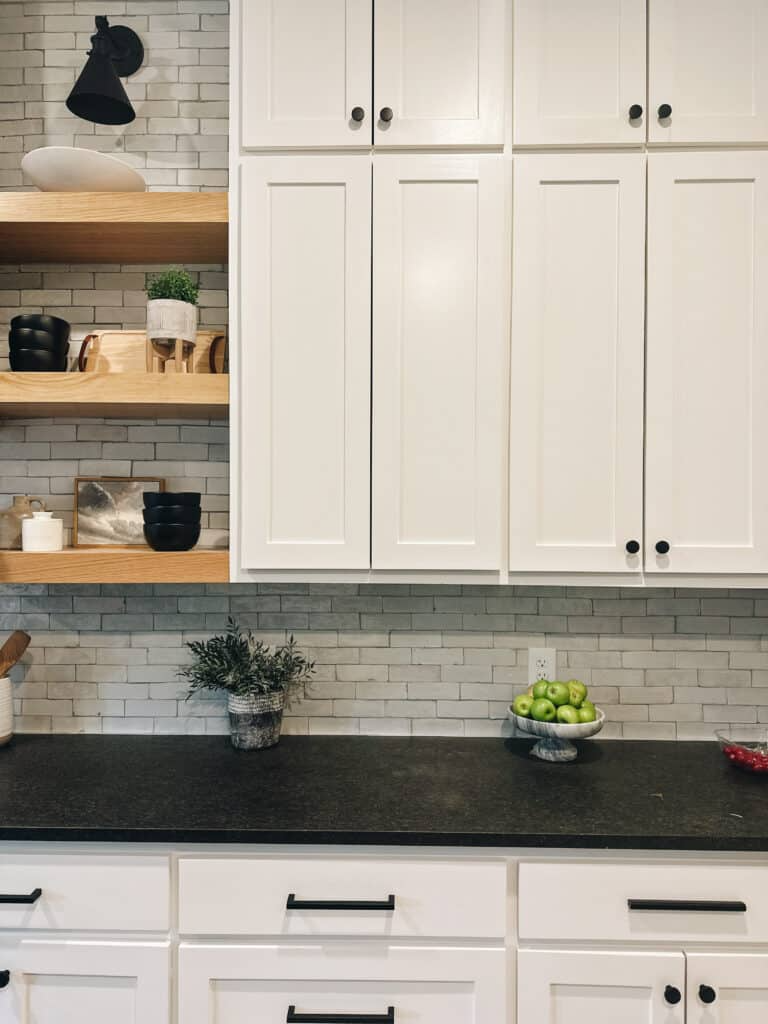
I recently needed to add hardware to a few places in our kitchen, like upper cabinets, drawers, and lower cabinets. A couple of our new cabinets needed to be replaced shortly after we moved in due to warping. So, we got new ones installed, and it was up to us to install the hardware.
This tool provides the means to drill perfectly aligned holes, whether for kitchen cabinet knobs or pulls of all different sizes. It is simple to drill repeating holes, which is a common task for something like kitchen cabinetry.
This hardware tool can be used on upper cabinets and base cabinets alike. It works great on drawers as well. It can easily be adjusted to fit all types of hardware. It is truly a very versatile tool.
How to Add Hardware to Kitchen Cabinets
I will cover all of the steps for using this tool while installing hardware on kitchen cabinets.
Step 1: Gather the Tools
The first step is to purchase the HardwareJig. This jig will save so much time when measuring. Additionally, it creates accurate work, so you won’t have to potentially spend time fixing mistakes. So, it is well worth the money, especially since it is so reasonably priced.
After that, the only other tools you need are a tape measure and a drill.
The kit comes with a drill bit that will perfectly fit the holes provided on the jig.
Step 2: Assemble the Jig
In order for all of the pieces to fit in the box, the jig comes unassembled. However, it comes together very quickly. There are 2 different parts you can use for the specific task.
One part (End Stop) is for installing knobs or pulls on cabinet doors. The other parts (Adjustable Drill Guides) are for installing drawer pulls.
Once you have assembled it according to your installation project, install the provided drill bit into the drill.
Step 3: Take Measurements
In this step, you will determine the cabinet hardware placement. I will cover 2 main different types of hardware you can install on kitchen cabinets while using this tool, although it can be used for many different types of hardware.
There are some general guidelines for LINKwhere to put knobs and handles on kitchen cabinets. I have a whole article on that, so be sure to check that out.
Bar Pulls
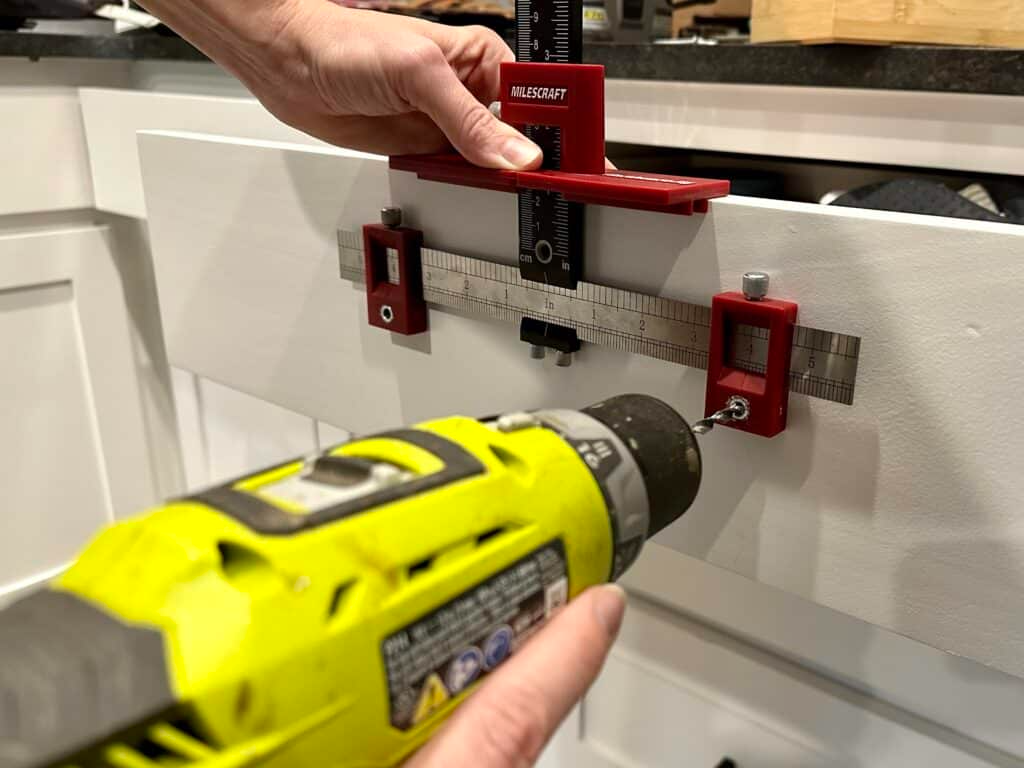
If you are installing cabinet pulls on drawers, lightly mark the center point of the drawer front on the top with a pencil. Make this mark light enough that you can erase it later.
You will now adjust the Hardware Jig rulers to the desired length. If you are installing bar pulls, insert the screws through the holes provided on the jig, as seen below. This way, the width of the stops are perfectly aligned to the bar pulls you are installing.
The process to install bar pulls will be very similar to cup pulls. The measurements will just be closer together, rather than the wider bar pull setting. It will still work great! This tool can be adjusted to fit anything from standard pulls to unique hardware.

Make sure that the horizontal ruler is centered on the vertical ruler.
You can now set the depth by adjusting the red stop at the top. Measure to the center of the drawer and adjust the stop as necessary.
Now, when you place the jig resting on the drawer face, it will be perfectly aligned to drill holes for the bar pulls. Be sure to place the jig on the pencil mark you added earlier!
Knobs
If you’re installing knobs, first decide on the proper cabinet knob placement. This is typically in the bottom corner of the door for upper cabinets. They are in the upper corner of the door for base cabinets. Then, adjust the jig accordingly.
The placement of knobs is mostly a matter of personal preference.
You will also use the End Stop part of the tool. This allows you to butt the End Stop to the edge of the door. This results in repeatable, simple, and easy drill holes.
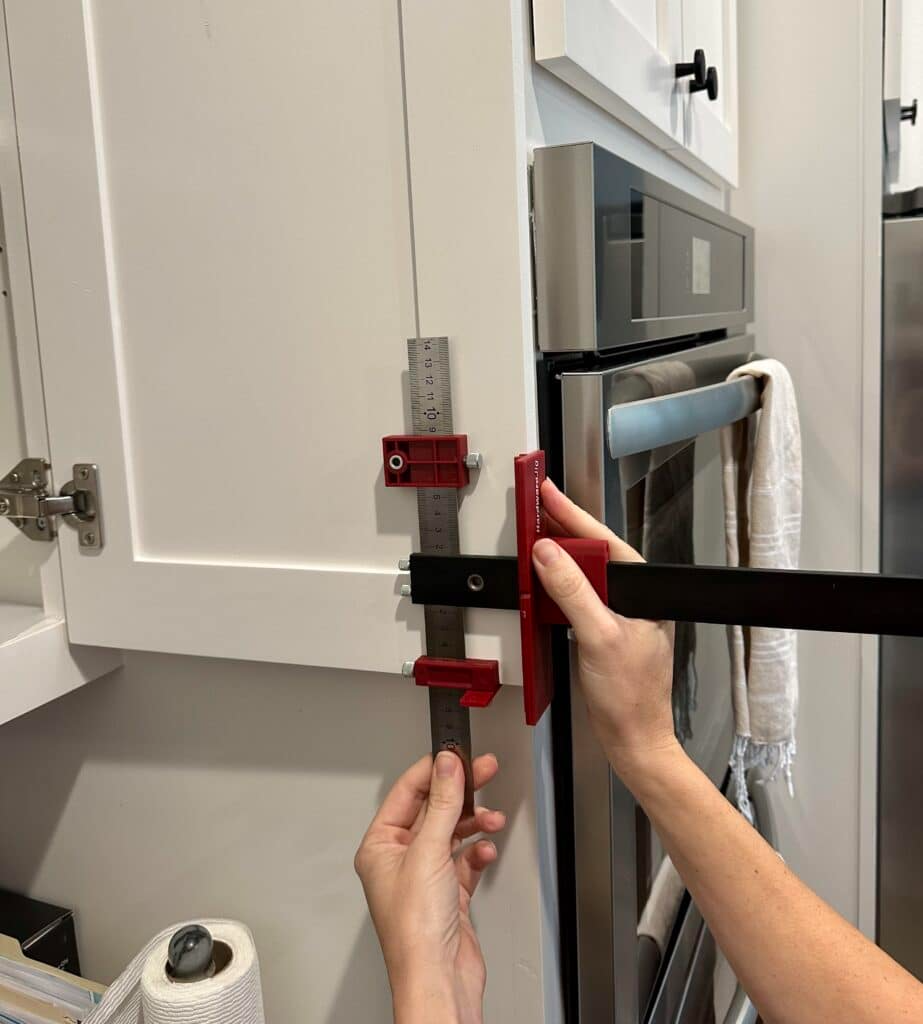
This process would be the same for finger pulls and edge pulls as well. The tool can be used on any face of cabinets, like the edge.
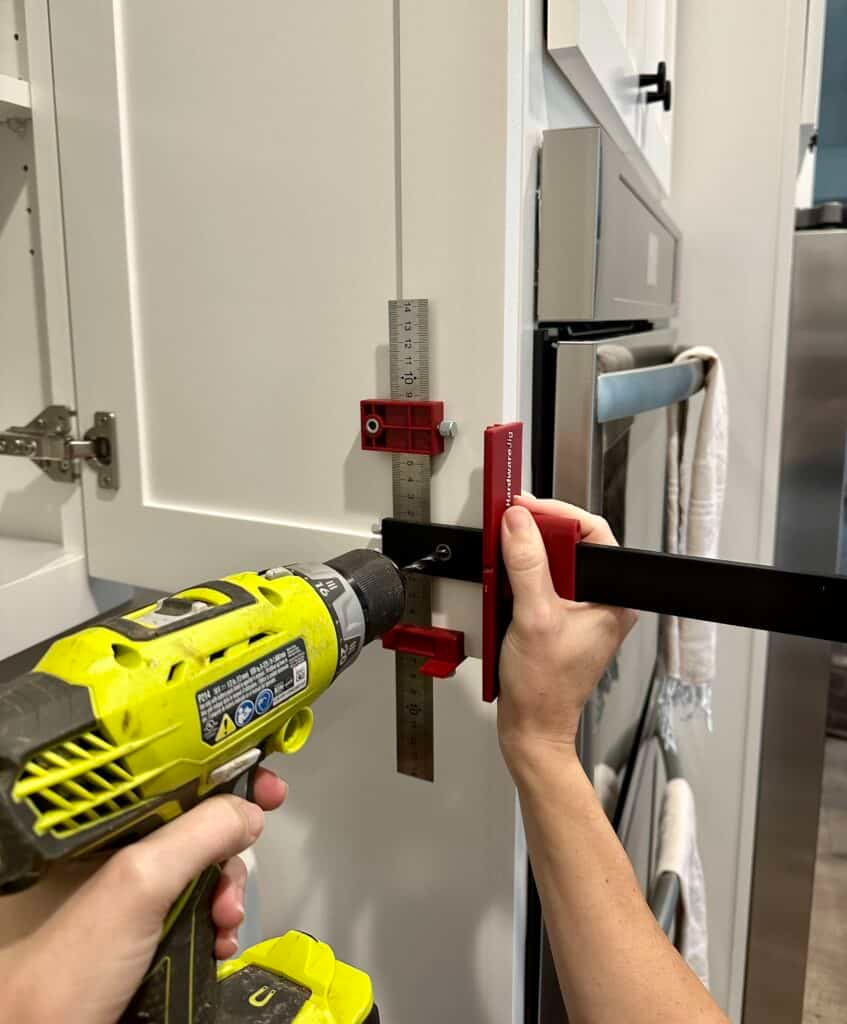
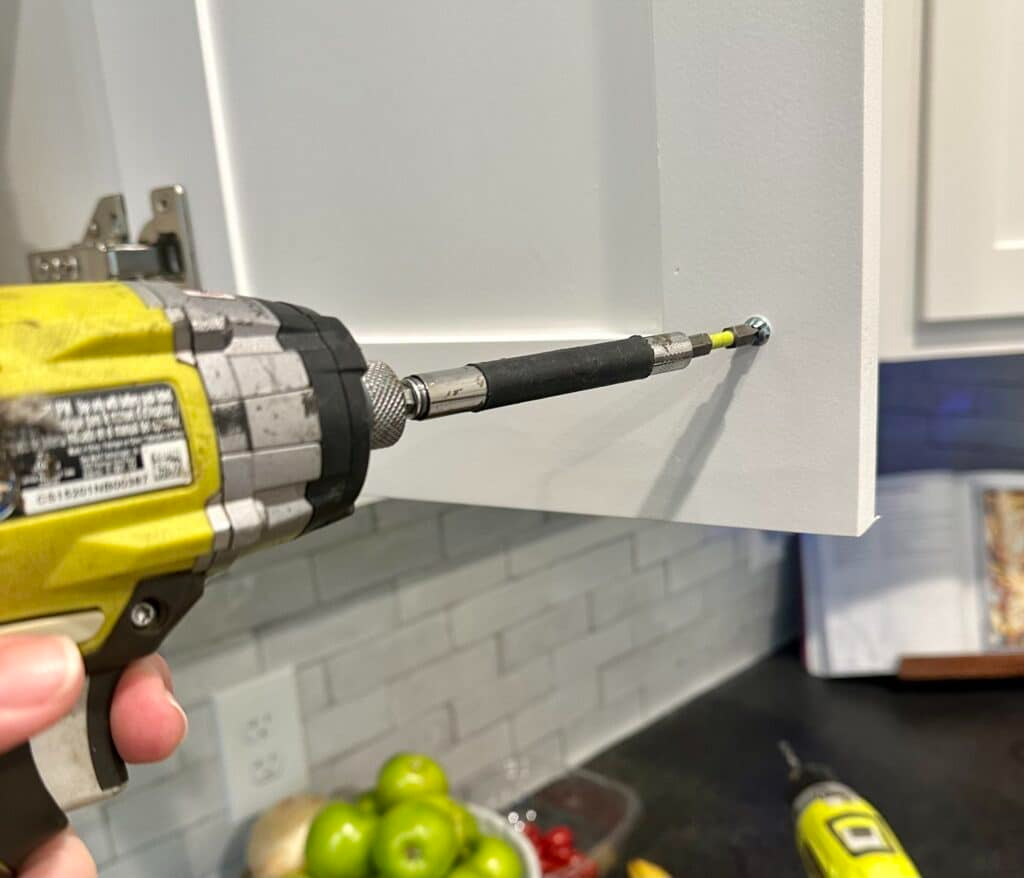
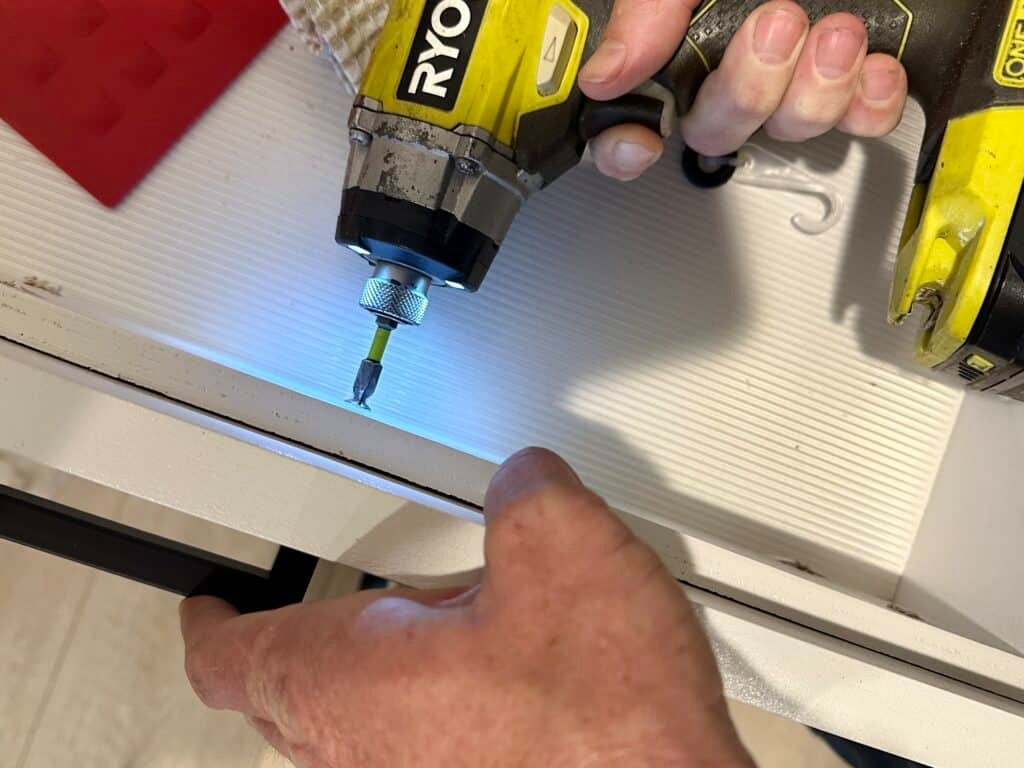
Step 4: Drill the Holes
Once you have set the jig measurements to your project specifications and are firmly holding it in place, you can drill the pilot holes for the cabinet handles.
It’s a good idea to take your time to make sure you have the placement exactly where you want it. If you happen to drill an hole in an unwanted place, you can fill the old holes with wood filler and begin again.
If you are drilling a hole in the drawer, the jig will rest on the top of the drawer.
Although you can drill from either side (front to back or back to front) of the cabinets, I recommend going from front to back. This will reduce the tearout in your cabinets.
However, drilling from the back allows you to use the same settings on the tool for all right and left opening cabinets. If you are drilling from the back, place a piece of painter’s tape on the front of the cabinets. This will help reduce tear out.
Step 5: Install the New Hardware
Now that all of the holes are drilled, you can install the hardware on the kitchen cabinets.
All of the holes should be perfectly spaced and aligned, making installing the hardware a breeze.
Oftentimes, hardware manufacturers will send two sizes of screws. As a general rule, the longer ones are useful for drawers, since the screws need to go through the drawer box and the drawer fronts.
And that’s it! This tool provides an easy way to take a potentially time-consuming task and make it more accurate. With this jig, first time homeowners or experiences DIYers alike can easily add hardware to a new kitchen, or use it to improve the overall look of outdated kitchen hardware!
If you found this article helpful, be sure to check out the following articles:
- Hardware Color Options for White Kitchen Cabinets
- How to Add Pull Out Drawers to Existing Kitchen Cabinets
- Best Way to Get a Smooth Paint Finish on Cabinets
- Best RTA Cabinets Made in the USA
- Upper Kitchen Cabinet Dimensions and Size Guide
- Average Cost of Custom Kitchen Cabinets
- Kitchen Island Overhang Dimensions
- Best Sherwin Williams White Paint Colors for Kitchen Cabinets
- Popular Shaker Kitchen Cabinet Hardware Ideas

Suzie Wible
Suzie has shared her knowledge for over 10 years about building furniture, painting techniques, how to build your dream home, and basic to advanced woodworking skills. Through this blog, readers will feel empowered to create a home and products they love too.