How to Add Pull Out Drawers in Existing Kitchen Cabinets
Our current pantry is made up of very deep shelves that are within our kitchen cabinets. Small items are constantly getting lost in the back of the shelf, so I decided to add pull out drawers to our cabinets.
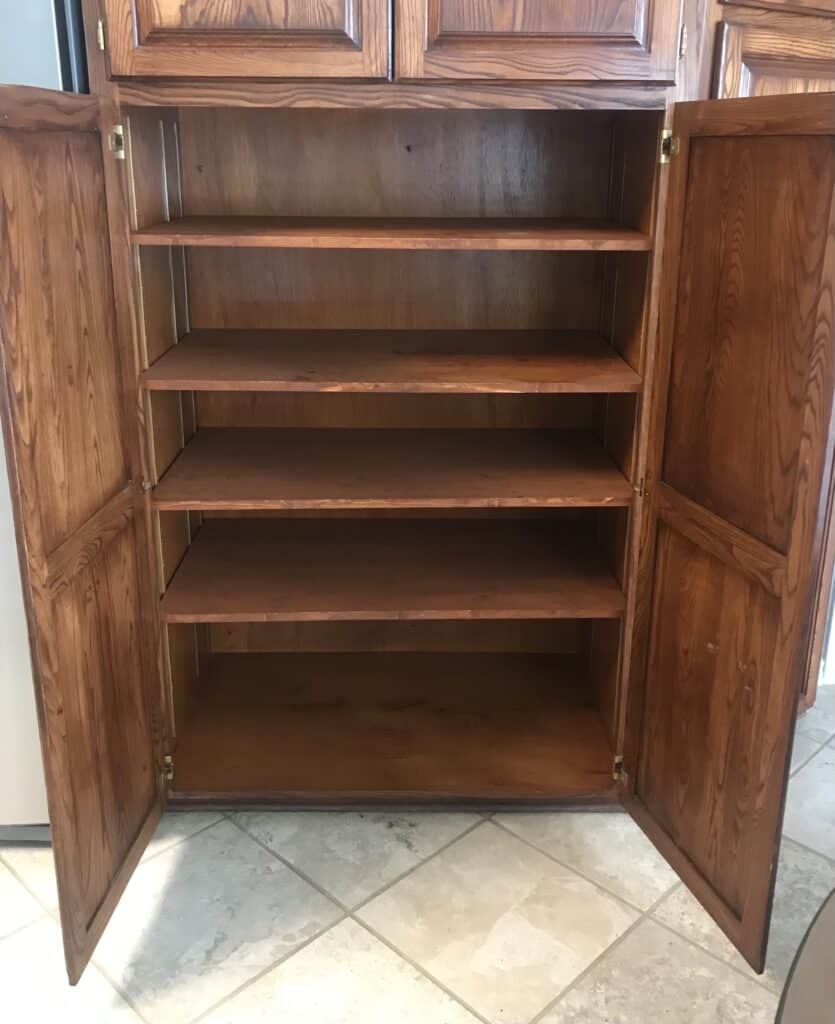
This simple addition has added some much-needed functionality and organization to the pantry. This drawer provides easy access to all of those hard-to-reach areas and it makes much better use of the cabinet space.

In this article, I’ll show you all you need to know to complete this project for your kitchen. The main tool you will need is the DrawerJig made by Milescraft. This incredibly handy little jig allowed me to quickly and easily install the drawer slides and the pull out drawer in the kitchen cabinet.

Disclaimer: This post is sponsored by Milescraft, but all opinions are 100% my own. This site contains product affiliate links. We may receive a commission if you make a purchase after clicking on one of these links.
Tools and Materials Needed for Adding Pull Out Drawers to Kitchen Cabinets
To complete this project, you will need:
- DrawerJig by Milescraft
- Face Clamps
- Table Saw or Circular Saw
- Wood Glue
- Power Drill
- Clamps
- Wood Screws
- Drawer Slides
- Orbital Sander
This DIY project is specifically for existing kitchen cabinets. There are a few things to look for before you tackle this project in your kitchen.
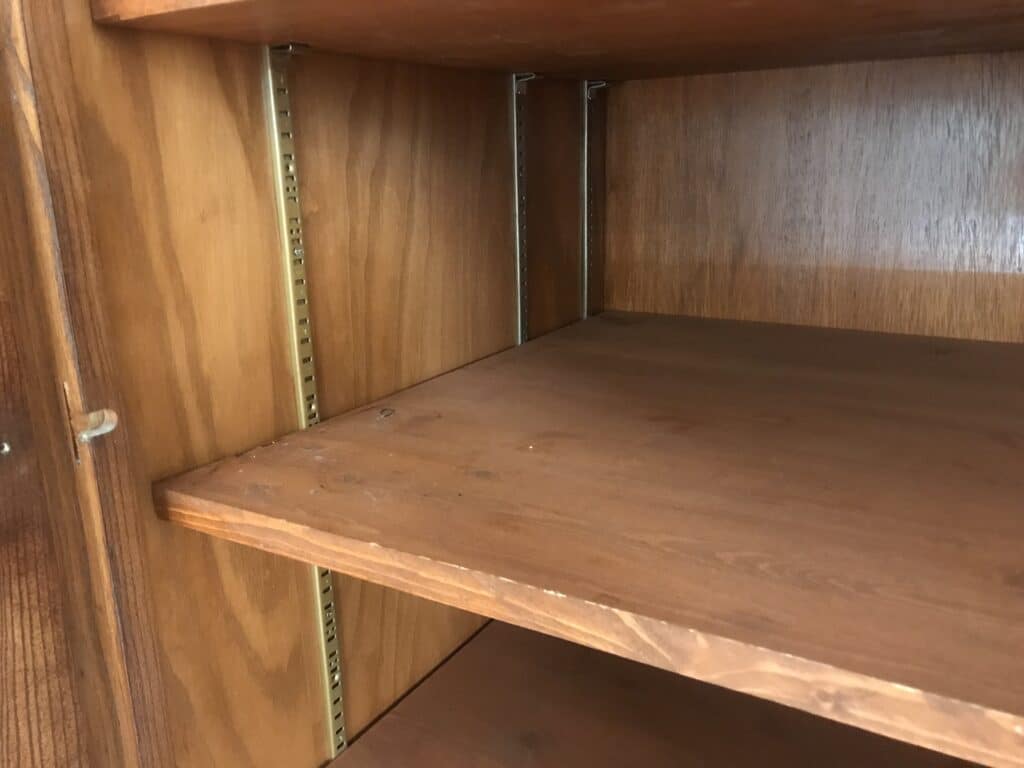
Removable Shelves
The first thing you need to check is if the shelves in your kitchen cabinets are removable or not. Some cabinet builders install permanent shelves, instead of shelves sitting on adjustable shelf pins. In order for this project to be completed, you will need to be able to remove the existing shelves in your kitchen cabinets.
In the pantry cabinet I will be working with, the shelves are sitting on adjustable shelf pins. I can’t remove the shelf pin hardware because I would like to continue to use the adjustable shelves above my new pull out drawer. Although this adds one extra small step when installing the new pull-out drawer, it is still completely doable and simple.
Face Frame versus Frameless Cabinets
The next thing you need to check for is if the cabinet boxes have a face frame or if they are frameless. I cover the difference in face frame vs frameless cabinets in this post on how to install drawer slides on face frame cabinets.
For my particular project, I will be installing pull out shelves on face frame cabinets. However, the DrawerJig is compatible with frameless cabinets as well. The process to install the pull-out drawer will be slightly different when installing them on face frame cabinets versus frameless cabinets, although very similar.
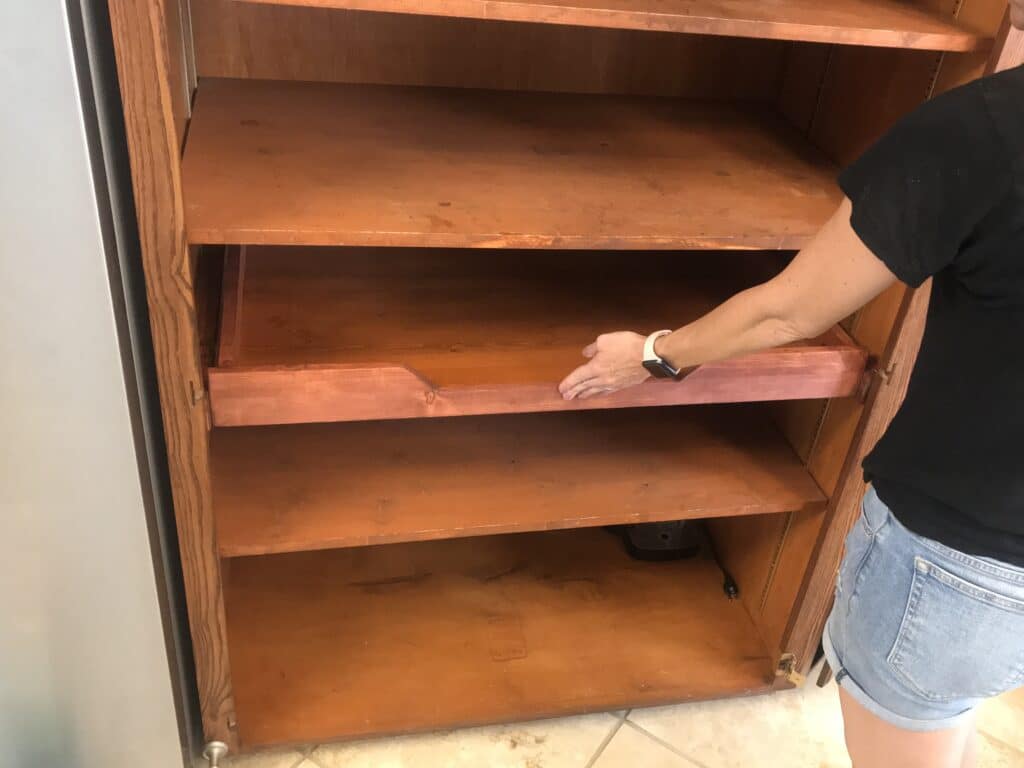
Step 1: Remove the Shelf from the Kitchen Cabinet
Like I mentioned earlier, this project is for adding pull out shelves or drawers to existing kitchen cabinets. The shelves must be able to be removed, most likely because they are sitting on shelf pins.

Step 2: Prepare the Cabinet Box for the Drawer Slides
Before you can build the pull out drawer, you will need to find the correct measurements for the drawer and install the drawer slides to the inside of the cabinet box.
Install the spacers
The first step is to install spacers to the inside of the cabinet walls. This is because the pullout shelf is being installed on a face frame cabinet. The drawer slides would hit the inside of the face frame or door hinges if a spacer was not installed. It would not be functional if there isn’t a spacer added to the interior of the cabinet first.
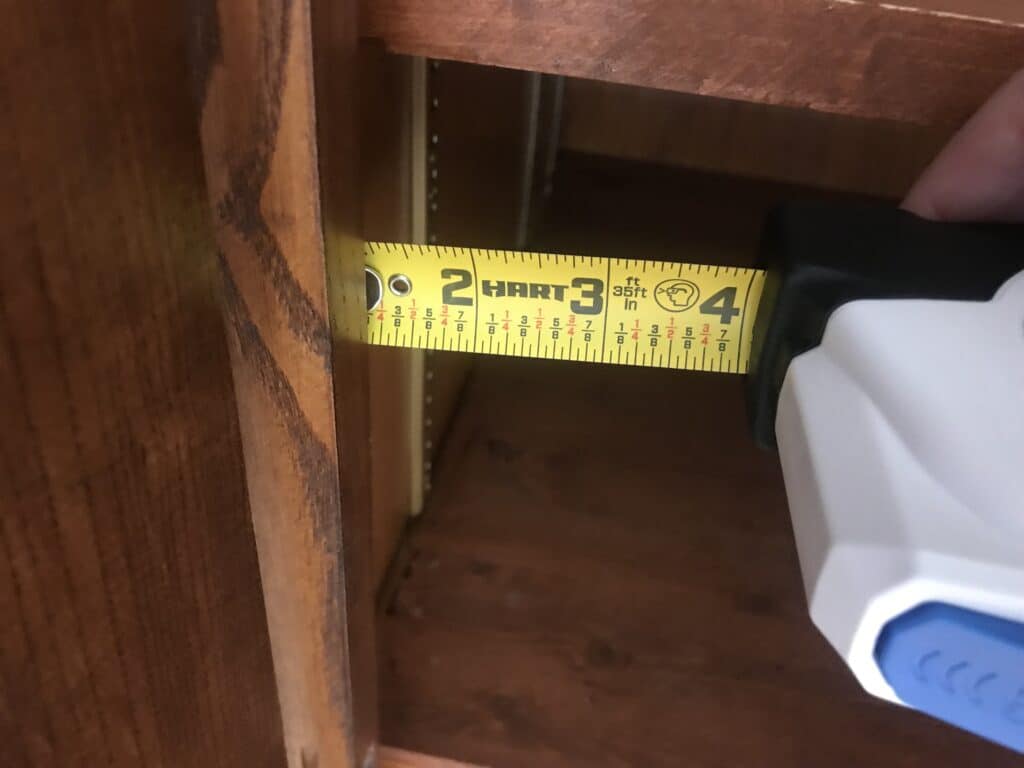
Measure the distance that the face frame of your cabinet overhangs from the inside. For me, it was 1 1/8 inches.
I made the spacer out of thin sheets of plywood laminated together, but you can use whatever piece of wood you might have on hand. Just make sure the thickness of the wood is the same (or slightly thicker) than the face frame overhang.

Mark on the spacer where the shelf pin hardware is (if you have any). Trim the spacer to be able to fit in between the shelf pin hardware. Attach the spacer to the cabinet box with wood screws. The DrawerJig works great for this part of the project as well.
Be sure to drill pilot holes first and countersink the screw holes in order to hide the screw head. This will also ensure that the drawer slides sit flush on the spacers.
Step 3: Build the Pull Out Drawer
We will now find the measurements of the cabinet drawers, make the cuts, and assemble the pieces to build the drawer box.
Find the Measurements of the Drawer
Now that the spacers are installed, measure the distance of the cabinet opening, between the spacers.
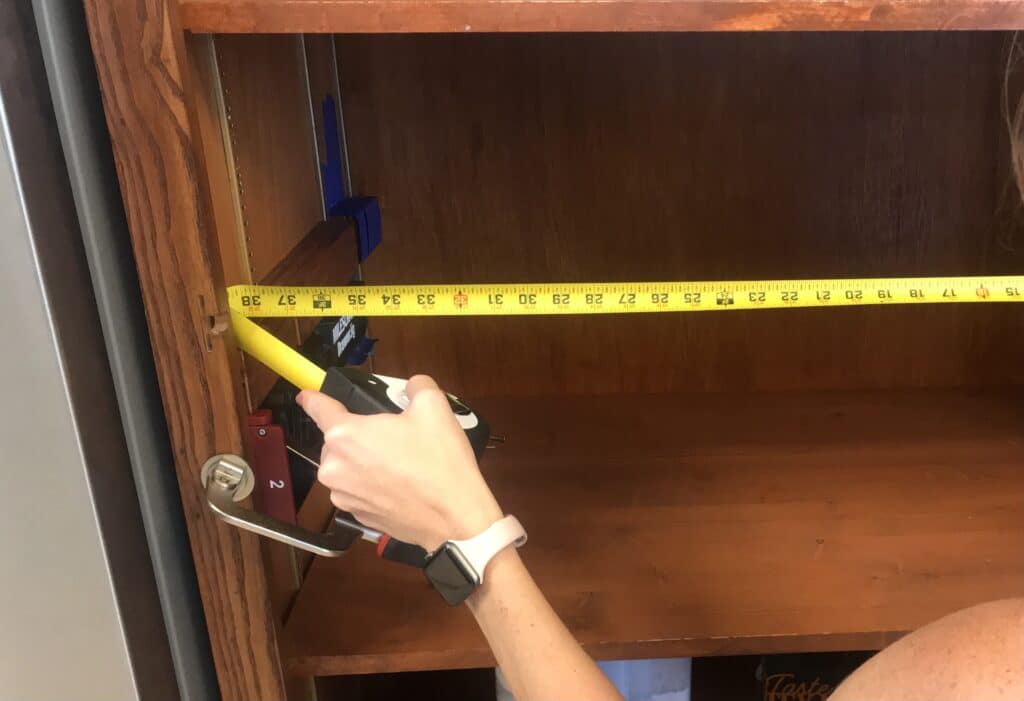
Next, subtract the width of both of the drawer slides from this measurement. Typically, drawer slides are 1/2 inch thick, so you would subtract 1 inch total. This number (distance between the spacers, minus the width of both drawer slides) will be the total width of your pull out drawer.
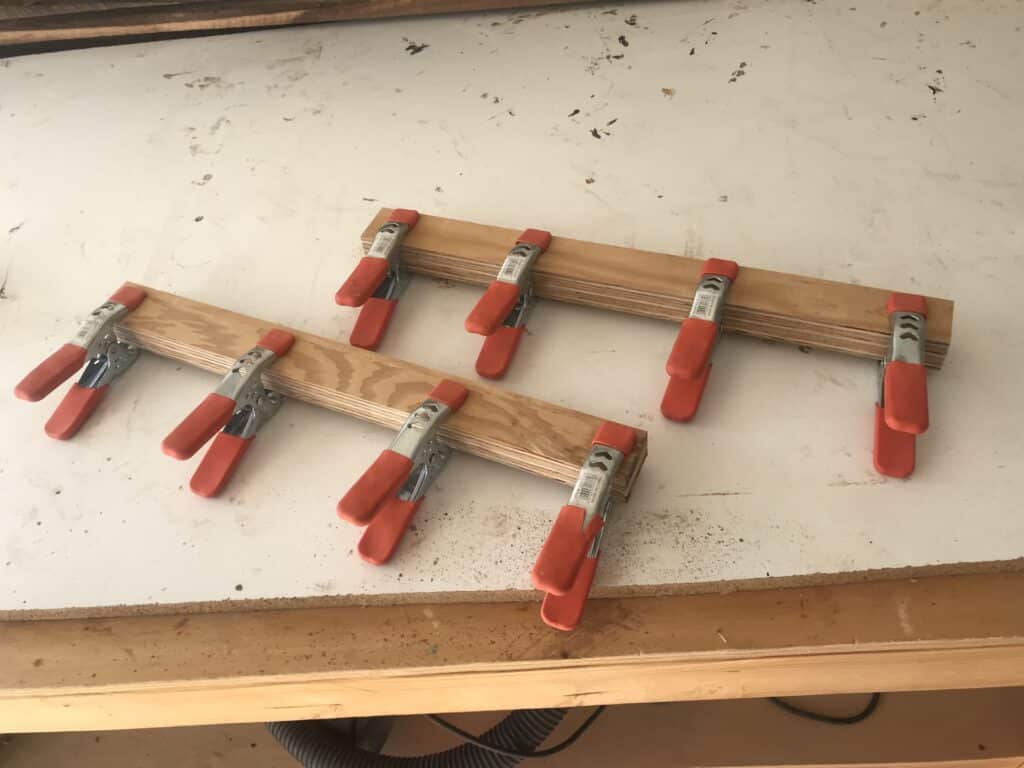
Make the Cuts
We will use the existing shelf to build the pull out drawer.
Trim the width of the shelf to the measurement you just found (distance between the spacers, minus the width of both drawer slides).
Since you will be adding a front to the drawer, you will need to find the measurement of the depth of the pull out drawer. Measure the total thickness of what wood piece you will use for the drawer front and subtract it from the shelf. Remove this excess on a table saw.

I made these cuts on my table saw, but you could also use a circular saw with an edge guide. By adding the front, back, and sides, the drawer will be much stronger for those heavier items.
You can now make the cuts for the drawer front, back, and both sides. Determine the height you would like and make the necessary cuts. The drawer height is up to you and what fits best in your space. I went with around 2.5″ tall sides.
Assemble the Drawer
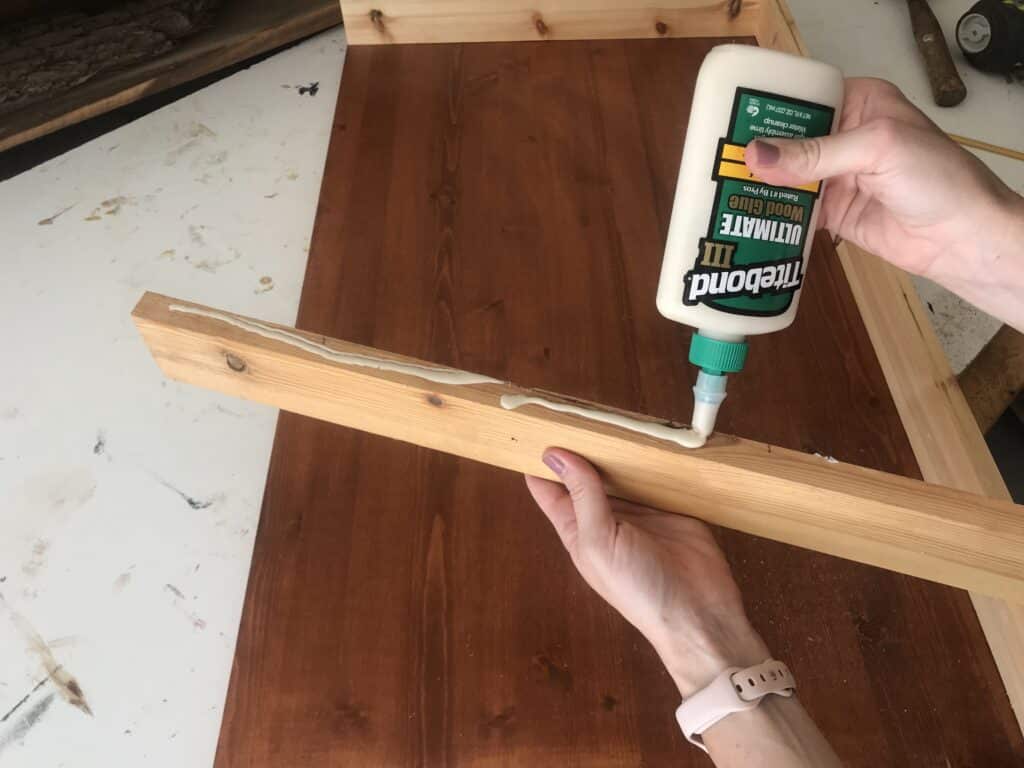
Attach the front, back, and sides to the shelf. In some cases, you could use this off-cut to trim out the front of the drawer, however, mine wasn’t quite long enough. Use wood glue and brad nails or screws. Clamp it together and allow it to fully dry. You now have a drawer box!


The drawer box might need to be sanded. If so, use an orbital sander and sand it with 80 grit, then 120 grit before staining or painting.
For an added touch, you can paint the drawer or stain it to match your existing kitchen cabinets. I found a stain combination that matched my existing cabinet color well, so I stained it that color. I also applied my favorite matte sealer for added durability. If you do decide to paint it, be sure to check out this post on the best way to get a super smooth paint finish when painting cabinets. I also used the same sealer when I painted our dresser black.
If space allows, you could even add drawer pulls. However, I skipped this since I cut the curve in the front, which doubles as a handle.
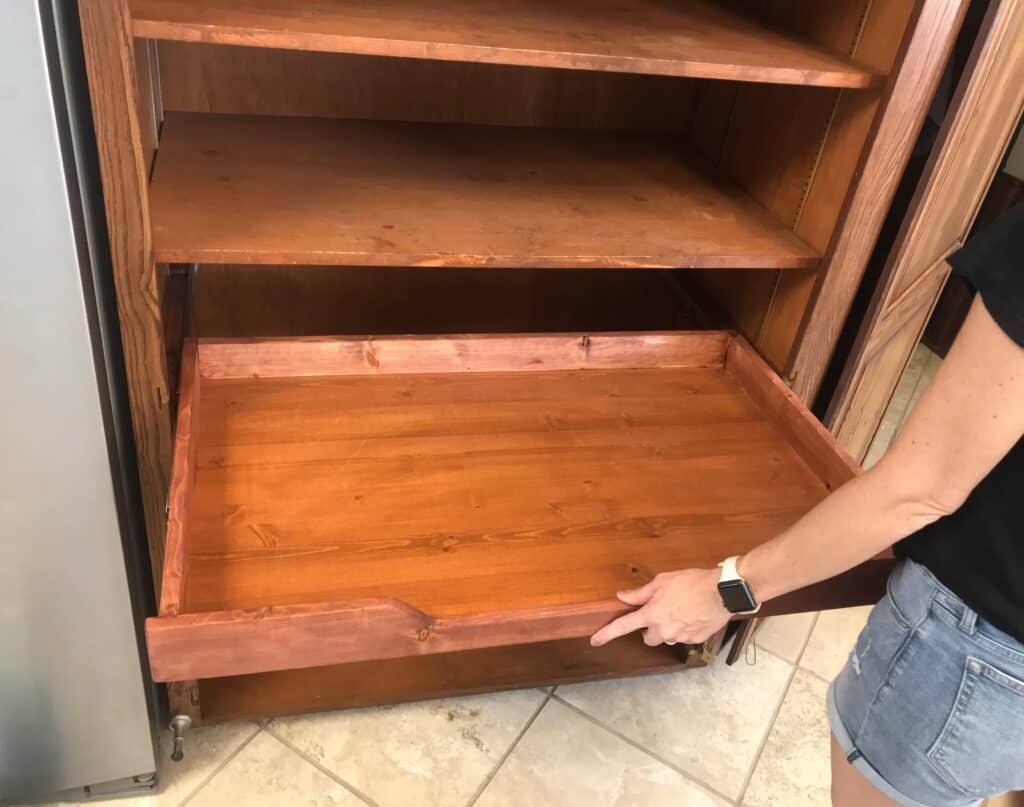
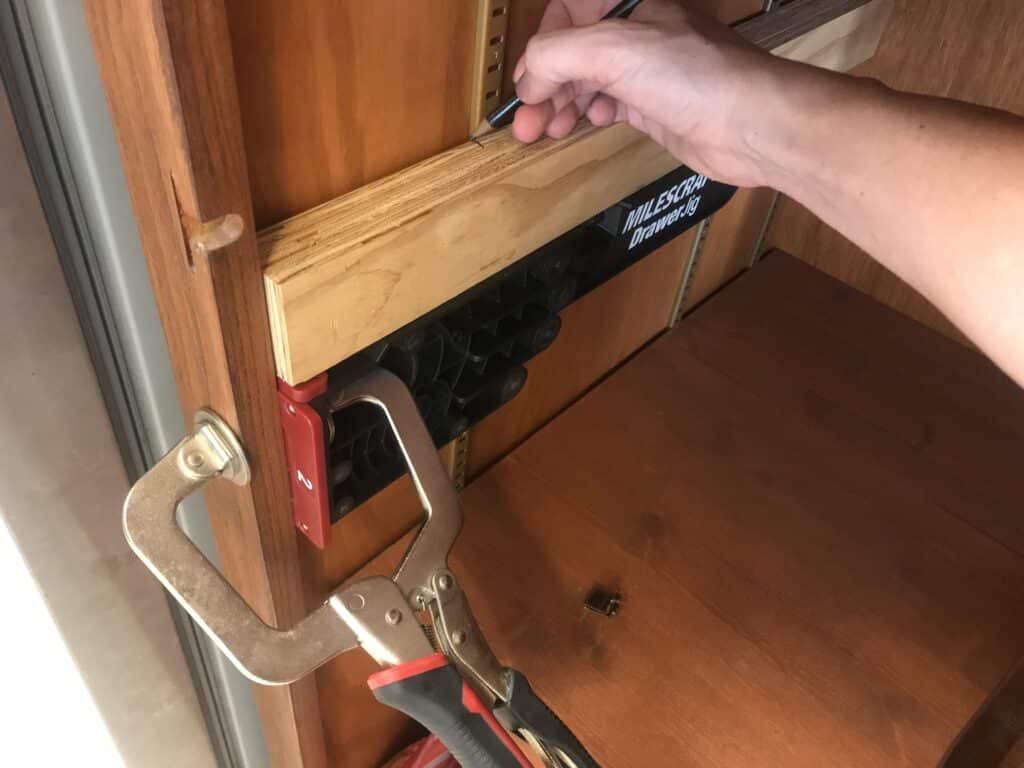
Step 4: Install the Pull-Out Drawers on the Drawer Glides with the DrawerJig
This is when the DrawerJig makes your life so much easier! Attach the DrawerJig tool to the face frame with a face clamp. Set the drawer slides on the jig. Attach them to the sides of the cabinet with the provided screws that come with the ball-bearing slides.

You will now flip the DrawerJig around and clamp it to the front of the kitchen cabinet face frame. Set the assembled drawer box on the jig. Extend the ball bearing slides and attach them to the sides of the drawer with the screws that come with the roller slides.

You can now push the drawer in and out fully. Because of the DrawerJig, it should be a perfect fit!

You now have a working pull out drawer for your existing kitchen cabinet! This method would also work great in bathroom cabinets or under the kitchen sink. It is a great solution for deep cabinets, making all of the items within easy reach. I’m planning on adding these simple pull-out shelves to the rest of my pantry to add a little more organization, function, and usable storage space.
The DrawerJig from Milescraft is a truly incredible tool that makes a potentially frustrating install job so simple and easy. There is no need for another set of hands and no precise measuring. It will make all of your cabinet drawer installs go very smoothly. I highly recommend it!
If you’re interested in other cabinetry projects, be sure to check out how to install European hinges on face frame cabinets, how to use the ShelfPinJig, and how to install drawer slides on face framed cabinets. All of these tutorials came together for a mudroom hall tree build, so be sure to check that one out too!
Find the webstory for How to Add Pull Out Drawers to Existing Kitchen Cabinets here!
If you’re doing cabinetry projects, you might find the following articles helpful:
- Best RTA Cabinets Made in the USA
- Where to Place Knobs and Handles on Kitchen Cabinets
- Kitchen Island Overhang Dimensions
- Popular Shaker Kitchen Cabinet Hardware Ideas
- DIY Gas Fireplace Surround
- DIY Custom Closet on a Budget
- What Color Hardware for White Kitchen Cabinets
- How to Put Hardware on Kitchen Cabinets

Suzie Wible
Suzie has shared her knowledge for over 10 years about building furniture, painting techniques, how to build your dream home, and basic to advanced woodworking skills. Through this blog, readers will feel empowered to create a home and products they love too.
Looks great! Well done. Great idea to make those shelves more useful. I’ve never had pull outs like this but like the idea so might have to try it somewhere. Thanks for sharing!