Built Ins Part 4: Trim, Caulk, and Paint!
In case you missed it: Part 1 | Part 2 | Part 3
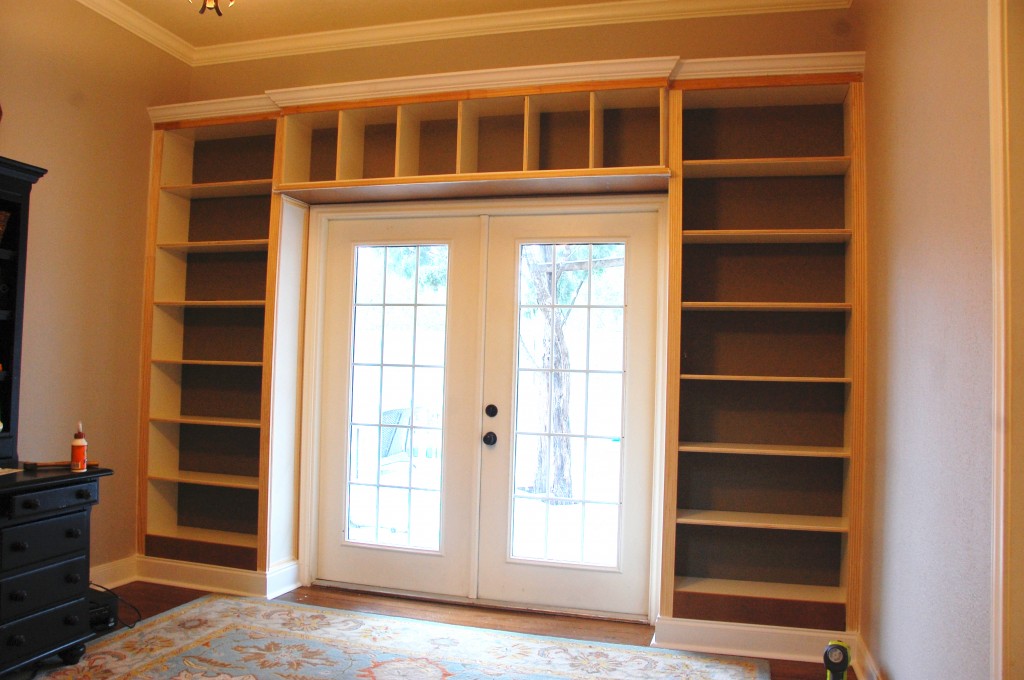
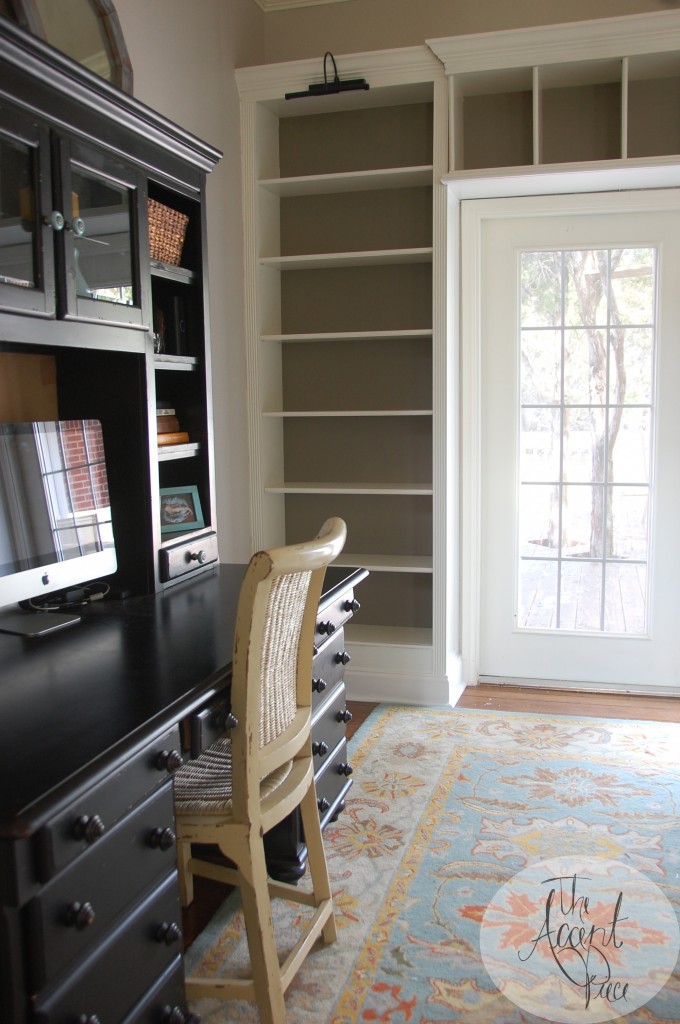
In those posts, I talked about how I’m building built in bookshelves on either side the french doors in our home. I’m going for the custom built-in look with Ikea Billy Bookshelves as a starting point. I explained how to paint Ikea billy bookcases, how to assemble them, and what color I painted the back of the bookcases. We learned how to attach a built in bookcase to the wall, and how to assemble Ikea bookcases. The last part is how to add trim and moulding to Ikea Billy bookcases to create a truly custom, built-in look. I’ve also added more tips on how to paint Ikea furniture!
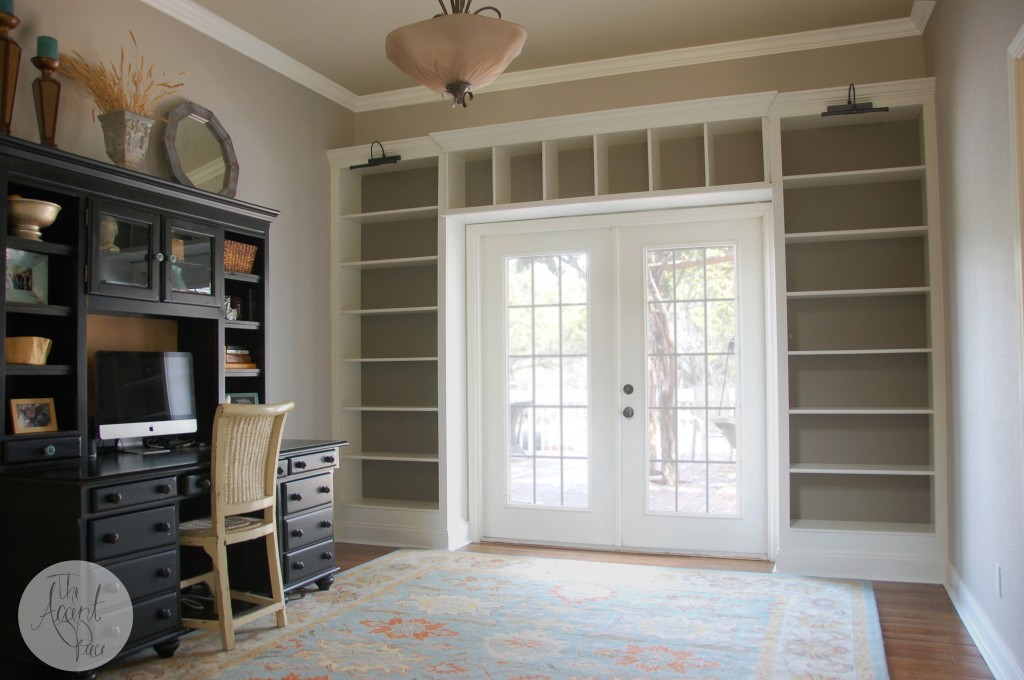
Y’all. The built ins are done. D-O-N-E. Done.
Imagine me doing a celebratory dance around my house…emphasis on the imagine part because I’m too tired to get up.
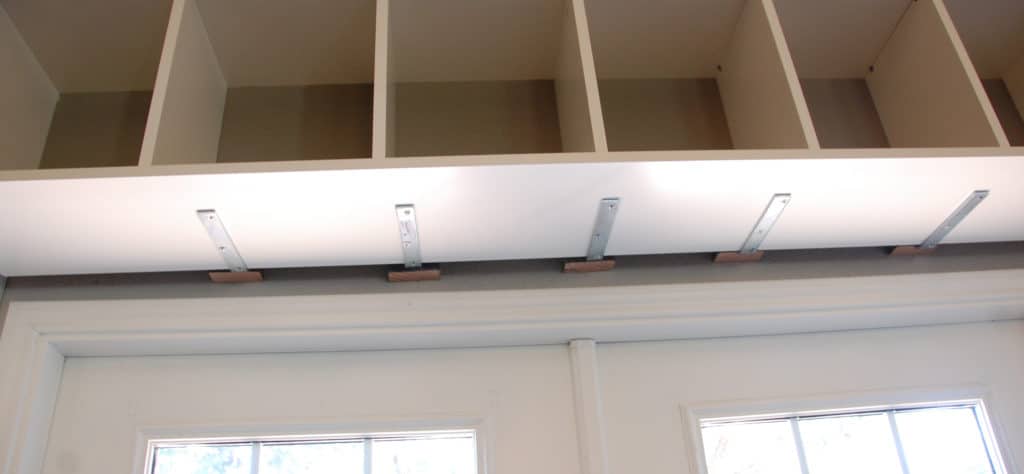
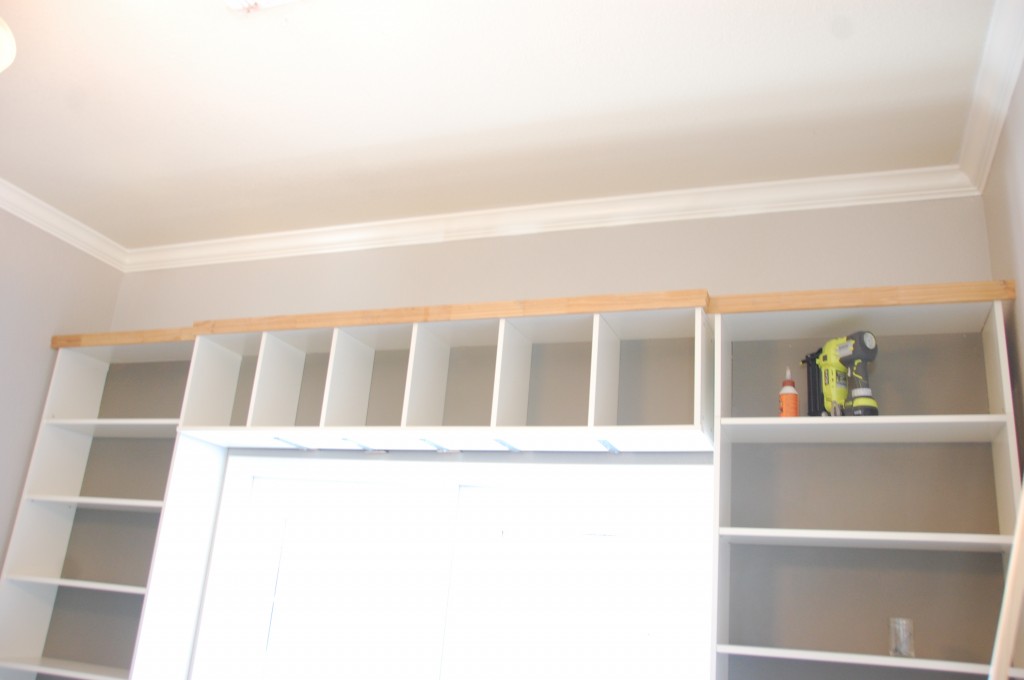
First, let me explain how we covered the L brackets on the overhang…
Remember how these brackets were showing?
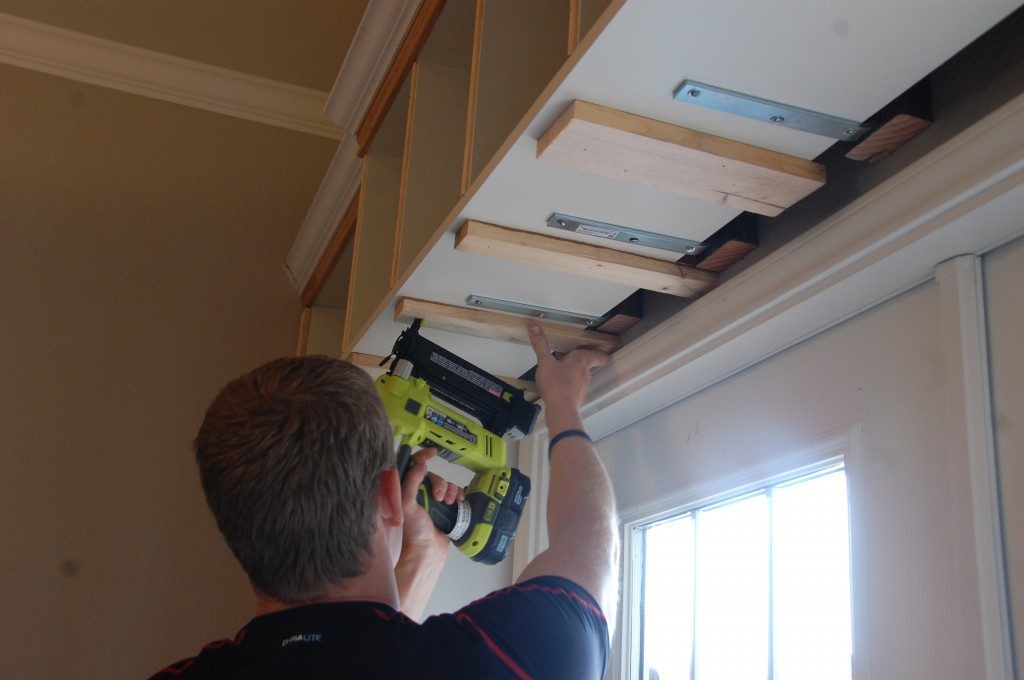
We first added some 1×2’s. I trimmed them with my miter saw. TIP: for tips on how to use a miter saw for beginners, check out this post.
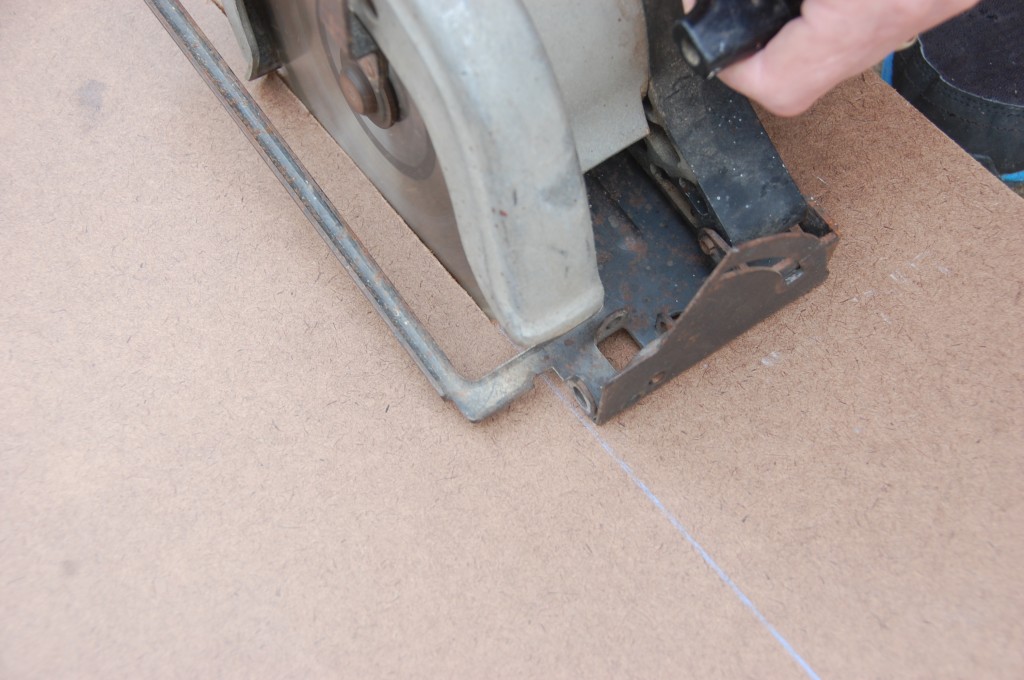
…then cut this board to size. It is about 1/8th of an inch thick.
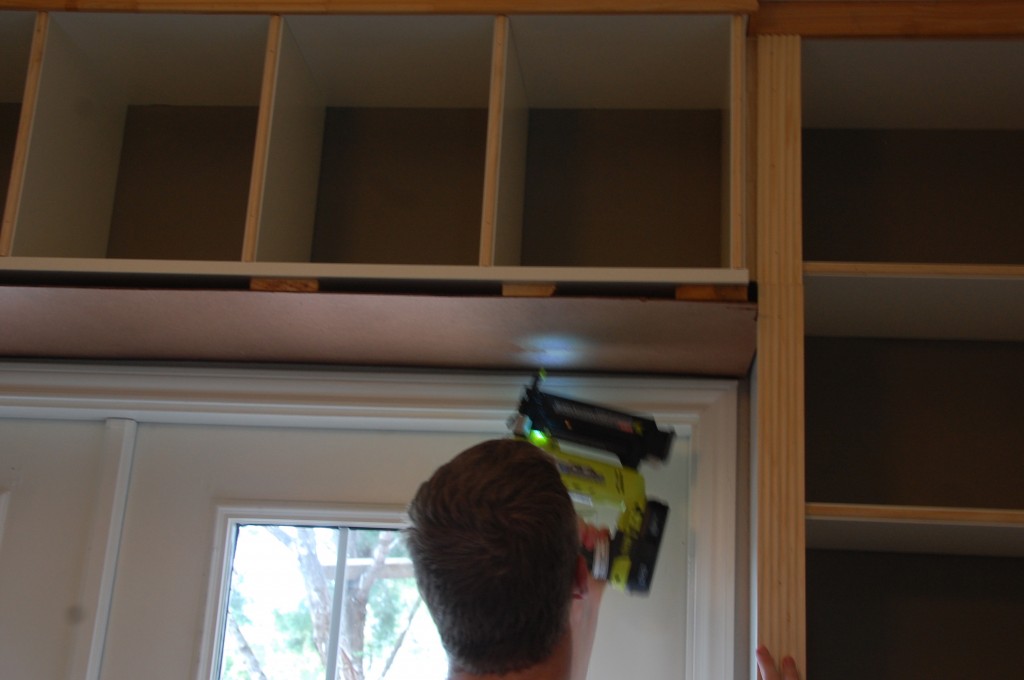
And then nailed that board to the 1×2’s. Moulding will eventually go in the front to cover that gap.
By the way, I just bought this Ryobi nail gun![]() . It is battery powered so you don’t need an air compressor and it made installing the trim on the DIY custom bookshelves a breeze.
. It is battery powered so you don’t need an air compressor and it made installing the trim on the DIY custom bookshelves a breeze.
I will say this, though; (and this is my fault for not reading more) but when I first bought the nail gun, I didn’t realized that the battery is sold separately. So once I bought the battery and got home, I realized you have to buy a separate charger for it. Like I said, this was my fault for not researching more, but it’s something you should think about when you are pricing this if you’re thinking about buying it because all 3 of those items add up.
All that to say, I love it now that I finally have all the parts for it 🙂
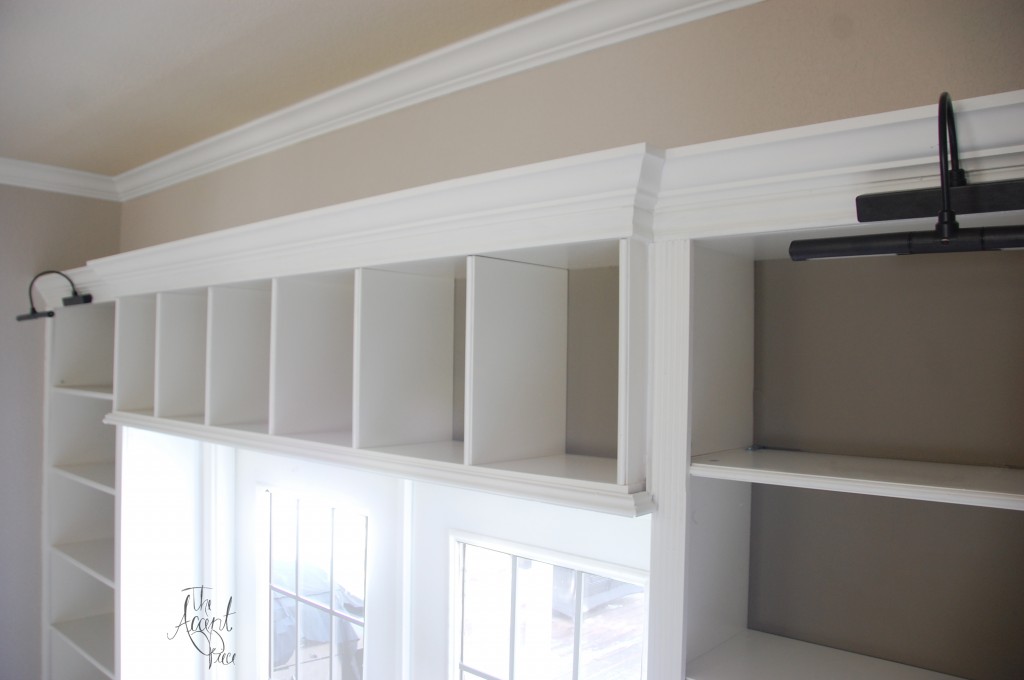
To install the crown on the bookcase to create a custom look, we first added some baseboard to the top to beef it up a bit. This will also be where the lights attach (more on that later).
This was actually a last minute decision when I happen to be in our attic and saw that the previous owners left this extra baseboard up there…sure why not??
We added some trim to the sides of the bookshelves and extended the baseboards around the front of the shelves. We also added a small strip of trim to the fronts of the shelves.
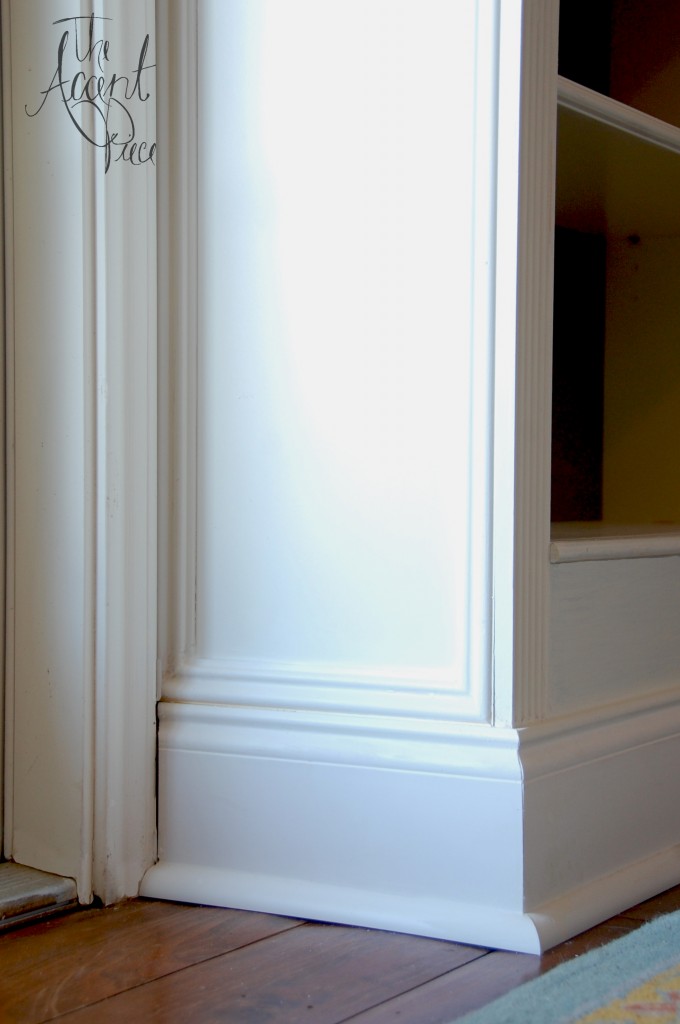
By the way, I used the coping method to install the baseboards. By doing this, I didn’t have to rip out the existing baseboards.
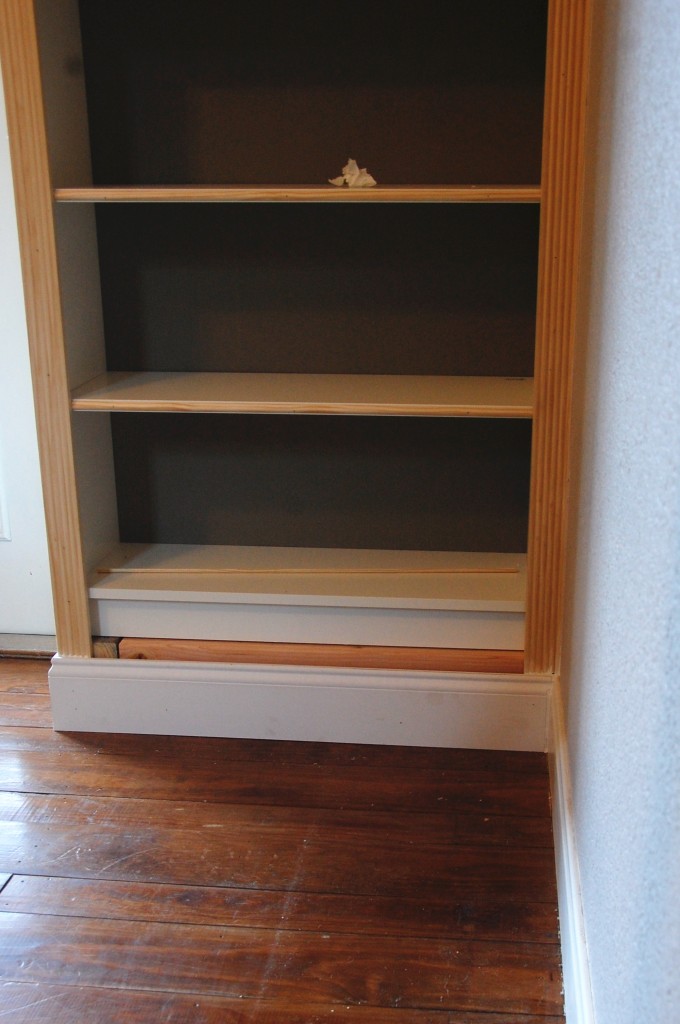
The top of the base of the bookshelf will be covered later with more trim…
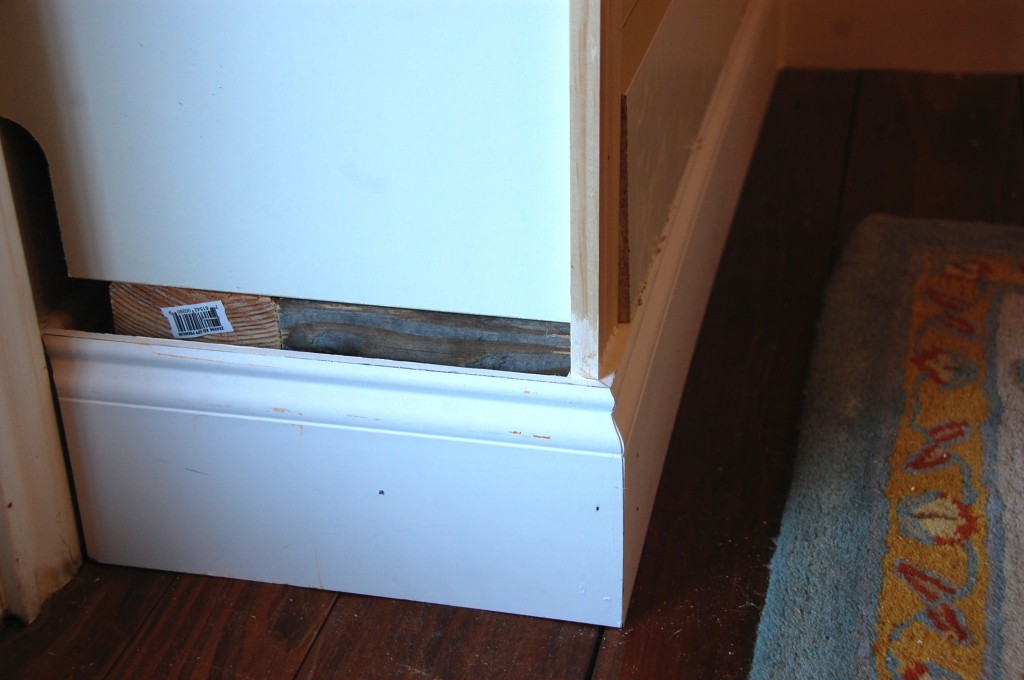
All I can say is…thank goodness for caulking that fills in all those little gaps! It takes the look of the custom built ins from DIY to professional!

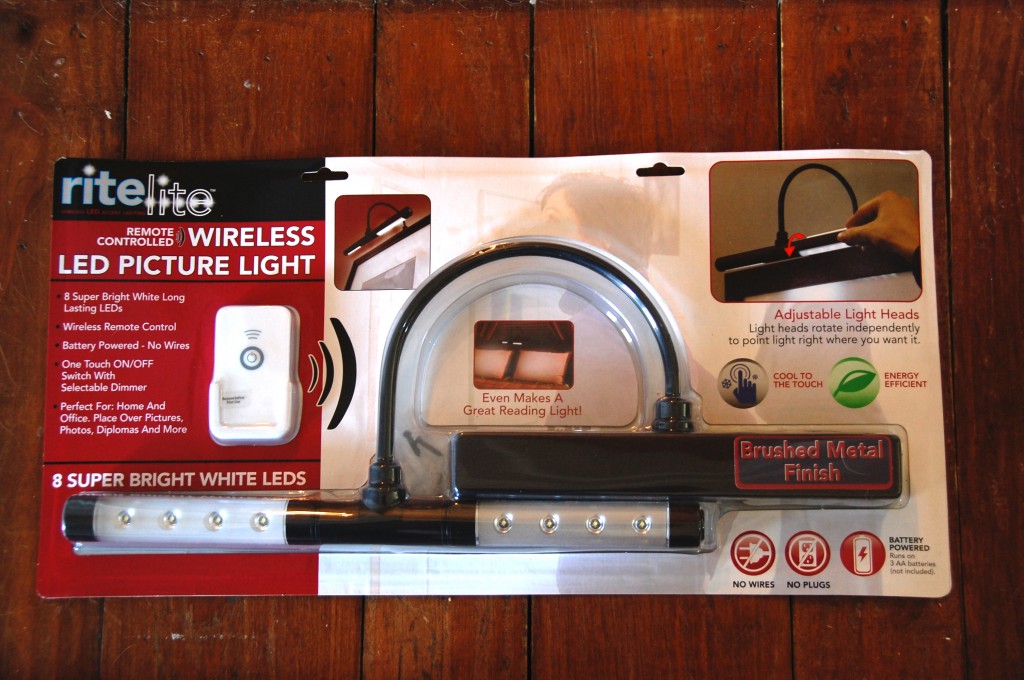
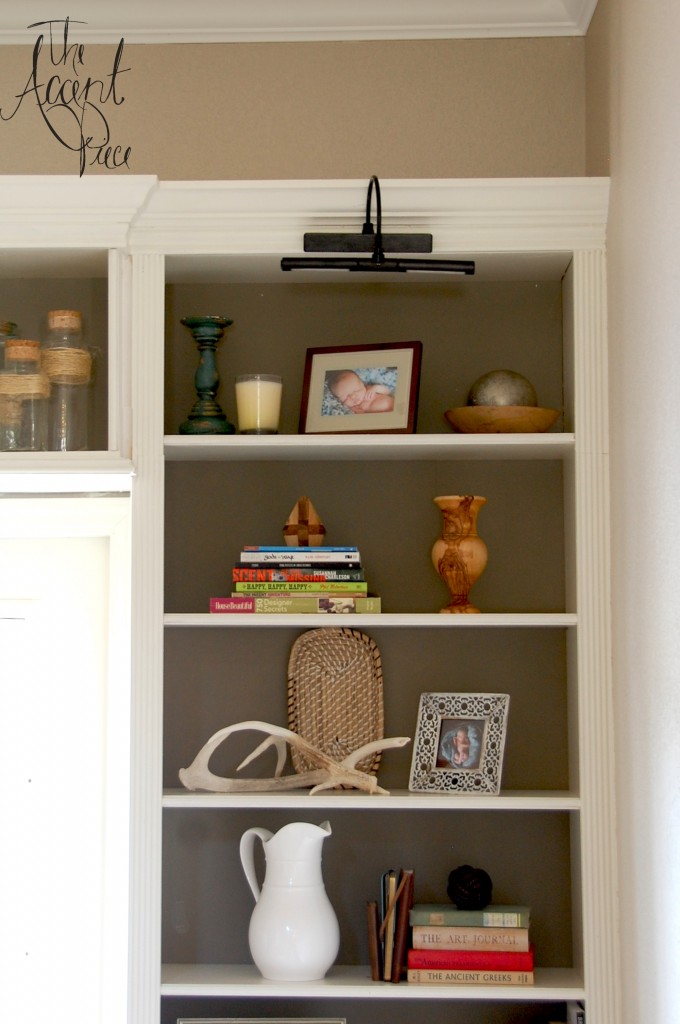
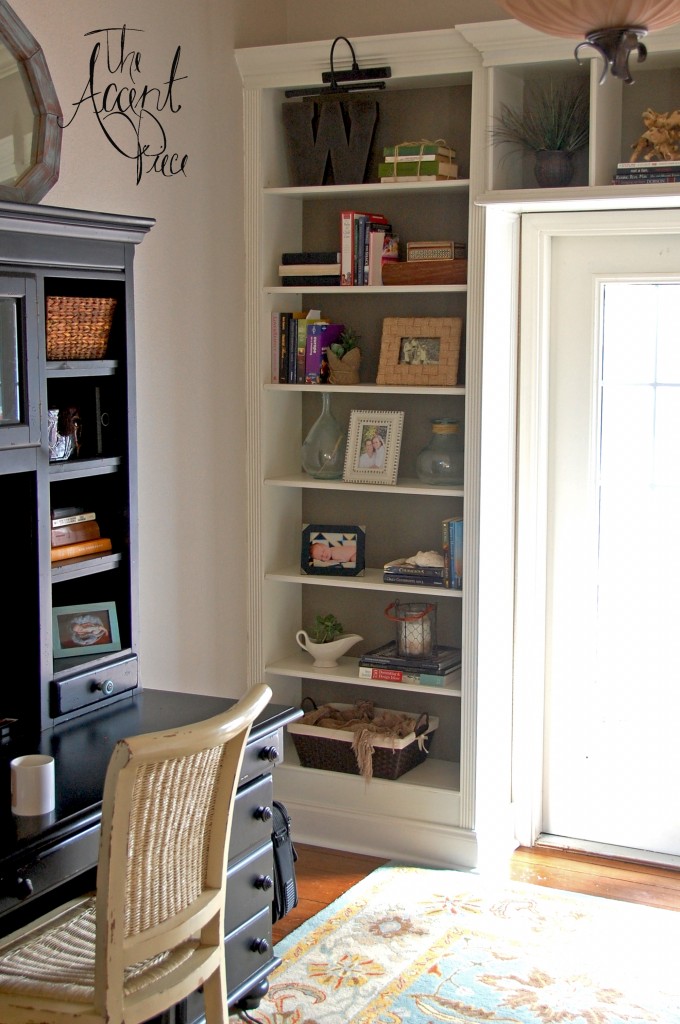
I bought these picture lights to mount on the bookcases. I wanted something battery powered so that I wouldn’t have to do any wiring. They turn on with a remote which is nice. As for the light it emits…it’s just so-so. Very LED-y. But that is a small price to pay (literally) to not have to figure out the wiring. And I like how they look.
So all in all, I would recommend them for picture lights for bookshelves when you don’t want to add electrical wiring.
And now the custom DIY Ikea Billy bookshelves are ready to be painted! I took a deep dive in this post for the question of whether to use a roller or brush when painting cabinets that you might find helpful! There are lot of tips for painting trim built ins there as well.
RELATED: For other Ikea hack project, check out this DIY Custom Closet and this Ikea Rast Hack.
Are you ready for it???
Here she is, in her Sunday best, makeup on, and ready for her first glamour shot… (did anyone else do those back in the day?)
It’s amazing what a little caulking can do to hide the imperfections!
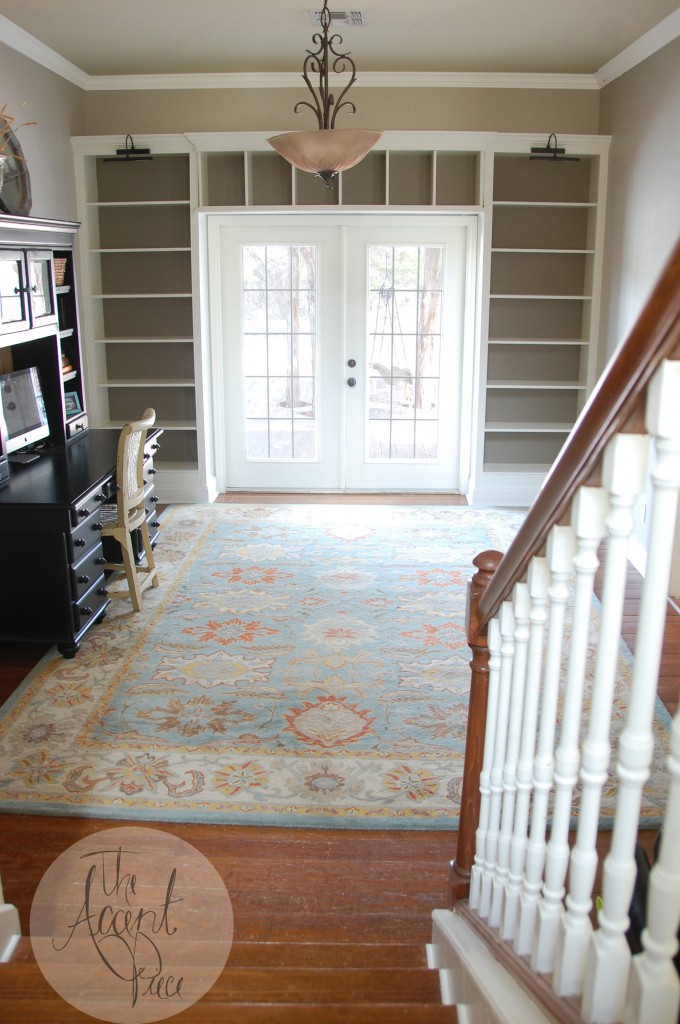
The view coming down the stairs…
Q: What white paint matches the Ikea white?
A: I painted the trim around the Ikea Billy bookcases Parchment White in satin by Glidden. It matches the Ikea white pretty well.
For more tips on how to paint built in bookshelves, check out this post!
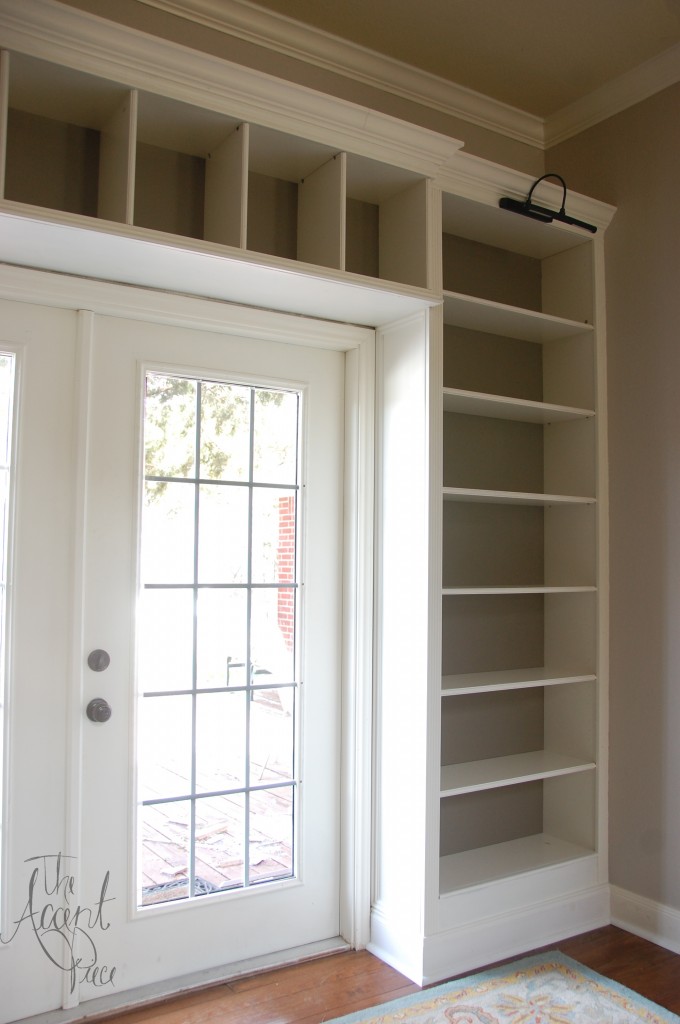
Here’s how the custom trim inside the bookcases hid the top of the bases of the bookshelves…
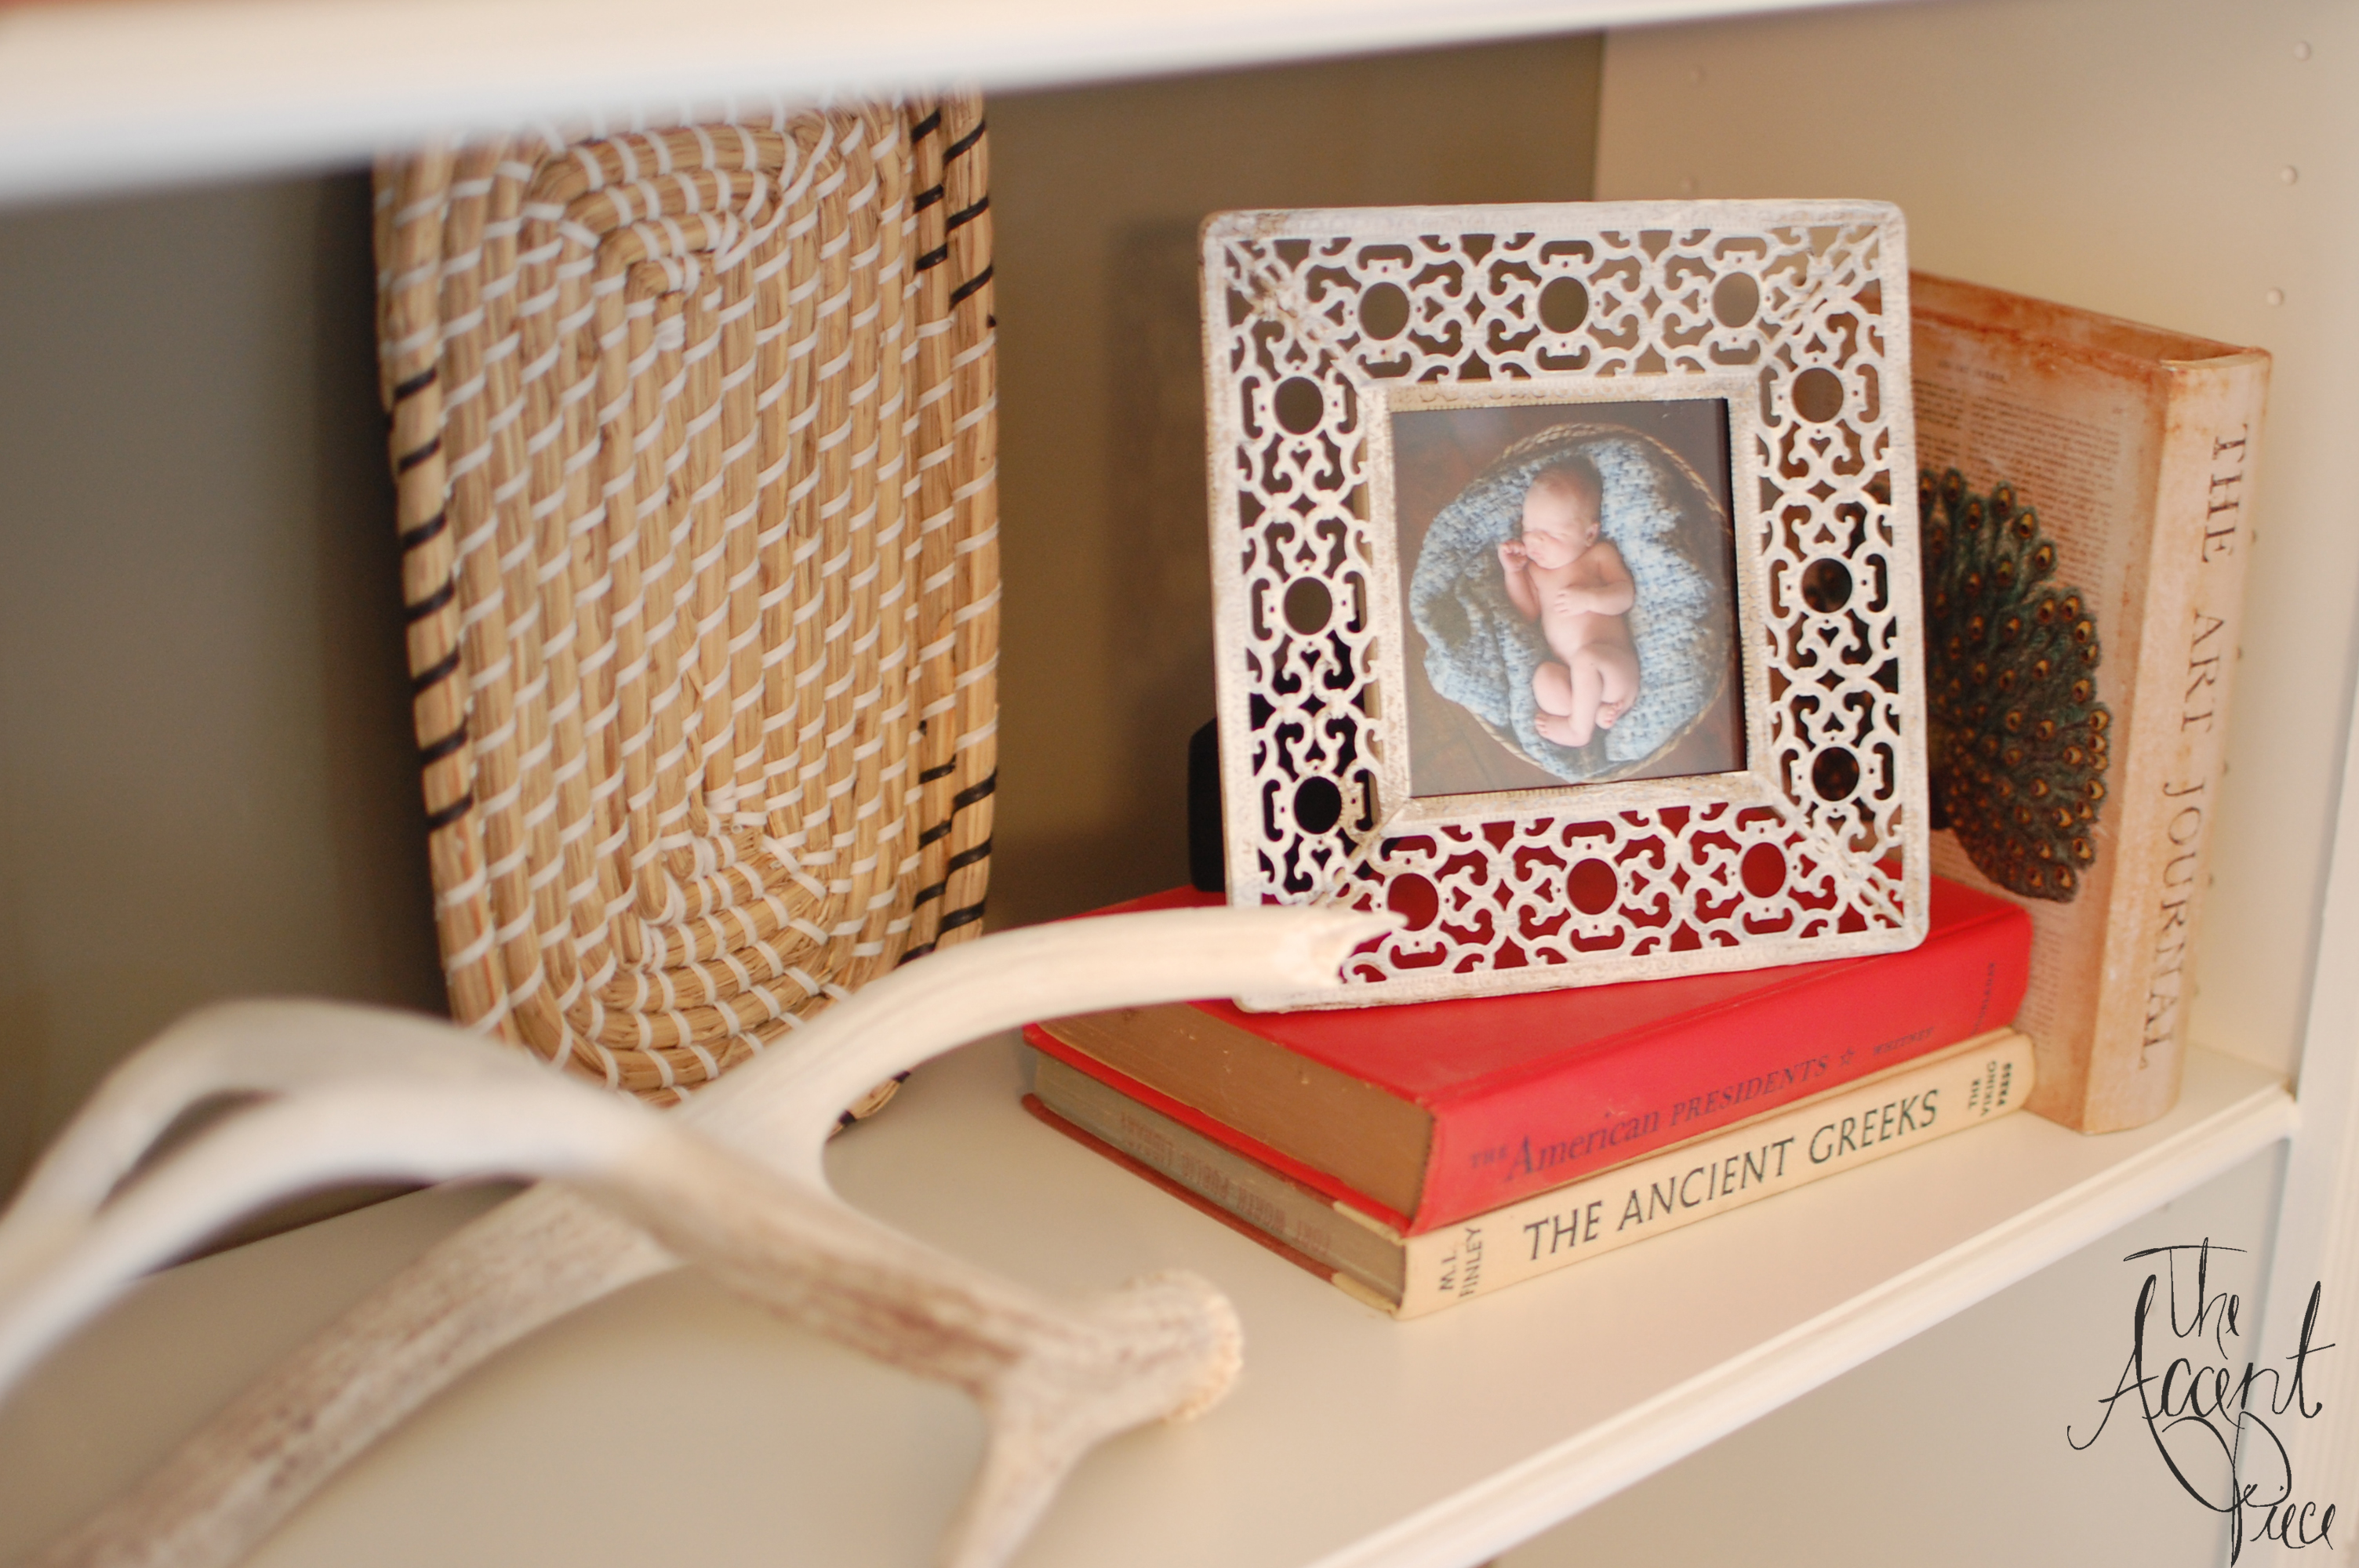
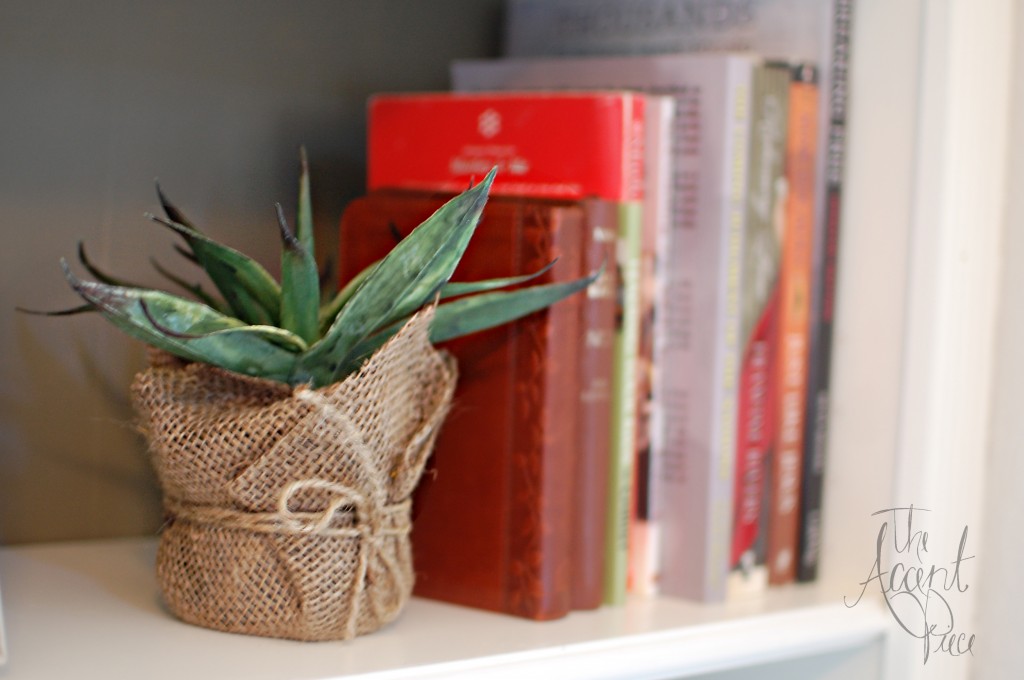
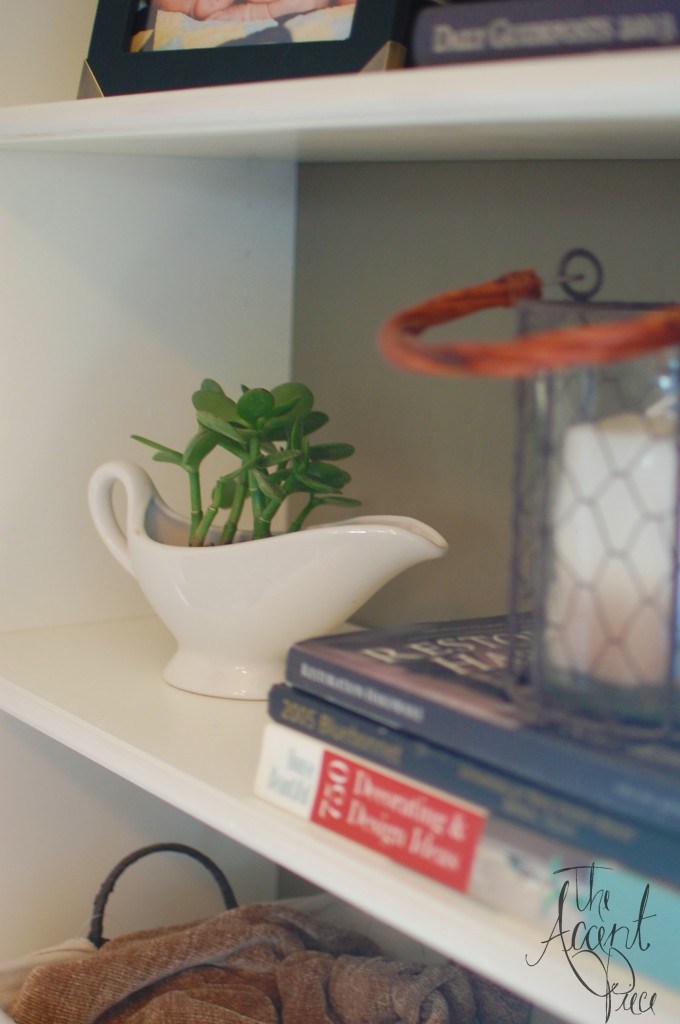
And now for some decorations…
Was Micah really ever this small? It’s a conspiracy, I’m sure of it…
And because I always love a good before and after…
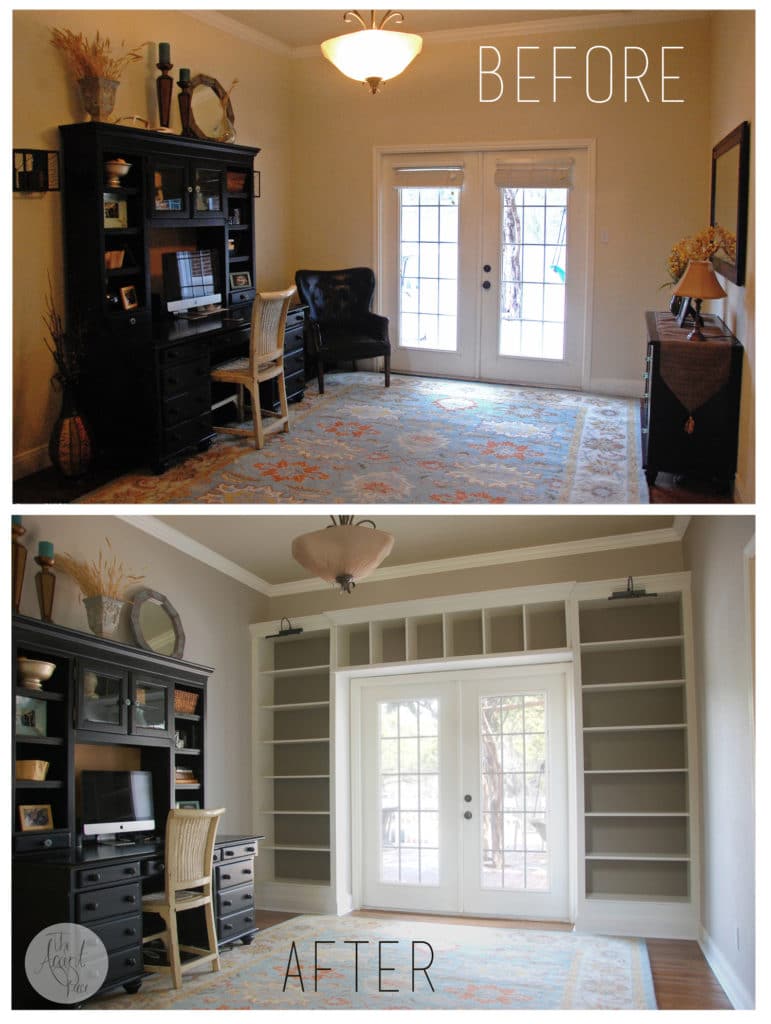
So there it is! A custom built in look made from Ikea Billy Bookcases. Man, it feels good to check this baby off the list.
In case you missed it: Part 1 | Part 2 | Part 3
Check out the web story for how to make custom built-ins using Ikea Billy bookcases here!

Suzie Wible
Suzie has shared her knowledge for over 10 years about building furniture, painting techniques, how to build your dream home, and basic to advanced woodworking skills. Through this blog, readers will feel empowered to create a home and products they love too.
Beautiful work! what a huge difference it makes in that room! Can you please break down the cost for us?
Sure! I’ll work on it and get it posted asap.
They look amazing! I have always wanted bookshelves like this. Awesome!
Thanks Stacy!
Oh Suzie, these look amazing. I love how all the trim you added makes such a seem less finish. Very professional looking. Great job!
Thank you!! 🙂
I agree, this is one awesome job Suzie! I came across your blog by Pinterest; my husband, Anthony, and I were thinking of doing something similar around our fireplace. I was wondering what the total cost of this project was and the time frame it took to complete this task? I’ve read where your little one ‘sensed’ you working and decided to ‘help’ you instead of nap so I can imagine it took some extra time. Anthony is active duty, Army so he has long days and sometimes even longer weeks so I’ll be taking on this task, but hopefully not alone 😉 We hope to hear from you soon, have a Blessed Easter!
Thanks so much for posting this! My husband and I are about to start a project very similar to this and can use all the help we can get! Our 8 year old is part of the building team — should be fun! I have to ask where your carpet came from — i am in love with the color of it!!!
I like the shelving. However, not having the top bookcase flush to the others looks very DIY. A professional would not build them like that. However, it is your house & you did it the way you wanted it and that is what counts. It was a lot of extra work for something that not does not look right though. The addition of the trim makes a positive difference in the look. For those who cannot do it that way I suggest purchasing bookcases with trim. They cost more, but will give a polished look. If you are a fan of contemporary styles, this is not an issue.
Let’s keep things positive! They are beautiful bookcases and really help to complete the room 🙂
Personally I believe that the forward sitting bookcase on top gives it that look of attention to detail and makes it look flash especially with effort put in to edge it all.
It adds to the illusion that it was custom made. But you know what the kids say today thanks to Tay-Tay ” haters gunna hate” hehehe!!
Looks good. Pinned it.
These are stunning! So inspiring! What is the name of the moulding you used along the sides? I have been trying to explain it to my carpenter and he just keeps looking at me like I am crazy!
Beautiful! I’d love to know where your office desk came from? I’ve been looking for something similar!
Wow, amazing, I’m in love! We’ve been wanting to do almost exactly thus in our play room, except with a bench running along the bottom (under a window) instead of the overhang! We were struggling spa bit because we have a little under half an inch difference on either side but this made me realize I can just hid the difference with molding! Genius 🙂
Stunning! One questions though, what size are those L brackets?
Can you please post a picture of the entire bookshelf decorated?
You are amazing to take this on! I have doors like yours in my bedroom leading into my closet that was an add on. I would love to do this, but I’m not quite as handy as you are I’m afraid! I think it looks awesome! Your paint colors are perfect, and it all looks great right down to the letter! Thanks so much for posting all of it. I would like to take this on, we shall see!
Gorgeous!!!
I love this bookshelf and your blog. Thank-you.
Love the bookshelves.
That’s brilliant! I love the look! And think of all that storage. Wonderful project.
Thank you for sharing your idea as well as detailed instructions and photos. Our results we just what we wanted!