How to Install European Hinges on Face Frame Cabinets
Concealed European hinges for cabinets are a great way to create a beautiful and clean look for cabinet doors. These hinges do just what the name implies – they conceal the hinges from the outside, creating a sleek and minimal look.
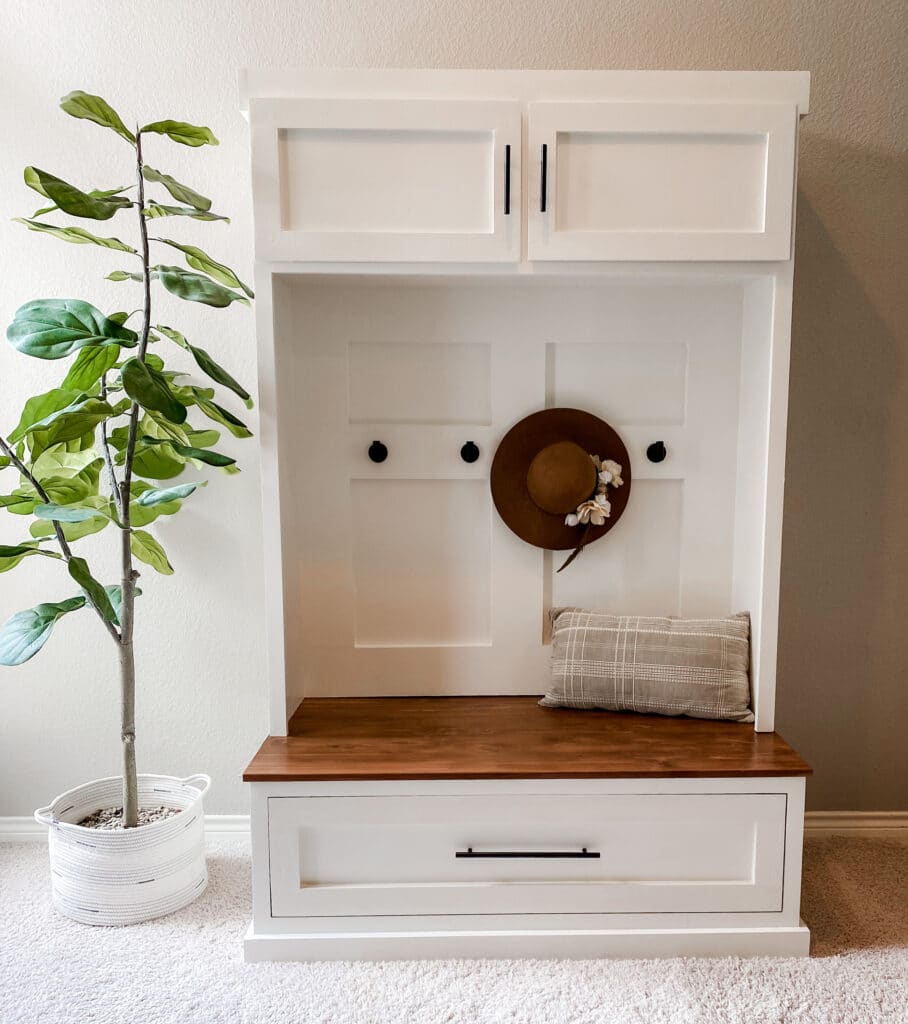
In a recent mudroom hall tree build, I installed cabinet doors over the coat rack portion of the hall tree. For the doors, I went with concealed euro hinges and I used the EuroHingeJig from Milescraft to install them.
This jig made quick and accurate work of installing the hinges to both the cabinet and the doors. In this article, I will cover exactly how to use the jig to install soft-close European hinges on face frame cabinets.
This is a project that you can easily accomplish yourself, thanks to handy jigs like this one! Now that I have used this jig to install cabinet door hinges, it has become my go-to tool anytime I do any kind of cabinet door making.
Disclaimer: This post is sponsored by Milescraft, however, all opinions are 100% my own. This site contains product affiliate links. We may receive a commission if you make a purchase after clicking on one of these links.
Q: What is a Concealed European Hinge for Cabinet Doors?
A: A concealed European hinge (euro hinge) is a hinge style that hides the hinges on the back of the cabinet door. They are attached to the cabinet opening on the inside and can be used on both face frame cabinets and frameless cabinets.
This hinge type is entirely on the inside of the cabinet. They are often soft-close cabinet hinges, which are great for increasing the quality and feel of cabinet builds and installs.
How to Install Concealed European Style Hinges on Face-Frame Cabinets
For this tutorial, I will be using the EuroHingeJig to install hinges on a face frame cabinet with partial overlay doors (as opposed to inset doors). However, this jig works great on installing european-style hinges on frameless cabinets as well.
Q: What is a Partial Overlay Cabinet Door?
A: A partial overlay cabinet door is a cabinet door style where the door front sits in front of the face frame of the cabinet box and is slightly larger than the opening of the cabinet frame. It is “partial” overlay because it reveals some of the face frame, instead of completely covering the frame.
Inset cabinet doors sit inside of the cabinet frame opening. Full overlay cabinet doors are similar to partial overlay, however, they cover more of the cabinet face frame.
Alright, let’s jump in to using the EuroHingeJig to install the cabinet hinges!
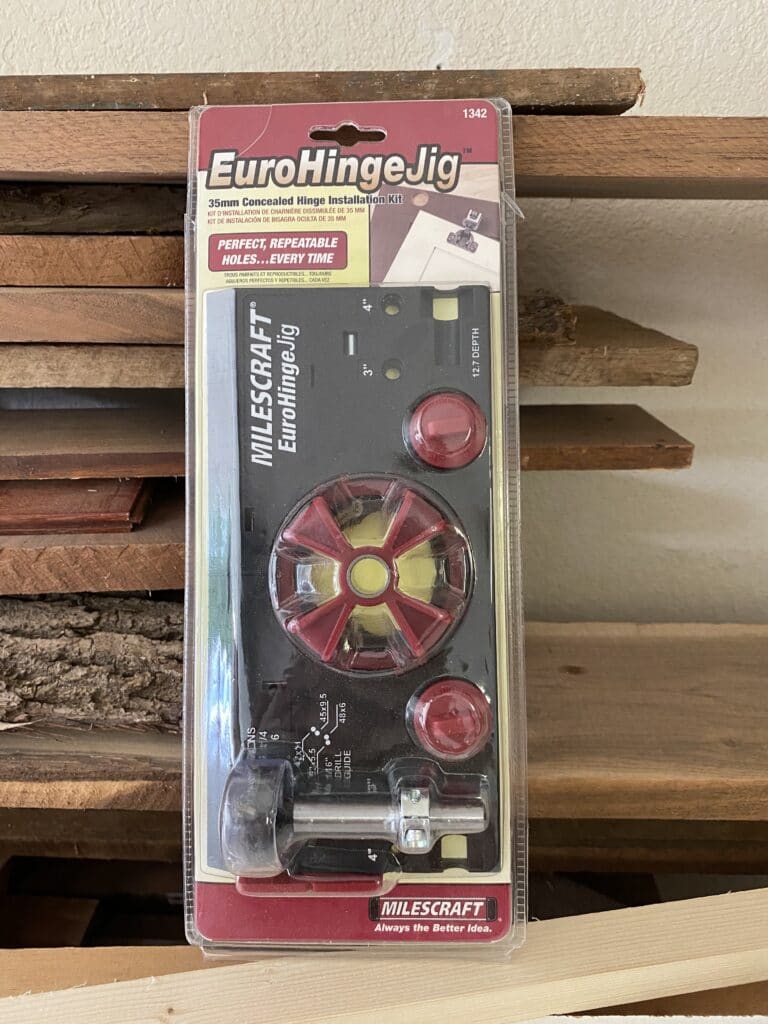
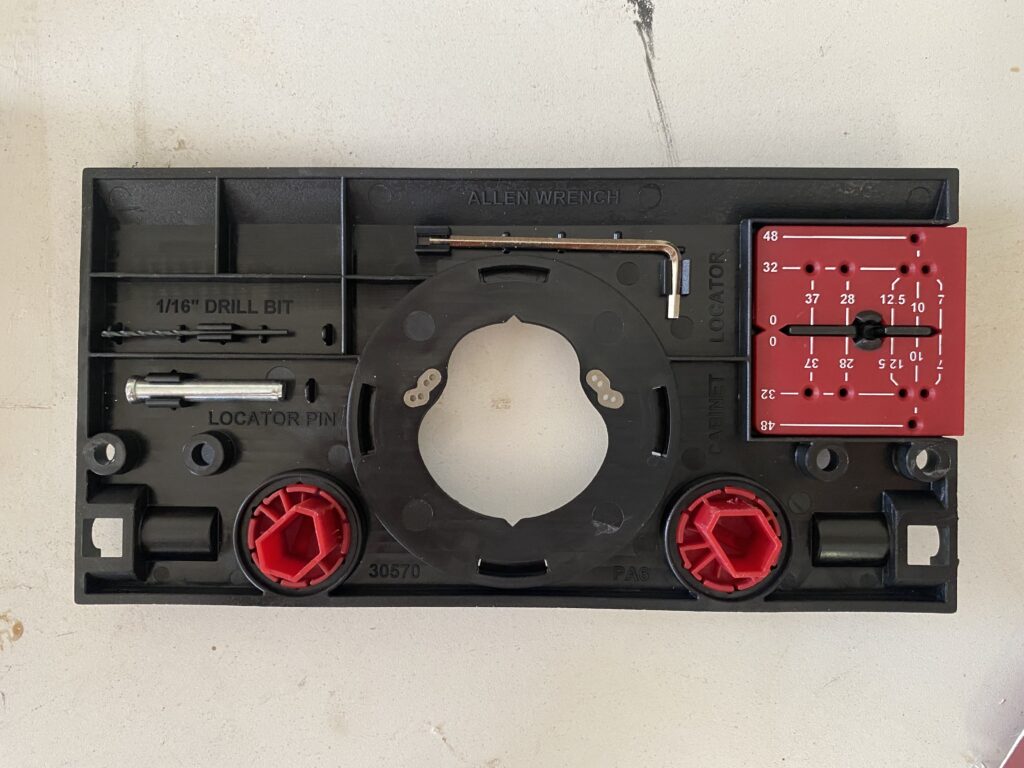
One thing I love about this kit is that it houses all of the small pieces that go with it on the back of the jig. This is so helpful when storing it and keeping up with all the small pieces when it isn’t in use.
Step 1: Align the Stop Collar on the Drill Bit
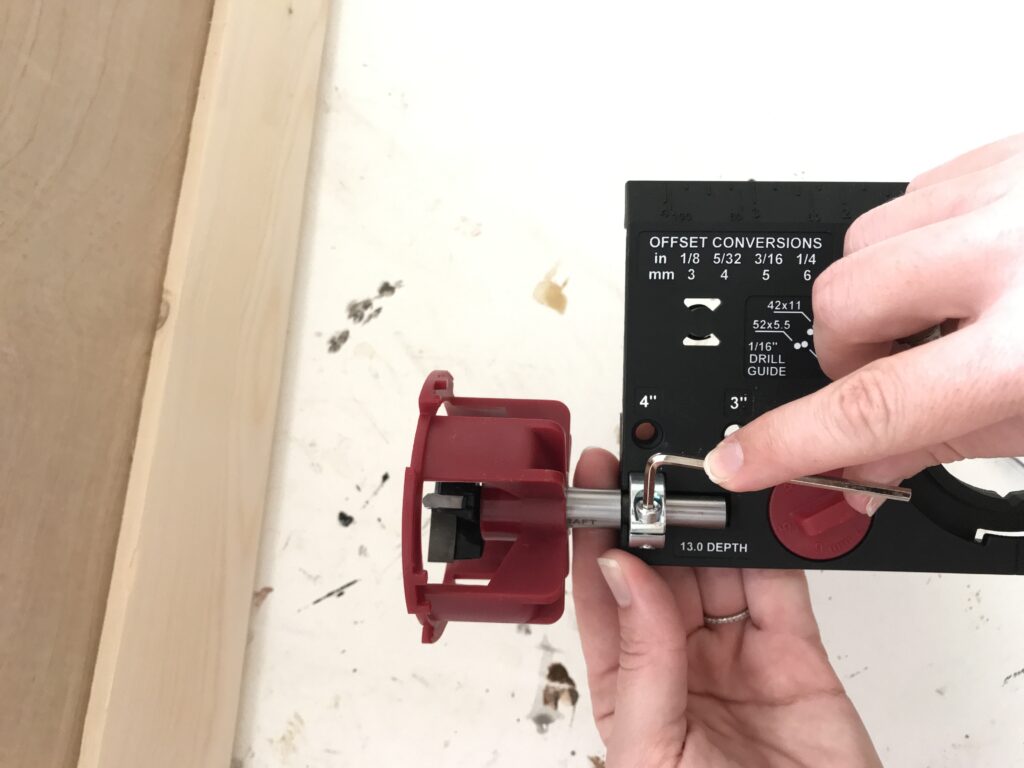
The EuroHingeJig comes equipped with depth-stop settings for the depth of the hinge cup. The jig has multiple common built-in depth-stop settings, so find the correct depth for your specific hinges and set the collar accordingly.
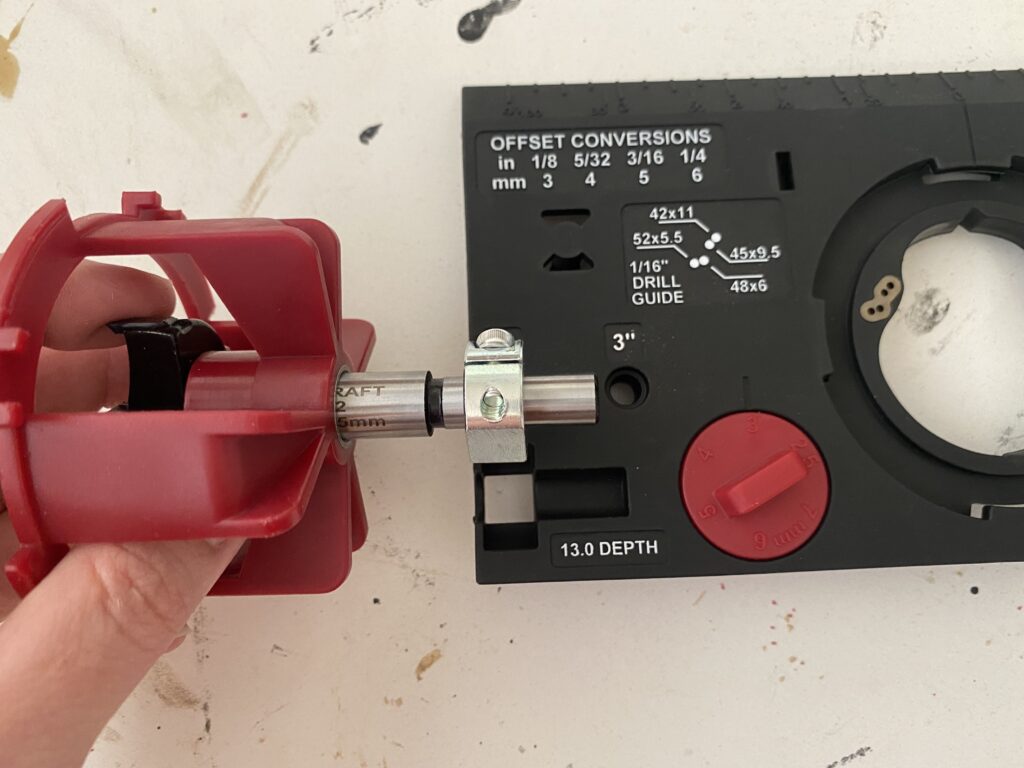
Once the correct depth of the stop collar is set, tighten the hex screw with the provided hex wrench. Attach the bit to your power drill.
Step 2: Determine the Hinge Cup Hole Location
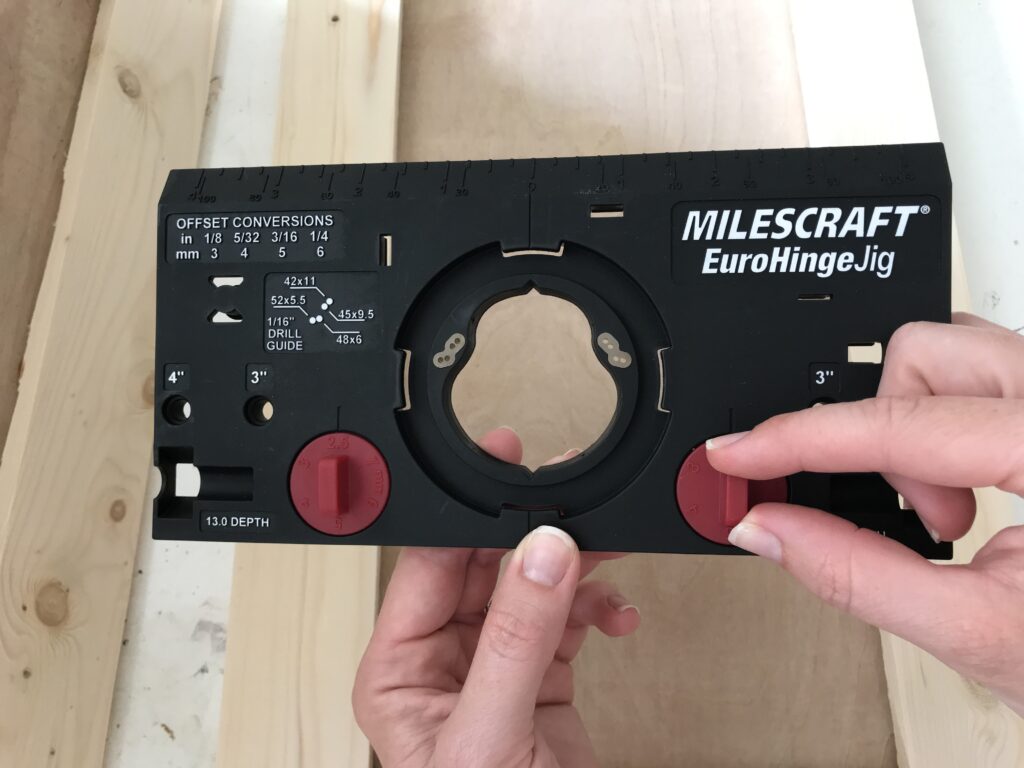
Determining the hinge cup location will depend on the specific hinges you purchased. The instructions that came with the hinges should include the distance of the hinge cup holes from the edge of the door. Once you find that, rotate both of the depth settings on the jig to match this setting.
Step 3: Set the Edge Locator Pin
The edge locator pin that comes with the jig will properly set the distance from the edge of the cabinet door to the cup that will be drilled. Read the manufacturer’s instructions for the hinges to find the correct depth. Choose either the 3″ or 4″ depth setting.
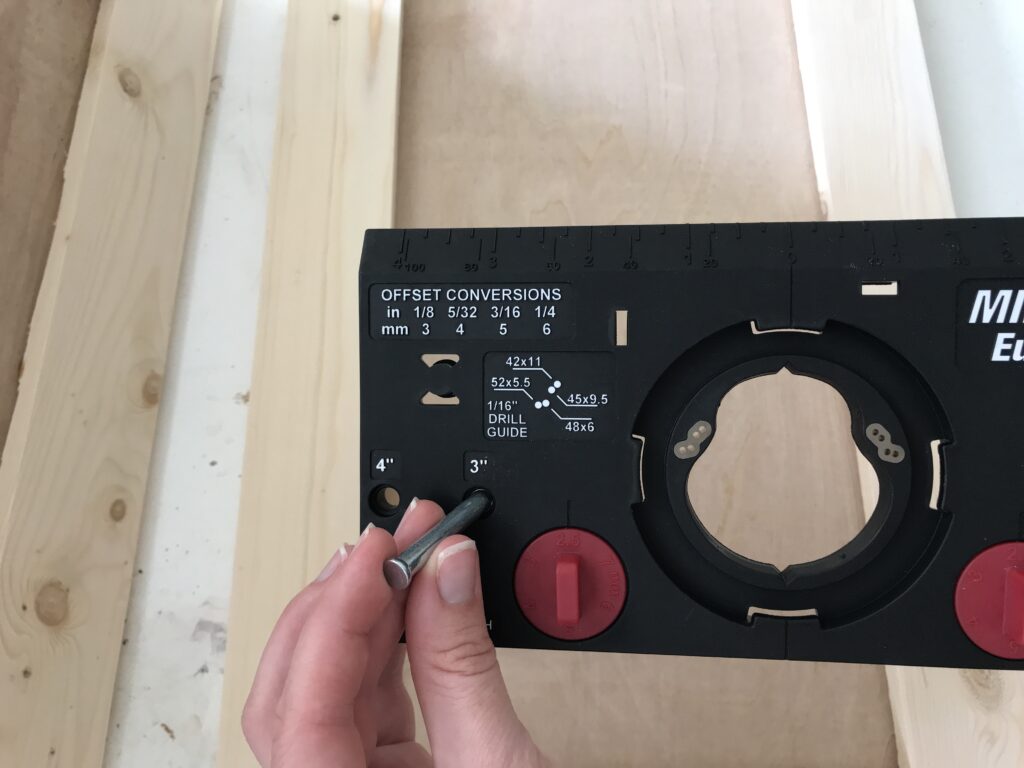
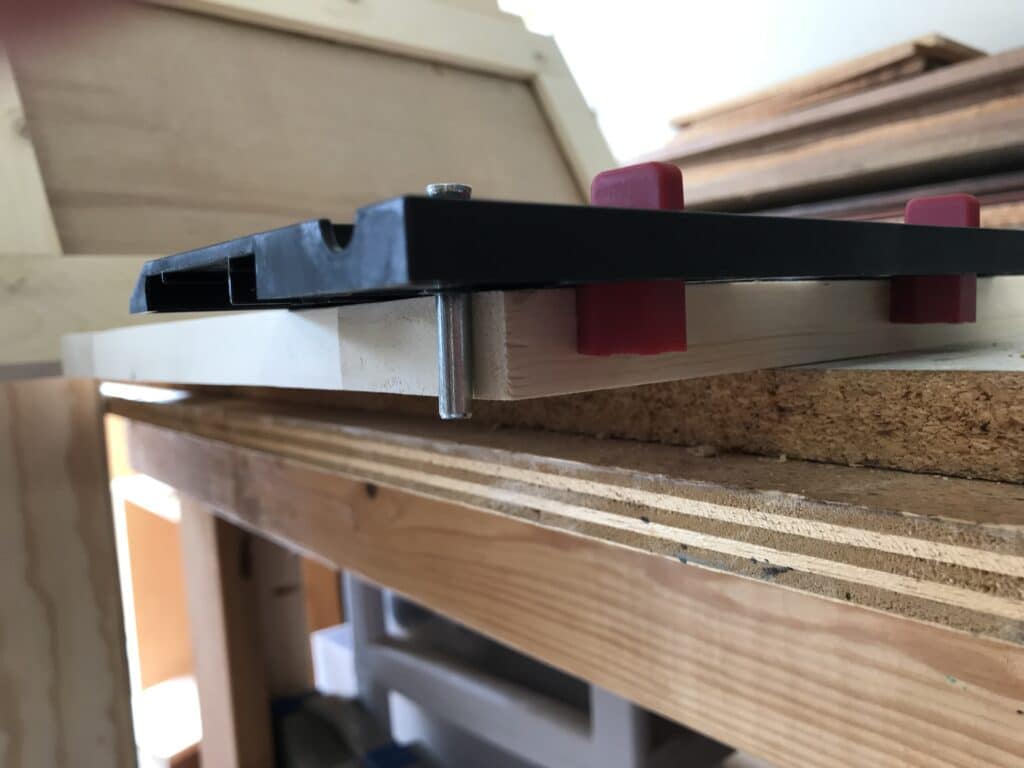
The jig will now sit in the correct position on the cabinet door because the edge locator pin and edge alignment knobs will sit flush against the door.
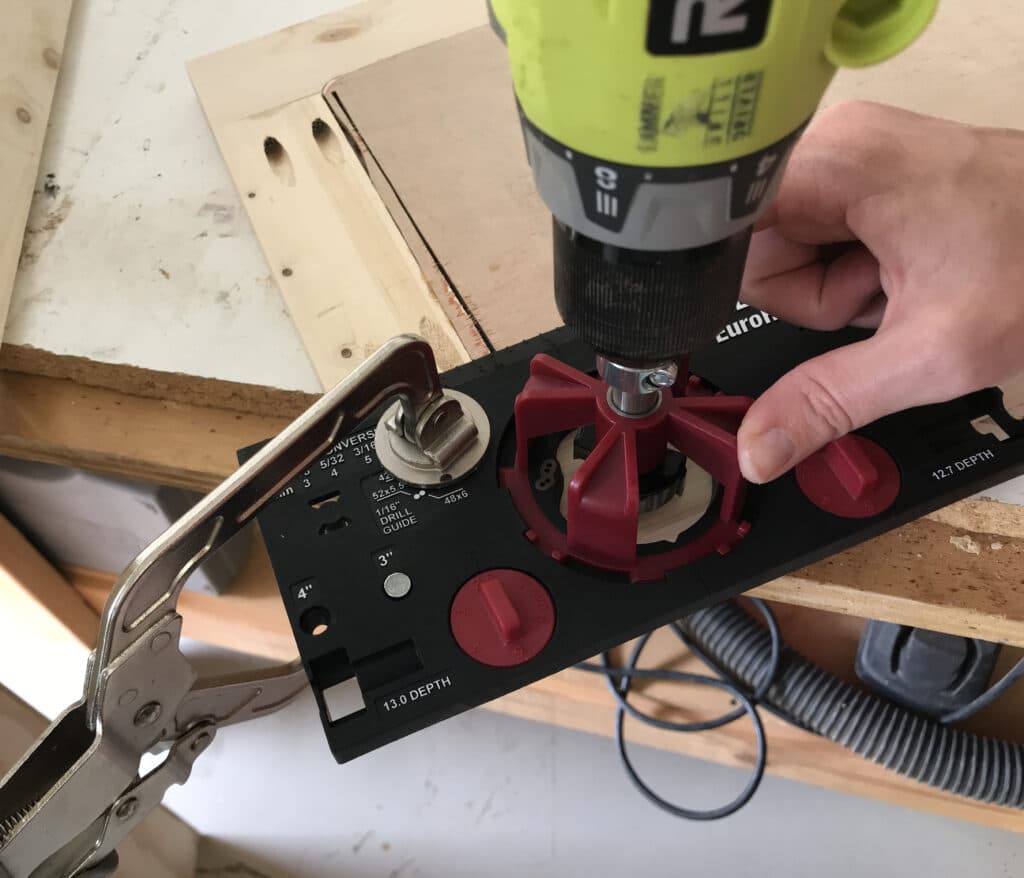
Clamp the jig on the cabinet door and to your workbench using a face clamp. There is ample space on the jig itself to find a place to clamp it, which is super helpful.
Step 4: Drill the Cup Hole in the Cabinet Door
Attach the drill guide to the jig by rotating it in a clockwise direction. It will lock in place and you are ready to drill the cup hole in the cabinet door! This feature of the jig is great because it will keep the drill bit perfectly perpendicular to the cabinet door.
This will alleviate the need for something like a drill press, and instead, it allows you to use just a power drill. It’s just one small feature of the jig that makes the process more efficient!
Start the drill and allow it to reach full speed. Plunge the drill into the cabinet door. You may have to back out and plunge it again a few times to complete the cut.
Repeat these steps for the other end of the cabinet door for the 2nd hinge.
Step 5: Attach the European Hinge to the Cabinet Door
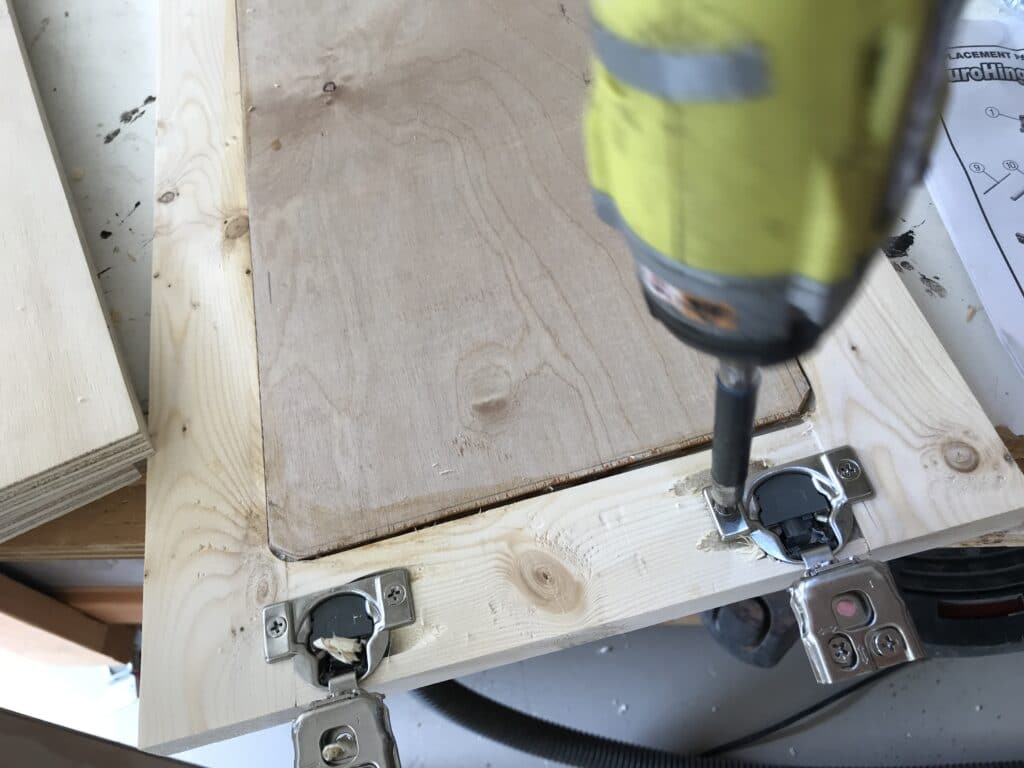
Now that you have drilled the cup hole, you can insert the concealed hinge into the hole. Pre-drill pilot holes for the screws using the drill bit that came with the jig. Use the provided screws that came with the hinges to attach the hinge mounting plate, making sure it is square to the edge of the cabinet door. Repeat for the other hinge of the cabinet door.
Step 6: Attach the Hinge to the Cabinet Frame
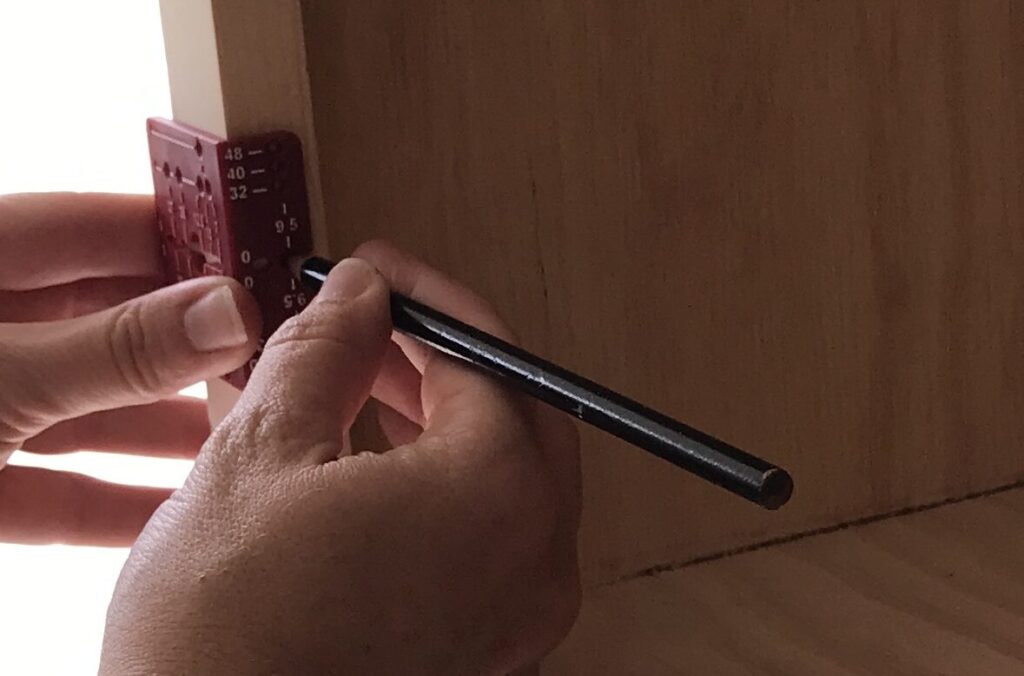
The jig comes with a hinge marking guide, which you will use to mark the location of the soft-close hinges on the cabinet side. This tutorial is covering installing the hinges on a face-frame cabinet, but it can also be used for a different type of cabinet, like a frameless cabinet.
If you are installing these on frameless cabinets, you will attach the hinges directly to the cabinet carcass, instead of to the face frame of the cabinet. Use the instructions that came with the hinges to help determine this location.
Q: What is the best soft-close cabinet hinge?
A: These European style concealed hinges are a great option for soft-closing hinges. They are easily adjustable for minor tweaks on the position of the door. The soft-close feature works great. These hinges, paired with the EuroHingeJig, were incredibly simple and easy to install. Very few adjustments were needed to square up the front of the cabinet doors, and the small adjustments that were needed were easy to do.
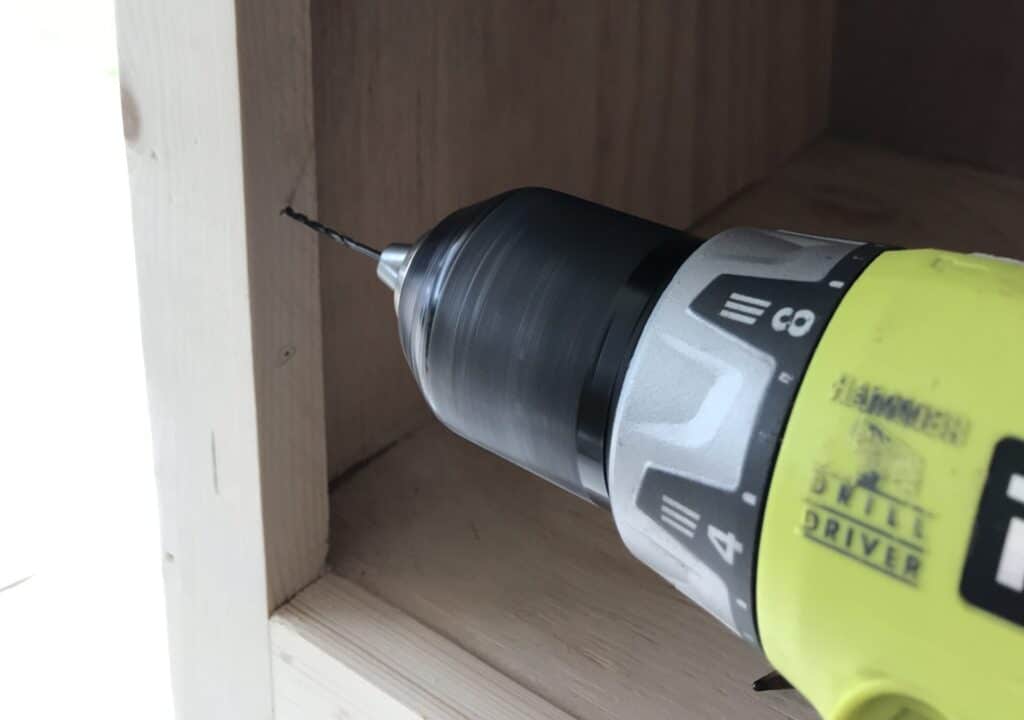
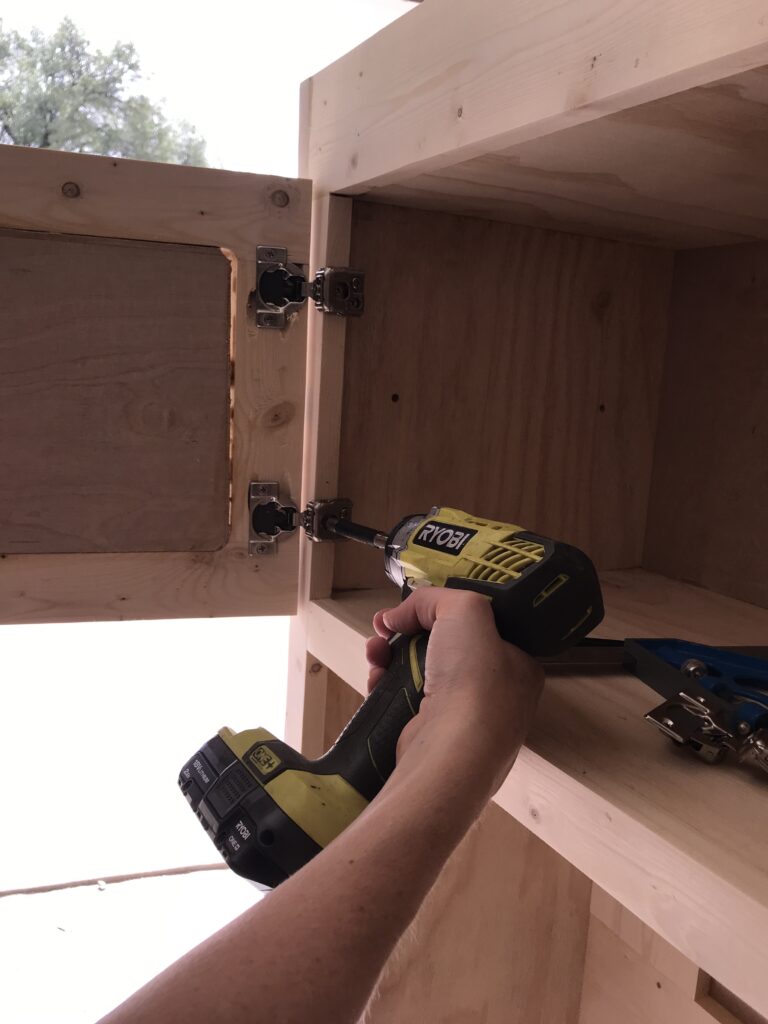
Use the drill bit that came with the jig to drill a pilot hole for the installation screws.
You can now attach the hinges on the cabinet doors to the cabinet frame. Repeat steps 1 through 6 until all hinges and doors have been installed.
This method would be used if you go the RTA cabinet route for custom kitchen cabinets. Or, if you’re making mudroom built-ins from stock cabinets, this would be another great way to make them more custom.
By installing these hinges, a very clean look is created on the front of the cabinet because of the hidden hinges.
The EuroHingeJig from Milescraft makes installing soft close hinges incredibly simple and easy. It takes the guesswork out of the process and saves so much time in installing hinges on cabinets. This jig will quickly become a staple in your cabinet-making!
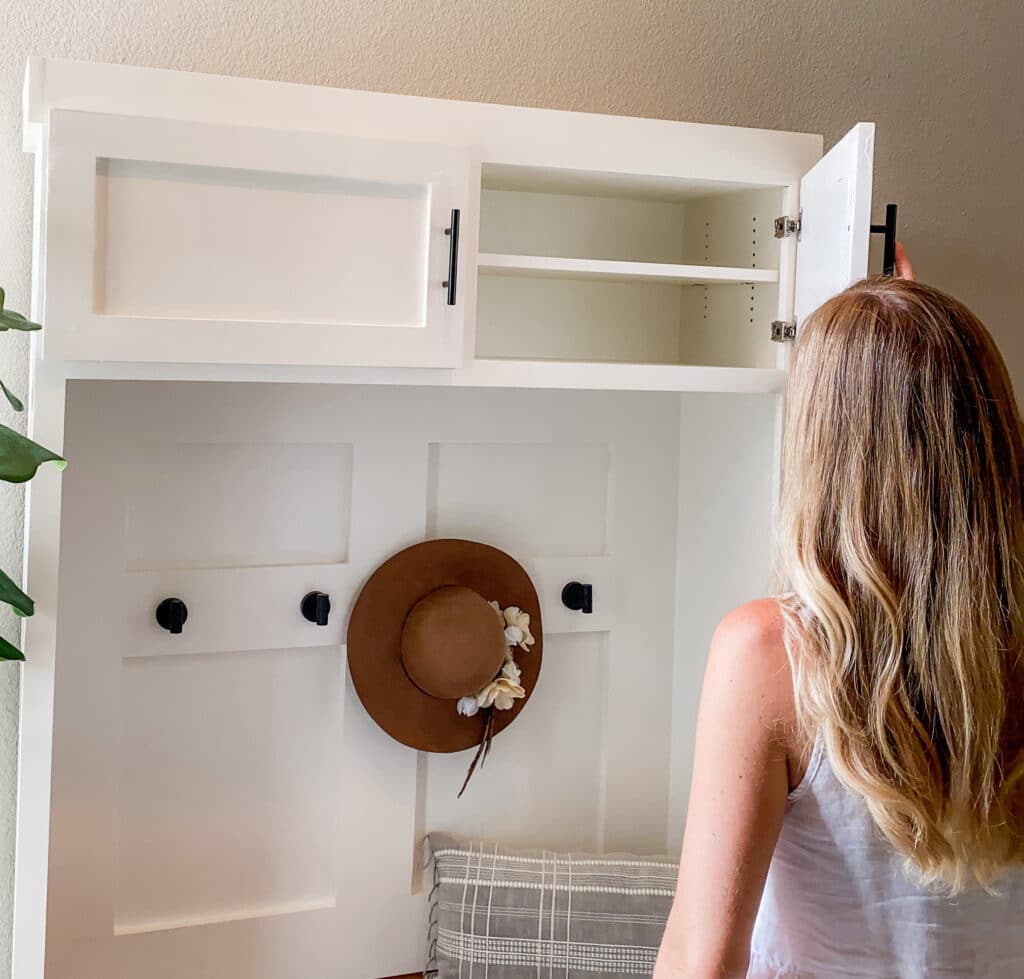
Milescraft also makes some other handy jigs that are very helpful when making cabinets. You can read about how to install drawer slides on face frame cabinets here, which is the best shelf pin jig here, and see them all put to use in one big project on this mudroom hall tree with upper cabinets and hooks here.
All of these jigs make cabinet building not just quick and easy, but very accurate as well.
If you try out this jig or have any other questions or feedback, feel free to contact me!
You can check out the webstory for how to install euro hinges on face frame cabinets here!
You might find the following articles helpful if you’re doing cabinetry work:

Suzie Wible
Suzie has shared her knowledge for over 10 years about building furniture, painting techniques, how to build your dream home, and basic to advanced woodworking skills. Through this blog, readers will feel empowered to create a home and products they love too.