4 Simple Steps to Building a Large Square Coffee Table
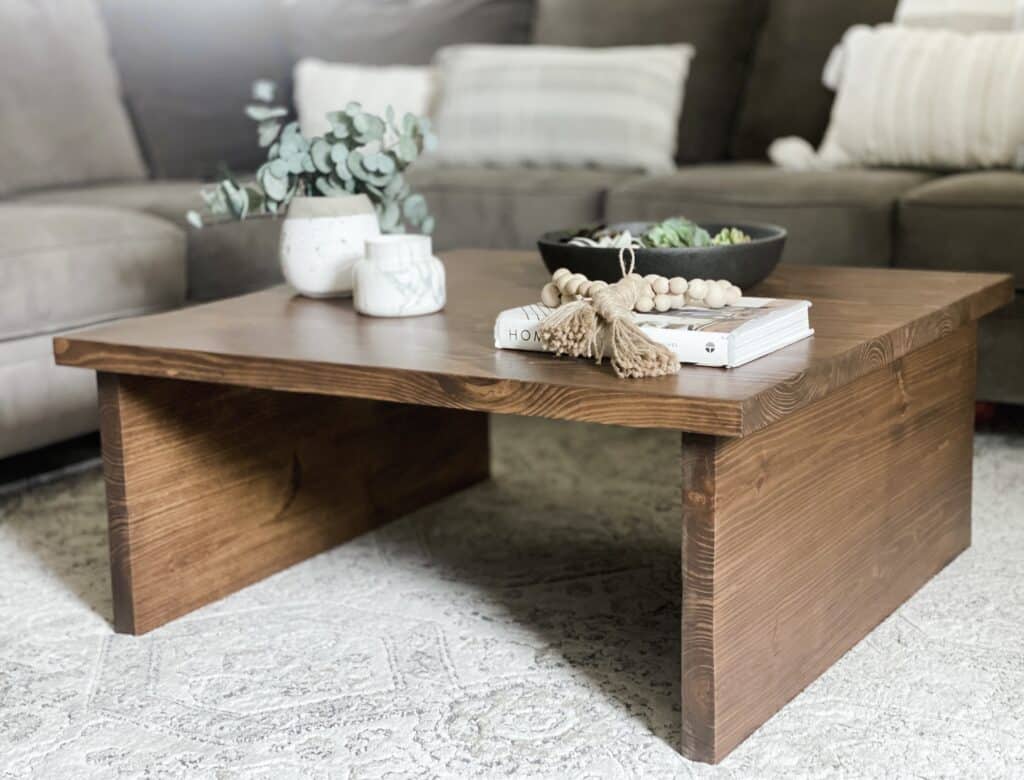
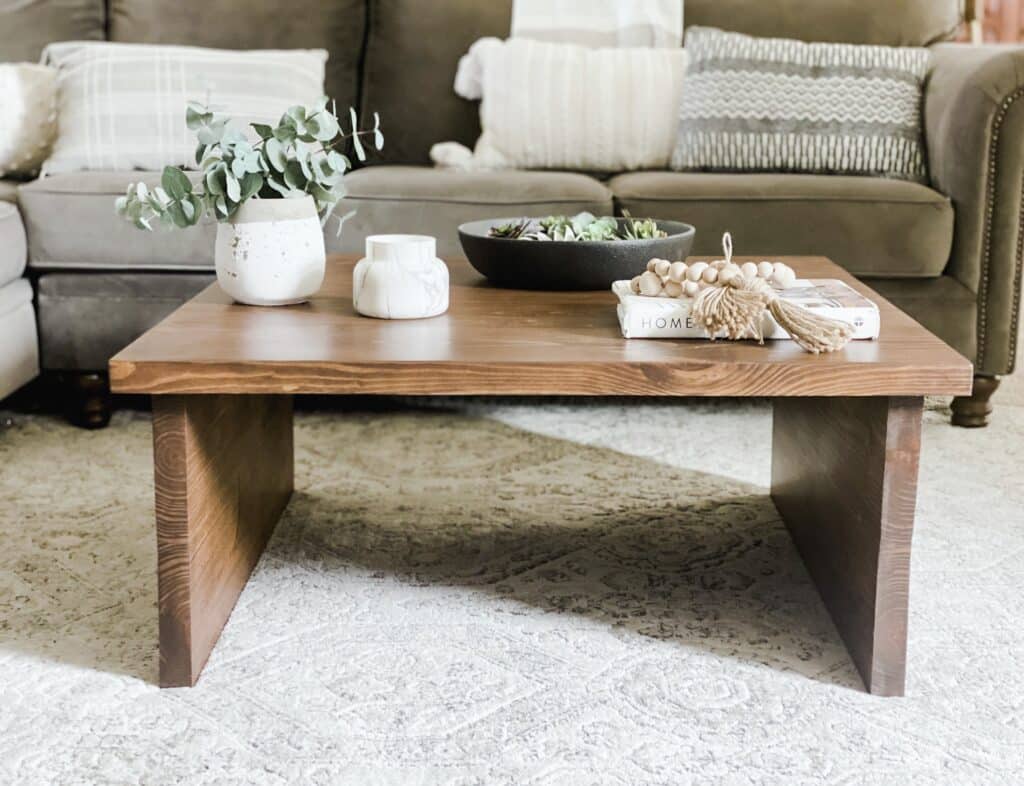
This large square coffee is such a fun build and perfect for those just getting into making your own furniture. This build is simple enough that beginners can tackle it, and creates such a beautiful and custom piece of furniture with a rustic design. For less than $100, you can make your own unique, solid wood coffee table!
This homemade coffee table would look great in any living room and can easily be modified to fit a larger or smaller space. Be sure to check out the free plans!
I made this coffee table with pocket hole joinery and used the PocketJig200 by Milescraft to do this. I especially loved using this jig because Milescraft thought through every step of drilling pocket holes and made the process so simple. Everything was streamlined, easy to use, and accurate. Check out the pocket hole jig here!
In this article, I will cover the simple steps to building your own rustic square coffee table, provide the free plan, how to use the PocketJig200, and also include tips on how to finish it in a way that will last for years to come.
Disclaimer: This post is sponsored by Milescraft, but all opinions are my own. This site contains product affiliate links. We may receive a commission if you make a purchase after clicking on one of these links.
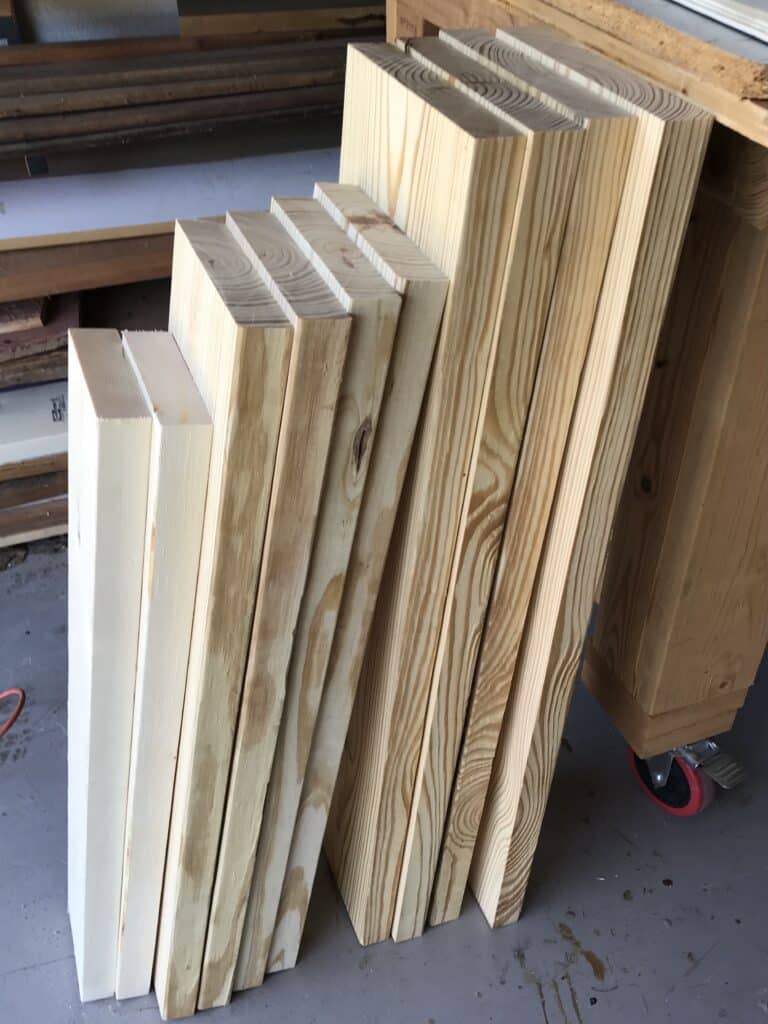
I ended up buying just a basic pine wood to make this table. By choosing this species of wood, I was able to cut the cost quite a bit. A harder species of lumber, like oak or walnut, will also create a beautiful table. However, this would be much more expensive.
With this stain (Special Walnut) on pine, however, I love this look. As an added bonus, it was a lower price point that hardwoods!
Download the Free Plans Below:
Materials and Tools Needed to Build the Coffee Table
The materials and tools list for this coffee table build is pretty simple, especially the lumber needed.
- 2×10, 12 ft long
- 2×8, 12 ft long
- 2×6, 5 ft long
- Milescraft PocketHoleJig
- Milescraft PocketScrews
- Miter Saw
- Power Drill
- Wood Glue
- Orbital Sander
- Stain
- Finish
- Clamps
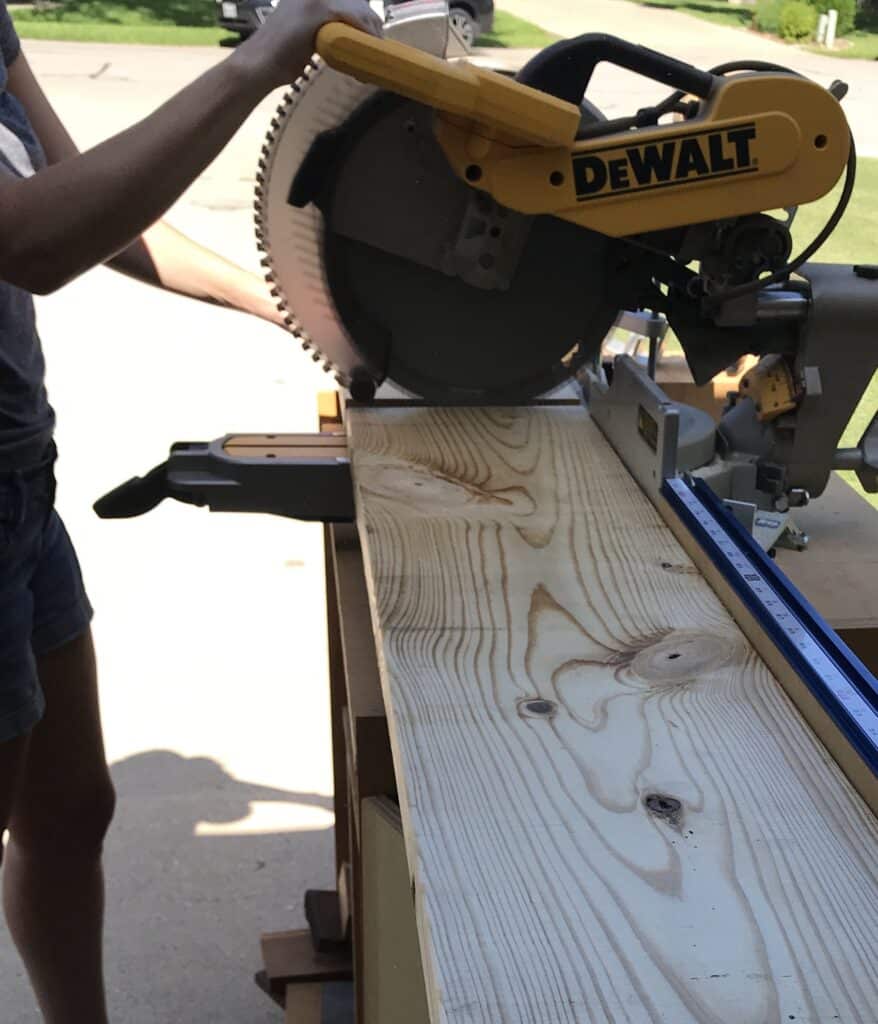
Step 1: Dimension the Lumber
The first step to building your own coffee table is to cut the lumber to size. The best part of this build is how simple the cuts are! Follow the plans and cut list in order to cut the lumber to the correct size.
I used my miter saw and miter saw work bench to cut the wood. Once the pieces were cut to size, I wanted to make sure all of the thicknesses were the same. So, I ran all of the wood pieces through my planer. This also created a much more smooth finish and less sanding was needed later.

Step 2: Cut the Pocket Holes
In order to join the pieces together in a way where the holes are hidden I used pocket hole joinery. This is my favorite joinery method because of the ease of use. It is a great way for beginners to start with building furniture as well!
I used the Milescraft PocketJig200 to complete this. I highly recommend this jig for any pocket holes you will be making! It’s a great system and so easy to use.
Milescraft thought through every step of drilling pocket holes when they designed this jig. An example of this is a magnet on the face of the jig that will attach to the face clamp. It allows the user to quickly unclamp, reposition the jig, clamp, and drill again. In a project like this where many pocket holes are drilled at once, this is incredibly helpful in cutting down work time and streamlining the process.
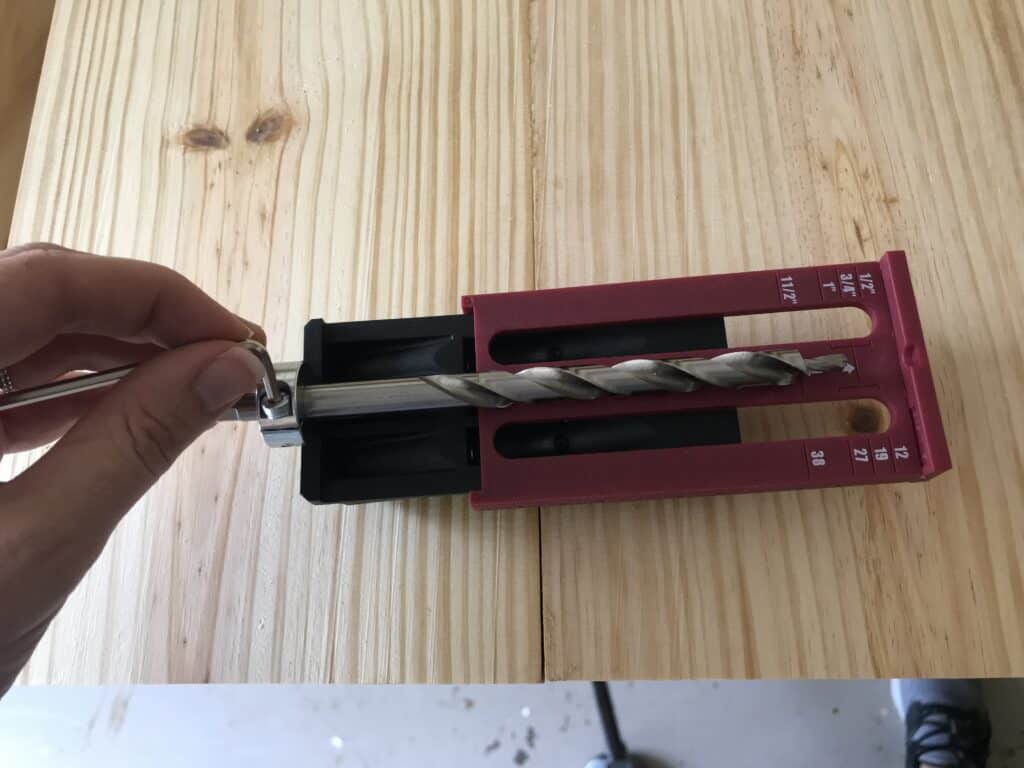
I find it easiest to mark all of the holes in every board first, then drill them all at the same time.
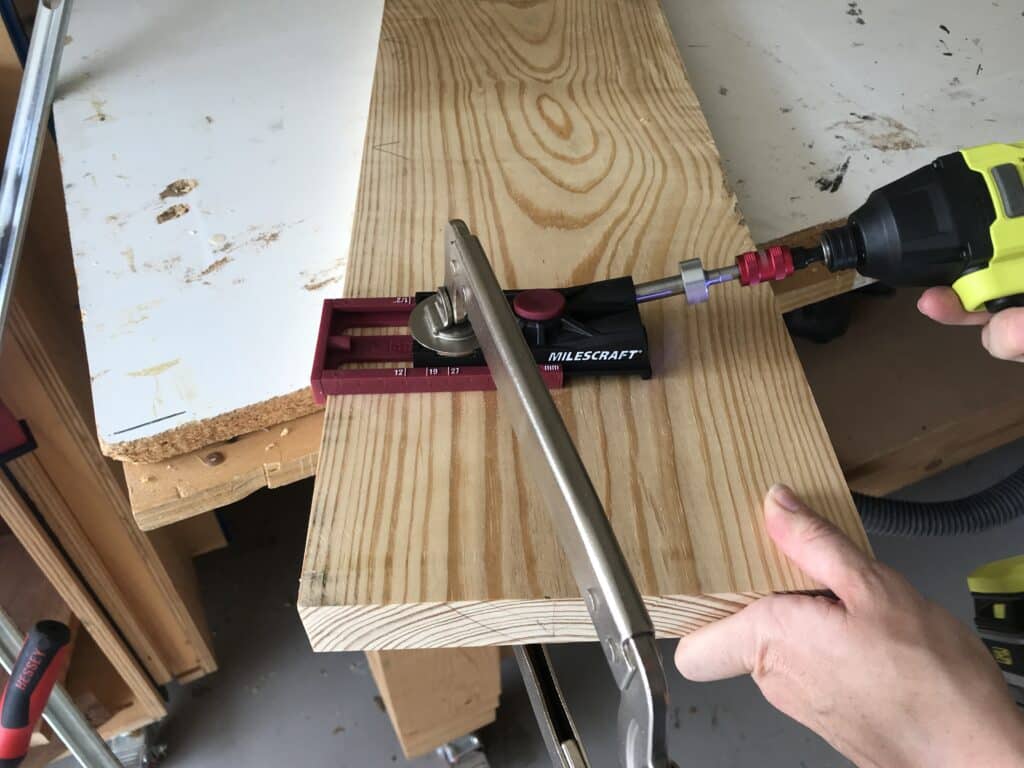
This simple jig will allow you to quickly create strong joints and be able to hide screw holes in the process. Everything you need is in the storage case – this is great for keeping all the parts organized so you can quickly find them in the future.
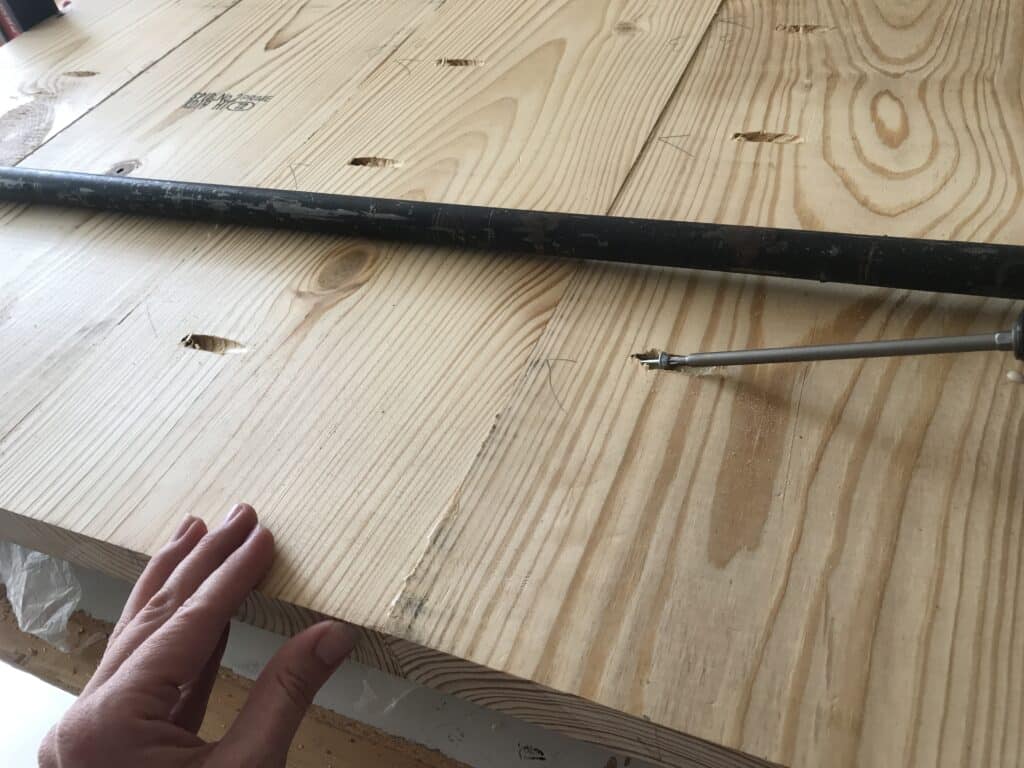
Step 3: Assemble the Coffee Table
Now that all of the pieces are cut and pocket holes are drilled, you can assemble all of the pieces together. Follow the plans to get the correct dimensions.
In order to get tight seams on the table top, I recommend jointing the edges of all of the boards. You can read about different methods to straighten long boards here.
Be sure to use wood glue and clamps. Allow the glue to fully dry before unclamping the piece.
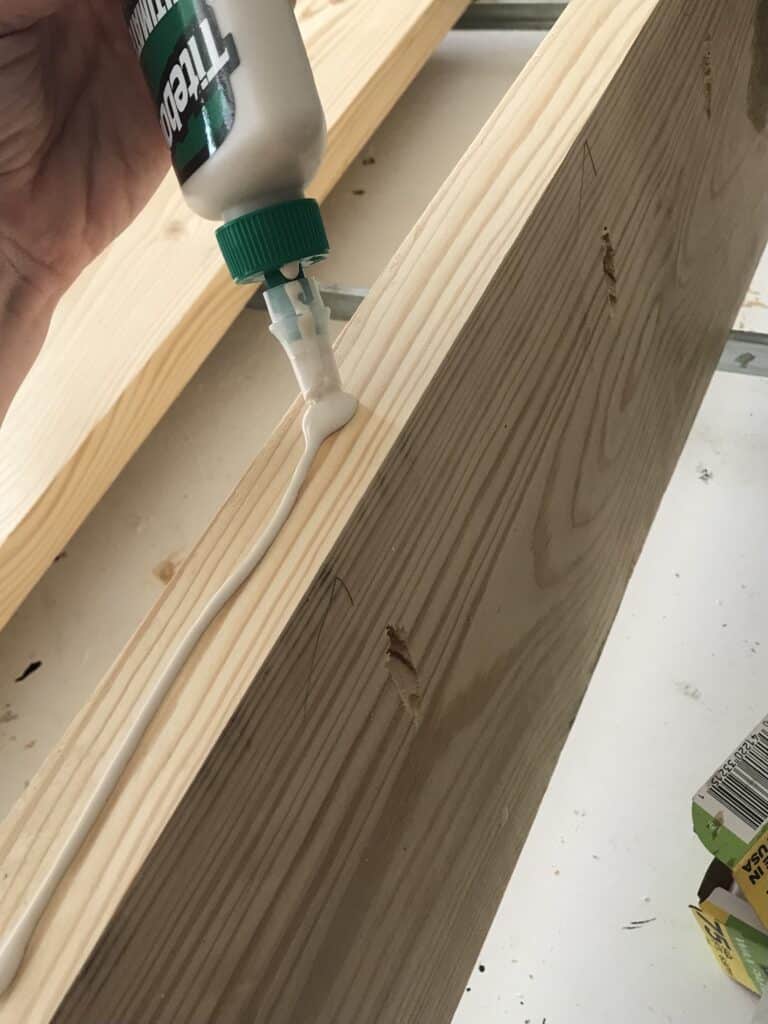

While the table is clamped, join the pieces together using Milescraft 2″ PocketScrews. These self-tapping screws reinforce a strong pocket hole joint. The T20 Star head worked great in preventing stripping and made quick work of adding the screws.
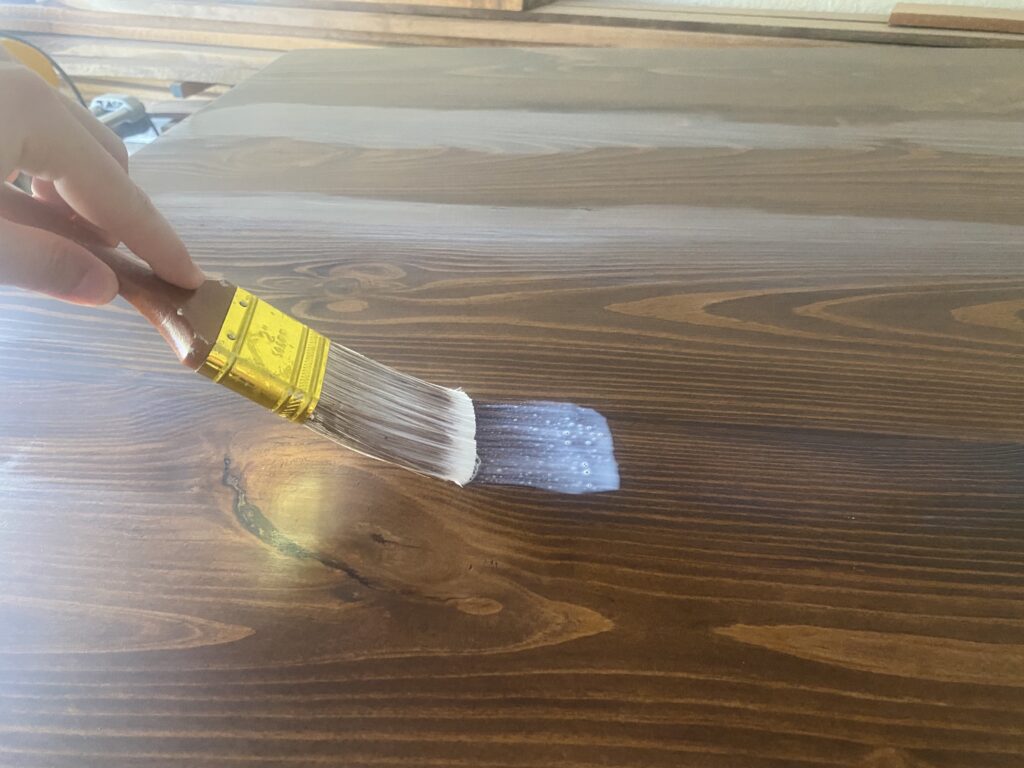
Step 4: Apply the Finish to the Coffee Table
Sand the coffee table before applying the stain and finish. Start with 80 grit sandpaper on an orbital sander and sand the whole piece. This is especially important if you didn’t plane the wood pieces before assembling them.
Once you have done that, switch to 120 grit sandpaper and sand the whole piece again. You are now ready to apply the stain.

The stain I used is called Special Walnut and I purchased it from Home Depot. Apply the stain evenly with a high-quality bristle brush and allow it to fully dry, according to the dry times on the back of the can. This is the ideal choice of brush in applying the stain, as it creates a uniform finish.
Use the methods found in this post on how to get a super smooth finish on cabinets to apply the finish.
Once the stain is fully dry, you can apply the finish. I used my favorite matte sealer (which is the same one I used on my kitchen table, black painted dresser, and mudroom built-ins).
And that’s it! You now have a new coffee table that will look great in any living space. To make matching pieces of furniture, the plans could easily be modified to make a matching end table as well.
In addition, you can tweak the plans to make a rectangle coffee table or a round coffee table using the methods found in this post on how to cut a perfect circle in wood.
For another rustic look in a living room, you could make this bench and use it as a live edge coffee table!
For similar project ideas, be sure to check out these solid wood side tables or this DIY sitting bench!
You could easily add storage under this rustic farmhouse coffee table by simply adding baskets under it!
If you want to add to the design, a simple bottom shelf could be added as well. That would also be a great storage space to hide remote controls in order to keep them out of sight when they’re not in use.
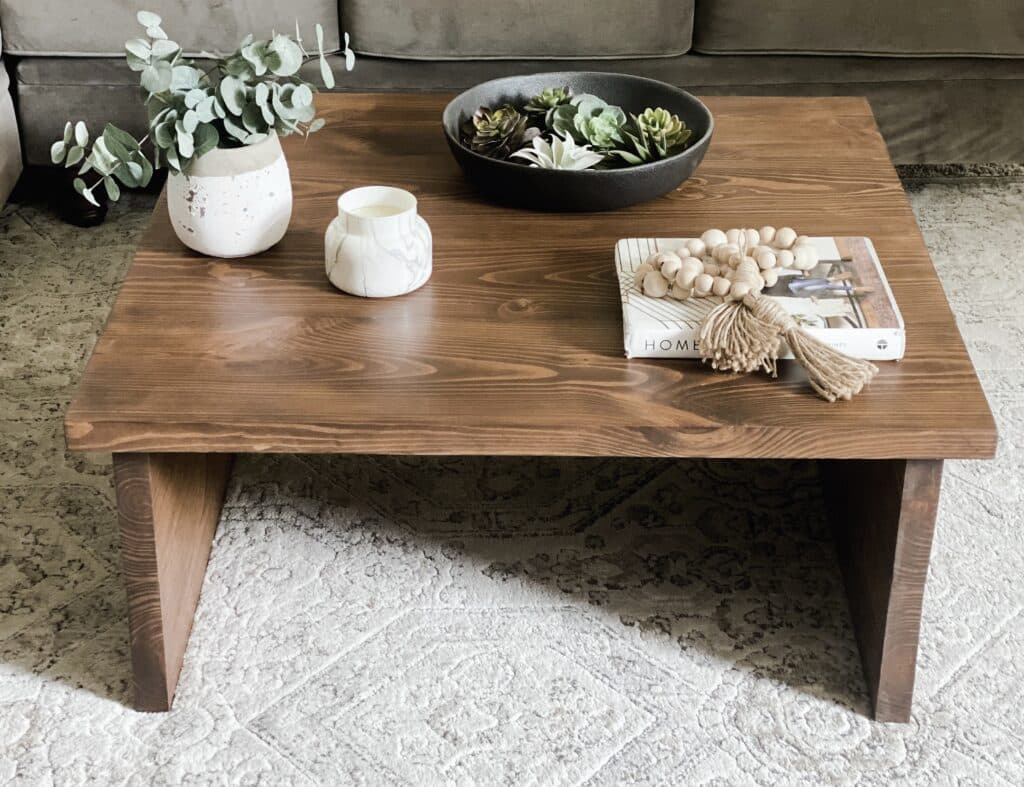
Square coffee tables are a great DIY project that looks great with sectional sofas. It is also the perfect coffee table that provides a rustic touch and will fill a large space in a living room.
This table is a great blend of rustic farmhouse style and modern styles, depending on how you decorate the top of the table!
Average Size of a Square Coffee Table
The average size of a square coffee table is 36″ by 36″. This will fit very well next to a sectional couch like the one pictured.

Be sure to check out the free coffee table plan, the PocketJig200, and the PocketScrews. Let me know if you have any questions or comments!
Check out the web story for how to build a large square coffee table here!
If you found this article helpful, be sure to check out the following articles:

Suzie Wible
Suzie has shared her knowledge for over 10 years about building furniture, painting techniques, how to build your dream home, and basic to advanced woodworking skills. Through this blog, readers will feel empowered to create a home and products they love too.