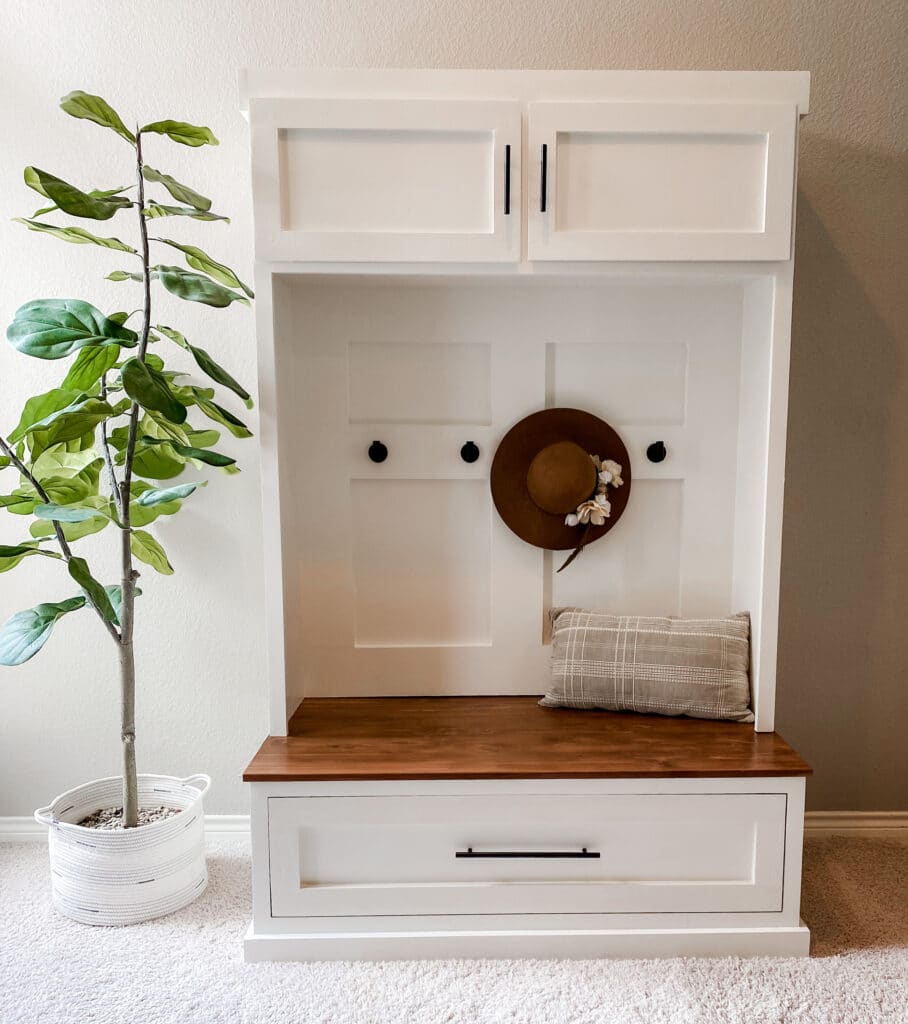
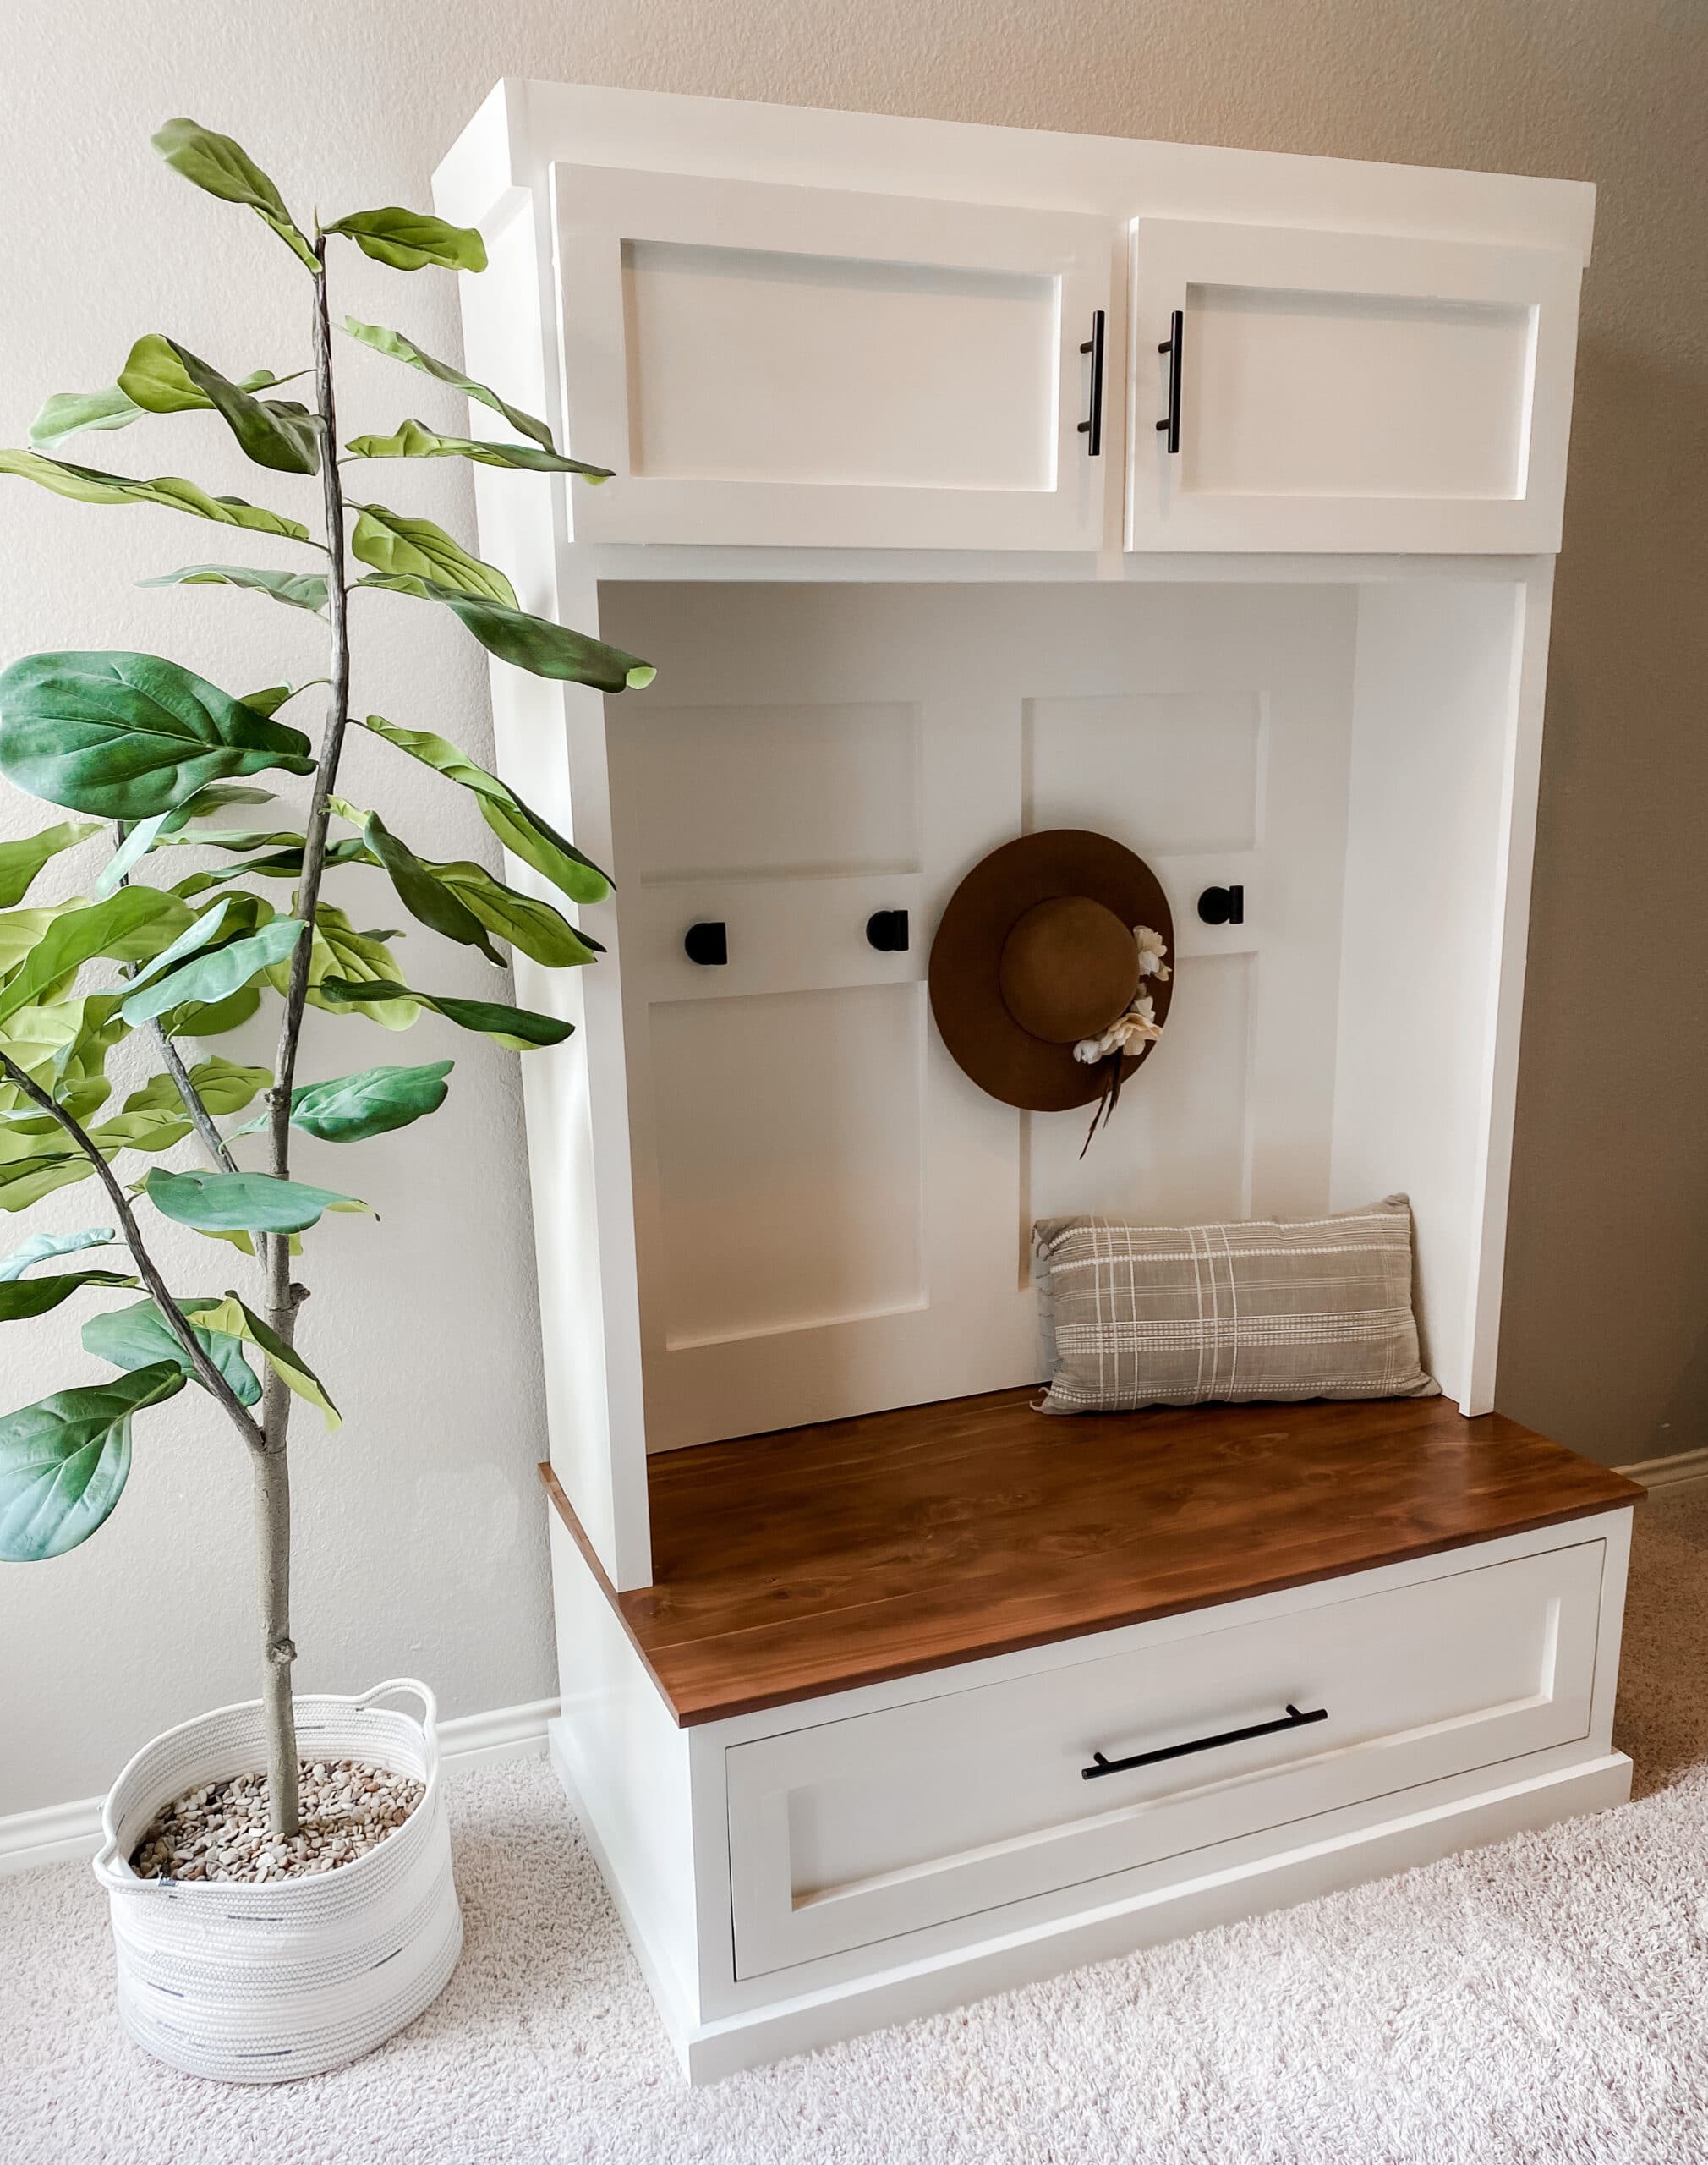
DIY Mudroom Bench with Upper Cabinet and Hooks: Free Plans
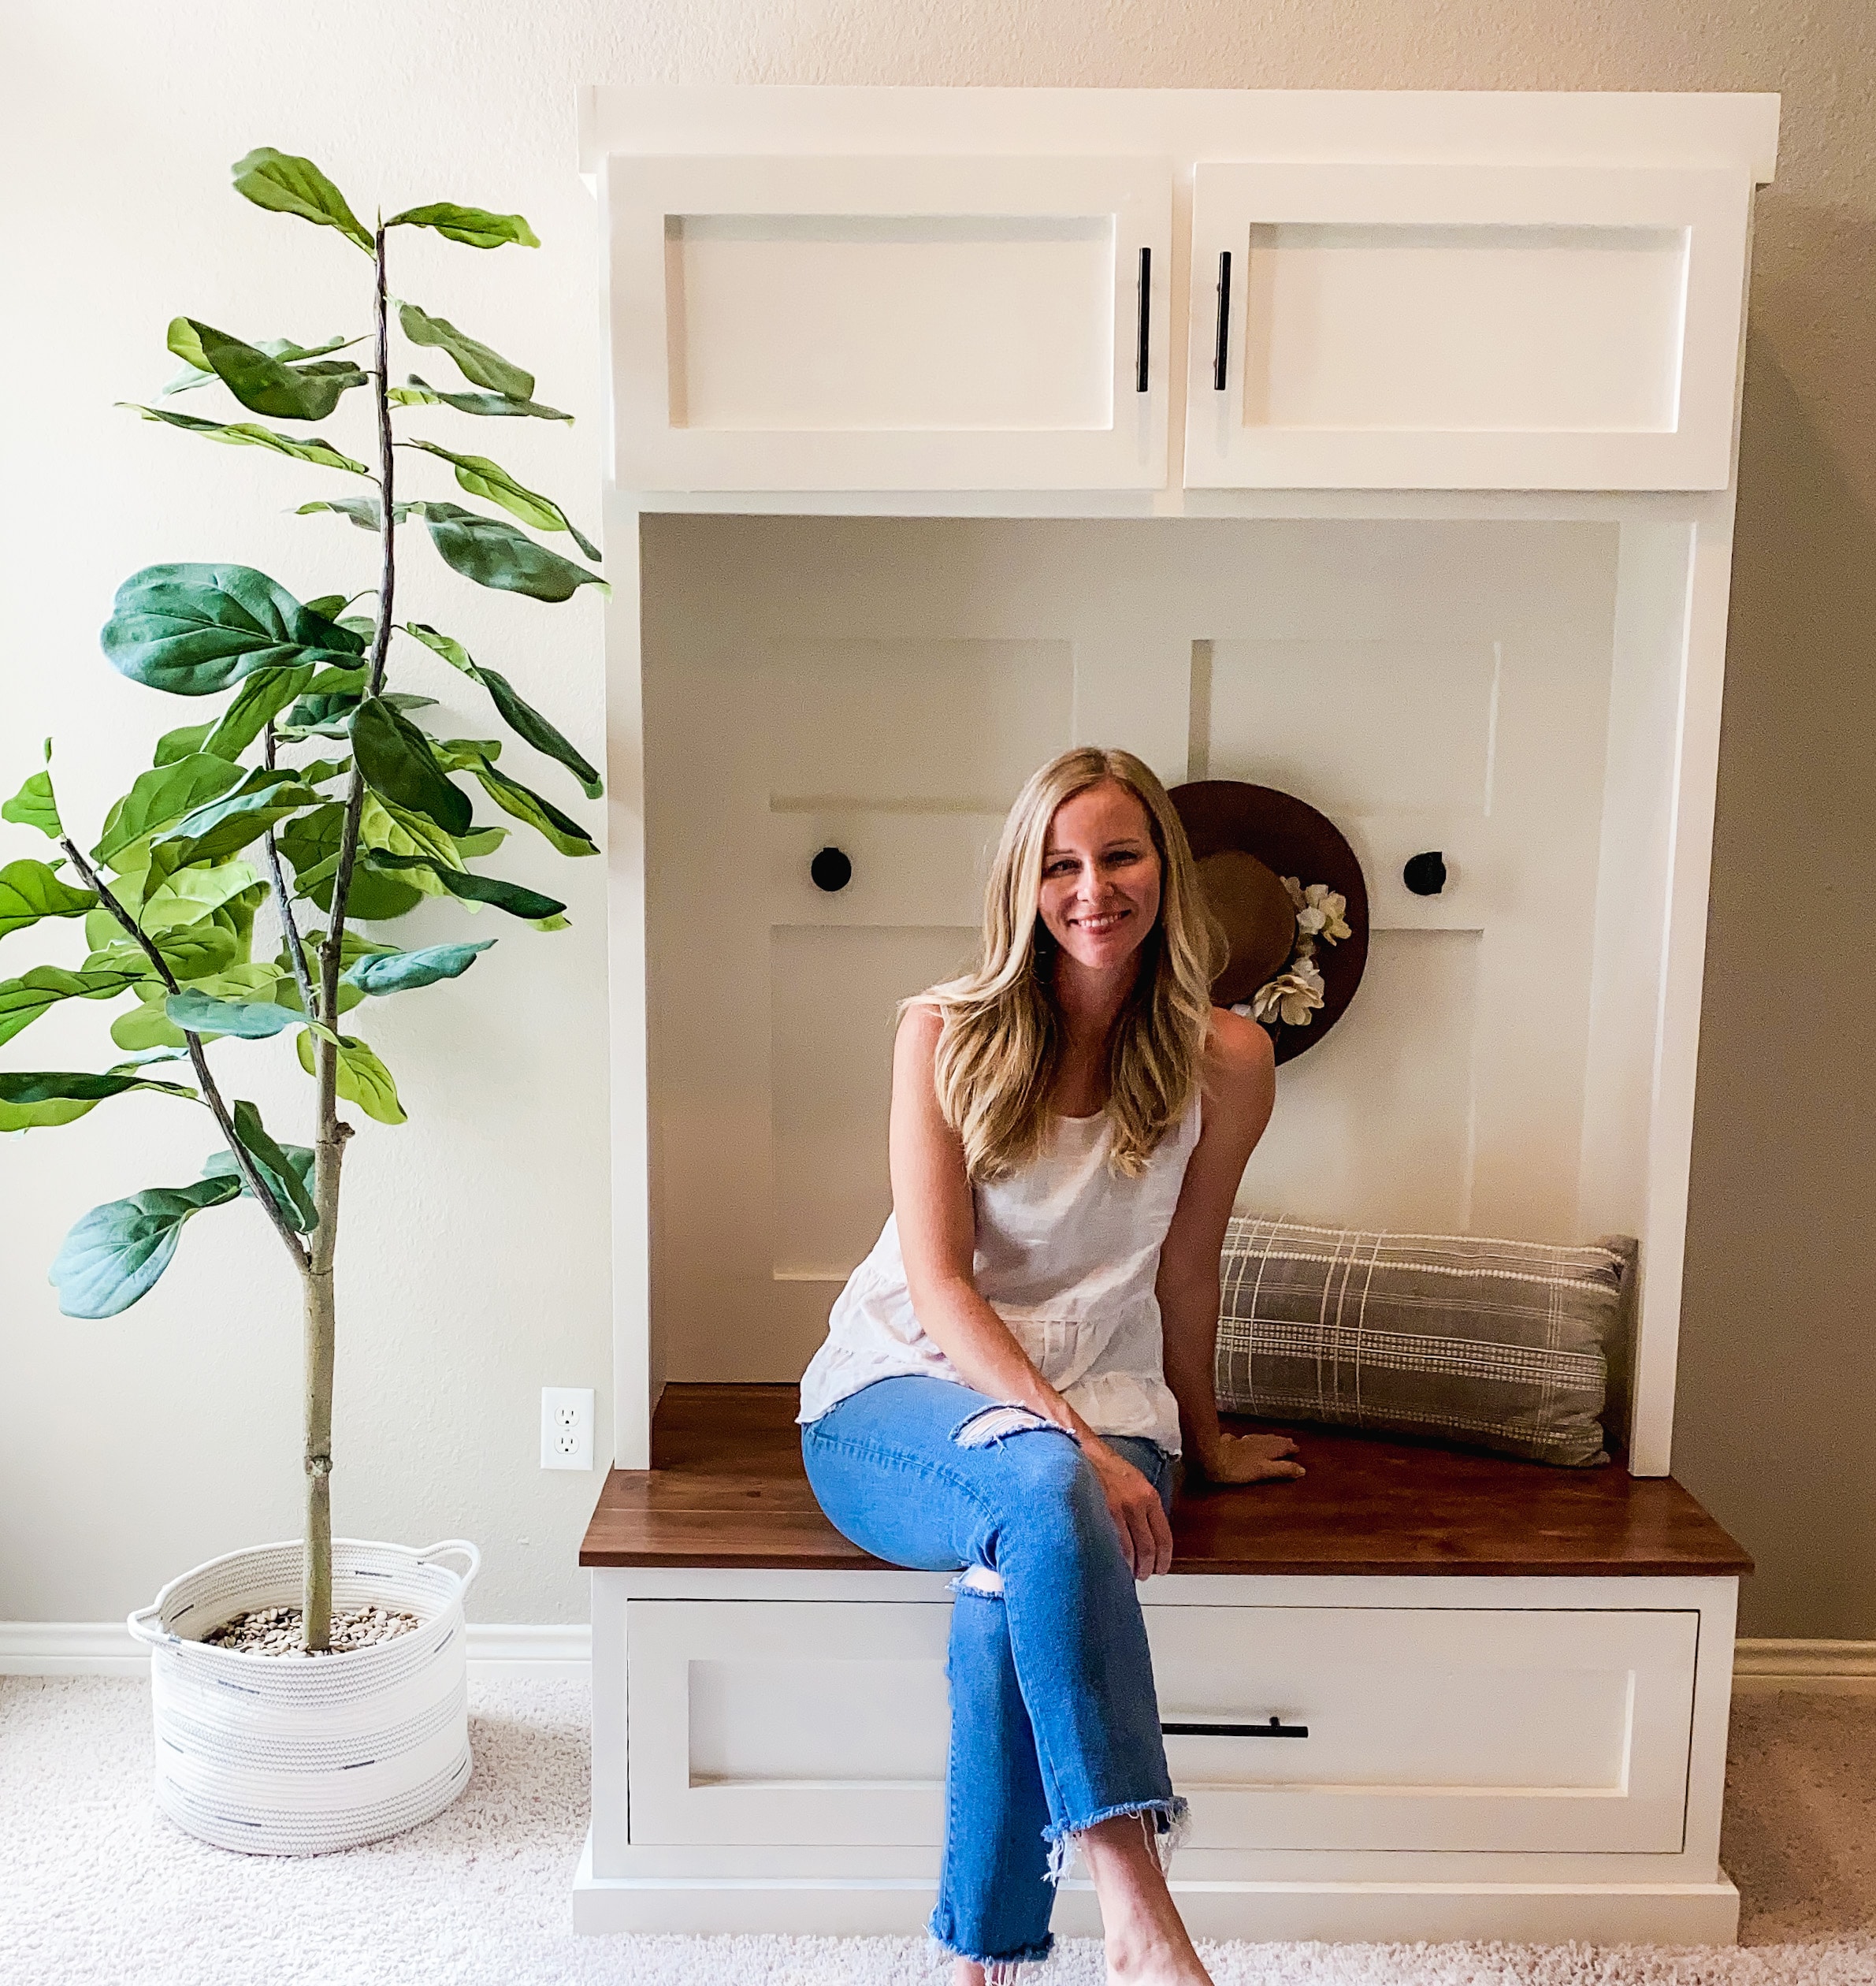
I have a big build for you today! It is a hall tree or mudroom bench with a storage drawer, hooks, and an upper shelf above the bench. As usual, I have provided a free PDF download of the mudroom bench plan for you to build your own, but I will outline all the steps here for you as well.
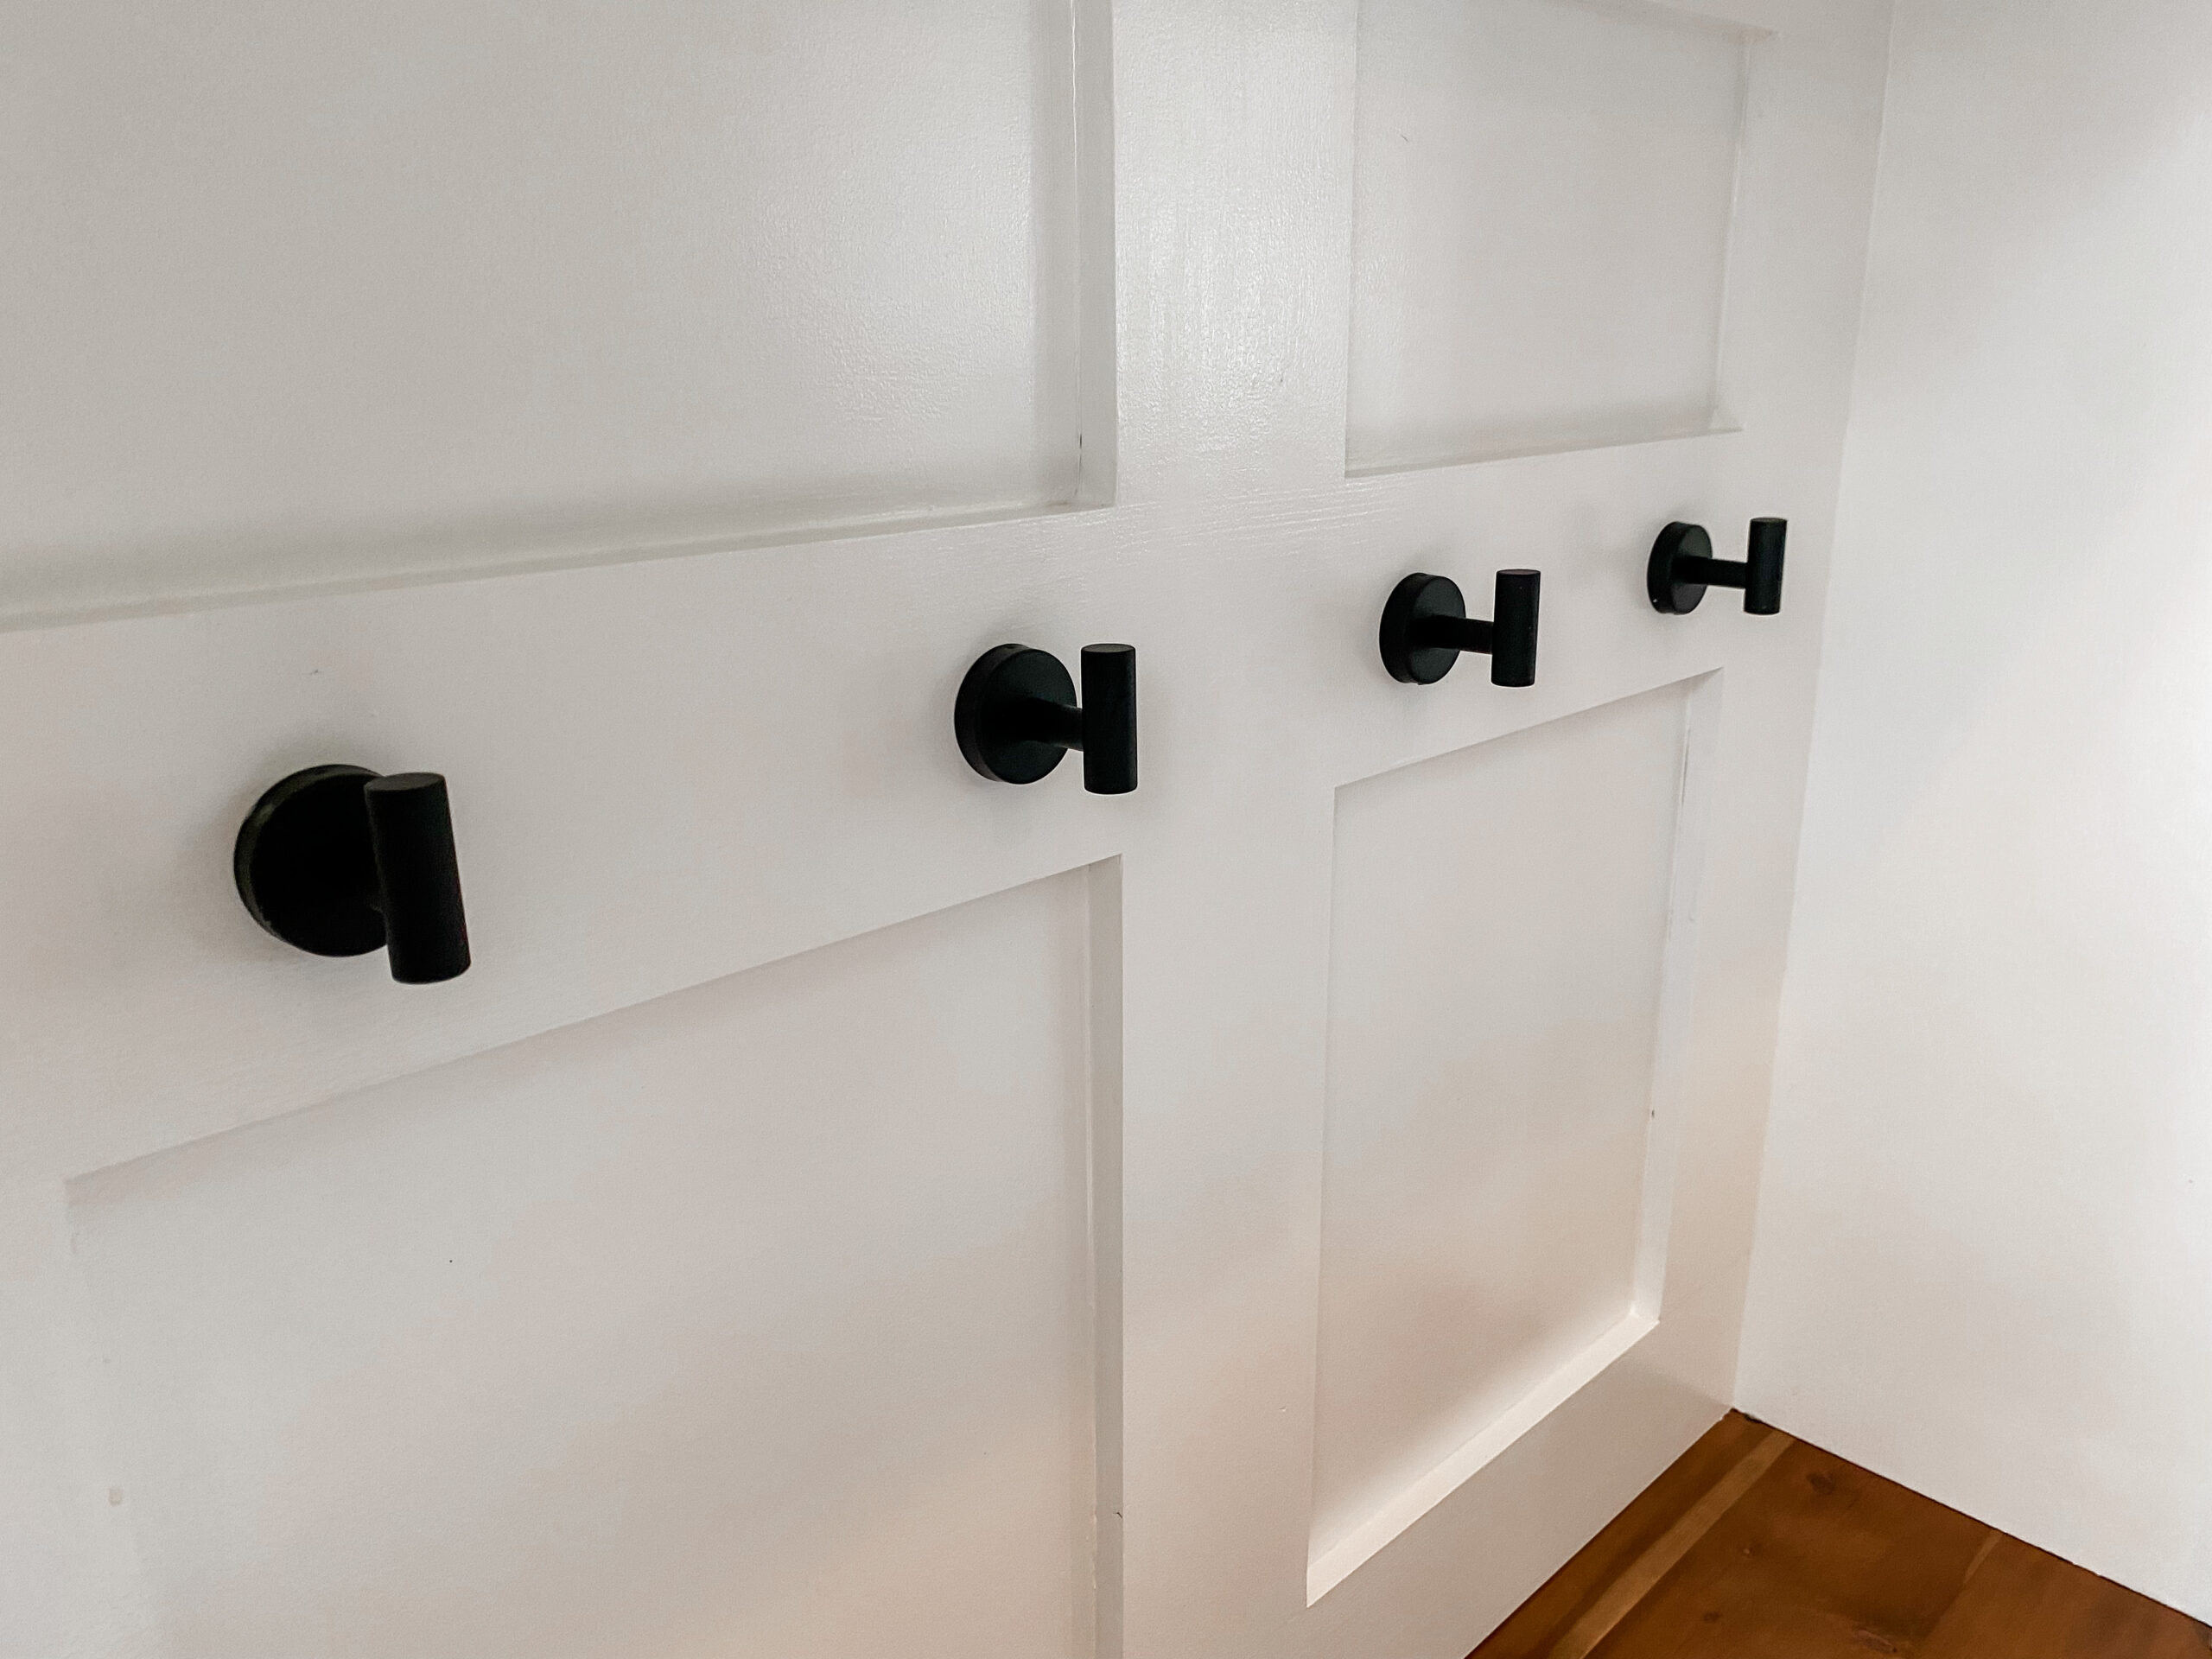
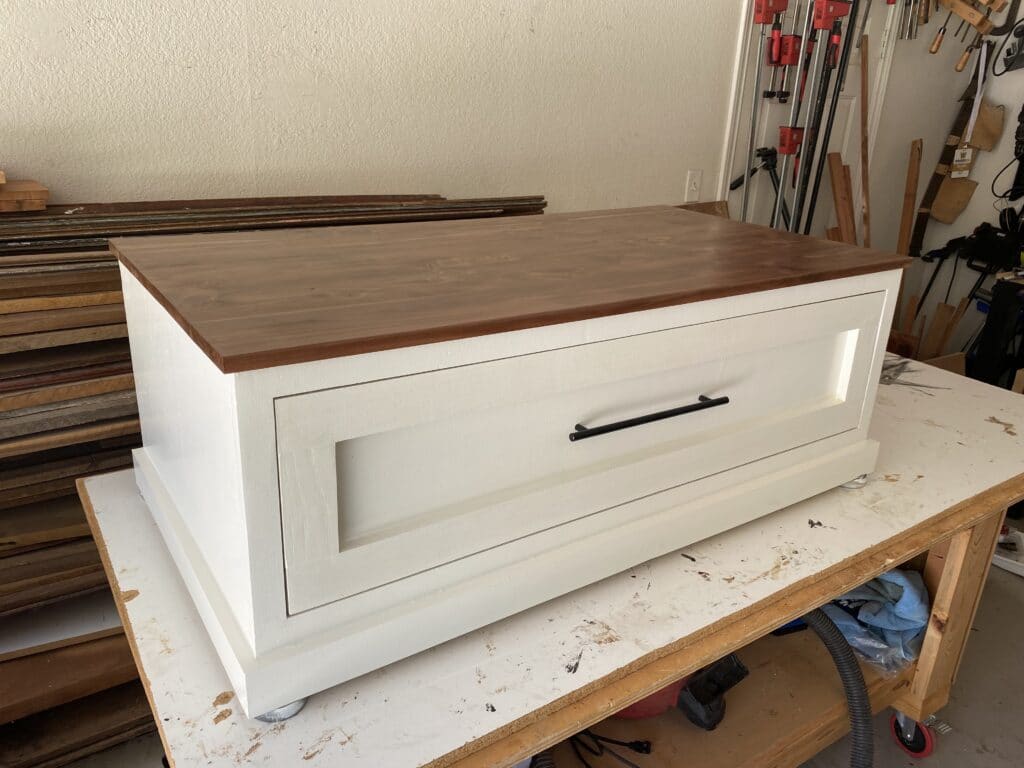
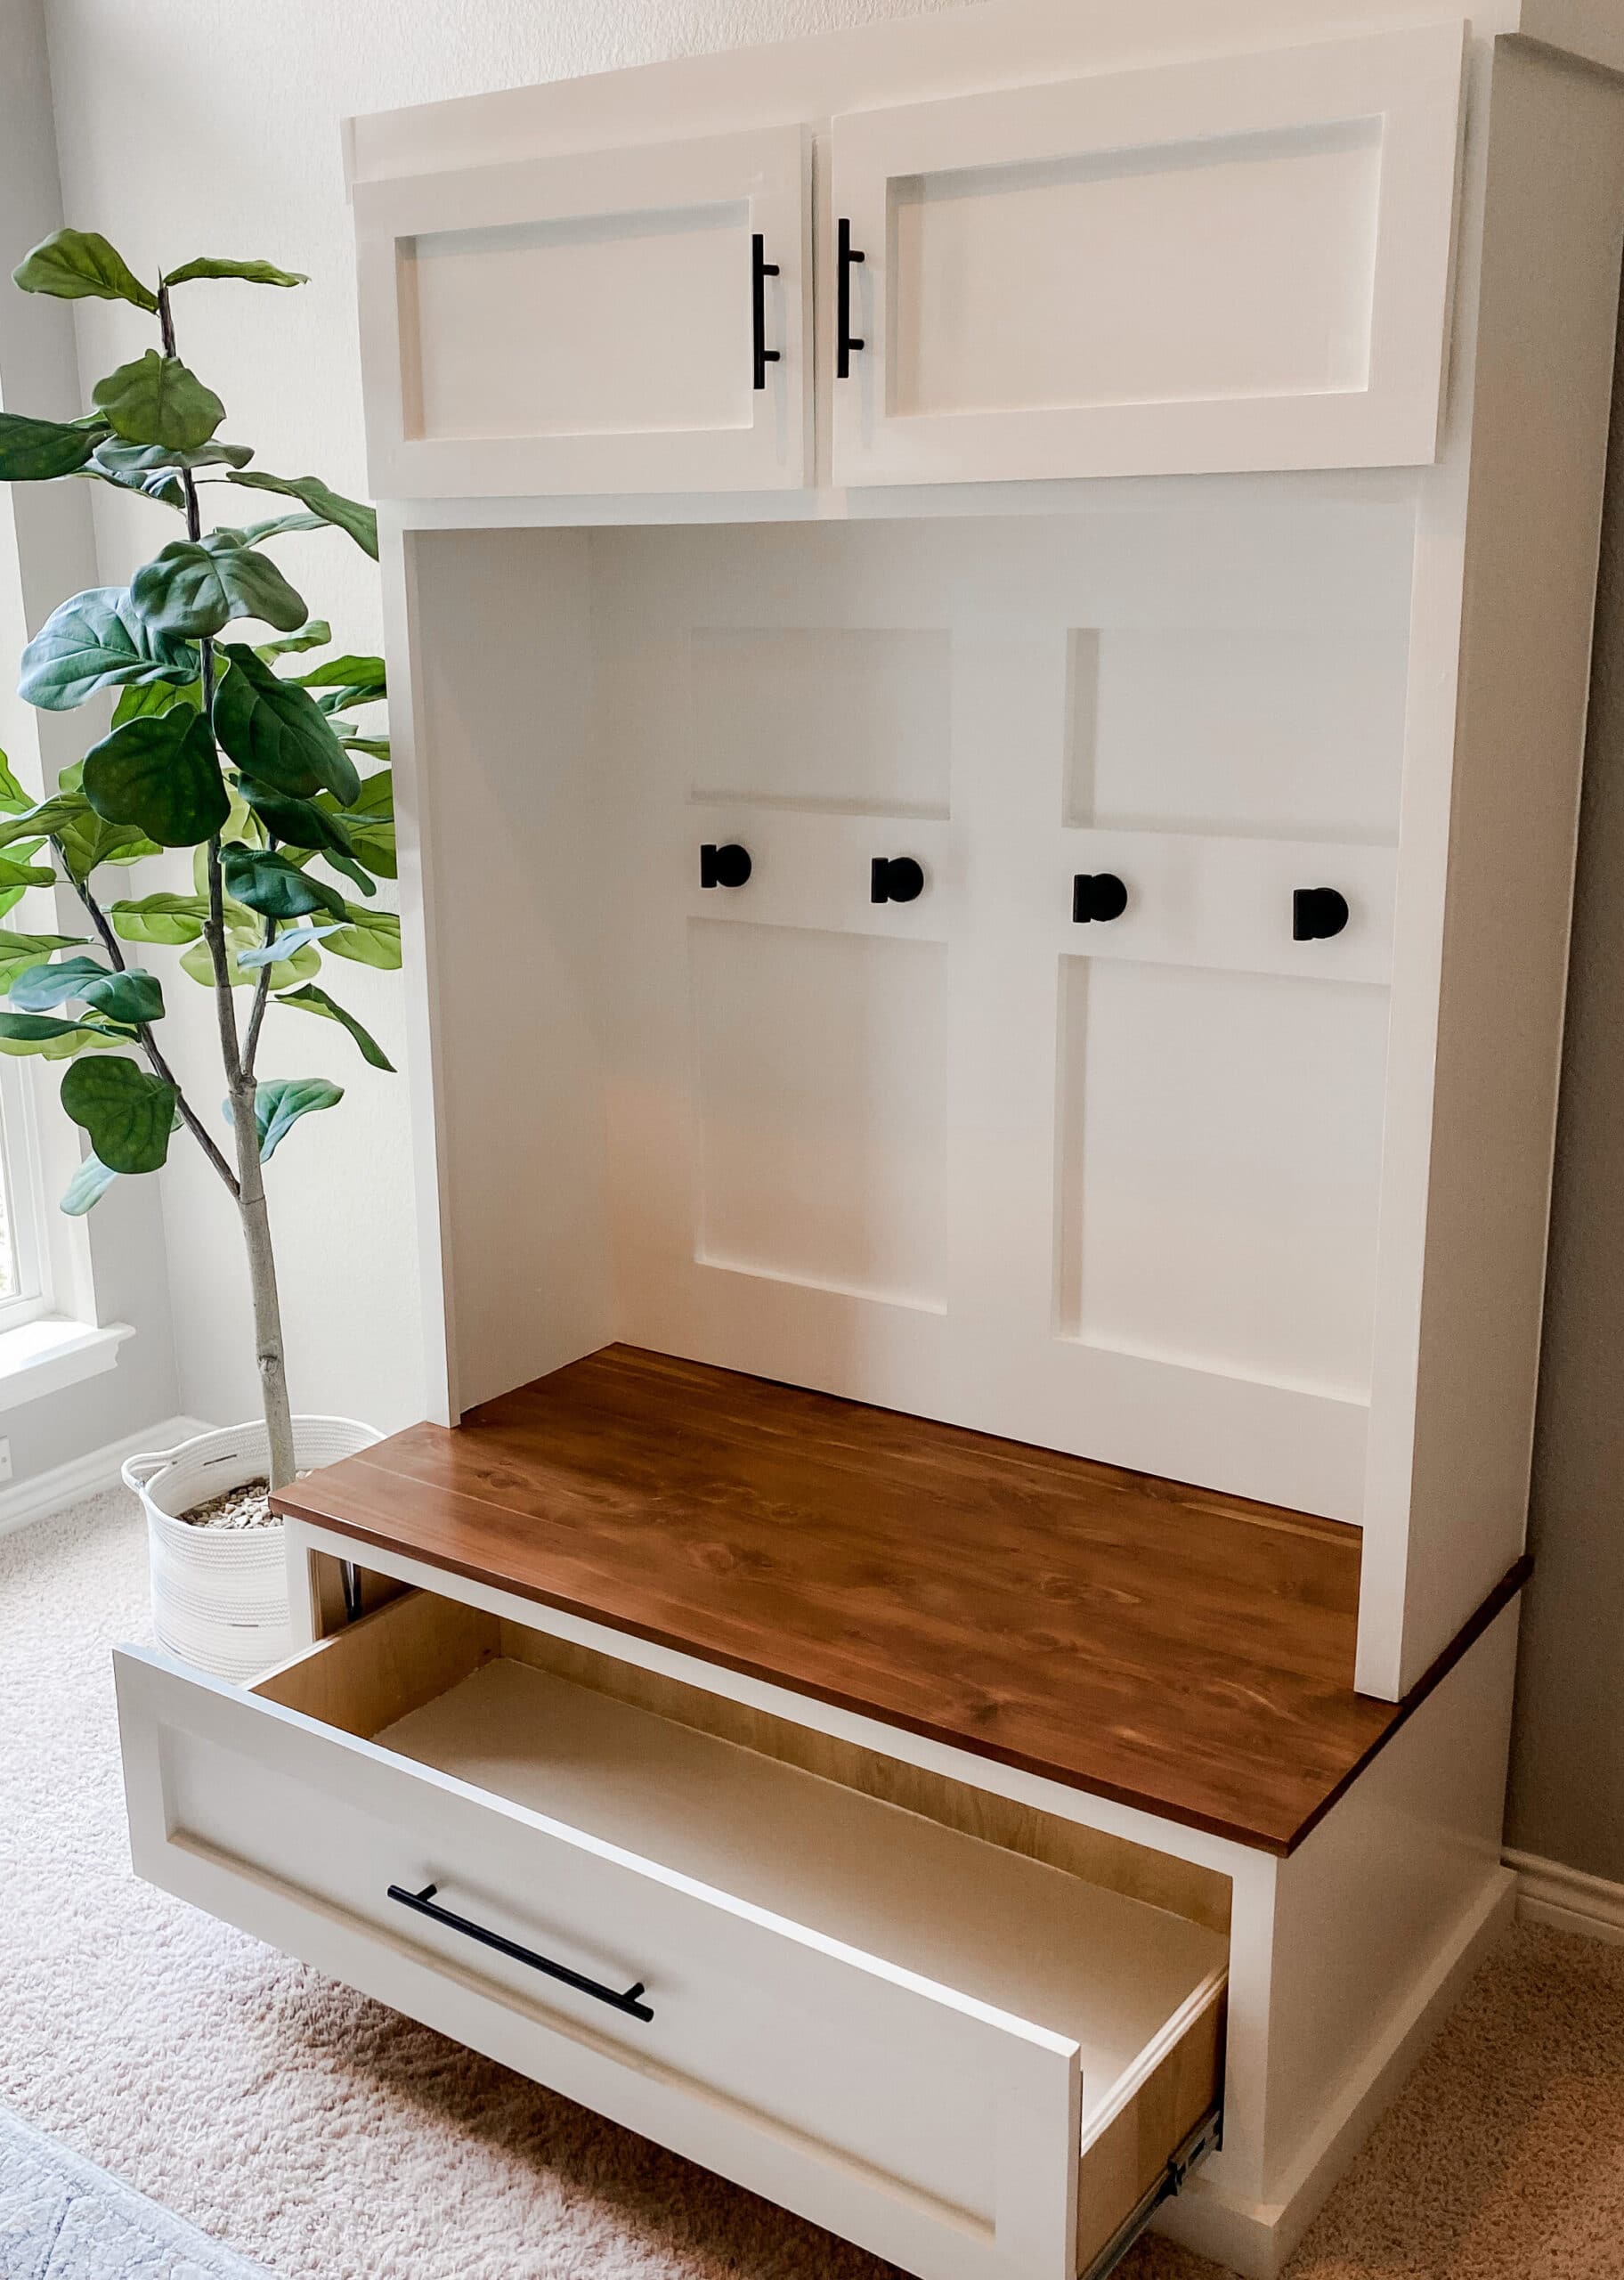
This hall tree is a great way to add storage space to small spaces like a laundry room. It has a large drawer in the bench, which is perfect for shoe storage. It has coat hooks (with space to add more hooks for every family member if needed!) and an overhead cabinet on the top to hide clutter.

This DIY project challenged me in a lot of different ways. However things like building drawers, installing shelf pins, and installing cabinet hinges were made SO simple because of Milescraft. They truly came in clutch for every one of those aspects of the build. Their jigs made all of those features of the hall tree super simple to build and install.
If building something so big is intimidating, I have some great resources for you to get started. The best place to start is this post on a beginner’s guide to how to get started with building furniture.
In this article, I will provide a step-by-step tutorial on how to upgrade your mudroom space with the tools mentioned in that post!
Disclaimer: This post is sponsored by Milescraft. All opinions are my own.
Download the free plans for this DIY Hall Tree/Mudroom below:
Tools Needed
Disclaimer: This site contains product affiliate links. We may receive a commission if you make a purchase after clicking on one of these links.
- Milescraft DrawerJig
- Milescraft EuroHinge Jig
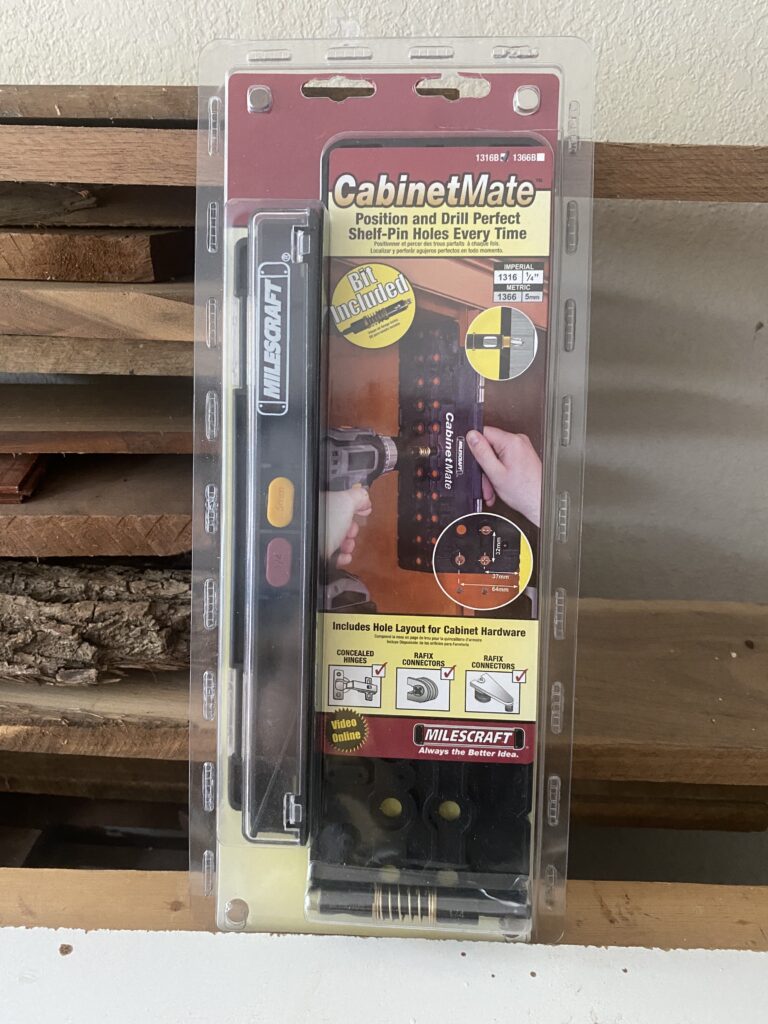
- Milescraft CabinetMate
- Face Clamps
- Table Saw
- Circular Saw
- Miter Saw
- Pocket hole system
- Power Drill
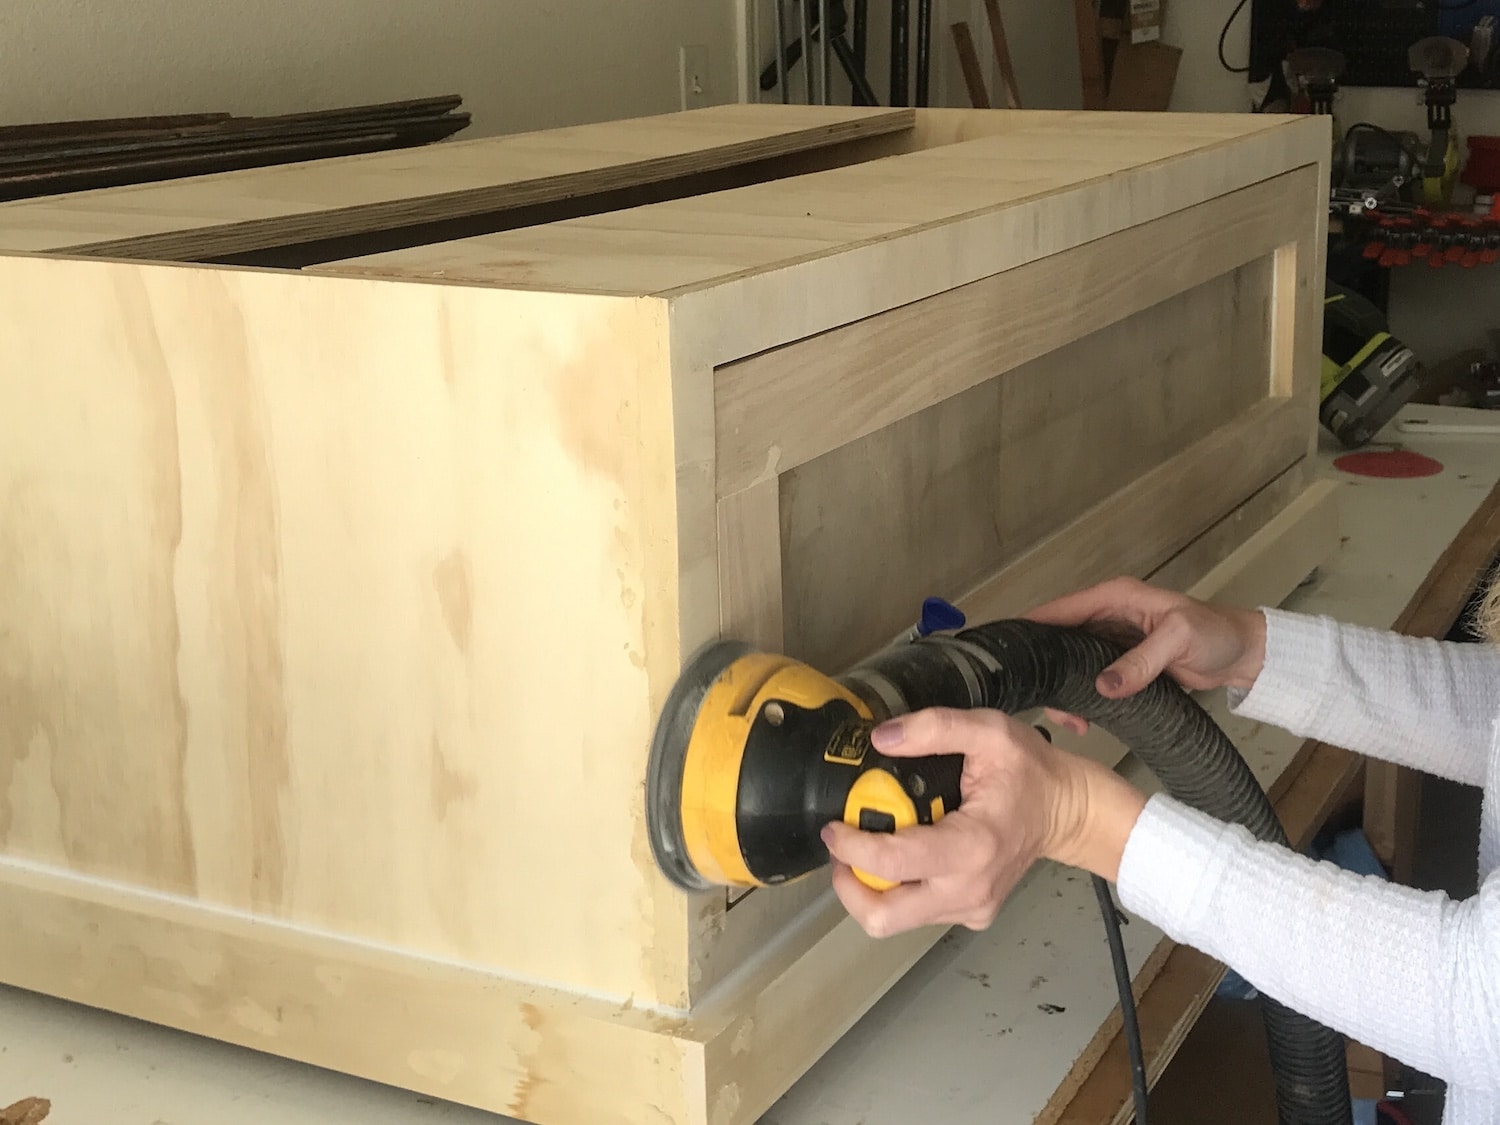
- Orbital Sander
- Combination Square
- Clamps
- Nail Gun
Materials Needed
- (2) 4’x8’ Paintable ¾” plywood
- 2’x4’ Paintable ¾” plywood
- 1×3, total of 41 feet
- 1×6, total of 23 feet
- 4’x8’ ⅛” backer board
- Pocket Hole Screws
- Wood Filler
- Stain
- Paint
- Paint Primer
- Paint Roller
- Paint brush
- Drawer Pulls
- Drawer Slides
- Playing Cards
- Polyurethane Finish
- Wood Glue
- Caulk
See the plans for the cut list.
Part 1: Make the Storage Bench with Drawer
The first part of this hall tree build is to build the base, with a bench with a drawer underneath.
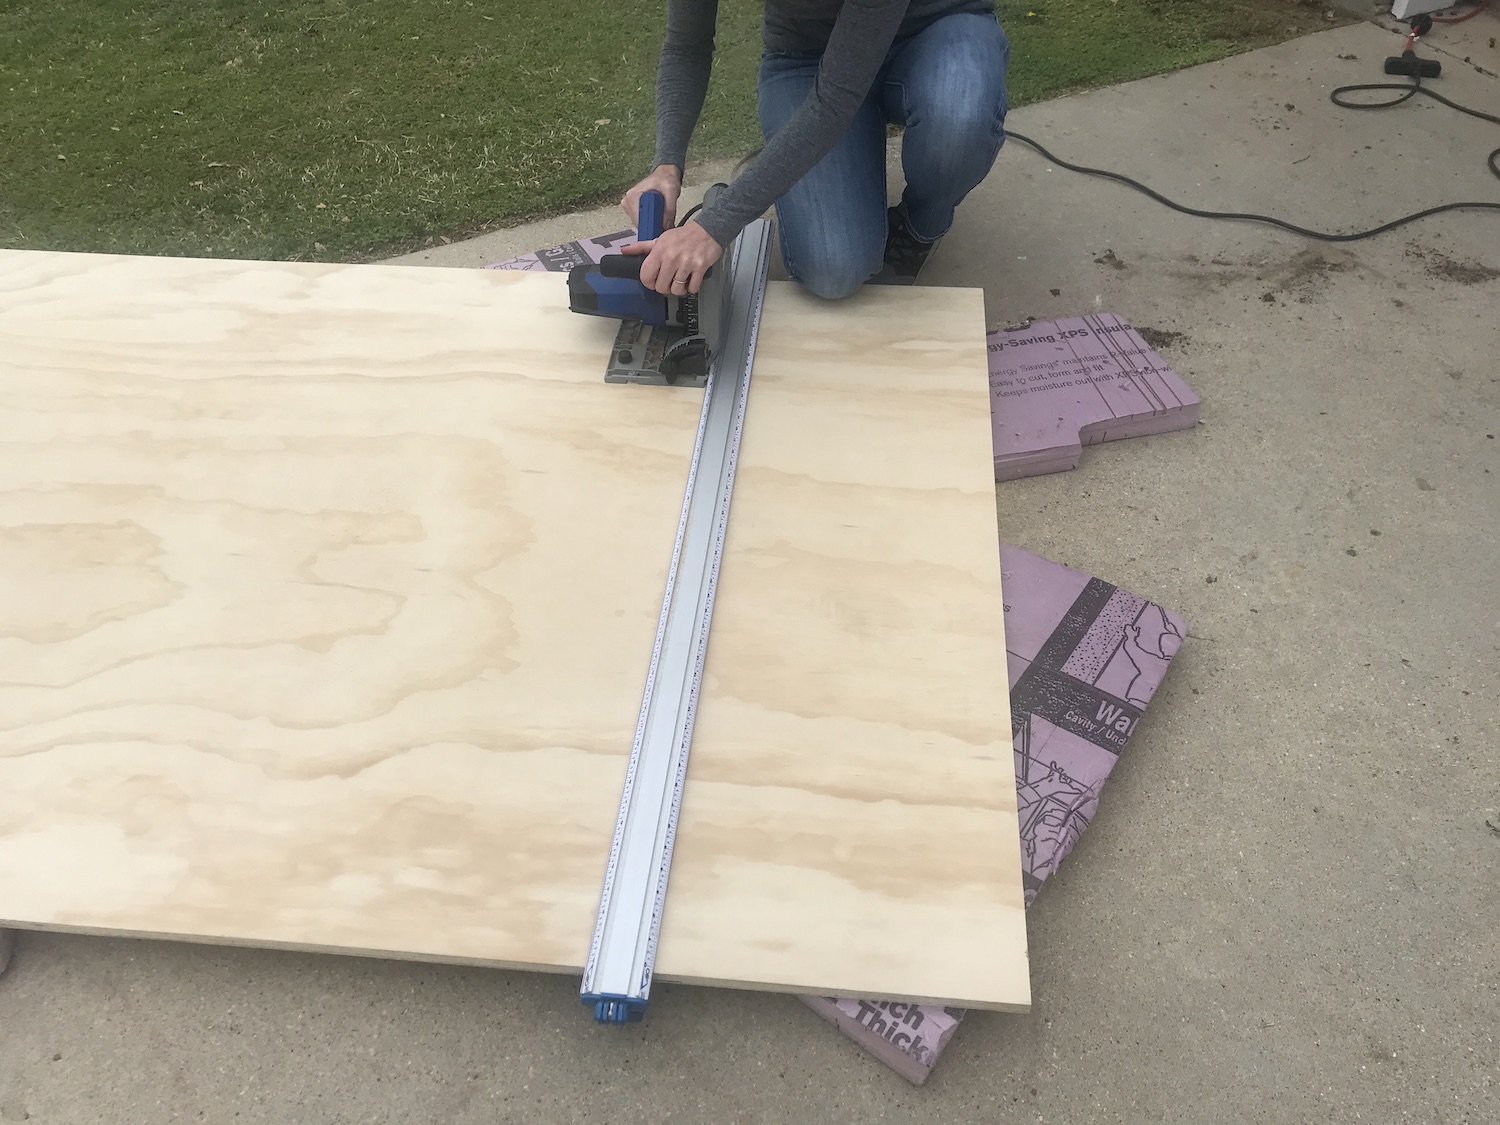
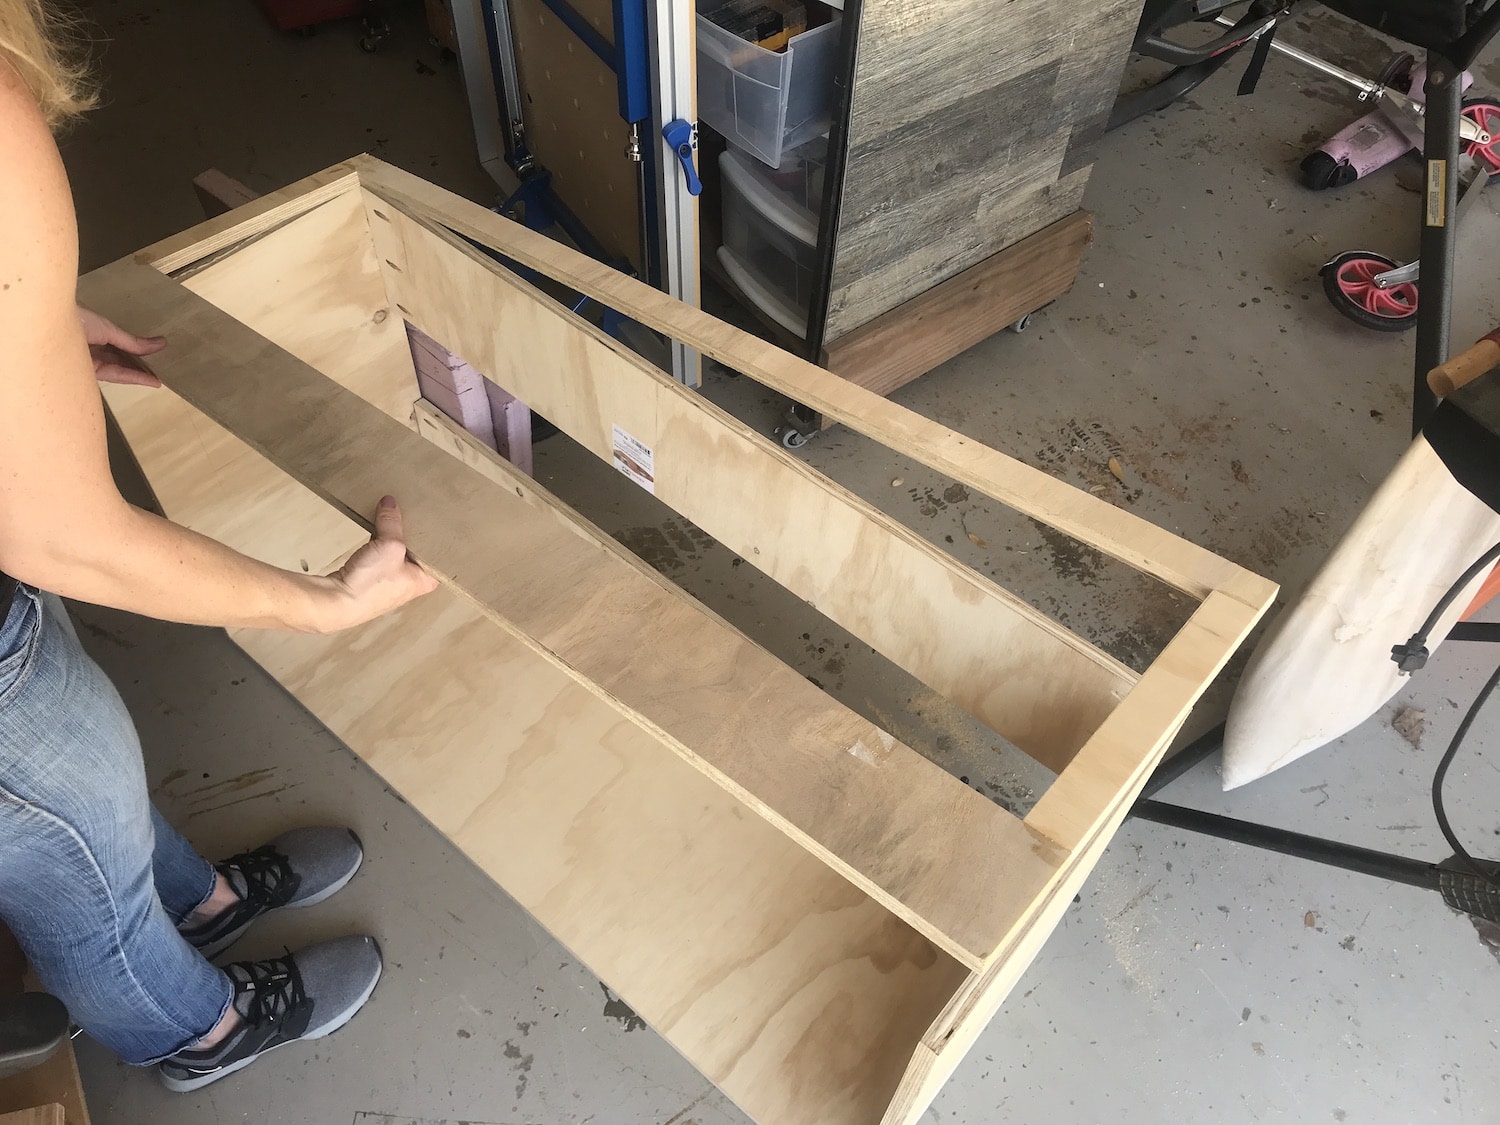
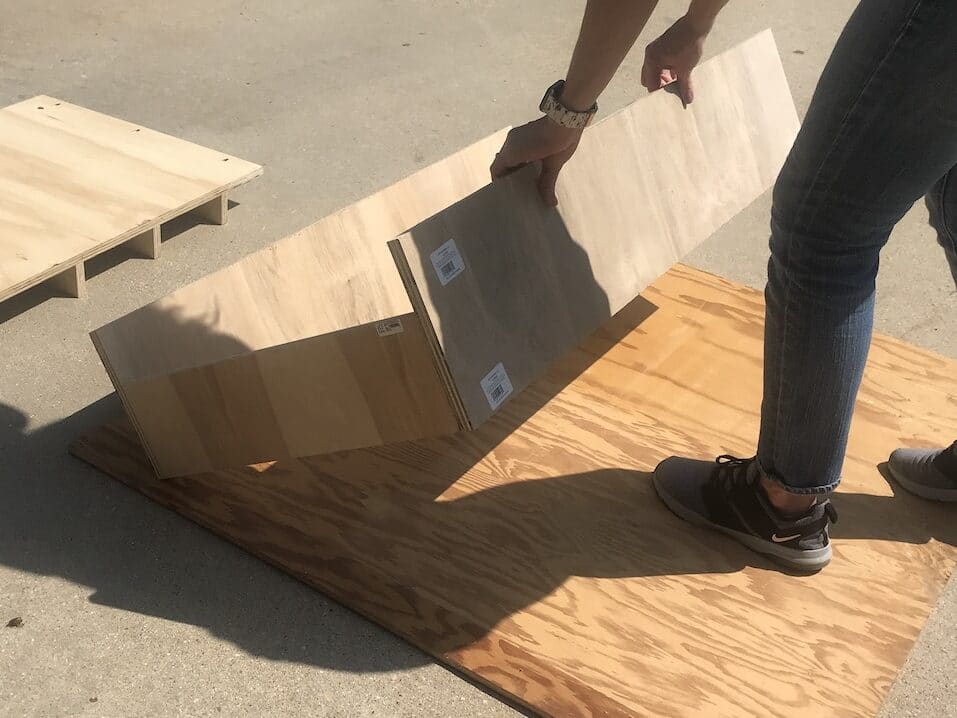
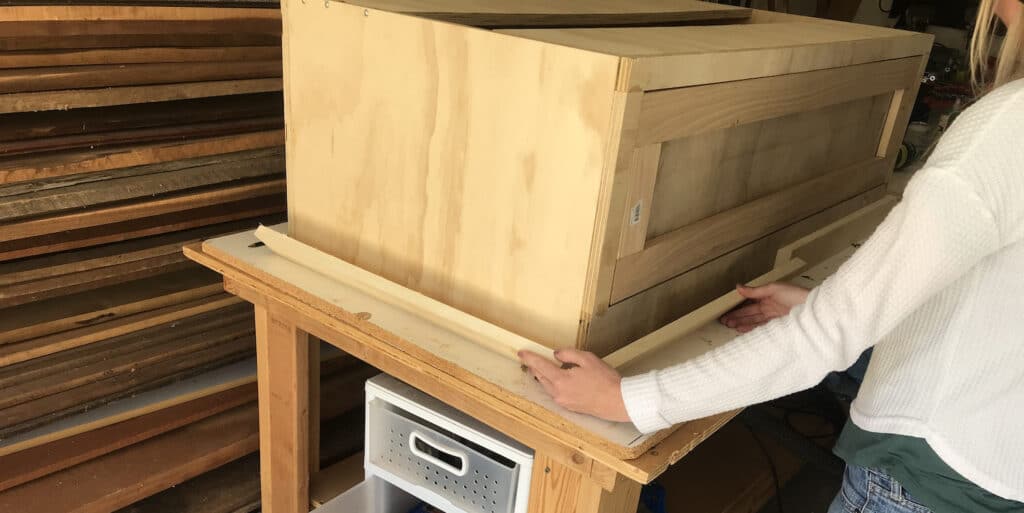
Step 1: Break Down Plywood and Build the Cabinet Box
The first thing you will need to do to build your own mudroom bench is break down the plywood sheet according to the plans in order to build the cabinet box. There are a couple ways to do this, but I used a combination of my circular saw and edge guide. I also used my table saw to cut the smaller pieces of plywood.

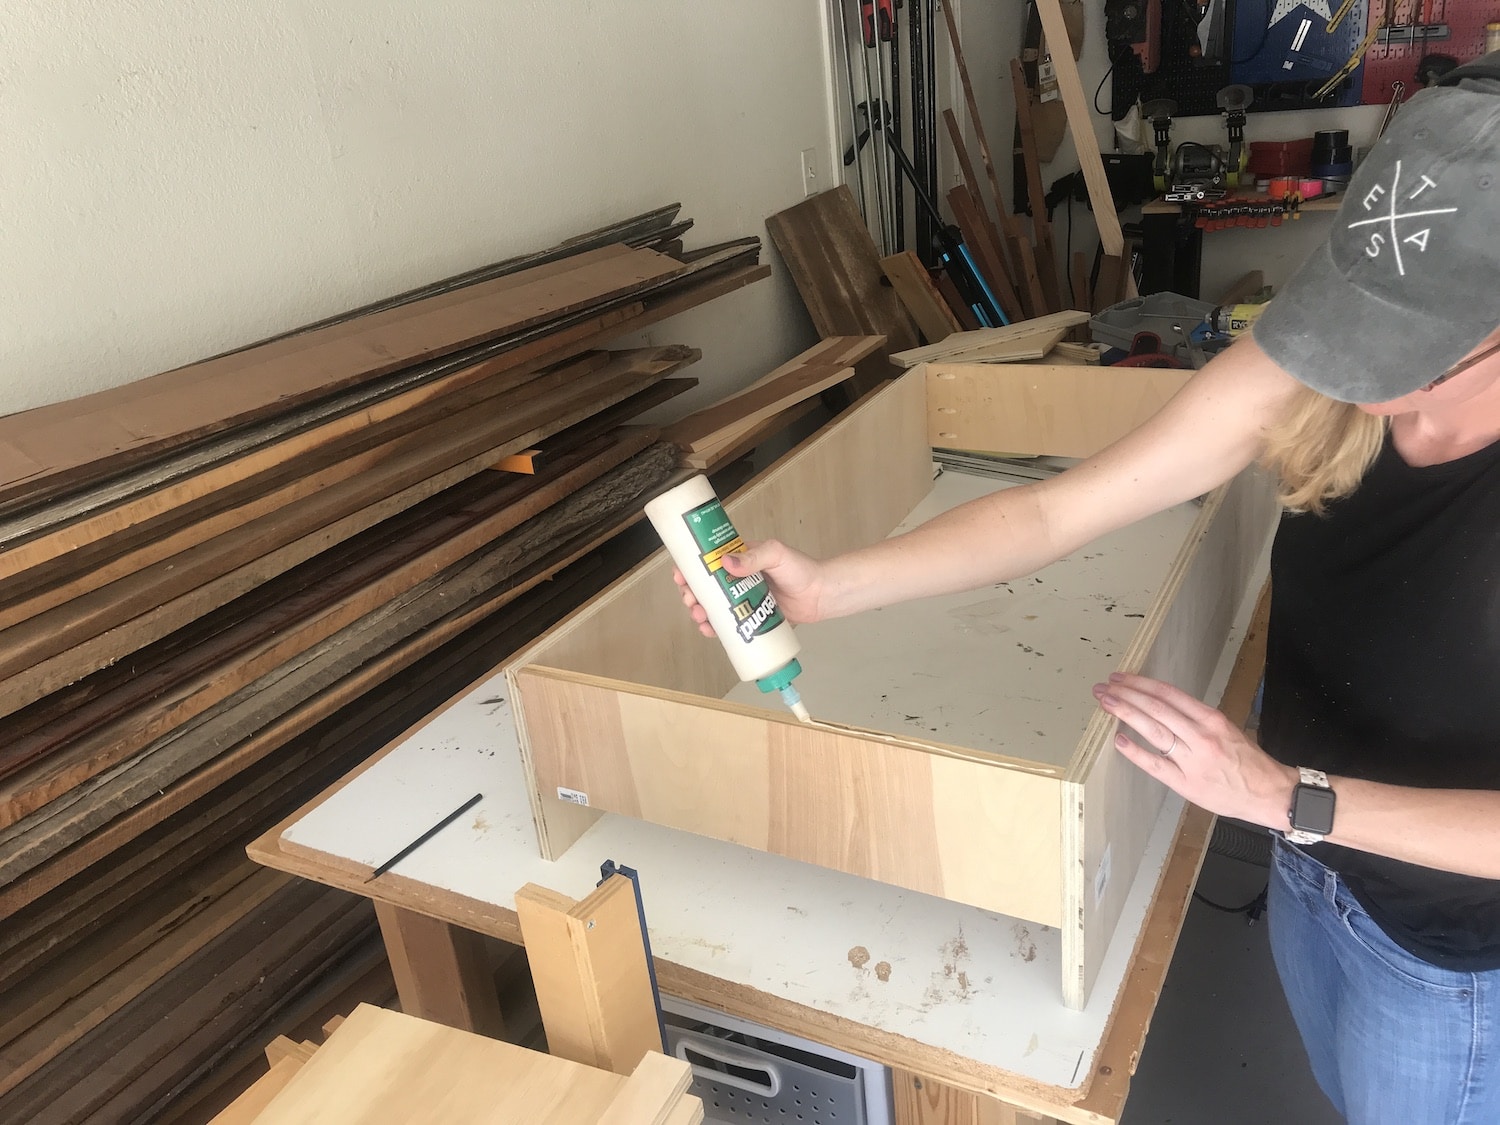
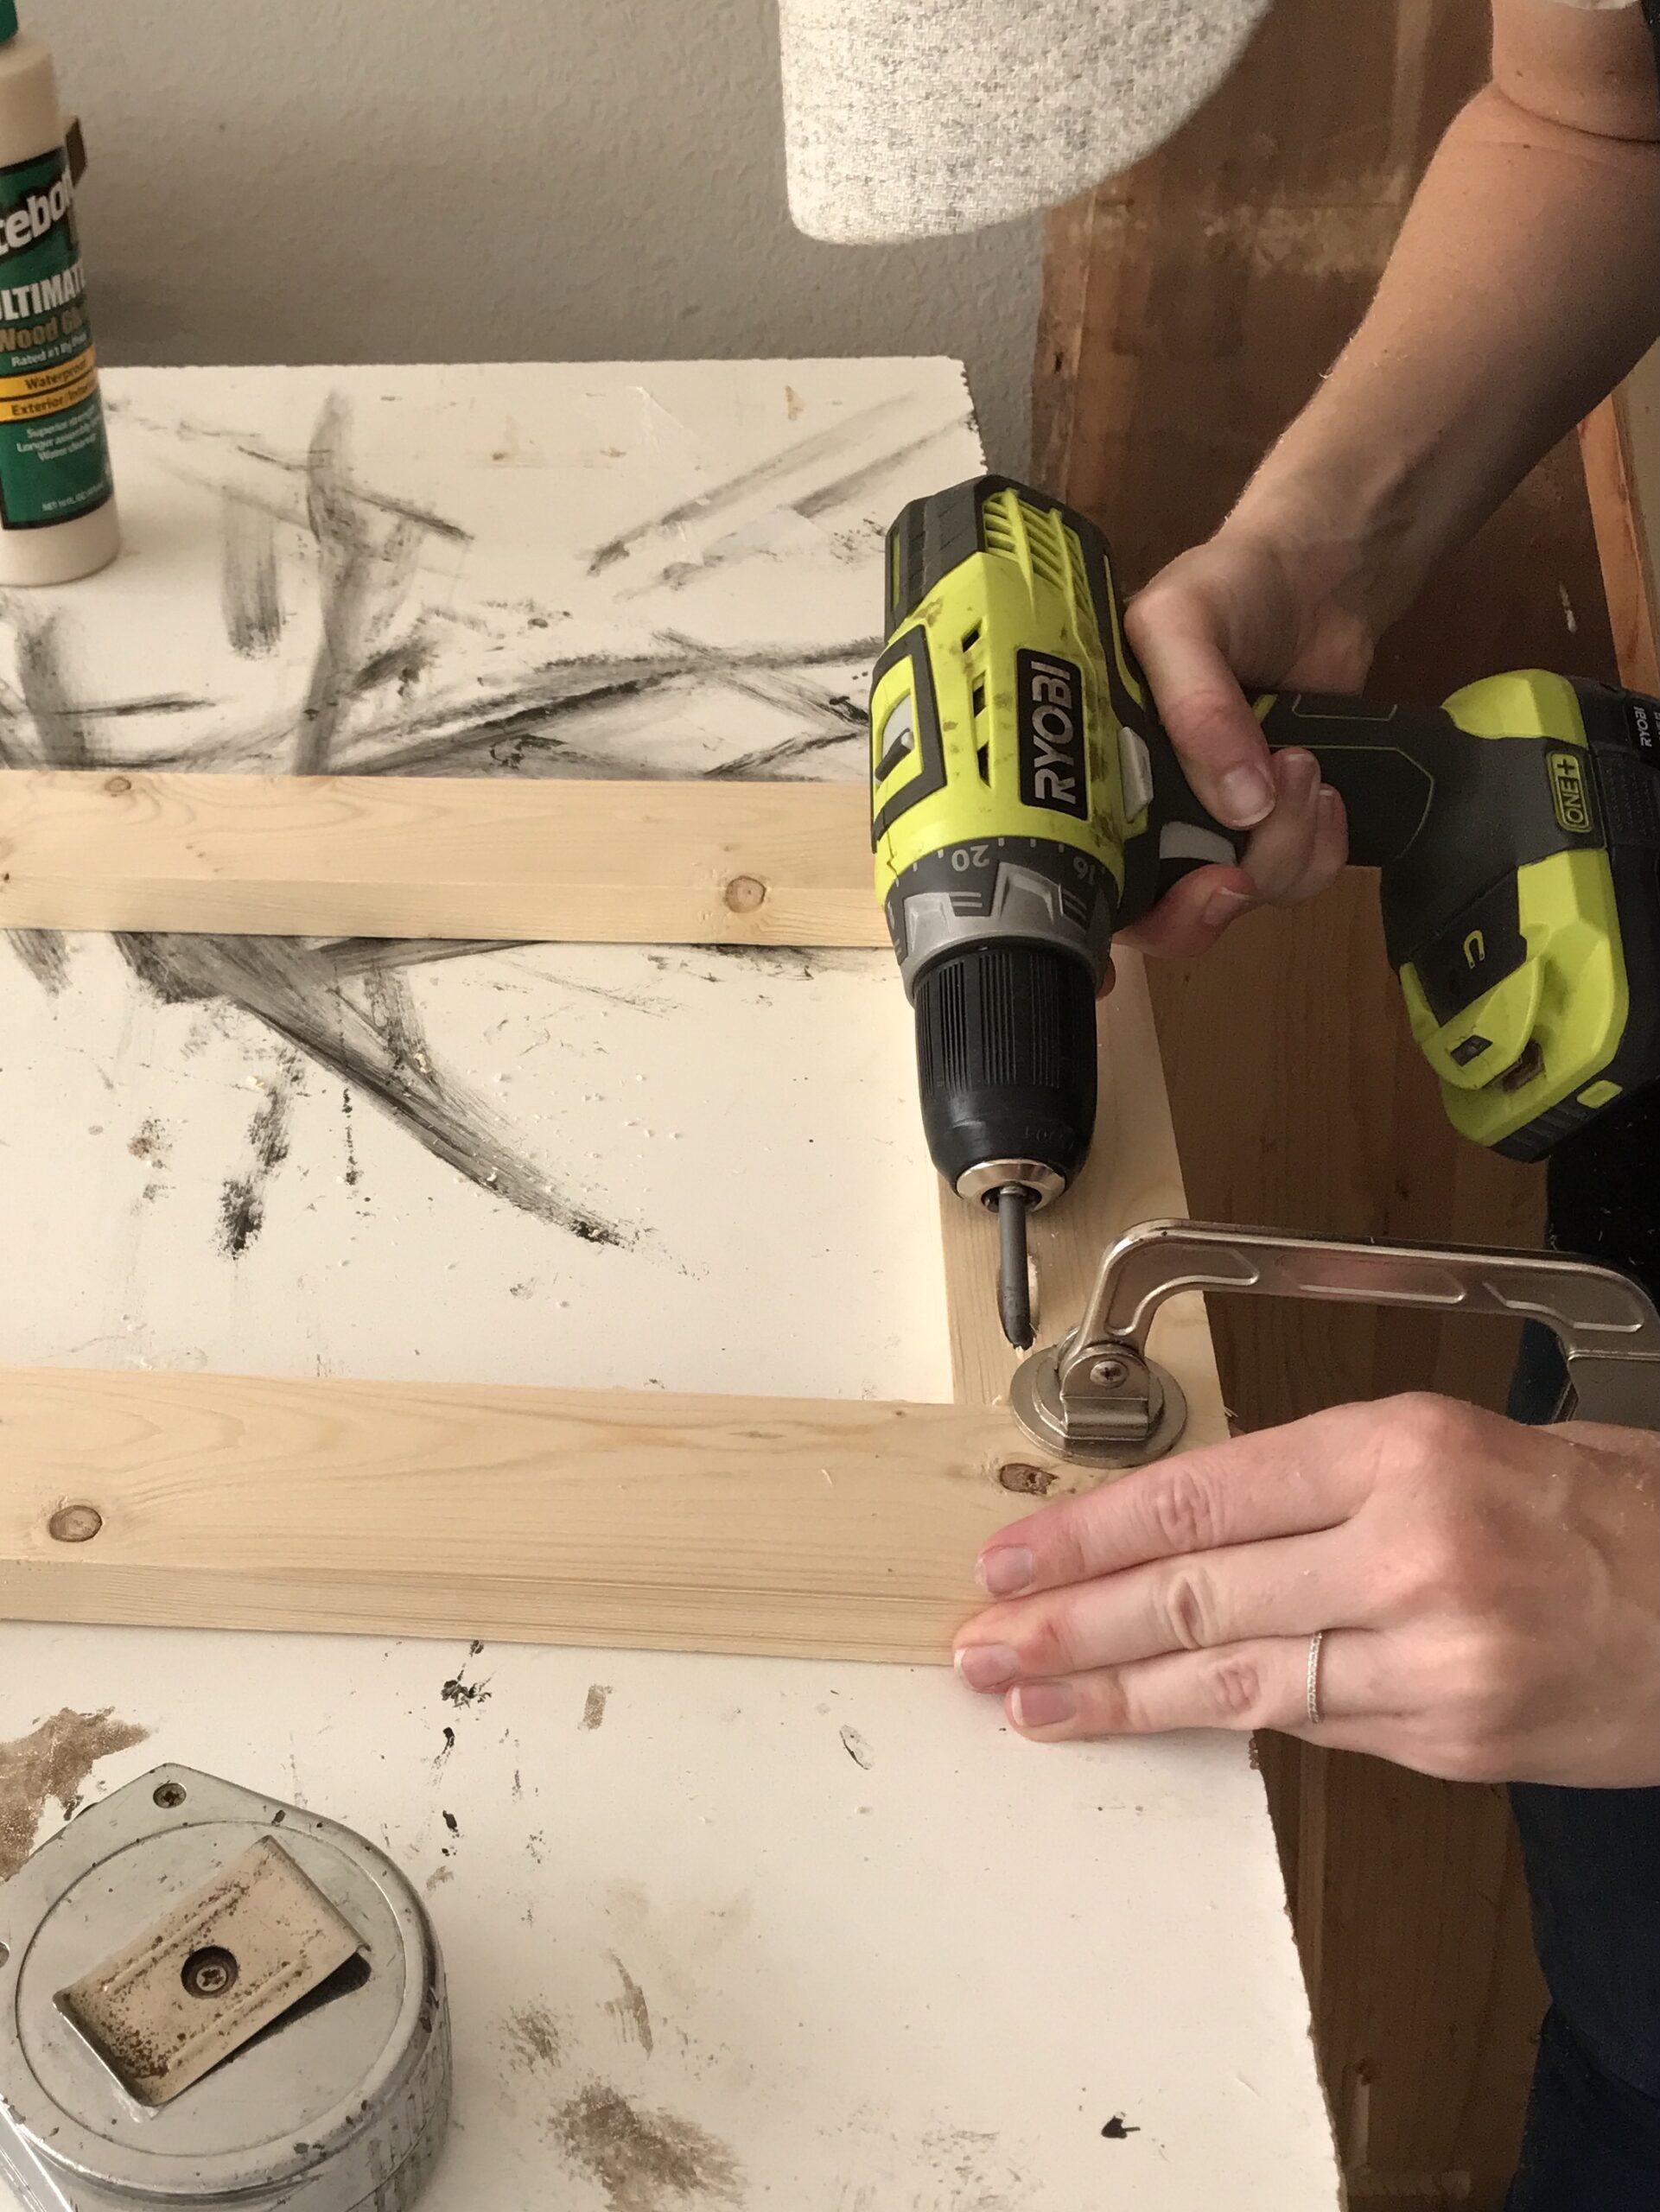
Once all of your pieces are cut, assemble the frame according to the plans using pocket holes and wood glue.
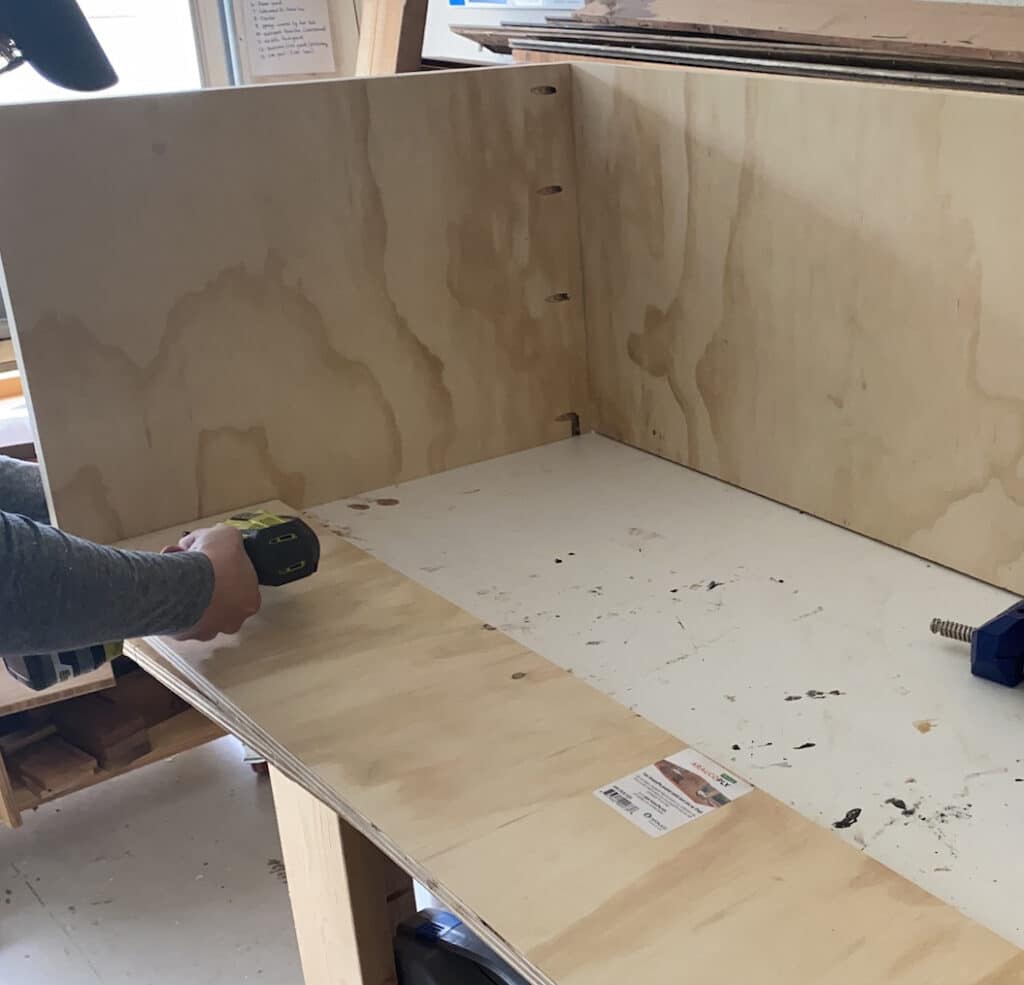
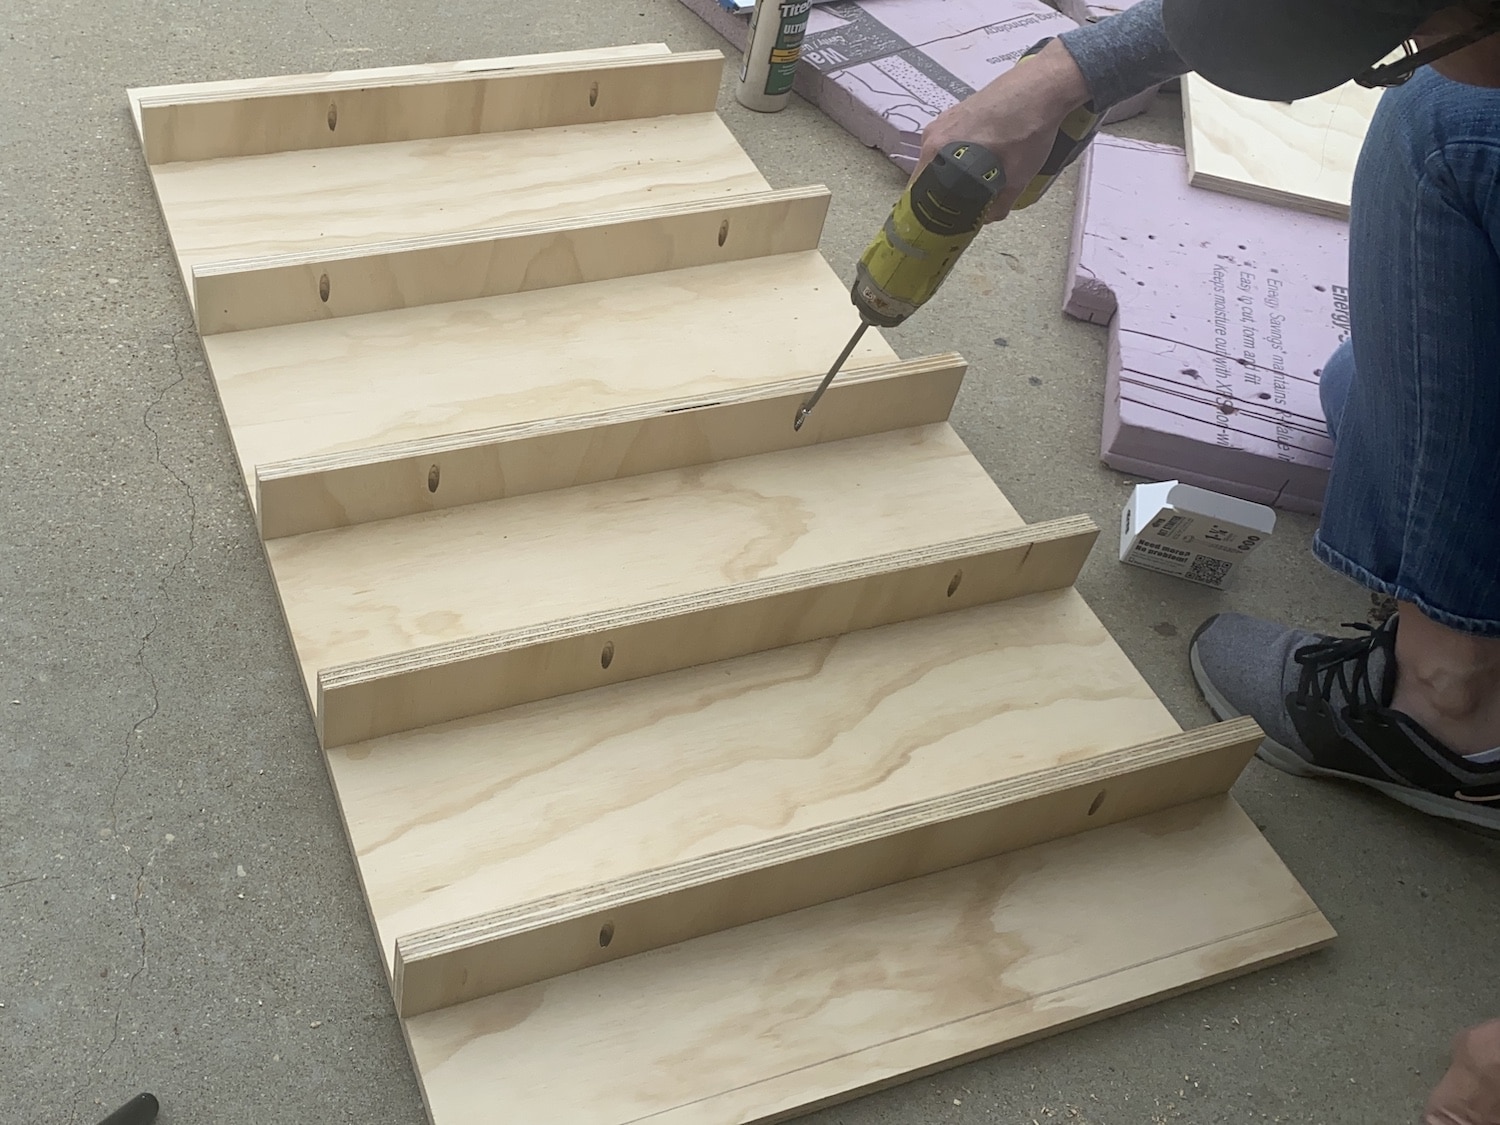
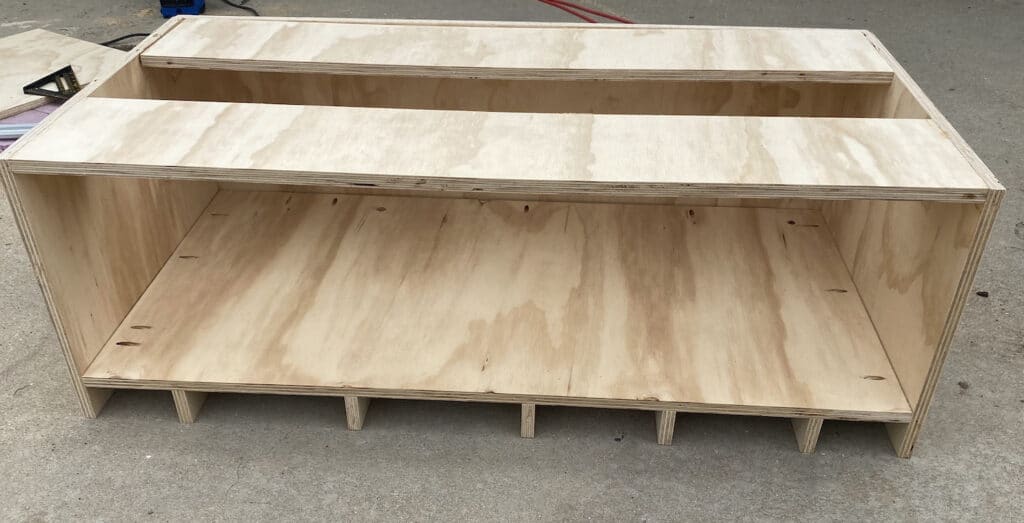
Make sure you are square as you go, as this is very important when installing drawers in future steps.
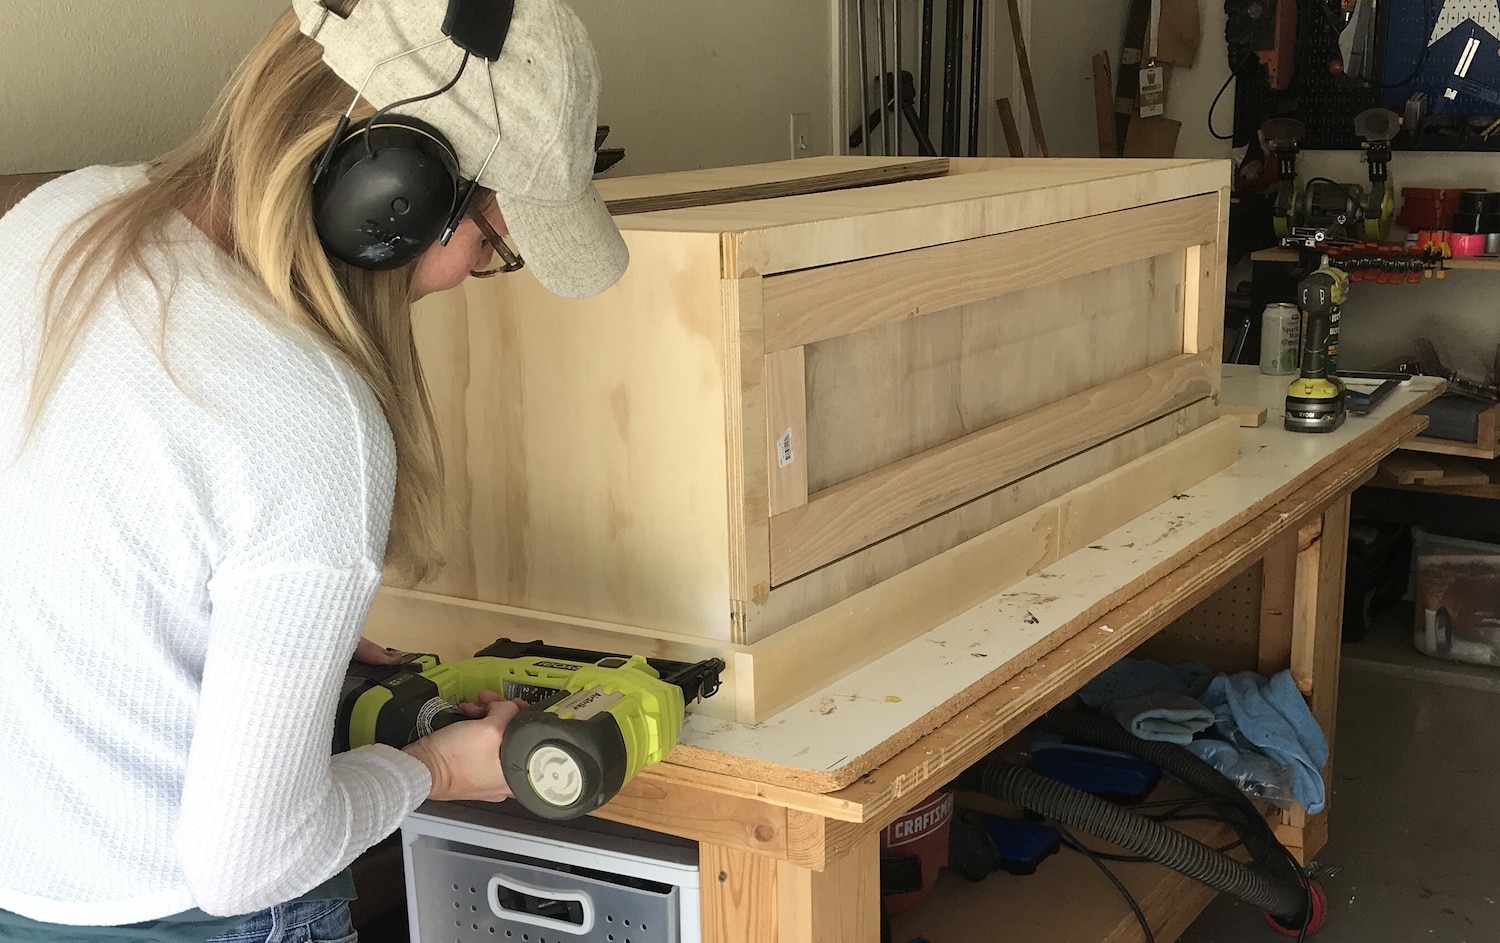
Step 2: Make the Face Frame for the Cabinet Box
This particular drawer cabinet will have a face frame. You can build cabinet boxes with drawers that are frameless, but that will change the build process slightly.
So, keep in mind that this is for a framed cabinet with inset drawer faces. This means that the face of the drawer front will sit flush with the frame around the cabinet member.
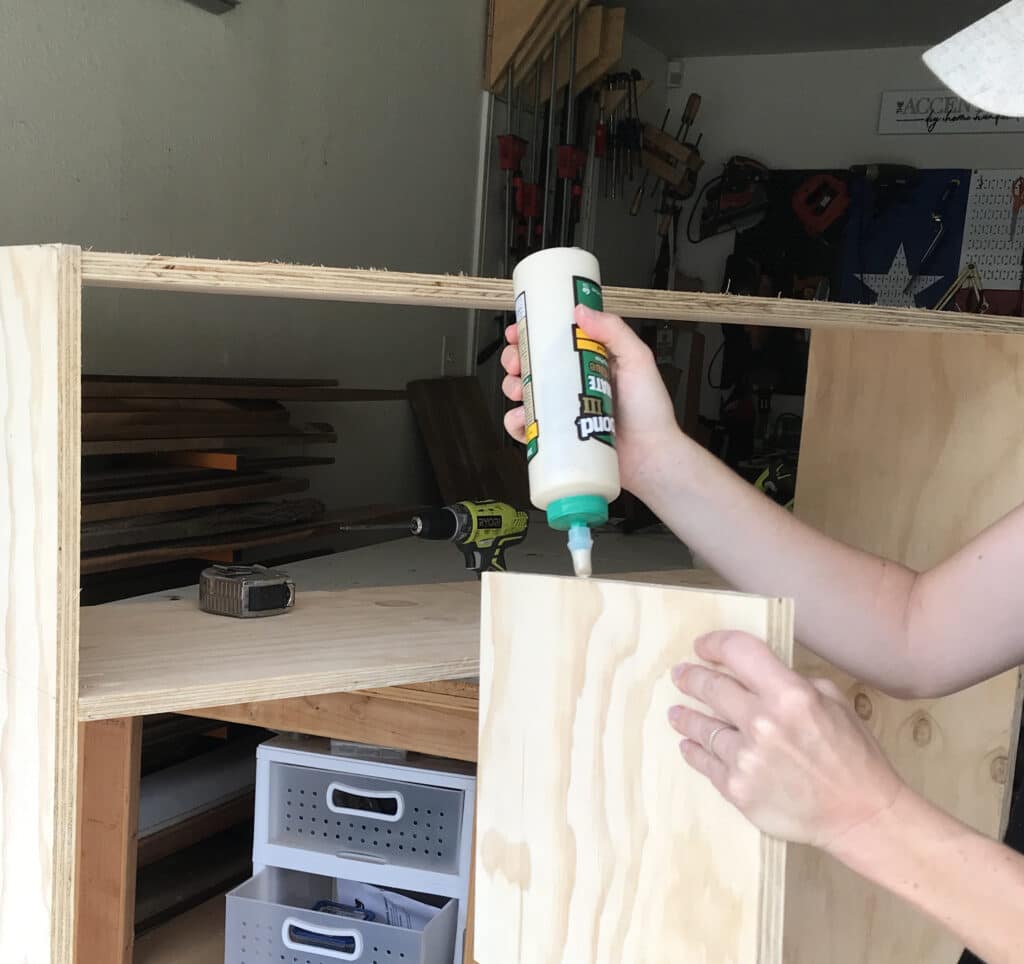
The face frame will be 1.5″ wide on the top and sides and 4″ wide on the bottom, as outlined in the plan. Assemble the face frame for the cabinet with wood glue and pocket screws.
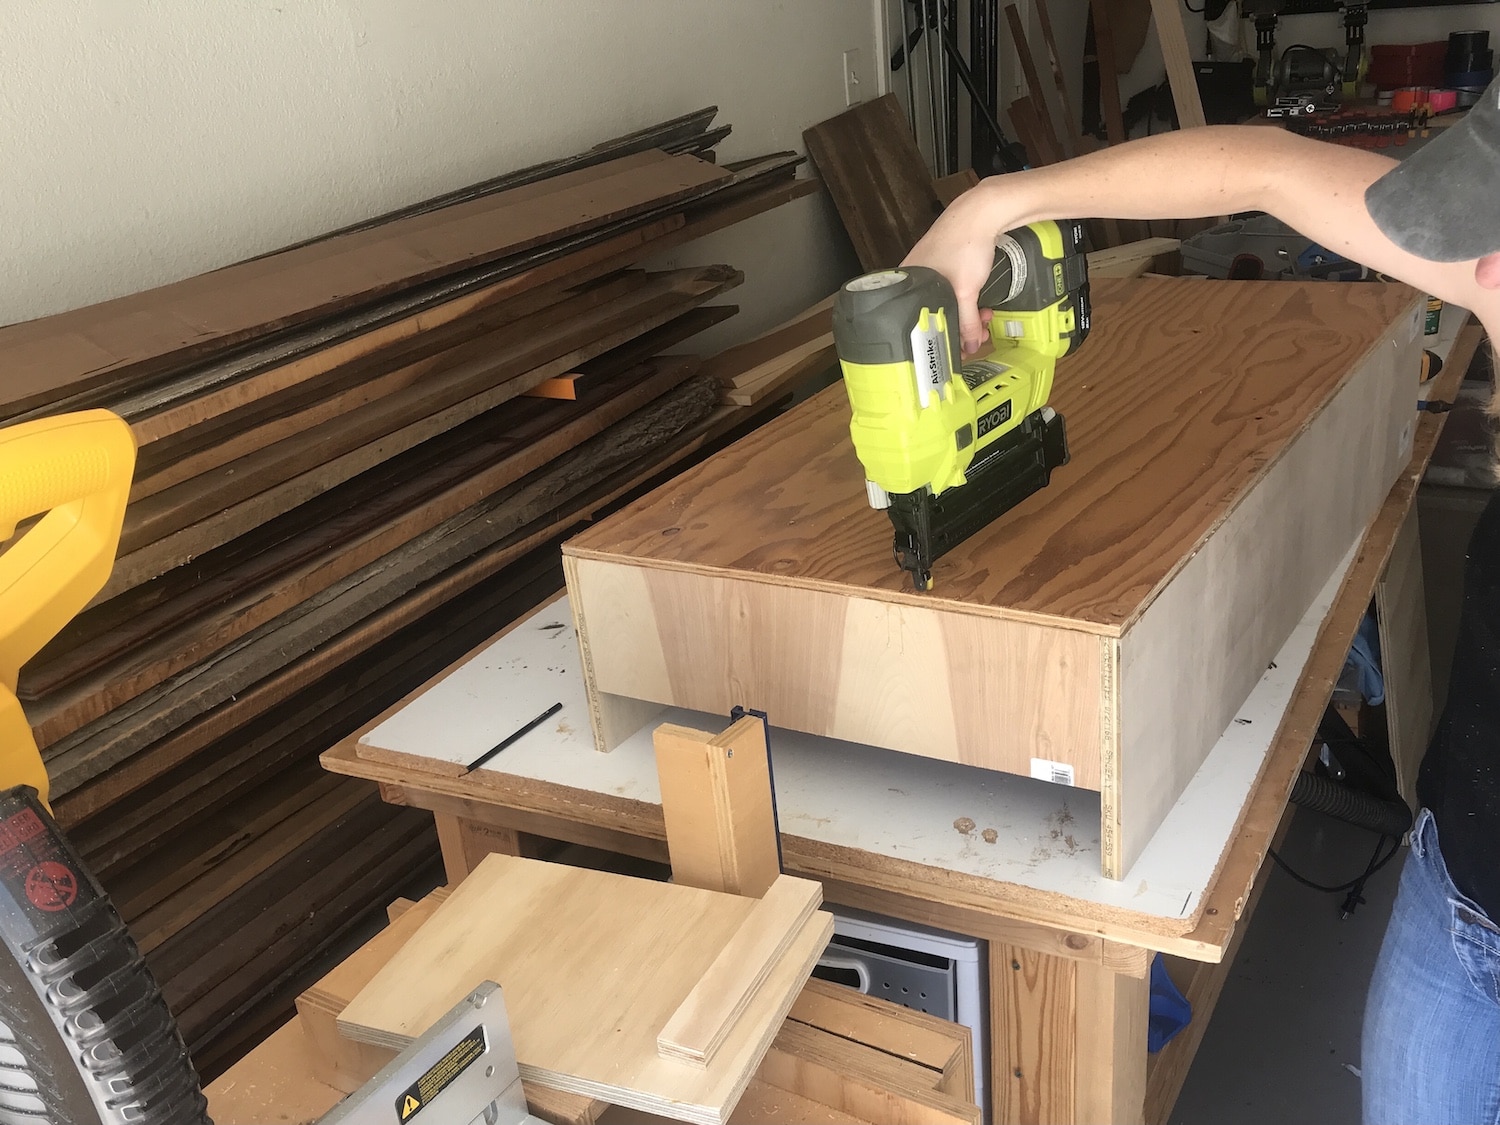
Once the face frame for the cabinet box is made, you can install it on the cabinet box. Use wood glue and nails to attach it. Use a nail gun with brad nails to do this. I love my battery powered one since I don’t have to use an air compressor!
Since this will be painted later, don’t worry about the nail holes – you will use wood filler later to cover them up.
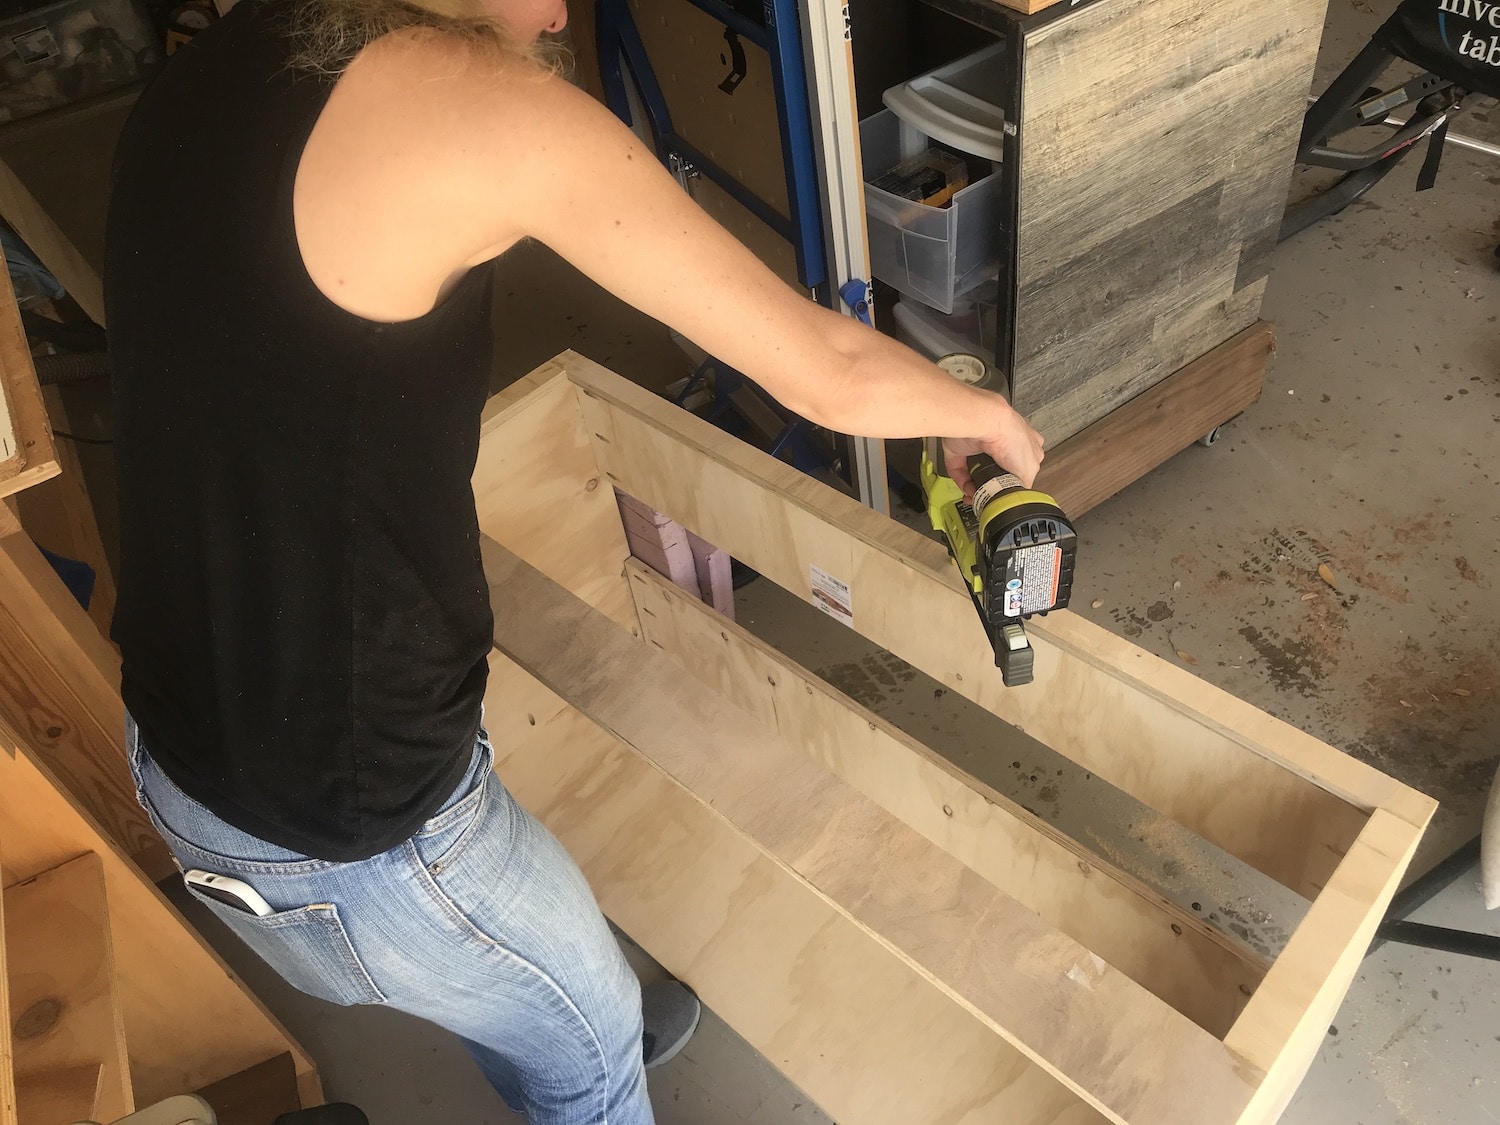
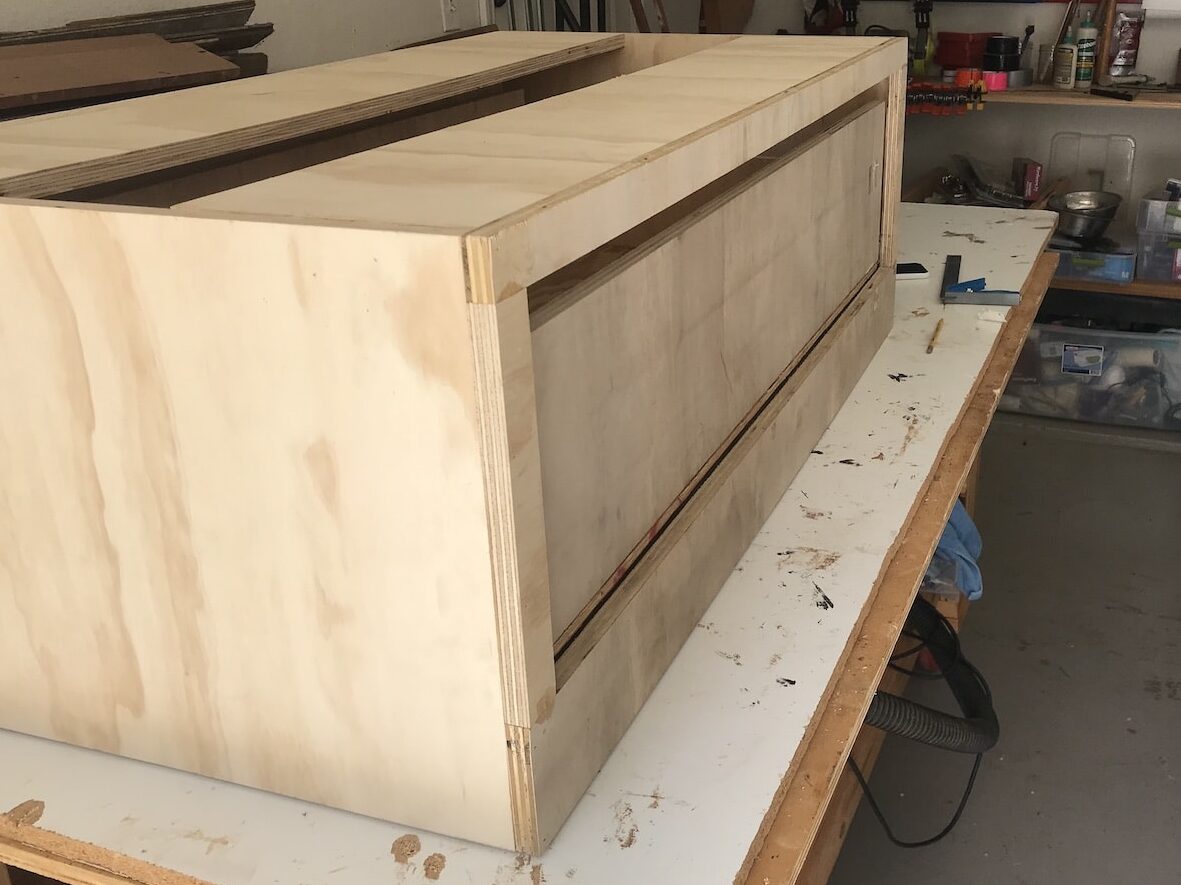
The cabinet box with the face frame is now done and you can move on to building the drawer!
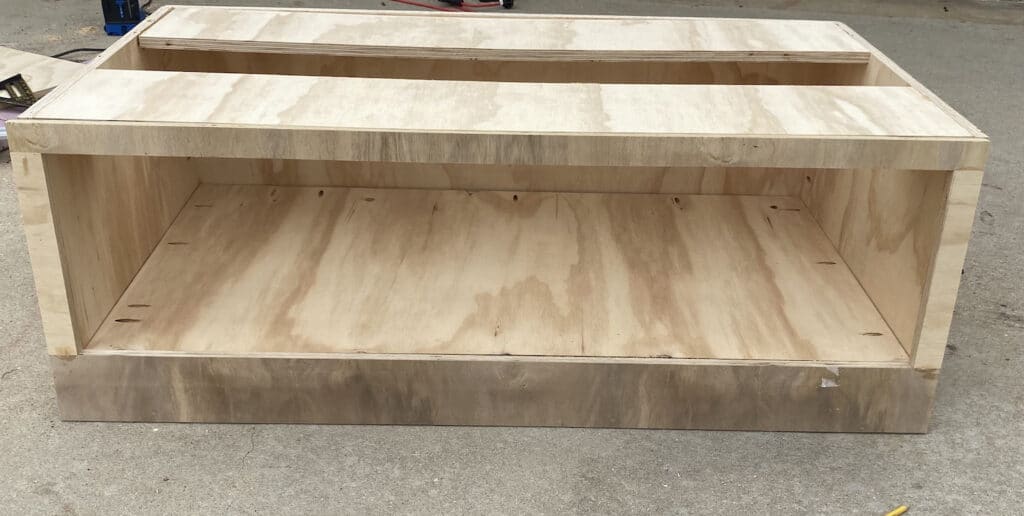
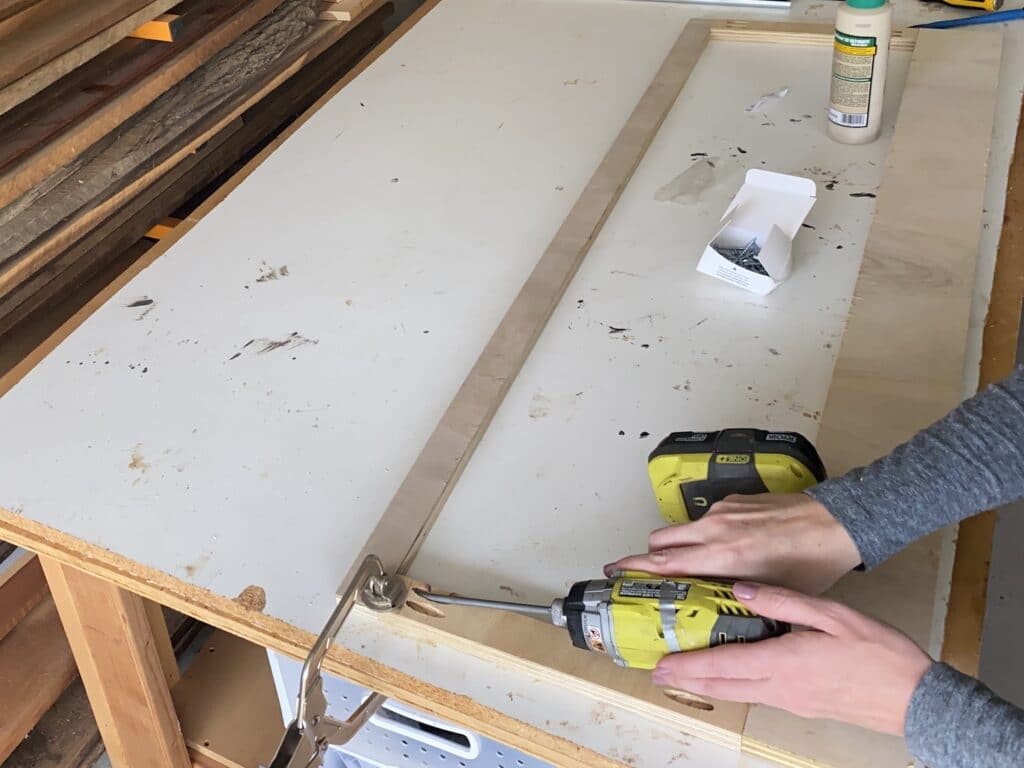
Step 3: Build the Drawer
Break down the sheets of plywood according to the plans. I sound like a broken record, but use a square when joining the pieces with wood glue and pocket holes! The drawer will not open smoothly if it is off square.
I started building the drawer by joining the sides to the front and back of the drawer.

Since this is such a large drawer, I found it easiest to lay the drawer frame on top of the wood I was using for the bottom. That way, I could mark exactly where to cut in order to make the bottom of the drawer fit perfectly.
I used my circular saw and edge guide to cut this since it was such a large piece.
Attach the bottom to the drawer box with wood glue and nails.
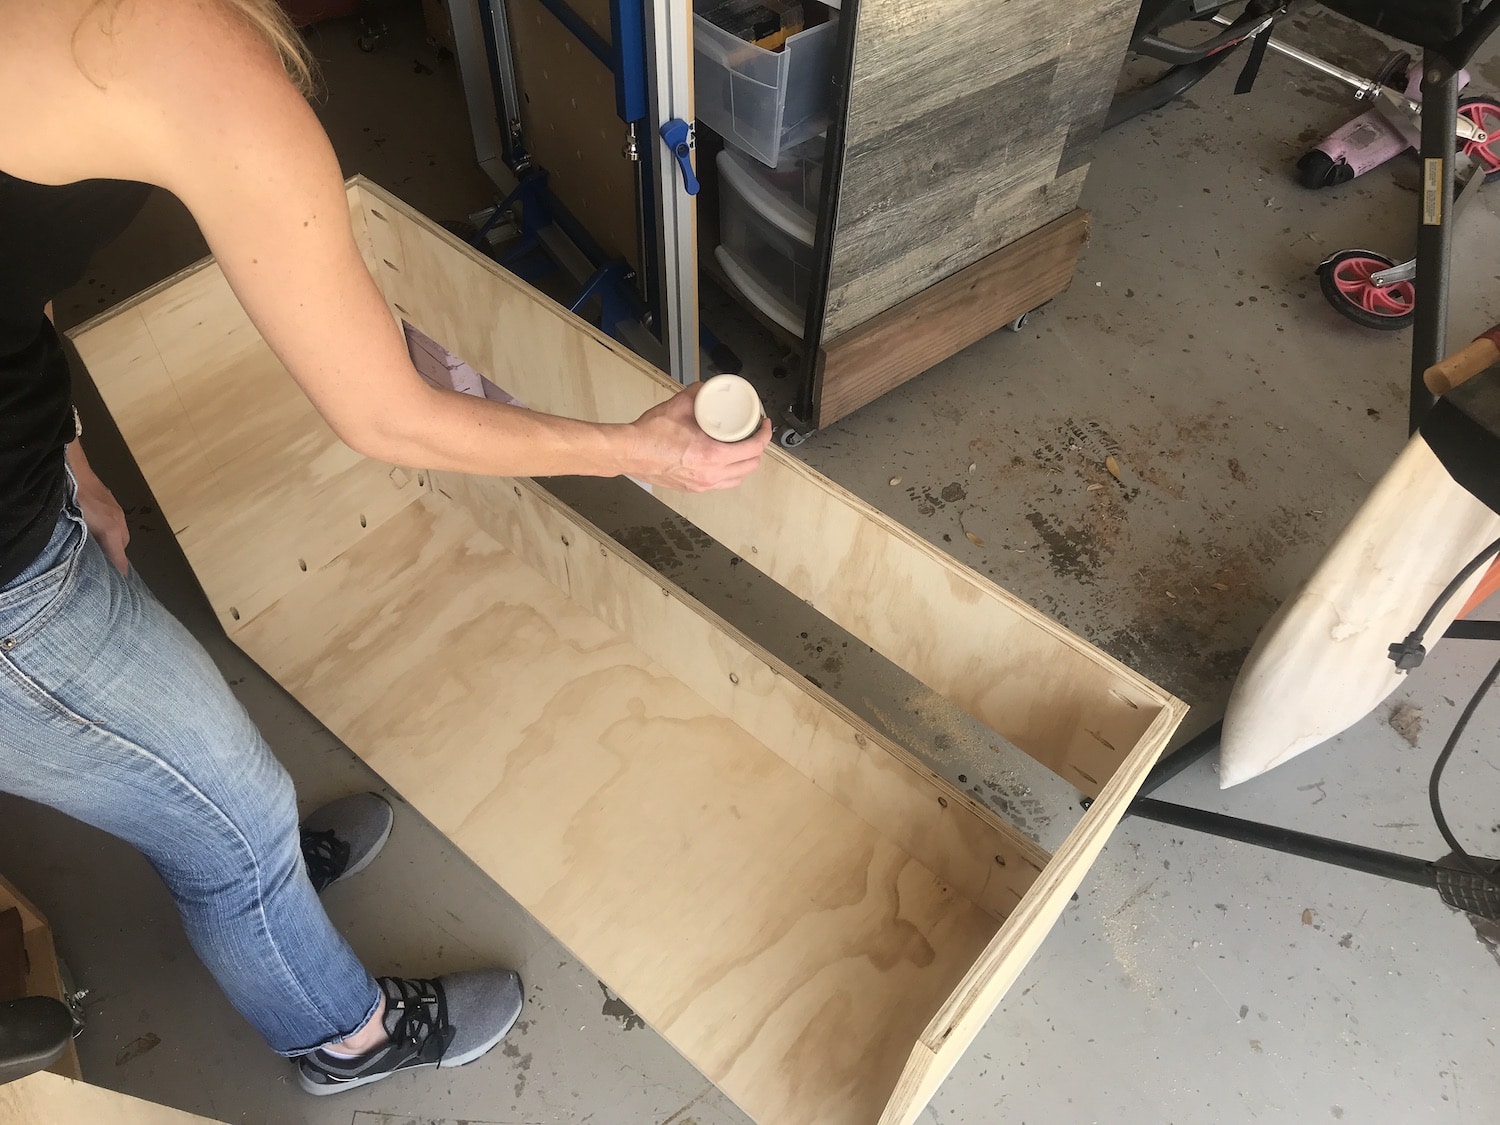
Step 4: Install the Drawer
The process of installing drawers has always been so intimidating to me, but turns out – I actually enjoyed making and installing them! The DrawerJig by Milescraft made the process so simple and straight forward. I easily installed this large drawer on the face frame cabinet without an extra set of hands.
You can read all about how to install drawer slides on face frame cabinets in this post. I’ll briefly cover how to do that in this post, but that article will go into more detail for you.
Milescraft thought through everything when it comes to installing drawers with this jig!
You start with using the DrawerJig on the inside of the cabinet to install the slides to the cabinet.
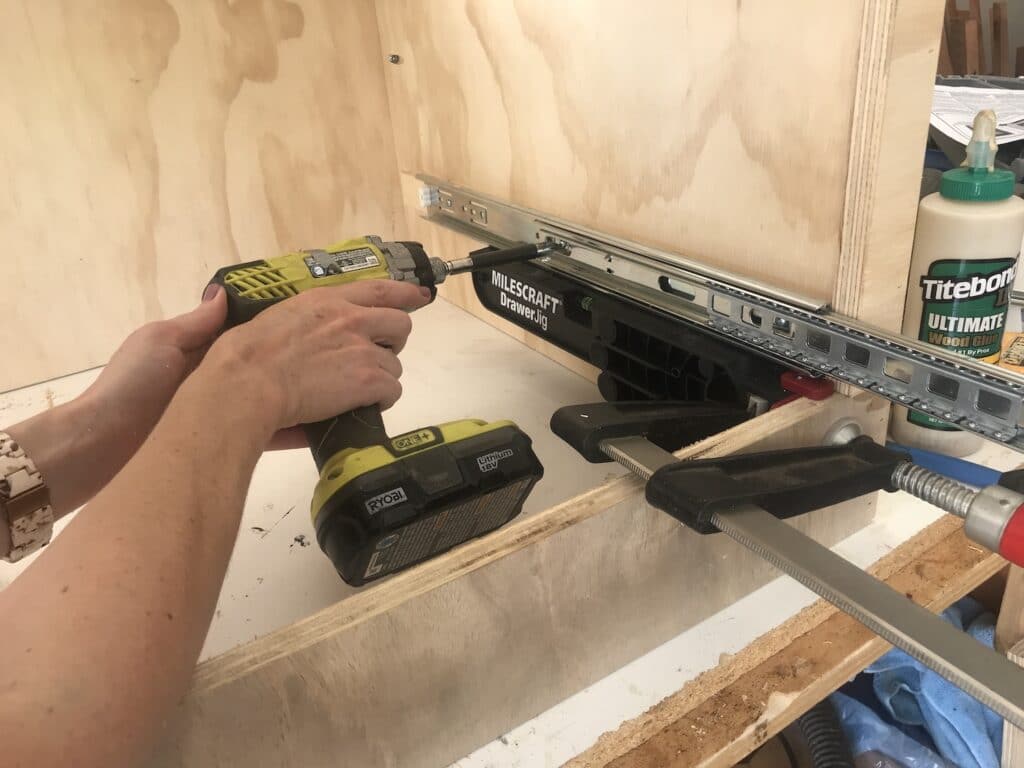
Once the drawer slides are installed in the cabinet member, the DrawerJig flips around to the front of the cabinet. The drawer will now sit in the perfect spot while you attach the drawer slides to the drawer.
Since this is a face frame cabinet with inset drawers, the front of the drawer box will sit 3/4″ inside the frame. This way, the drawer frame will be flush with the cabinet face frame when it is installed.


This jig made installing drawer slides on a face frame cabinet so simple and easy. First try and it worked perfectly!
This was also the method I used to add pull out drawers to existing kitchen cabinets.
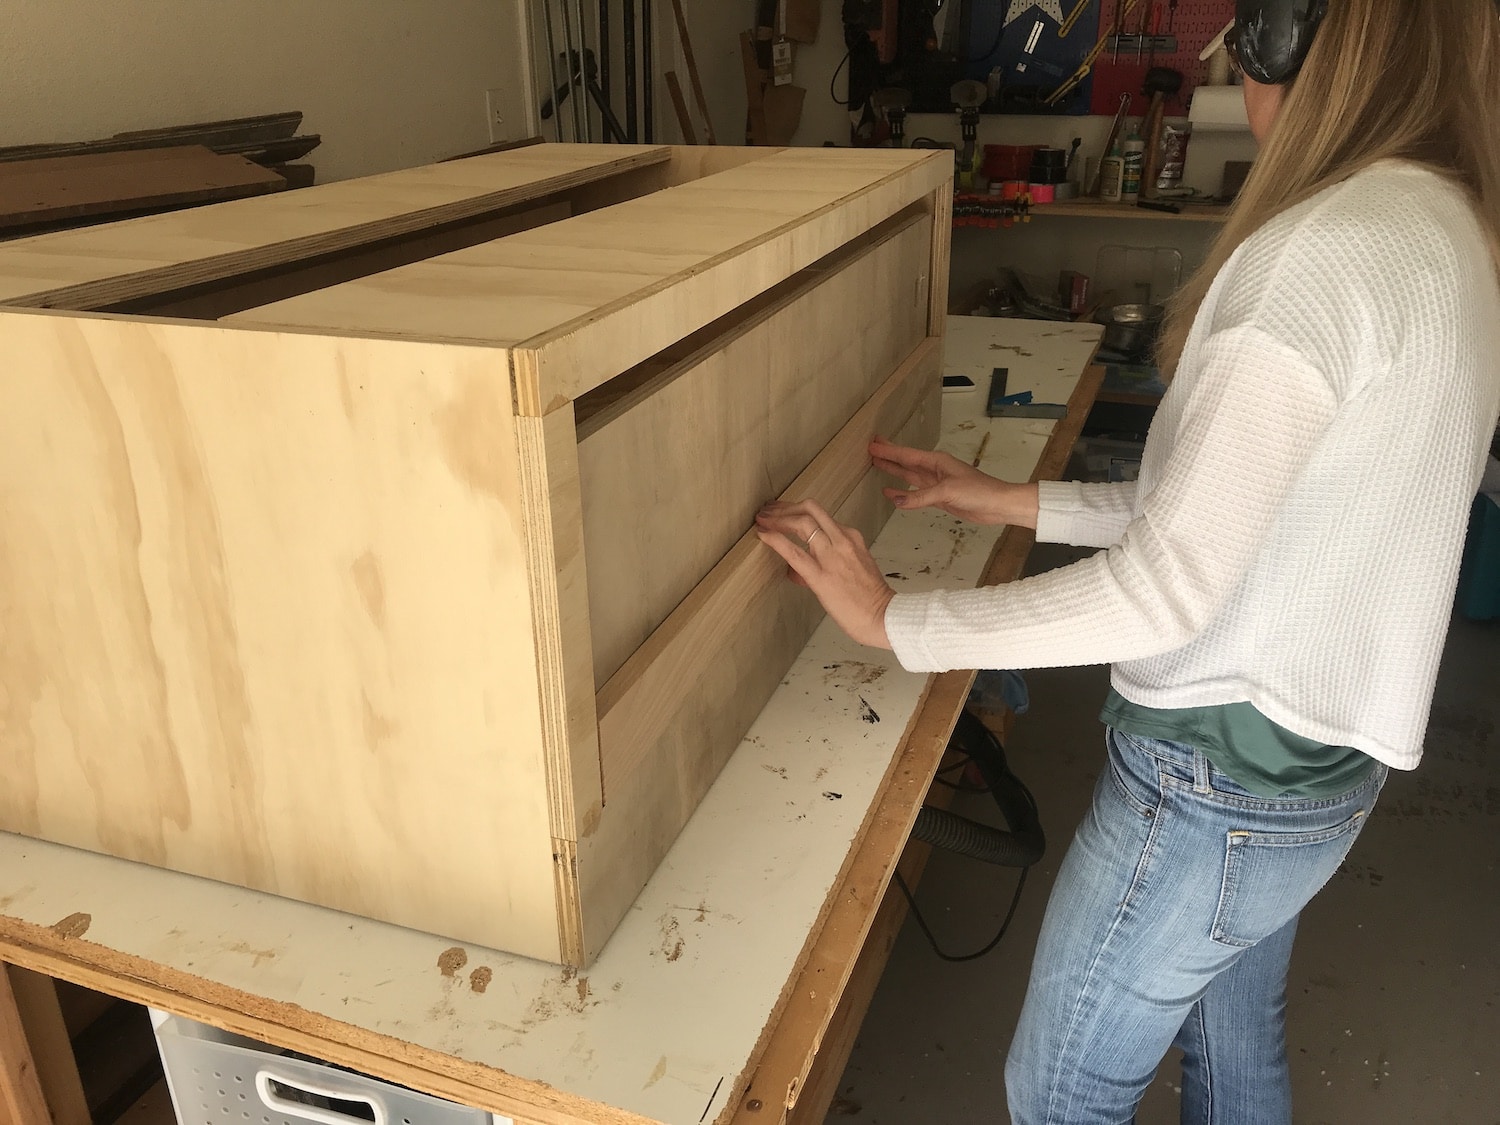
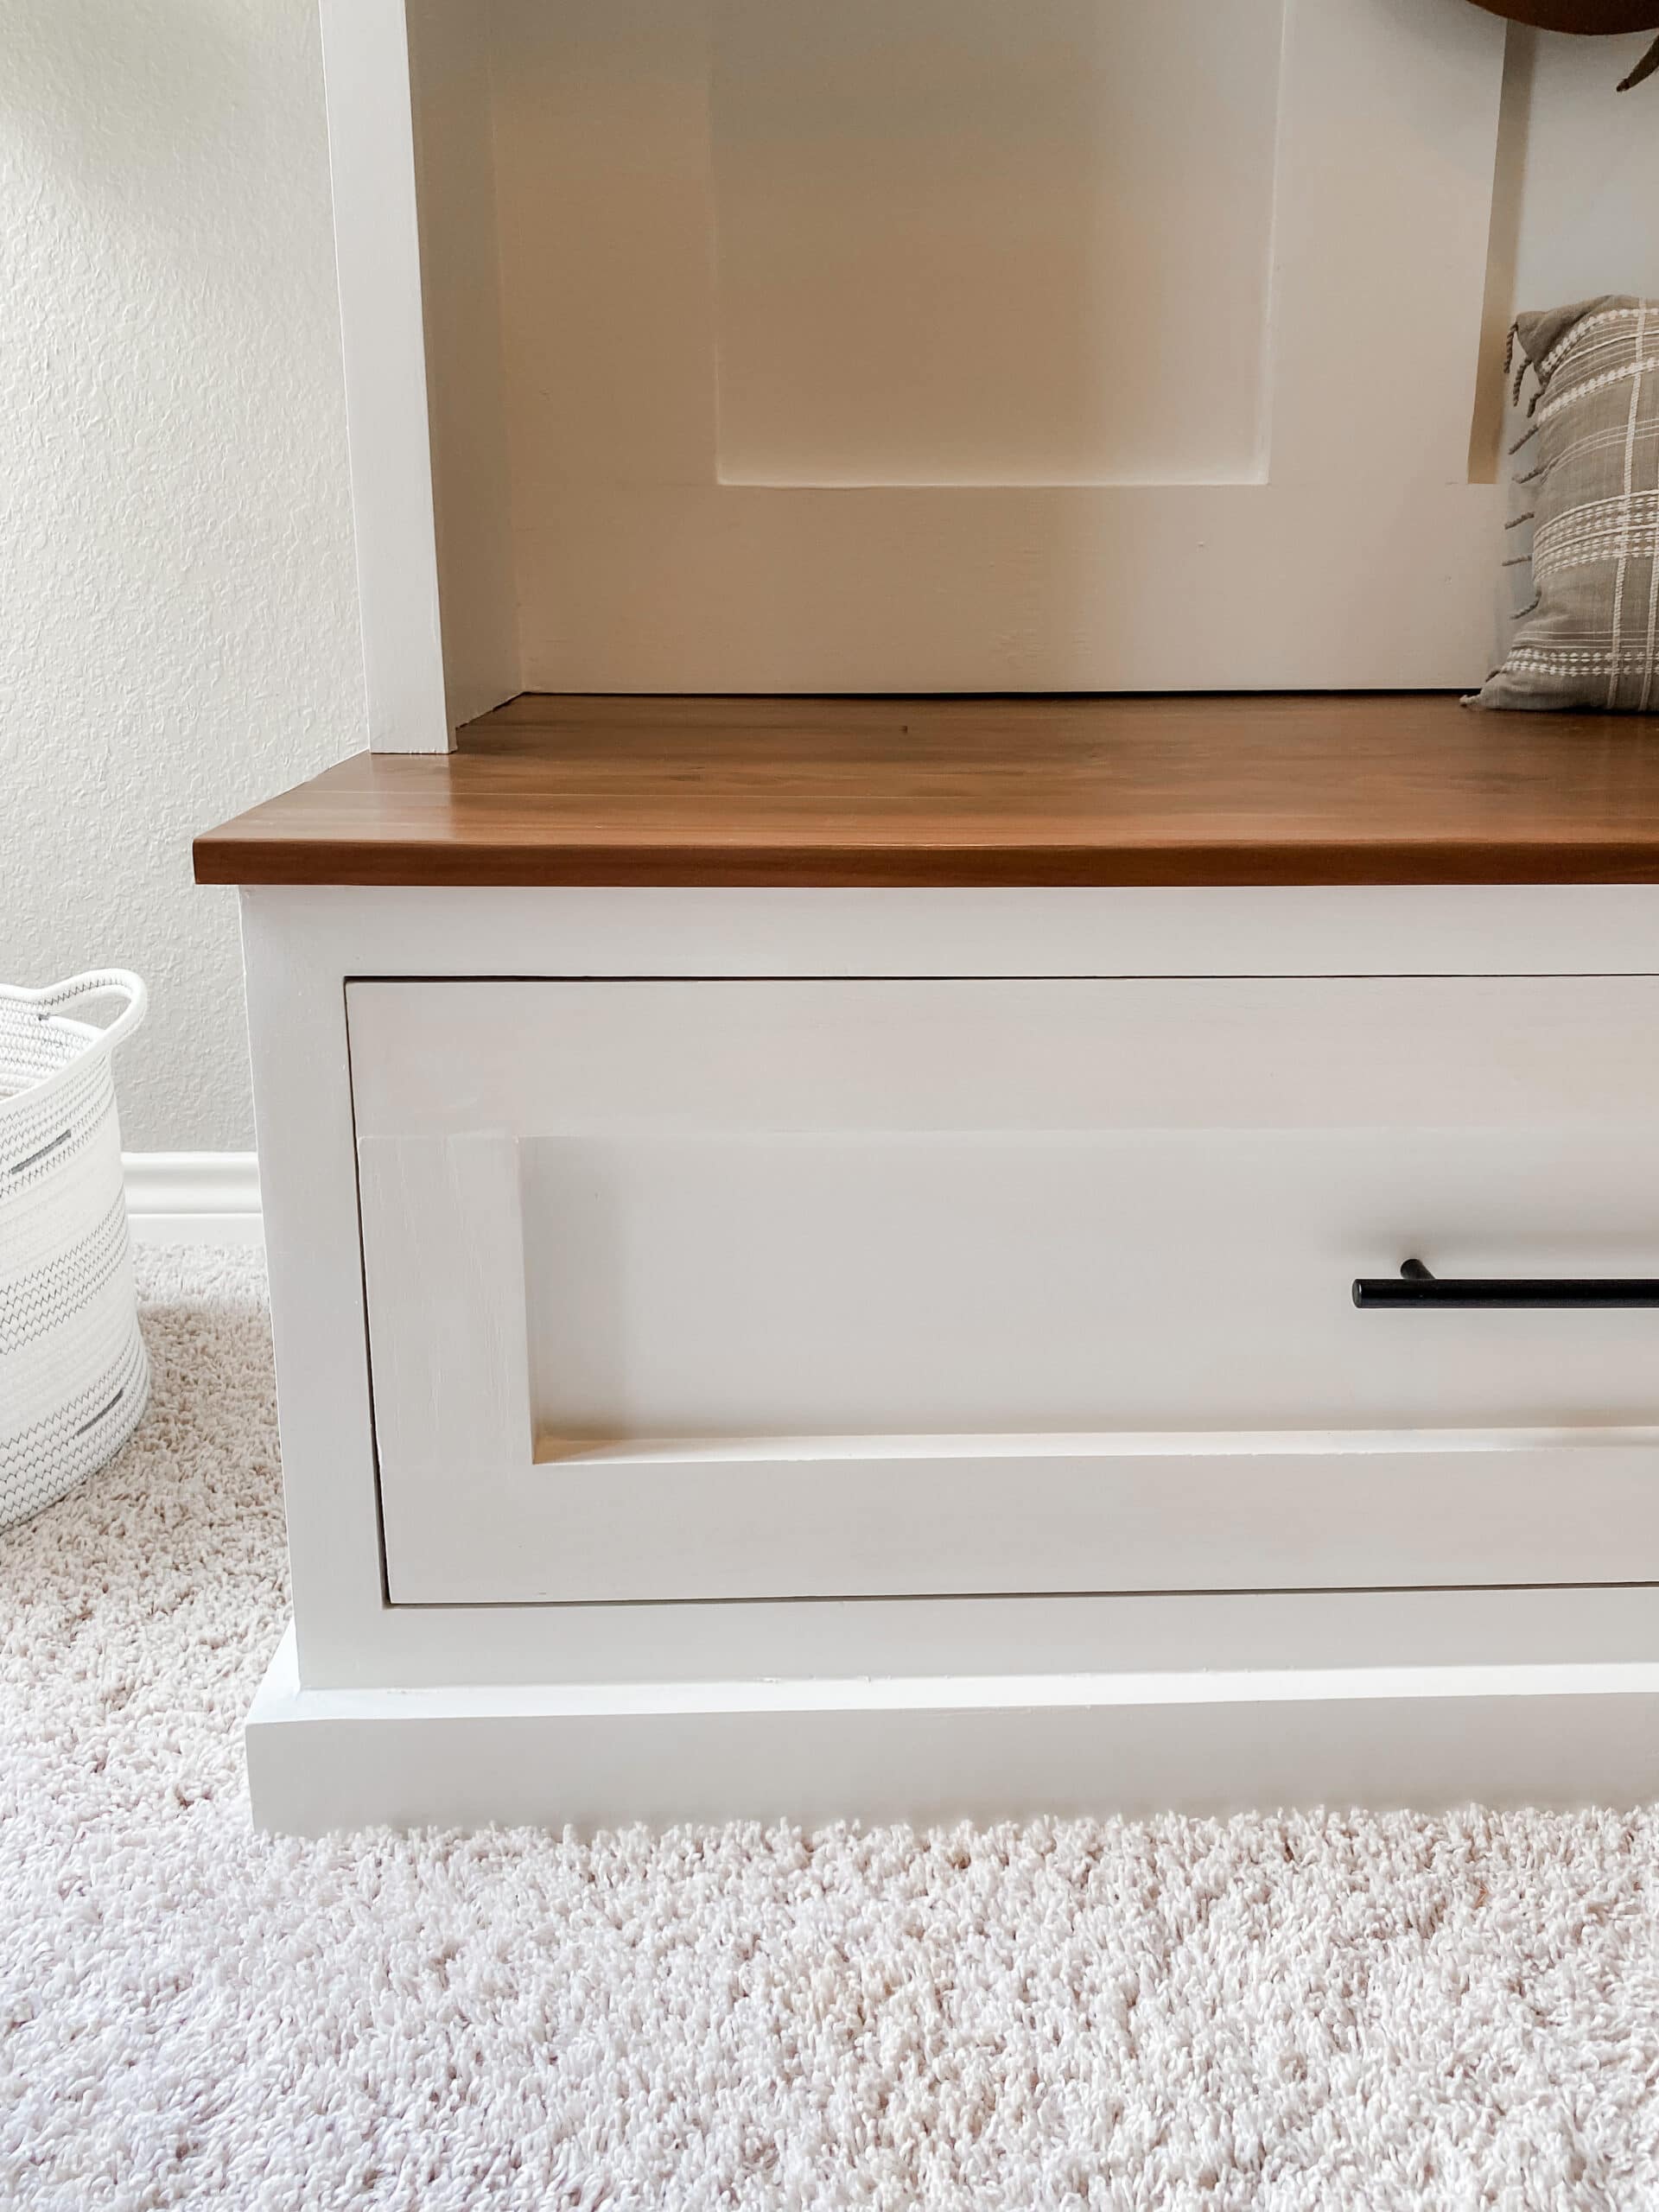
Step 5: Make the Drawer Face
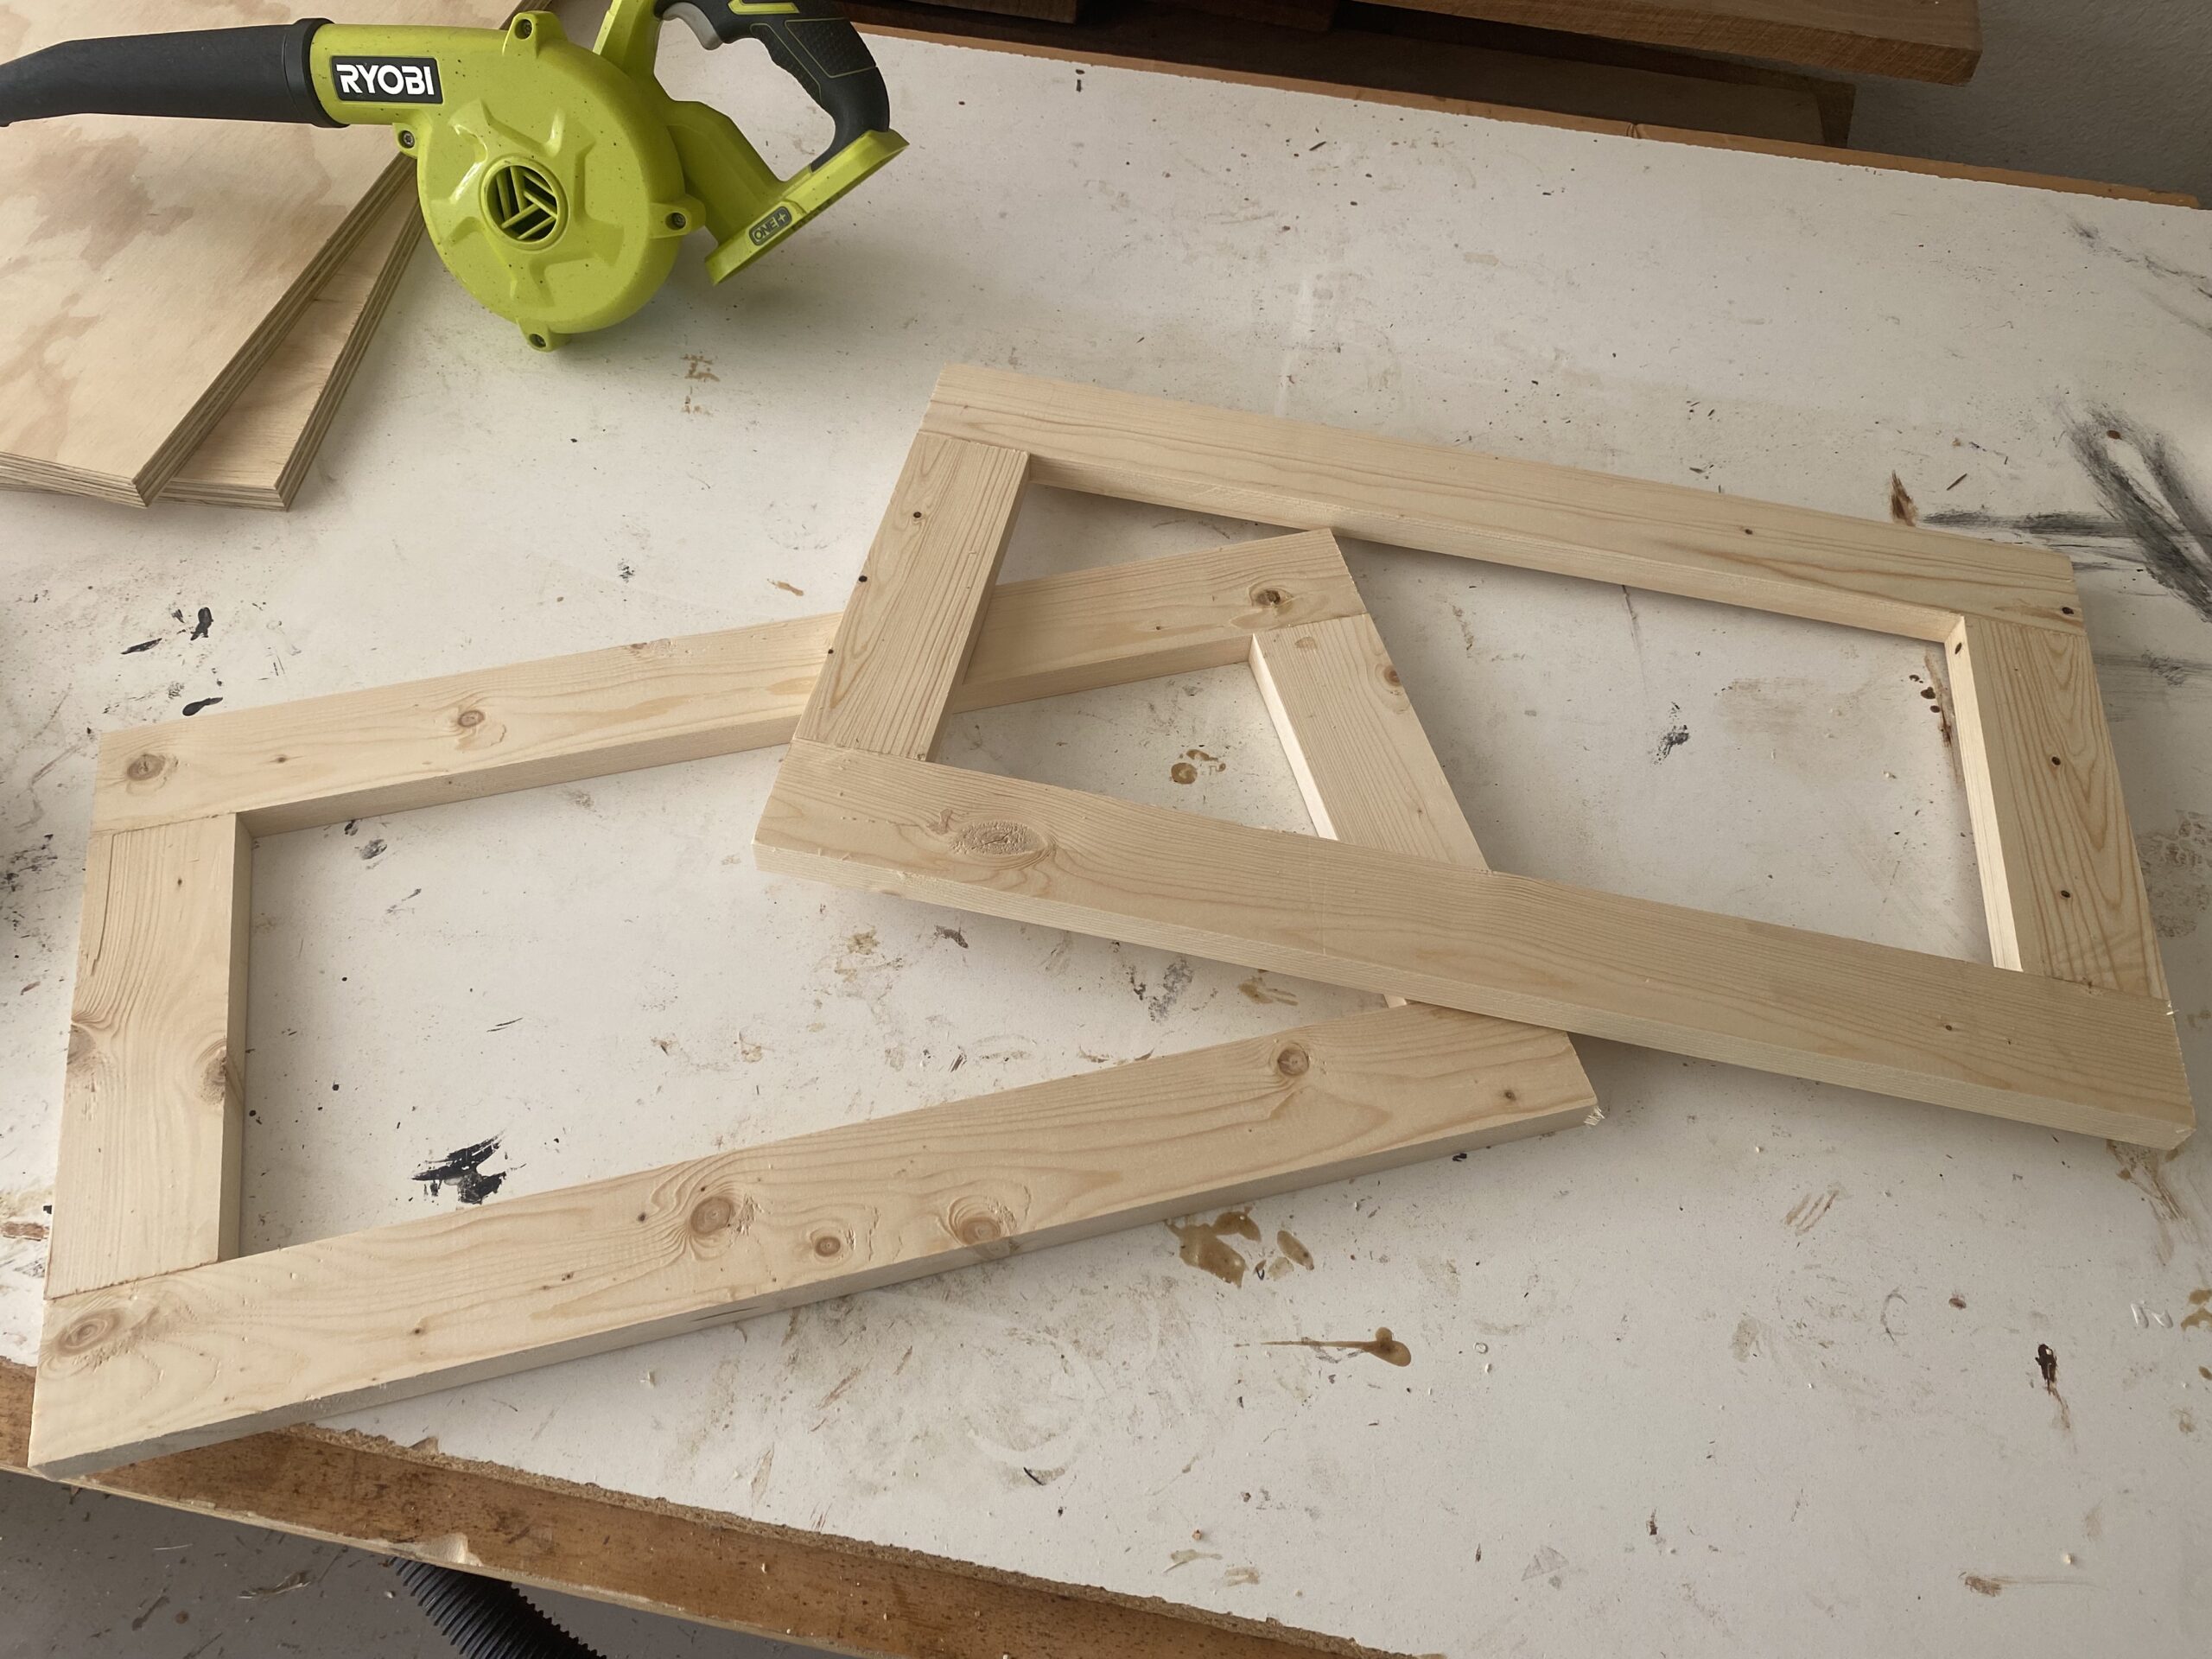
Now that your drawer is installed, you can frame out the face of the drawer. The frame edges measure 2.5″ wide and this will cover the gap between the drawer box and the face frame.
Typically, the gap around a drawer is 1/8″ all around. So, measure the opening between the face frame and subtract 1/4″. This will give you 1/8″ around all sides of the drawer frame.


Assemble the frame for the drawer front with wood glue and pocket holes. I used oak for this step for added stability, but you could probably get away with pine for this step.
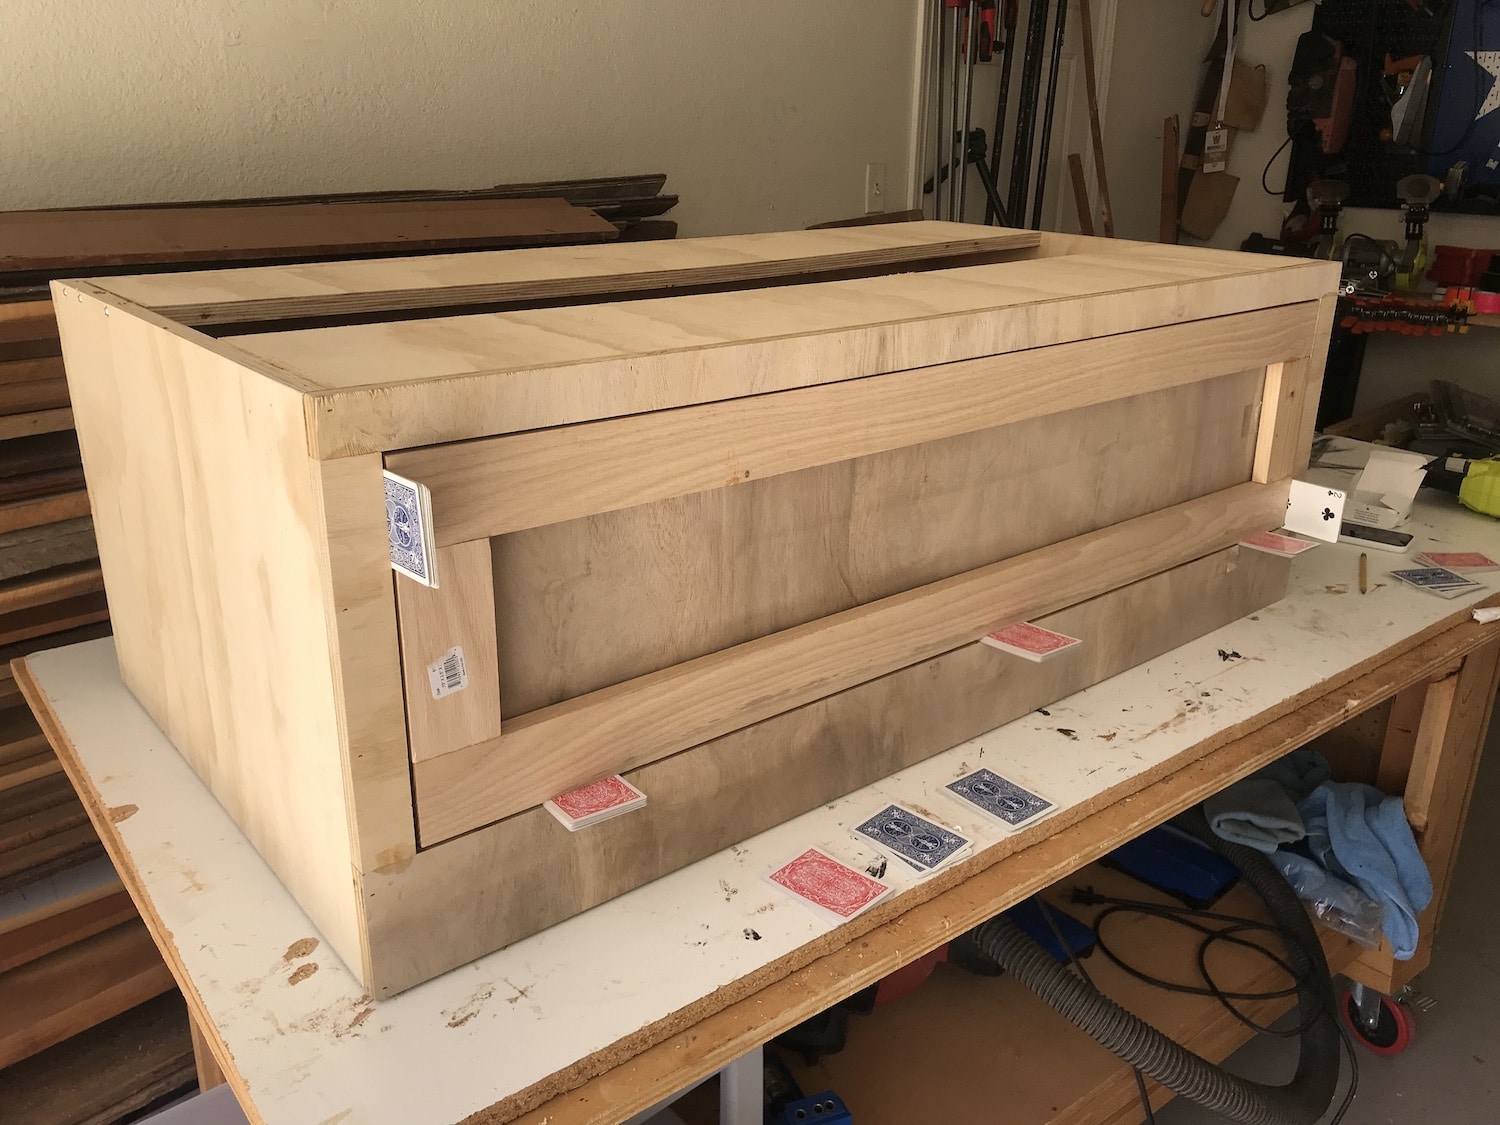
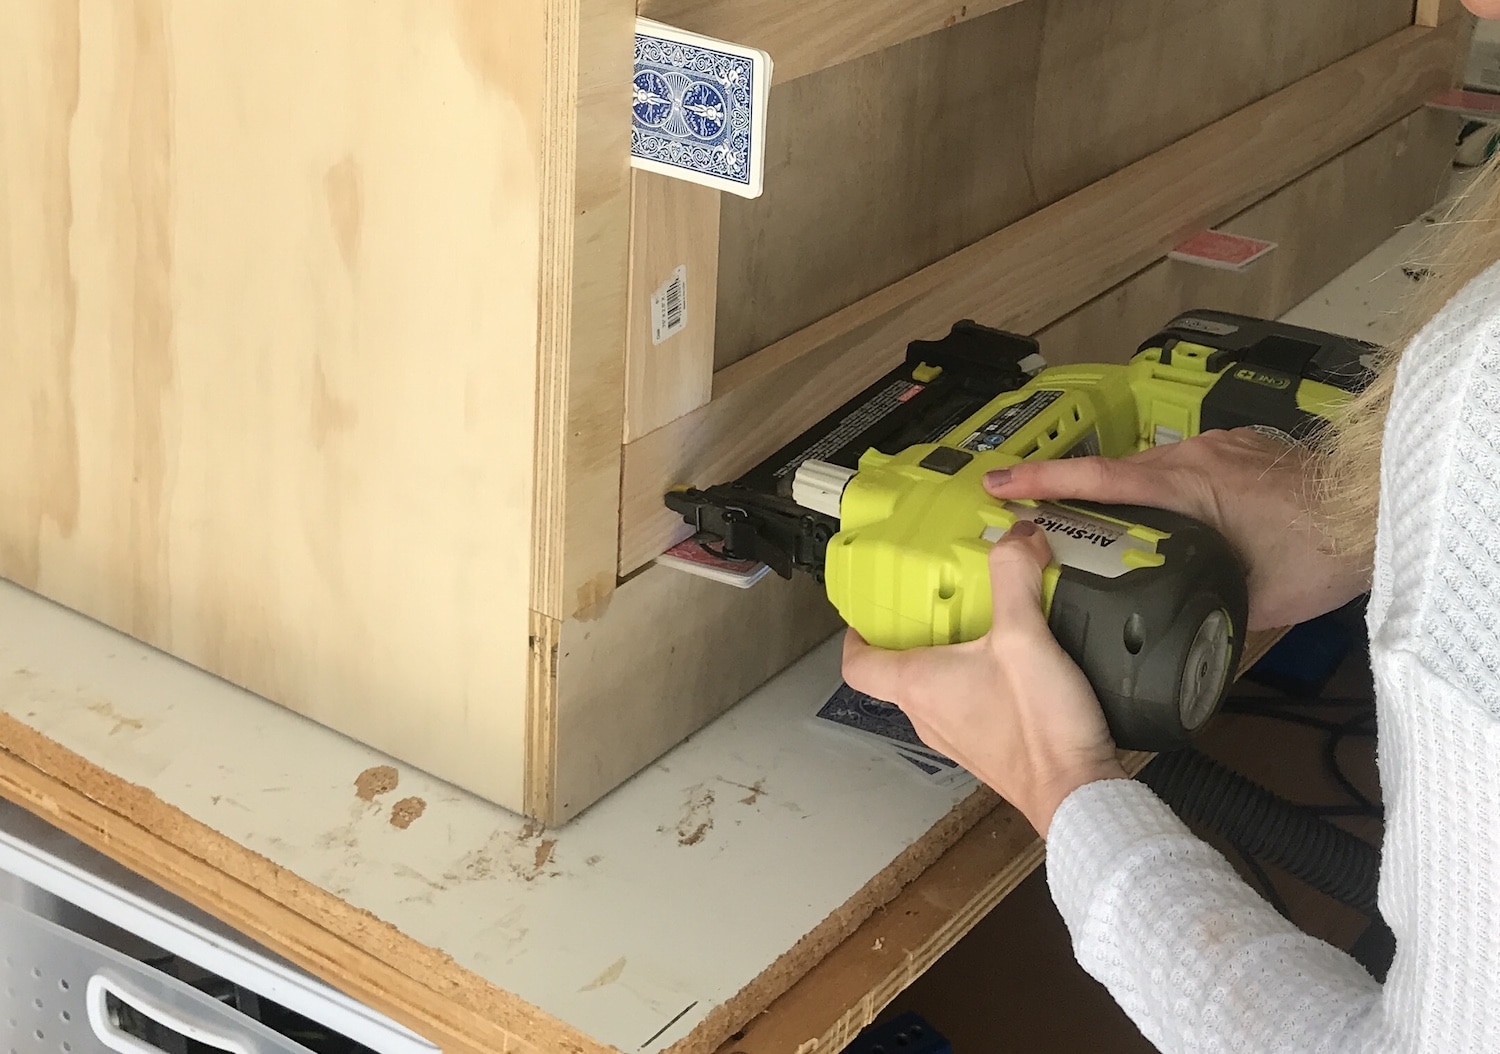
Attach the drawer frame to the front of the drawer with 1/8″ gap all around.
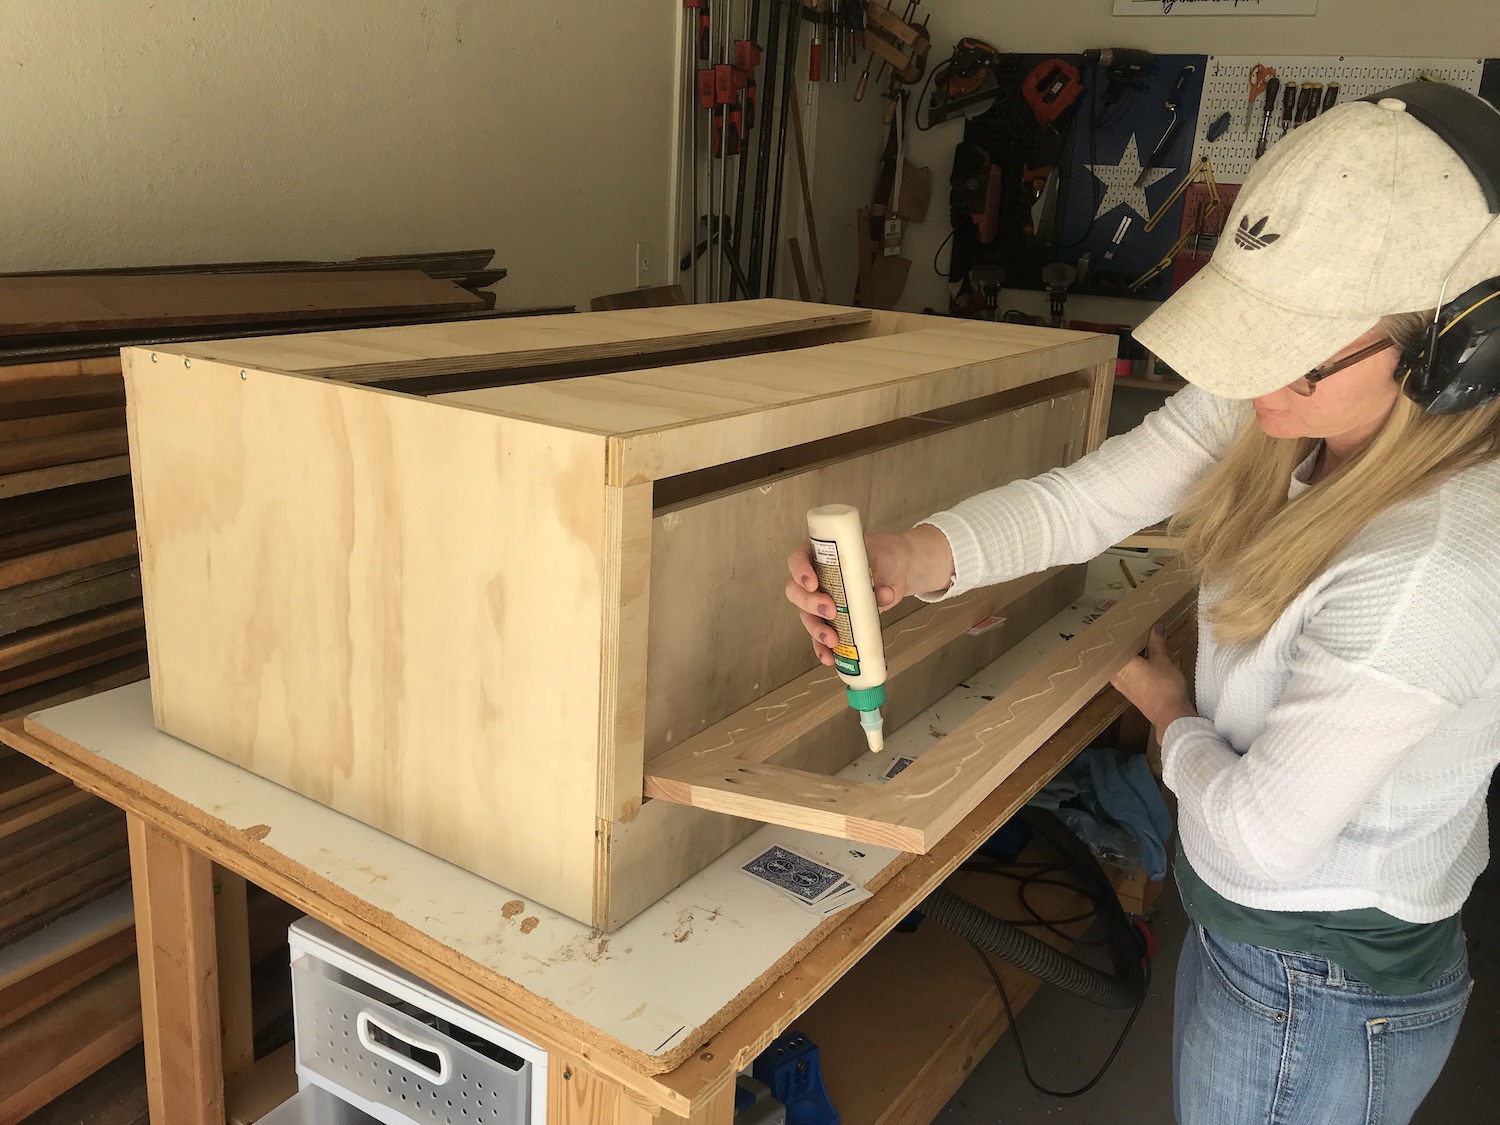
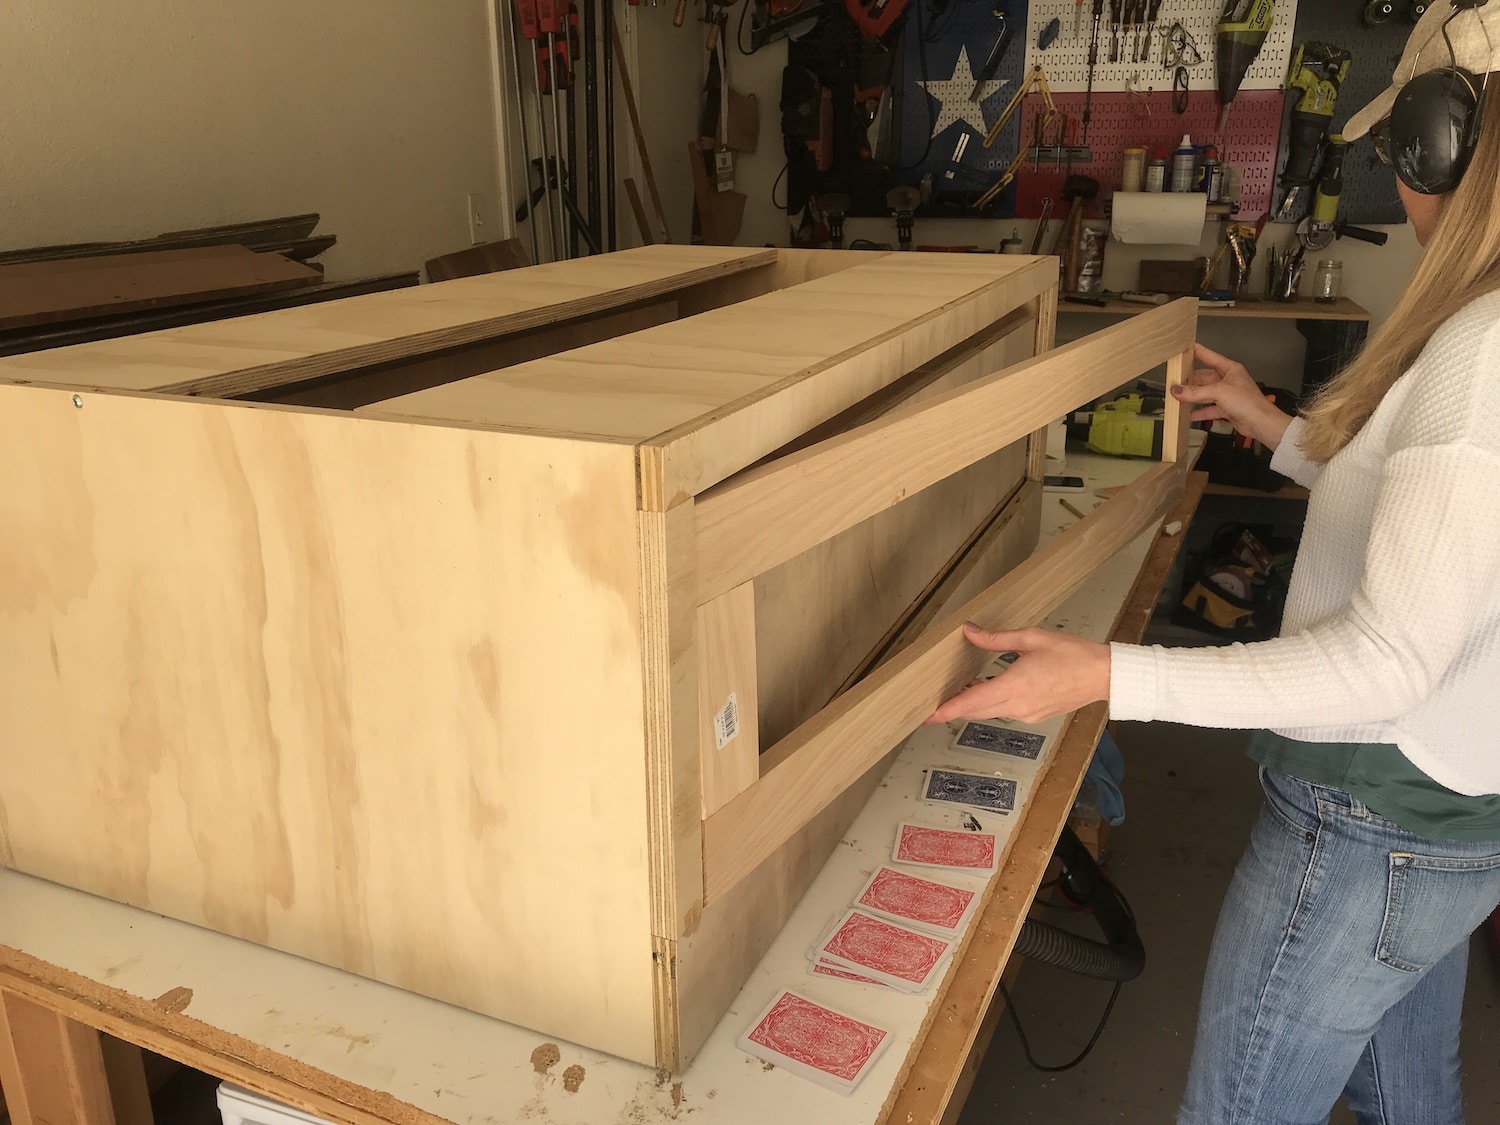
An easy way to do this is to figure out how many playing cards are needed to fill a 1/4″ gap. Then, divide the cards in two equal piles and surround the drawer frame with them. Use a nail gun to attach it and you can fill the holes later.
Step 6: Build the Bench Top
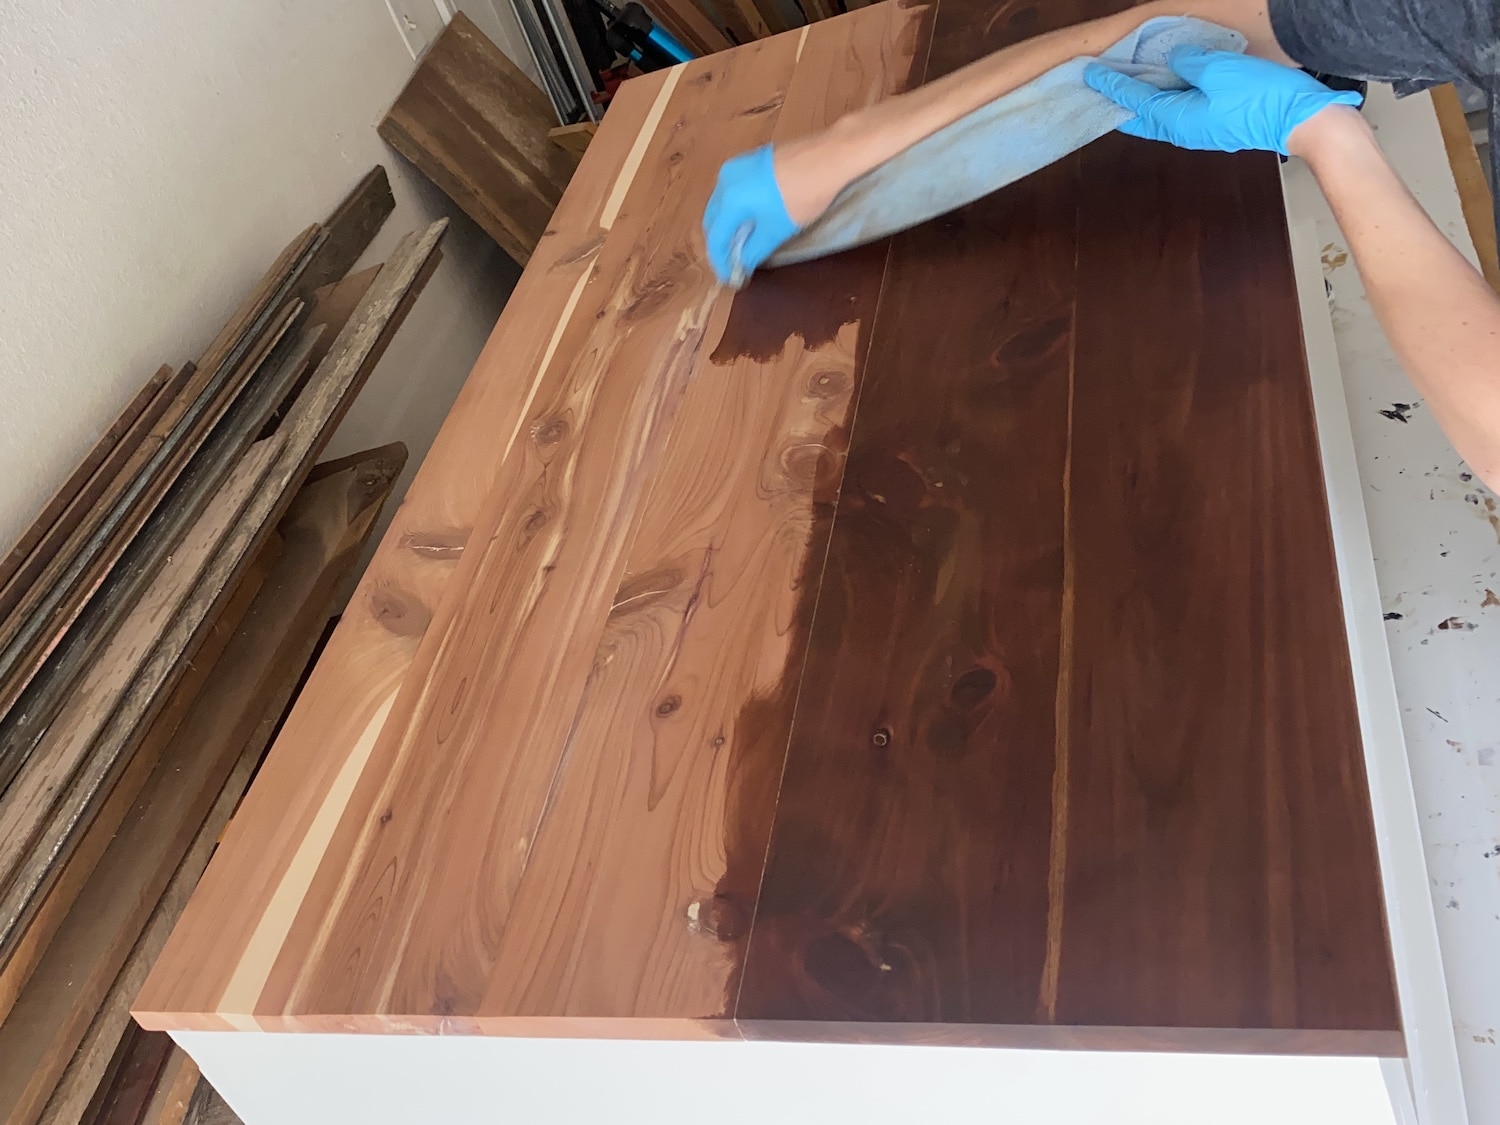
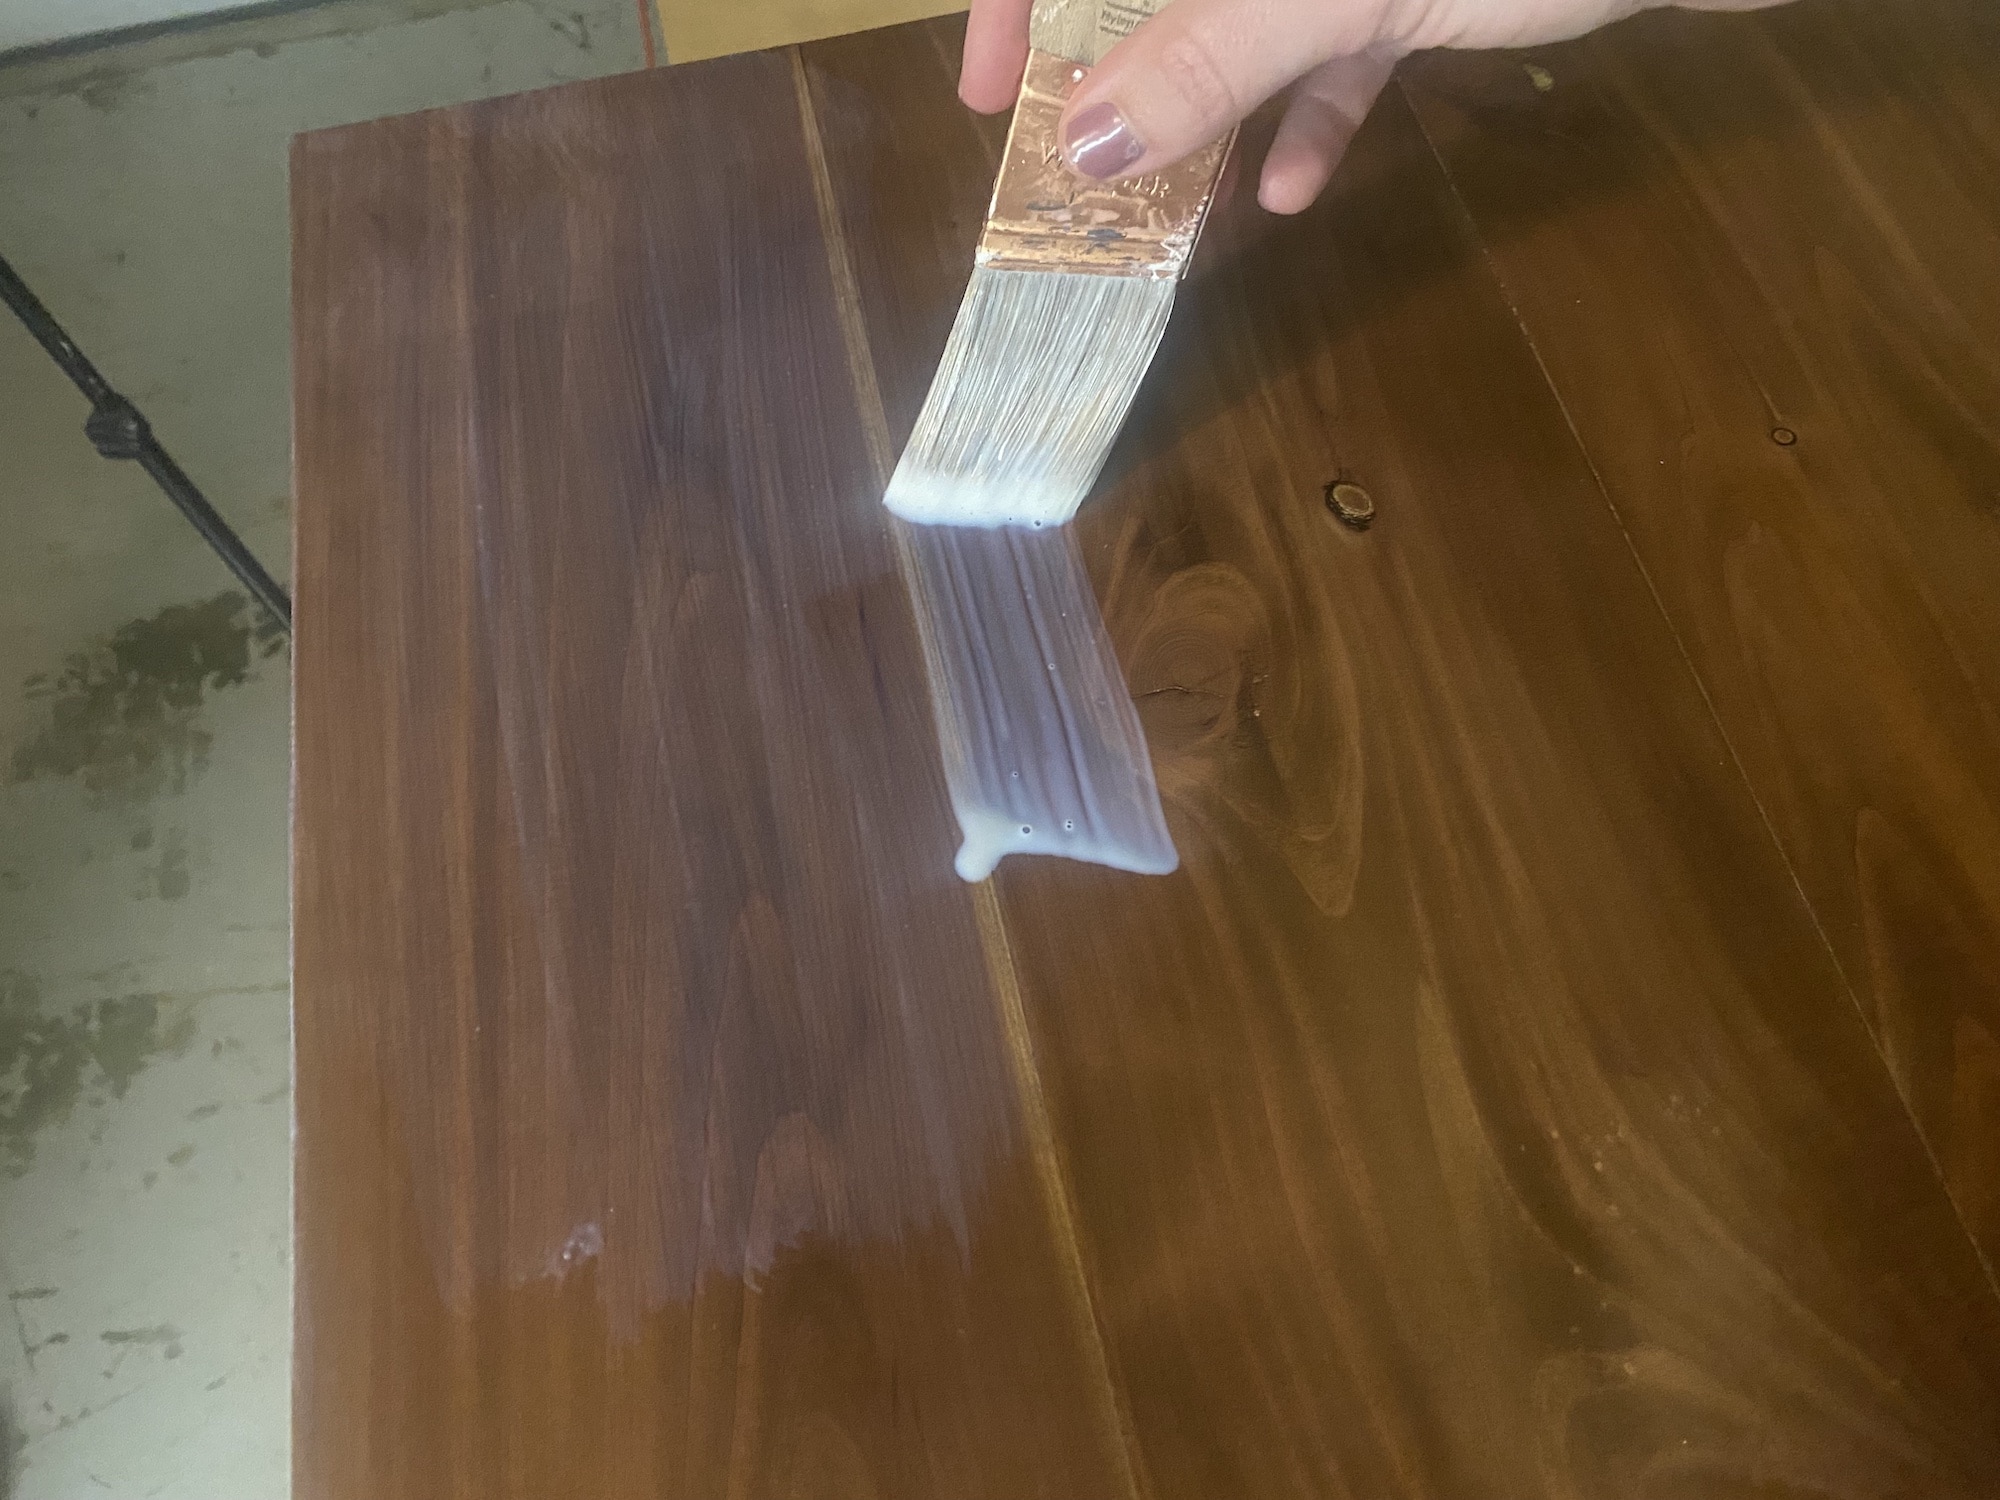
I used cedar to build the top for the storage bench. I was sure to joint the edges so the seams were flush. I glued them together and also attached them with pocket holes.

To finish the top, I stained it, then applied 3 coats of polyurethane in order to protect it. Cedar is great for the top of the bench as the wooden boards are easy to work with and the wood grain adds beauty to the piece.
This is the same finish I recommended in this post on the best finish for a wood kitchen table.
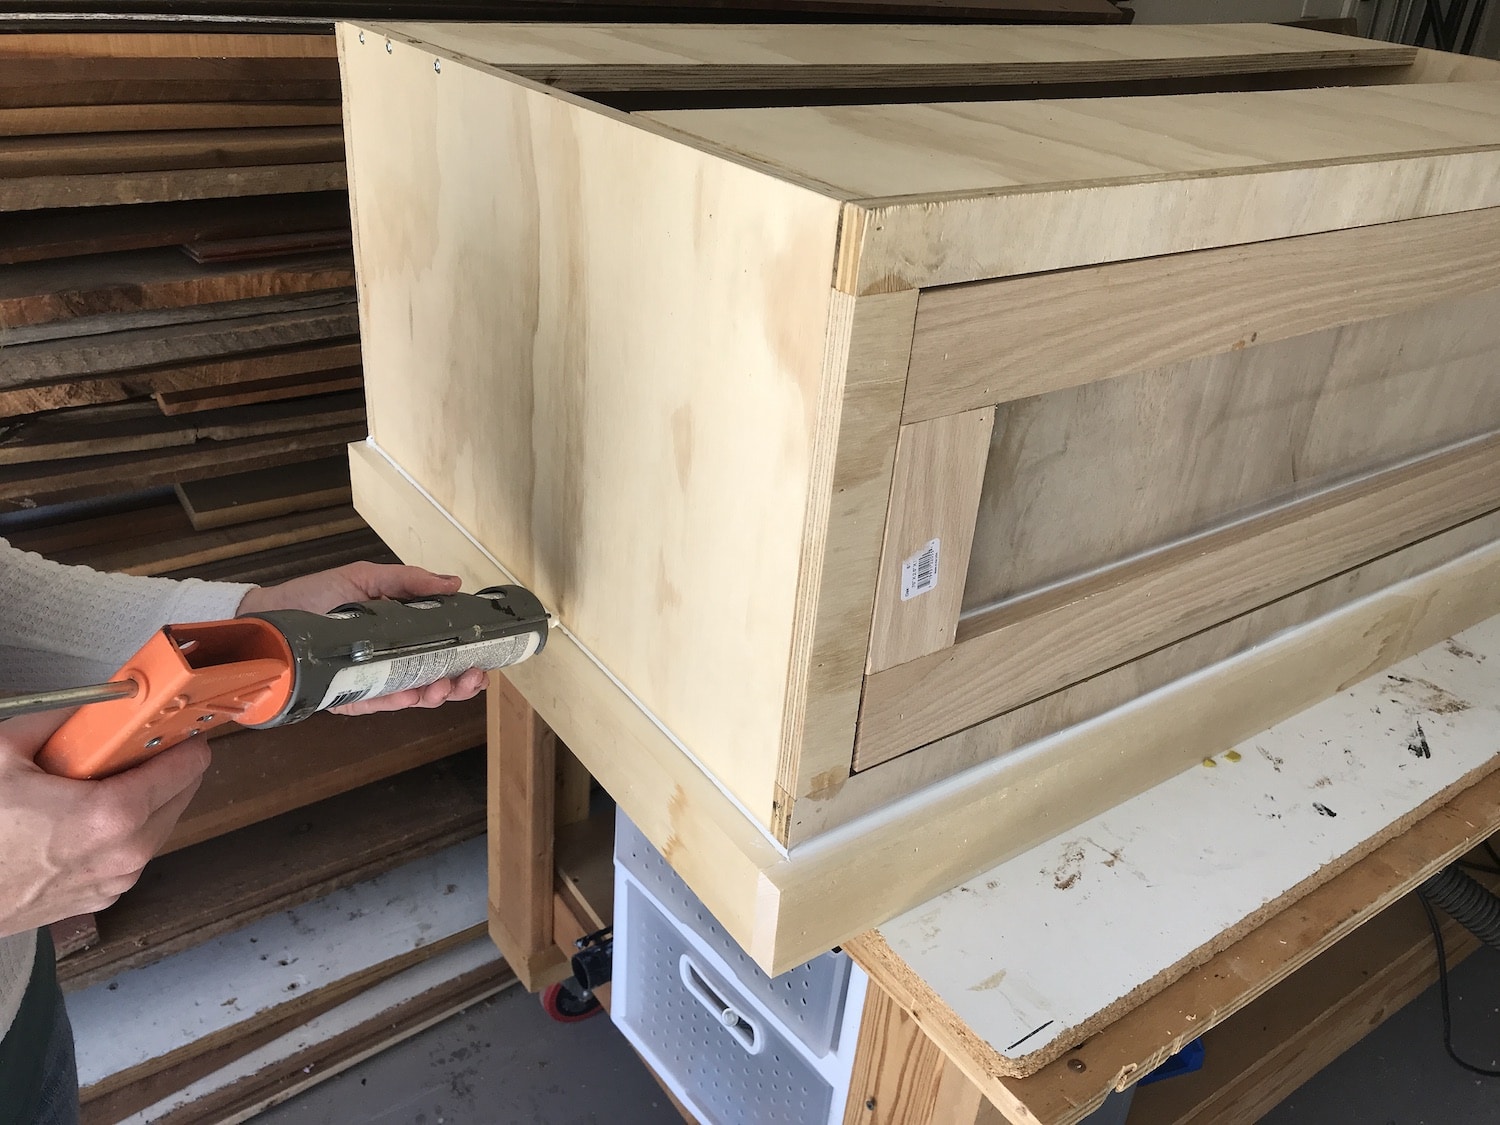
Step 7: Add Trim, Fill Nail Holes, Caulk, Paint, and Seal
Attach the bench top to the base from the underside of the cabinet box. The drawer is removable, which makes this much easier to do.
Add a 2.5″ tall trim piece to the bottom of the storage bench, just to give it a finished look. This part of the project was very similar to the trim around the built in bookcase project I did as well.
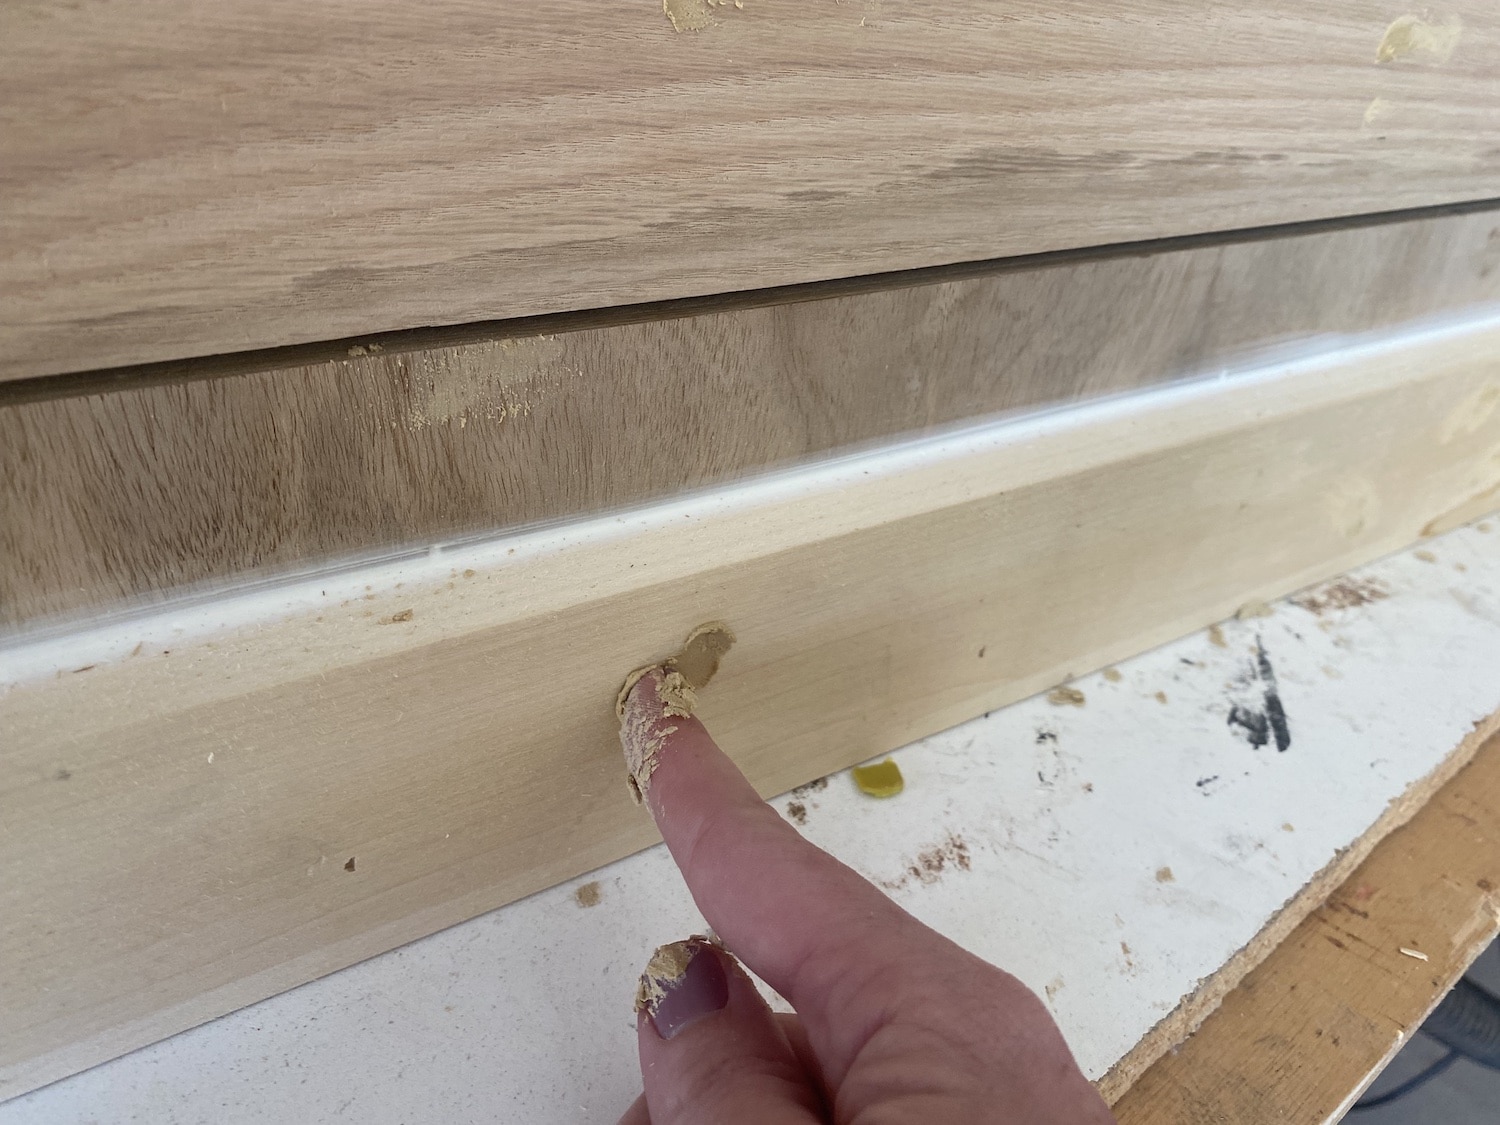
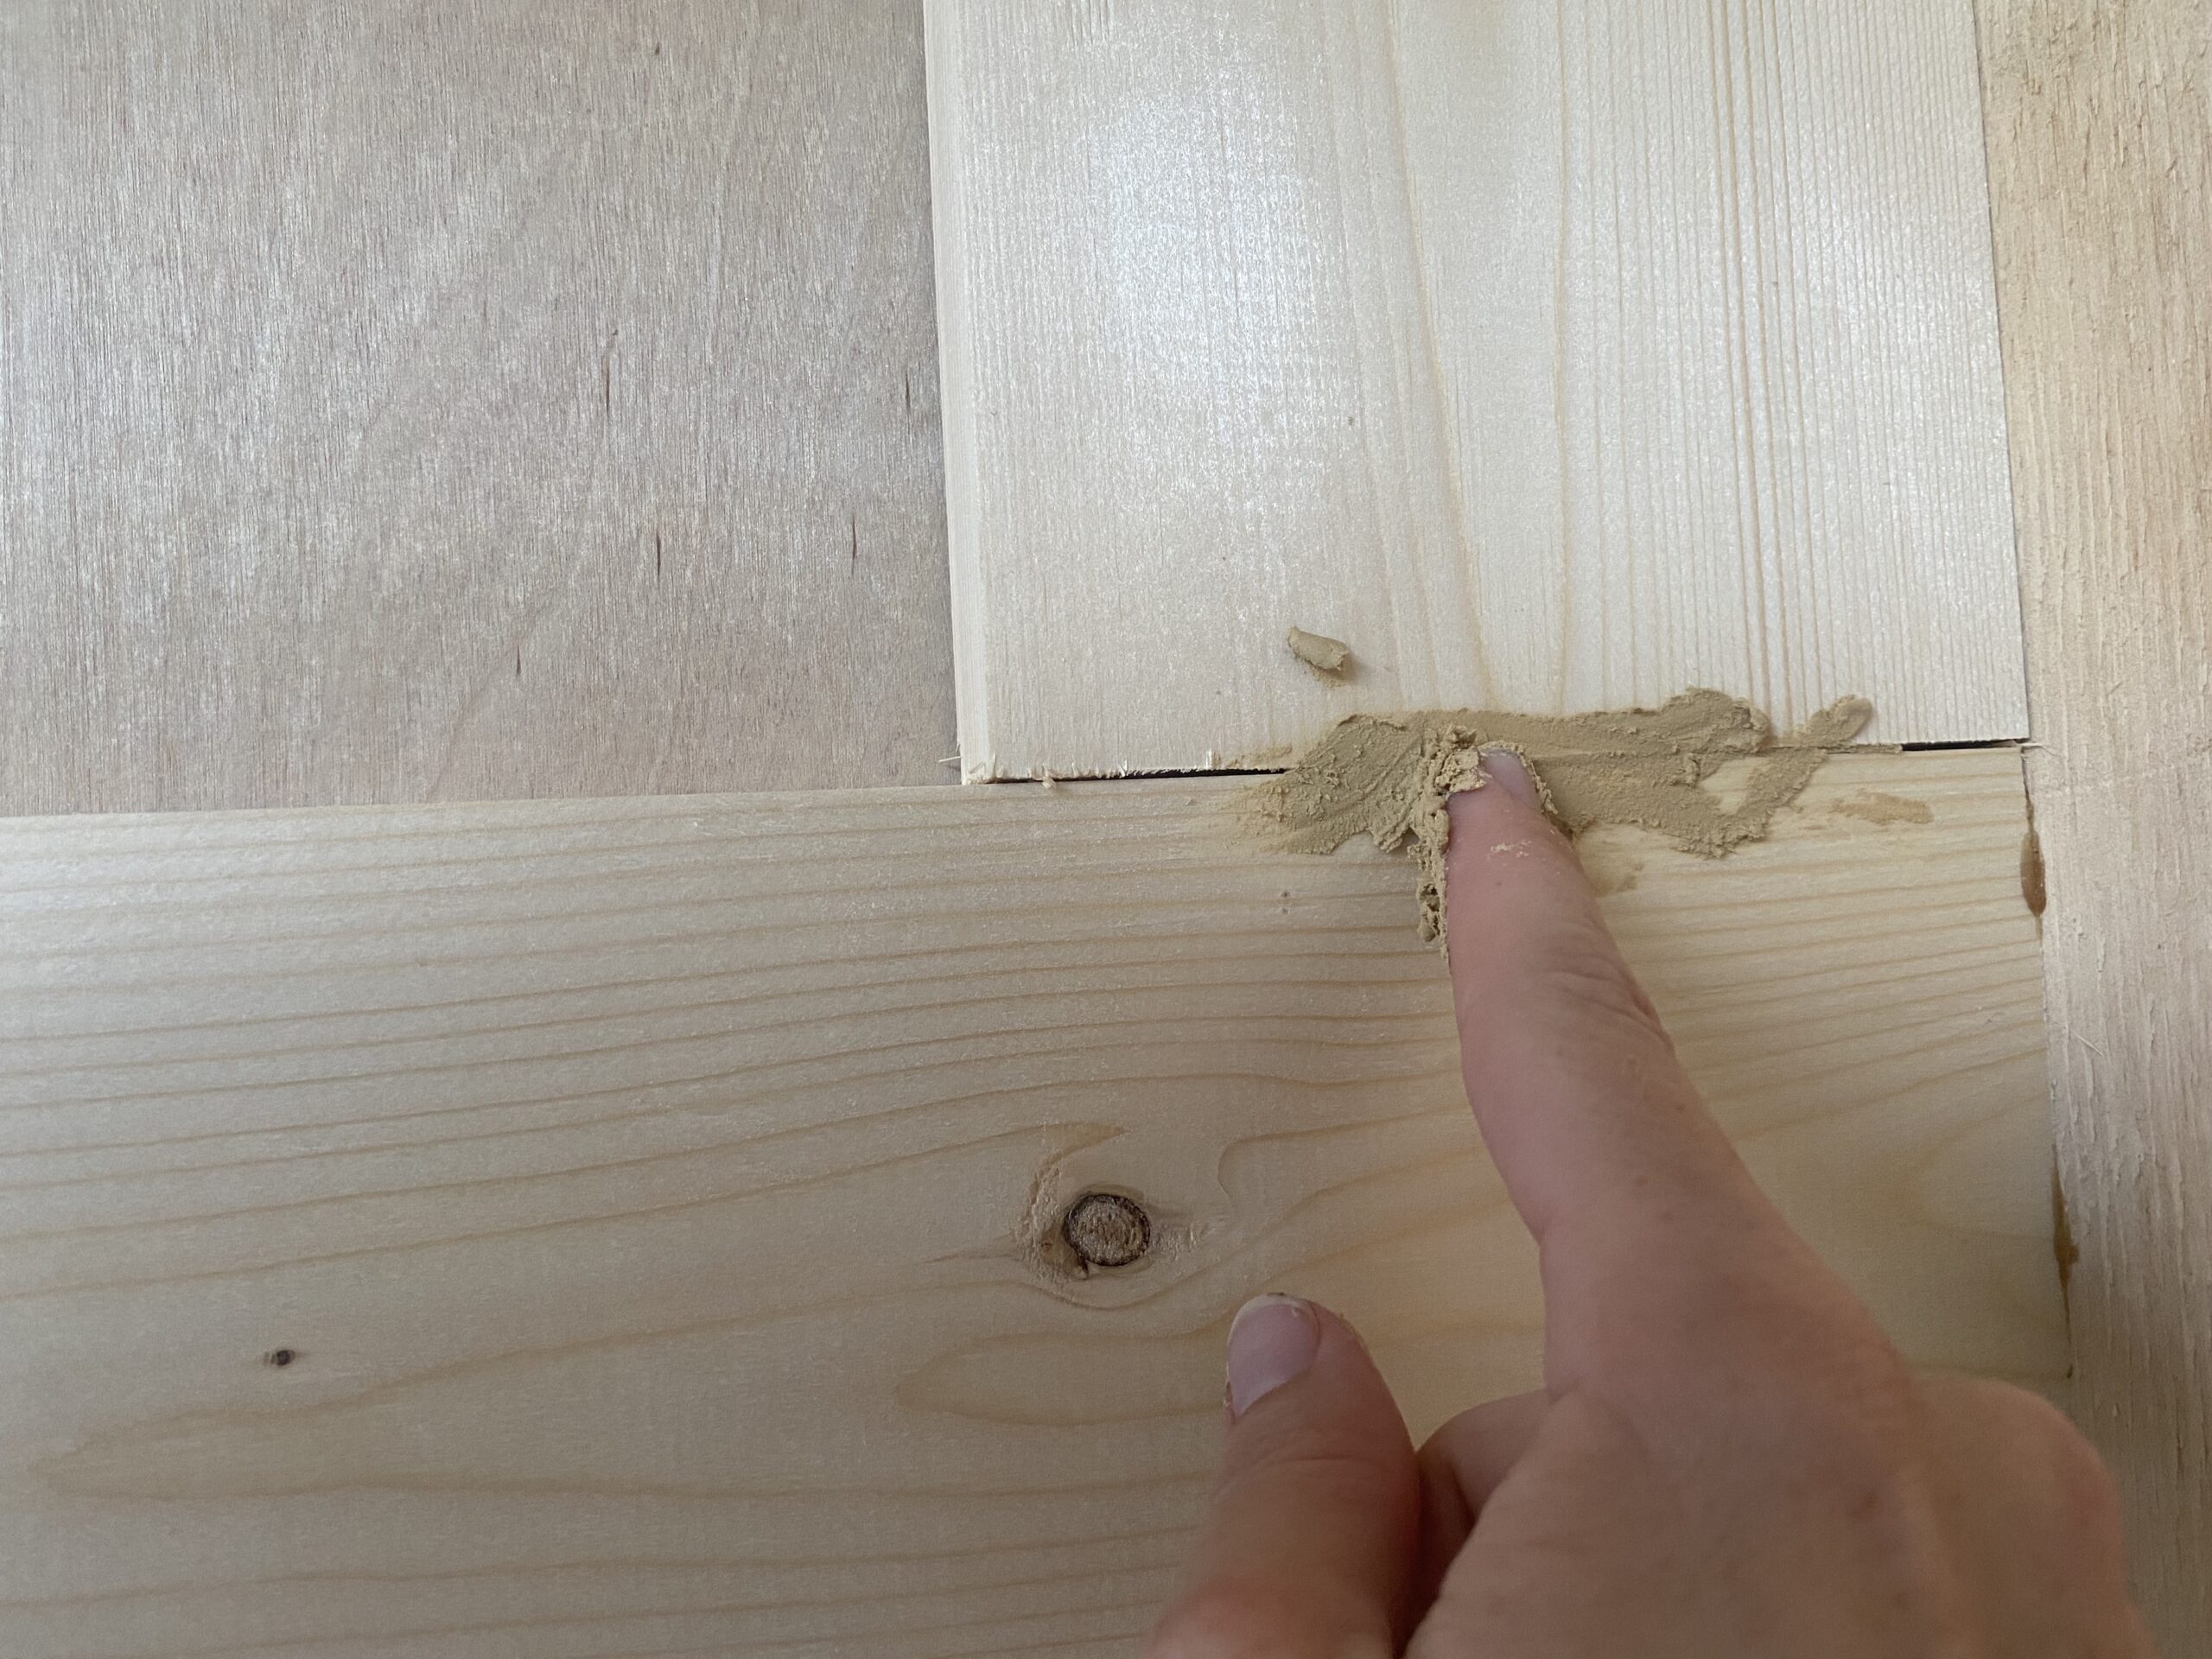
Apply caulk to all inside seams and wood filler to outside or flush seams and nail holes. Once dry, sand everything down with 120 grit sand paper.
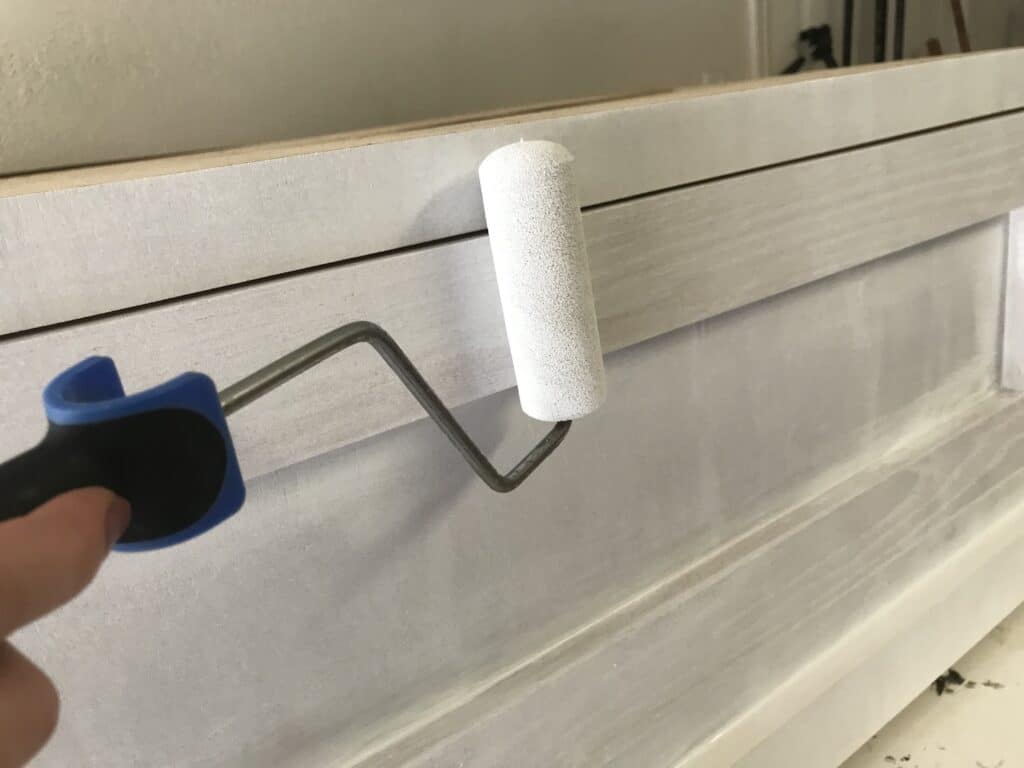
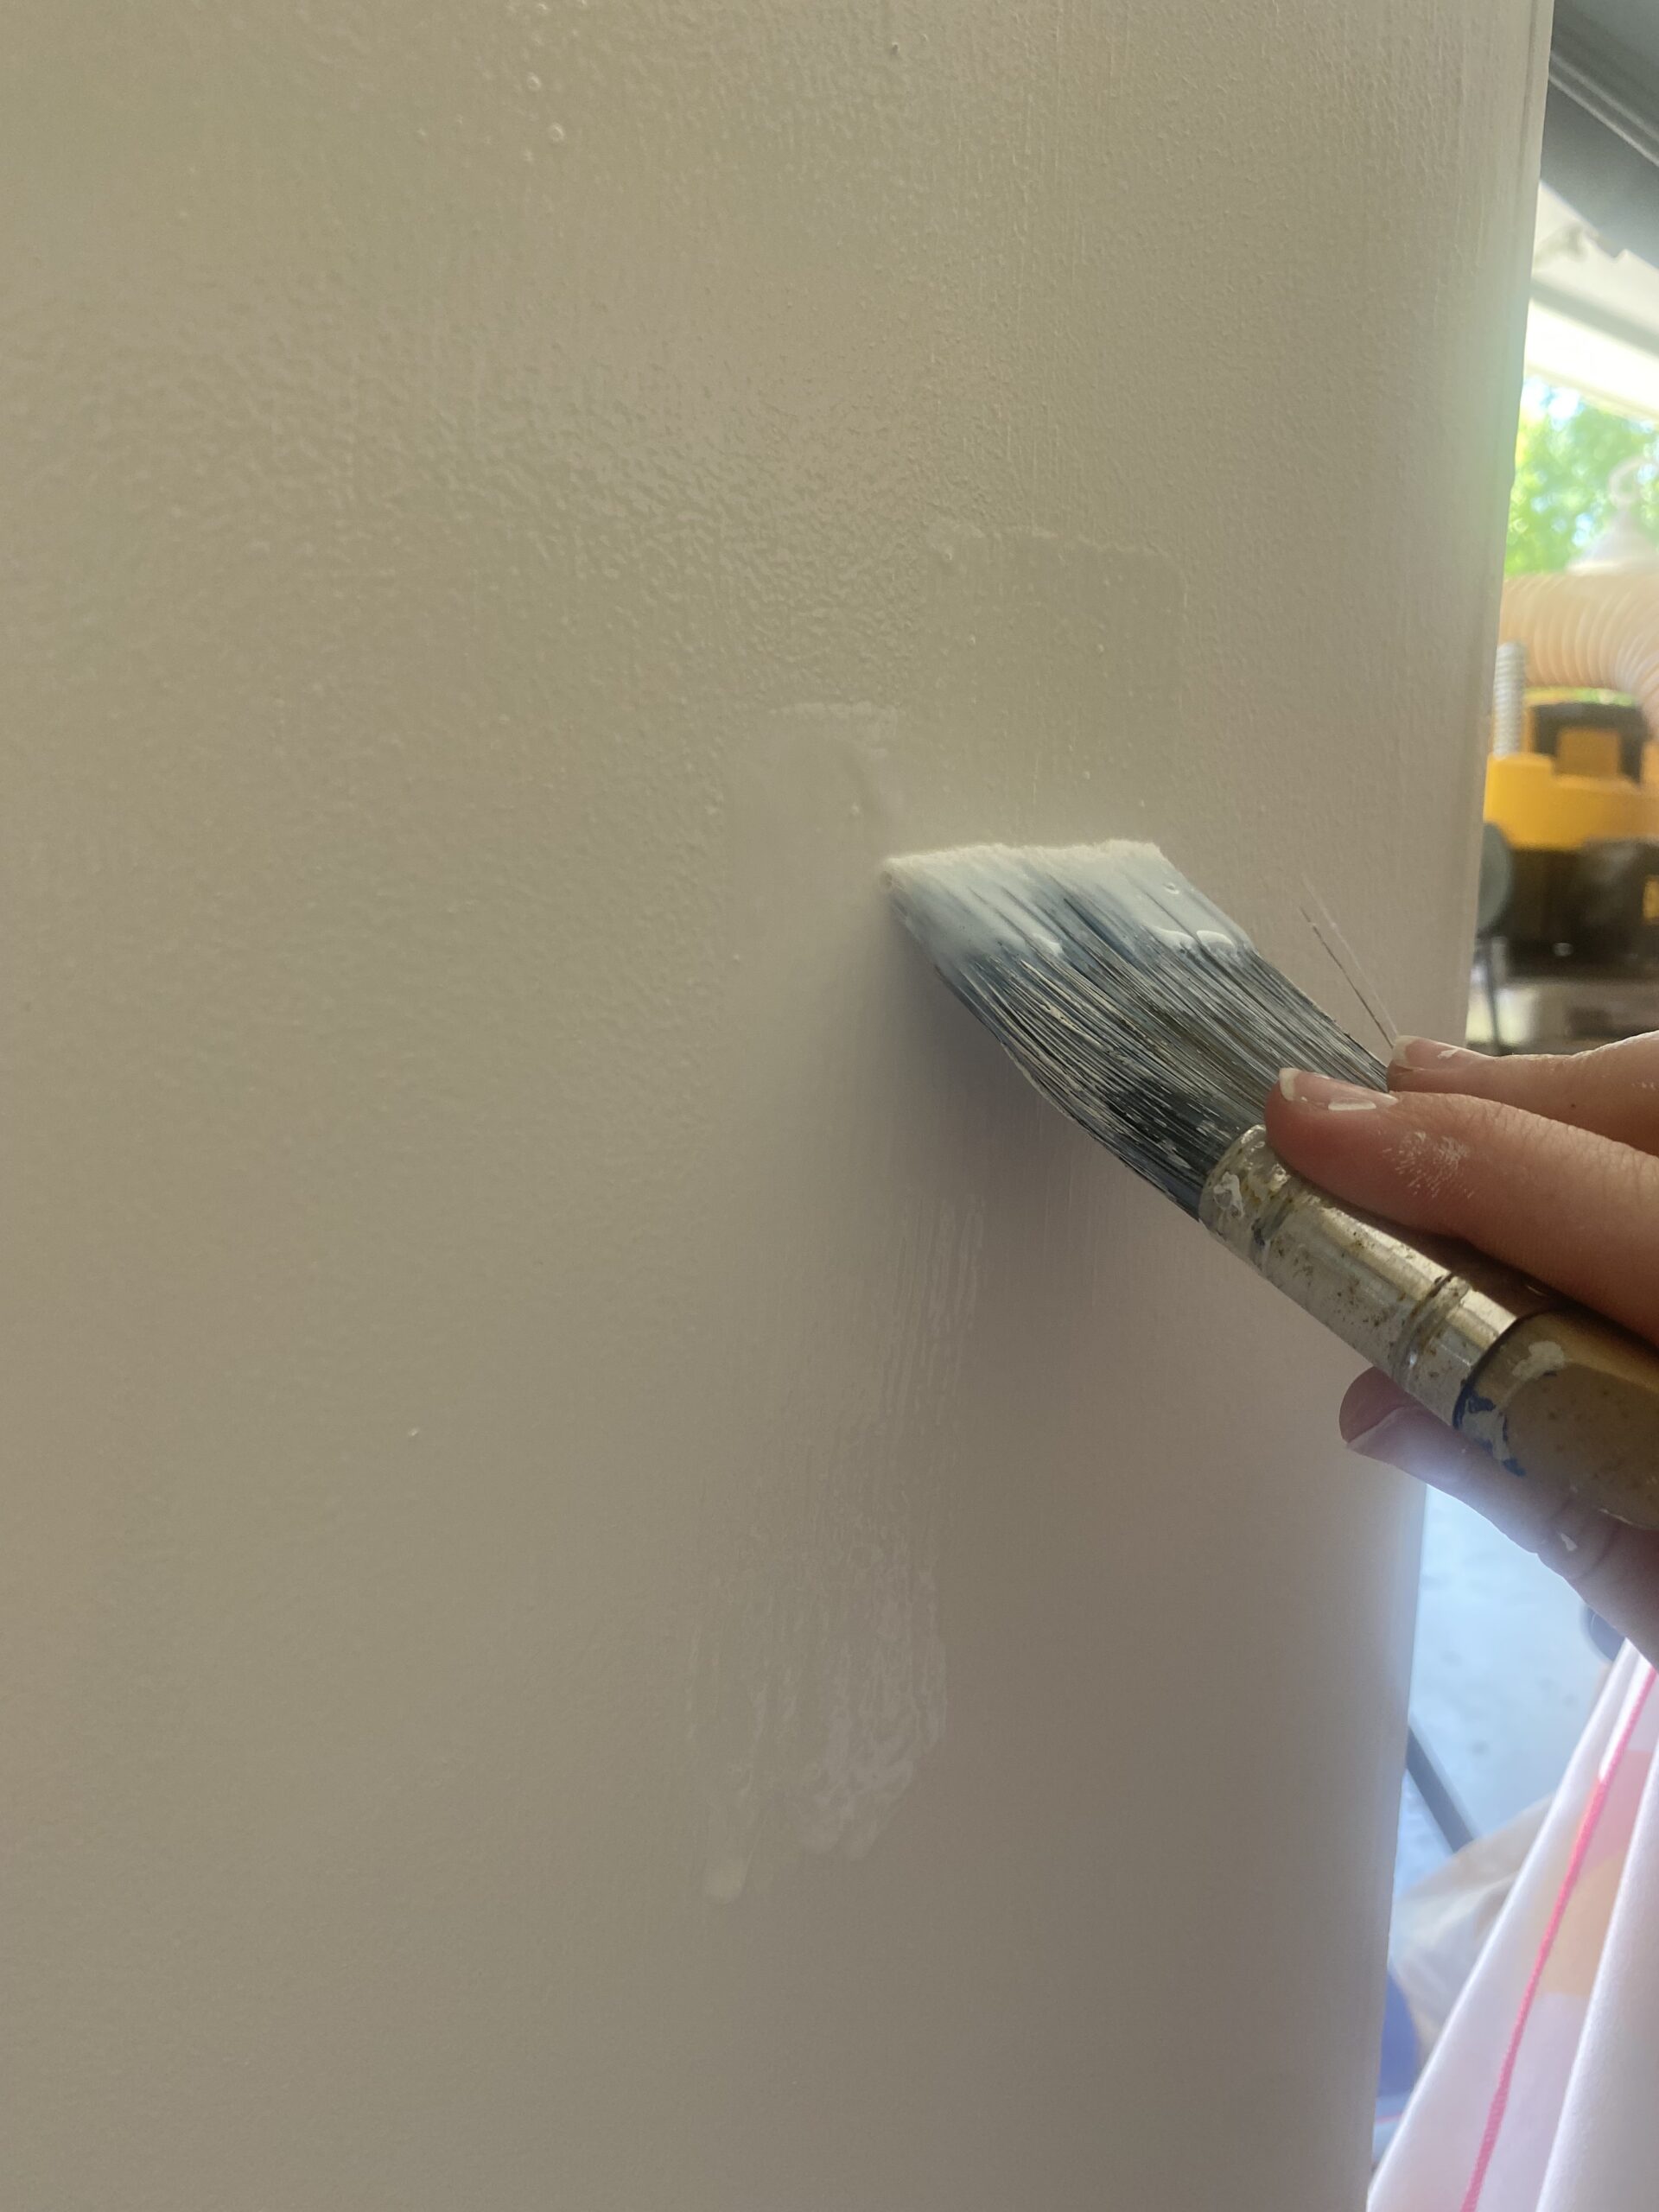
You can now apply the primer, paint, and sealer. For tips on the best way to get a smooth paint finish on cabinets, check out that post!
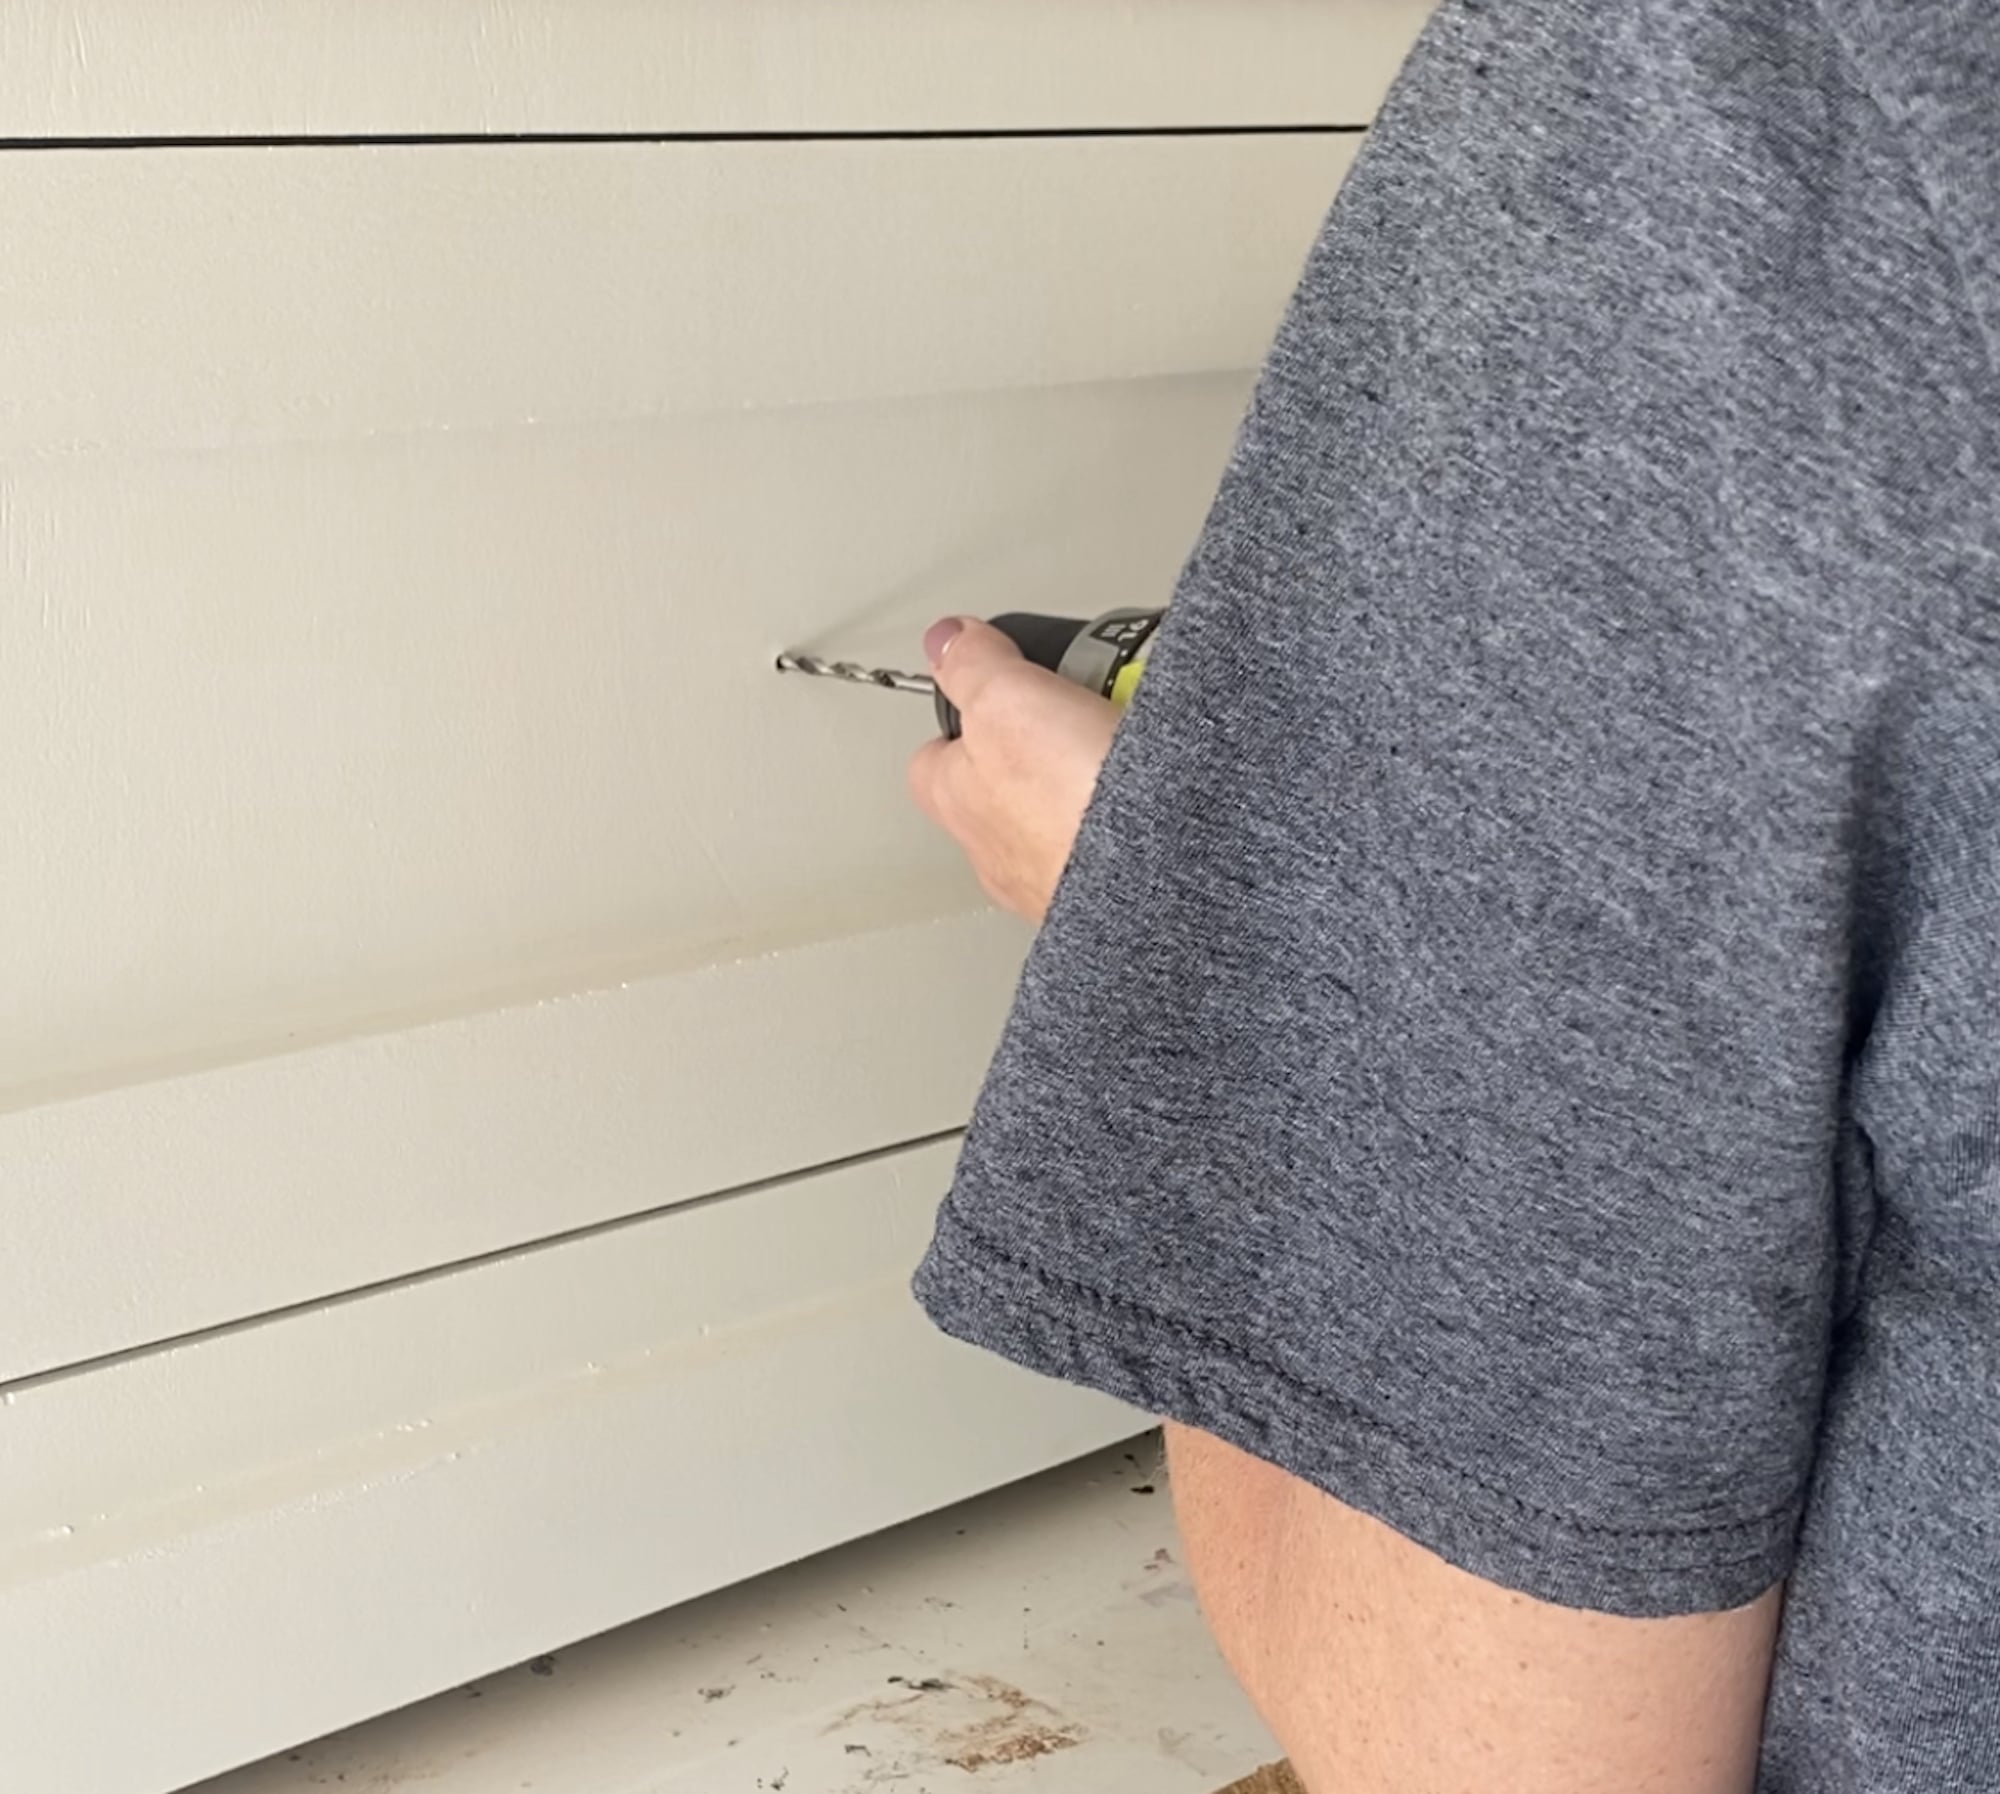
Step 8: Add the Hardware
I used this bar pull for the drawer. To install the hardware, I used the Milescraft HardwareJig. It made installing all of the hardware a breeze! I highly recommend it for any cabinet hardware install job you do.
I love that this part of the hall tree build is a stand alone project of it’s own. This storage bench would look great as an entryway bench to provide a seating area, or it is a great solution for storing toys! Since it is a large drawer, you could easily organize the inside with storage baskets.
For another bench project idea, check out this live edge waterfall edge bench project! Another great project for an entryway space is this wooden mosaic doormat.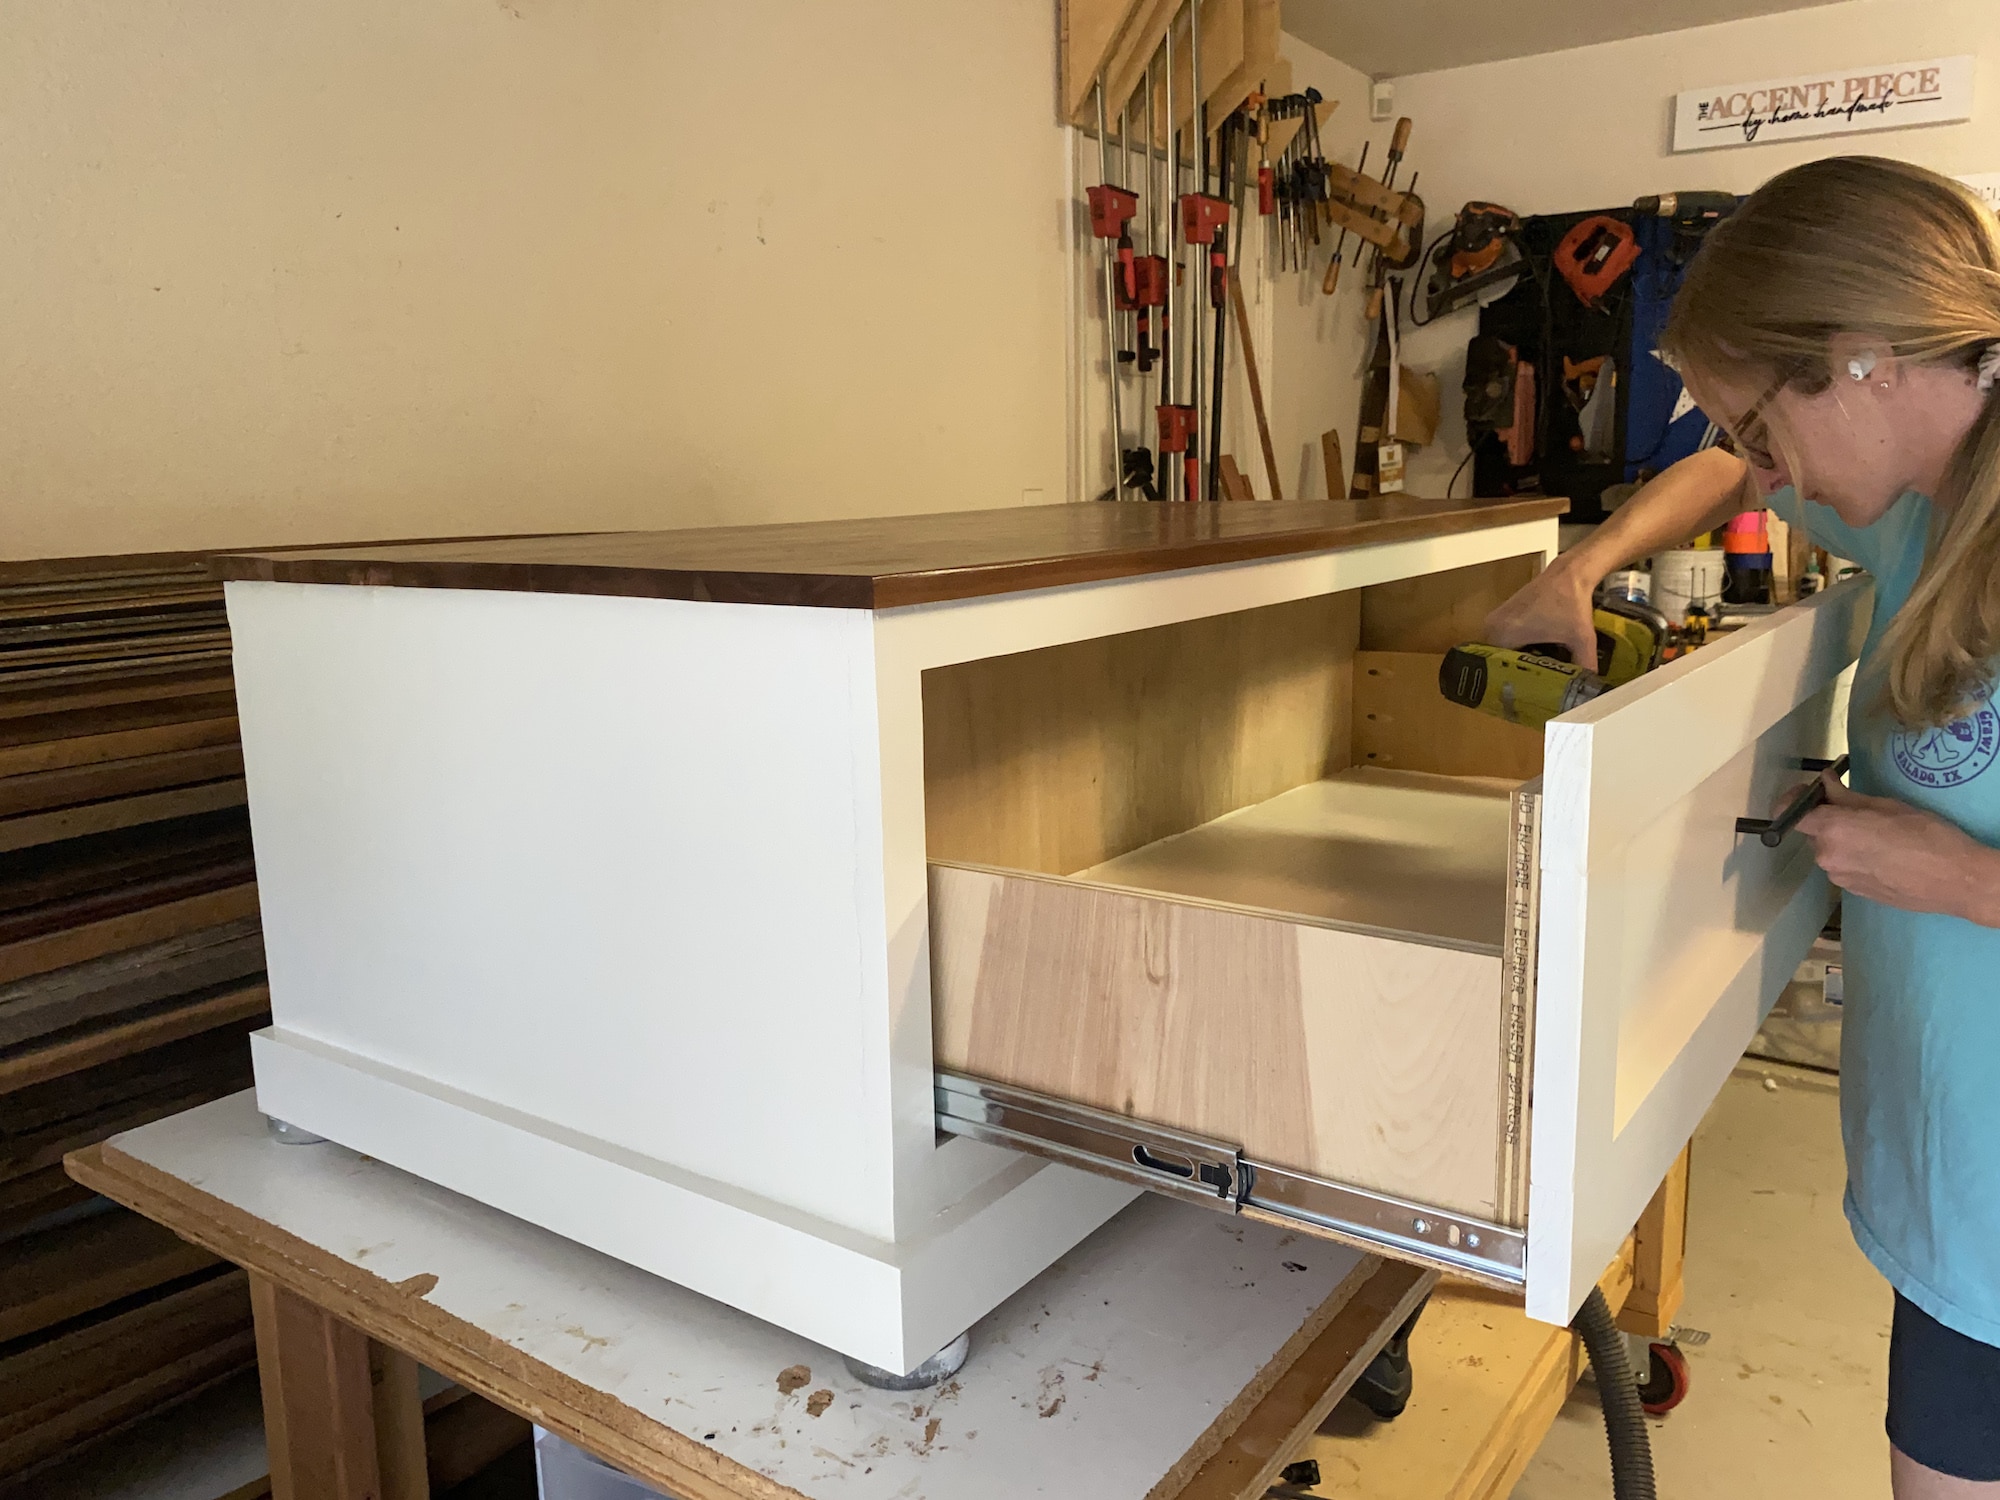
Part 1 is done! See, drawers aren’t so bad, right?? They’re actually pretty simple, thanks to Milescraft! Now that you have a place to hide those dirty shoes, let’s move on the Part 2.
Part 2: Build the Upper Cabinets and Coat Hooks
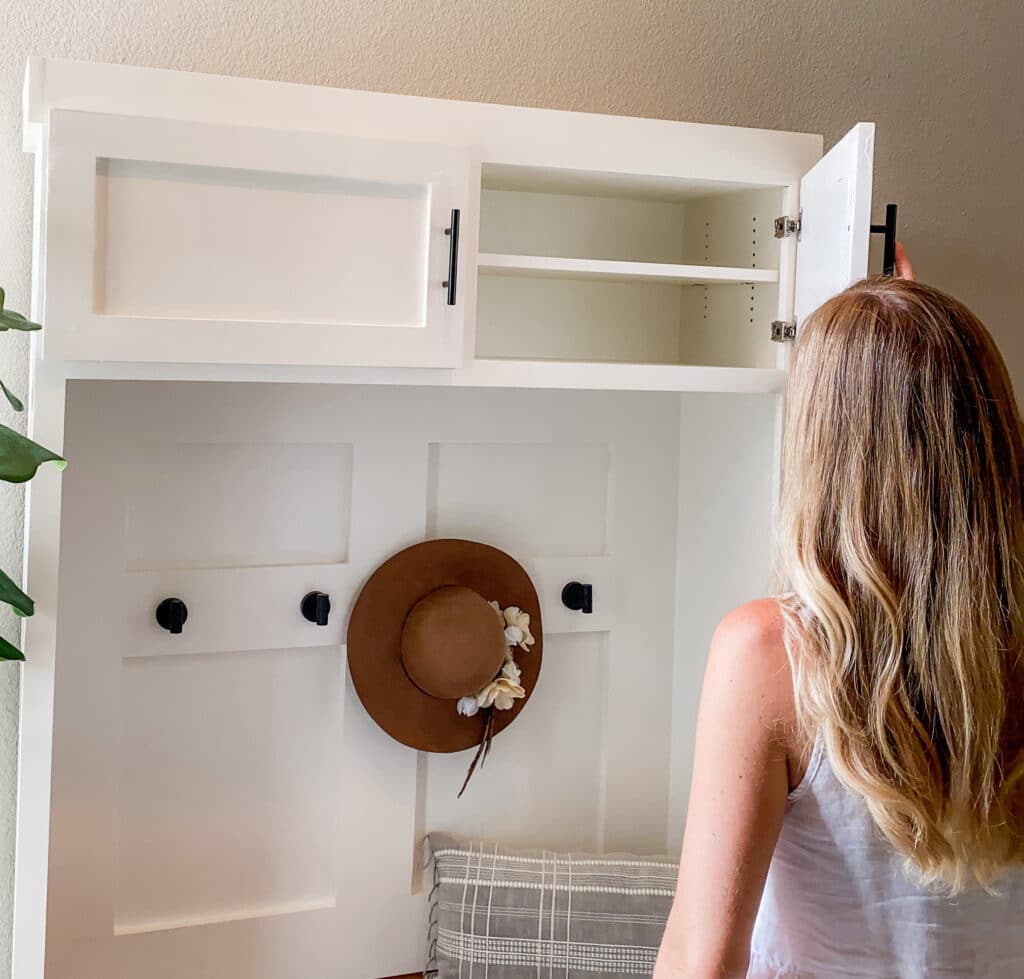
Alright, on to the second part! This is when you will build the upper section of the hall tree. This part will include coat or backpack hooks and upper cabinets with an adjustable shelf.
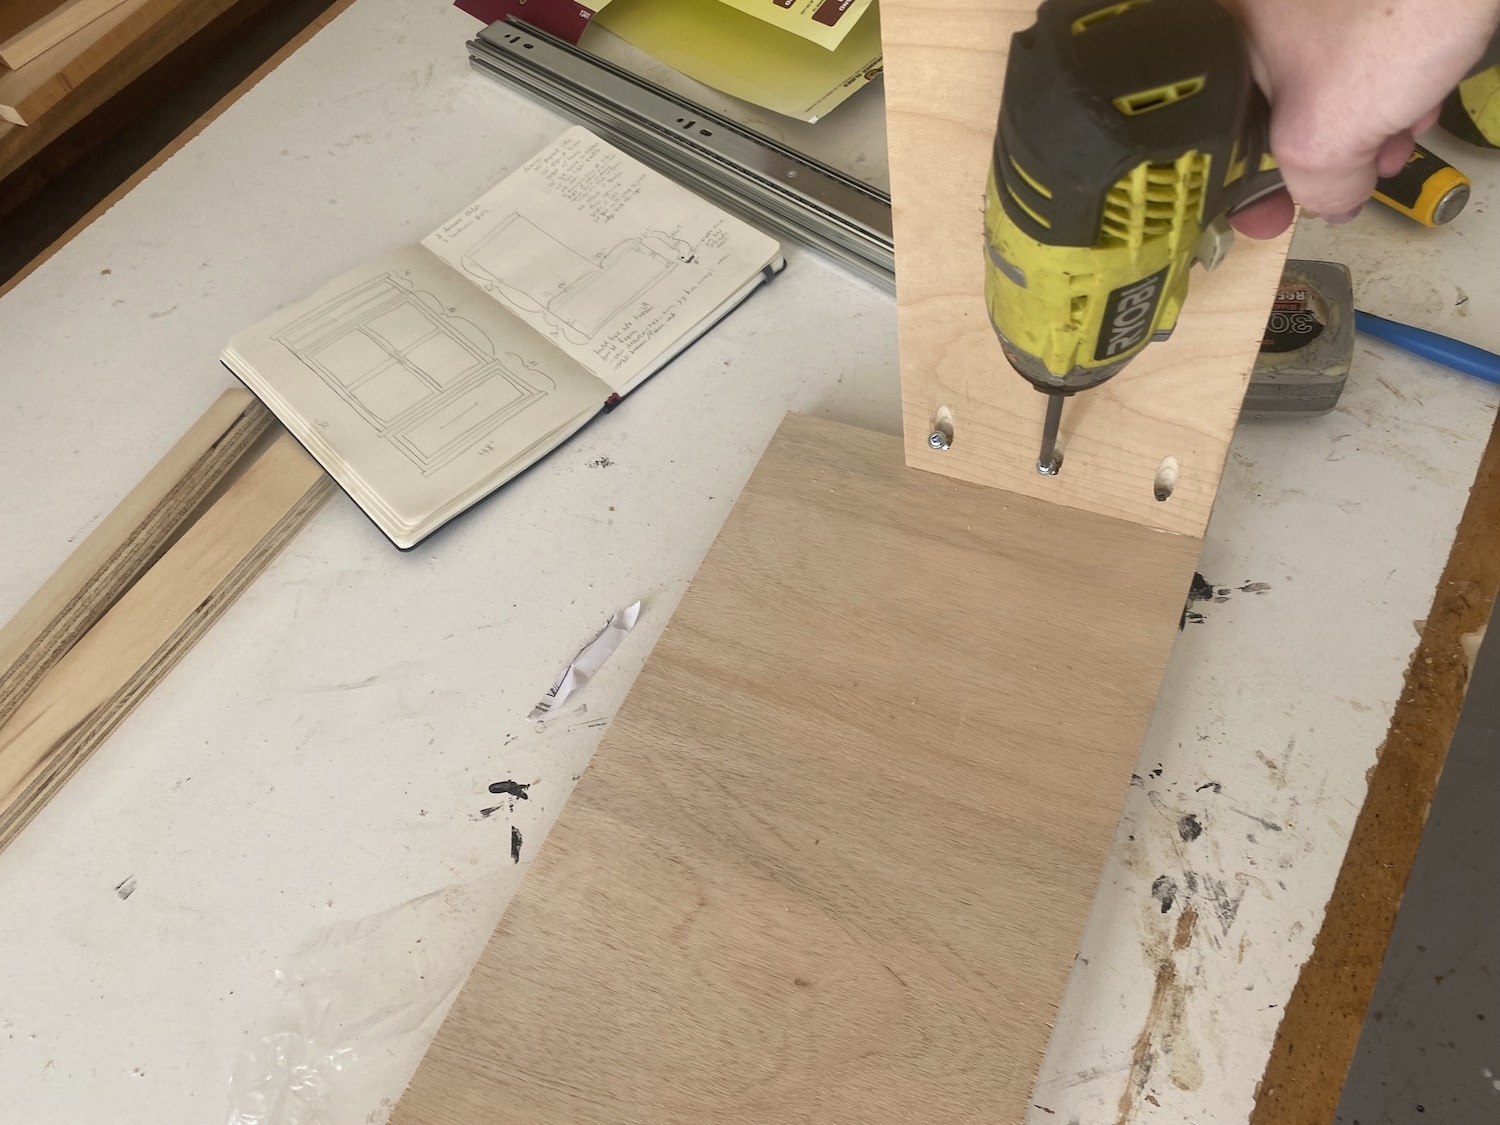
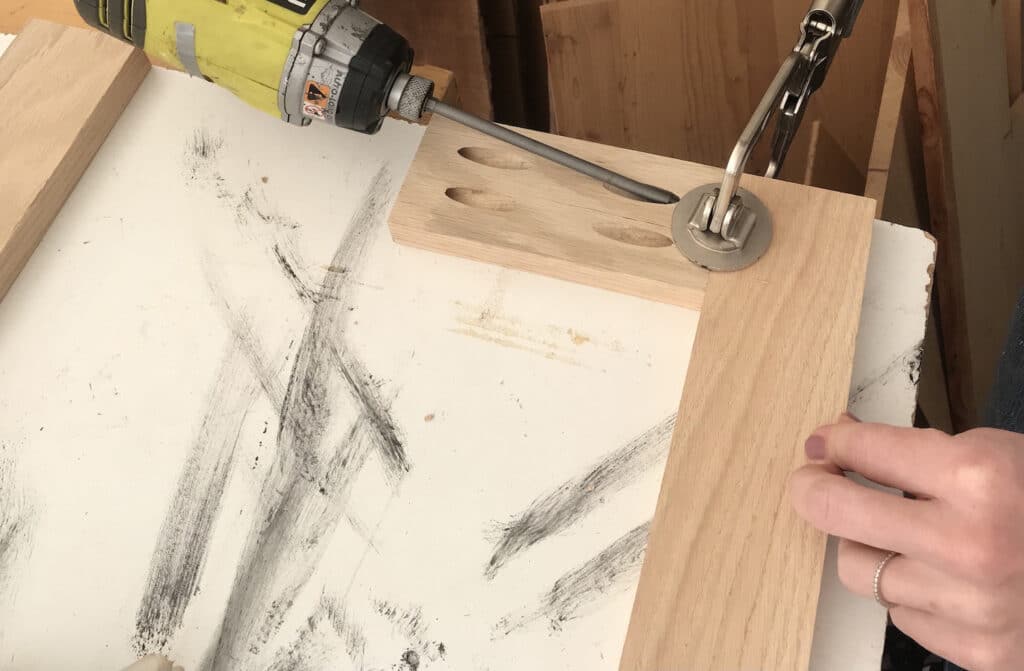
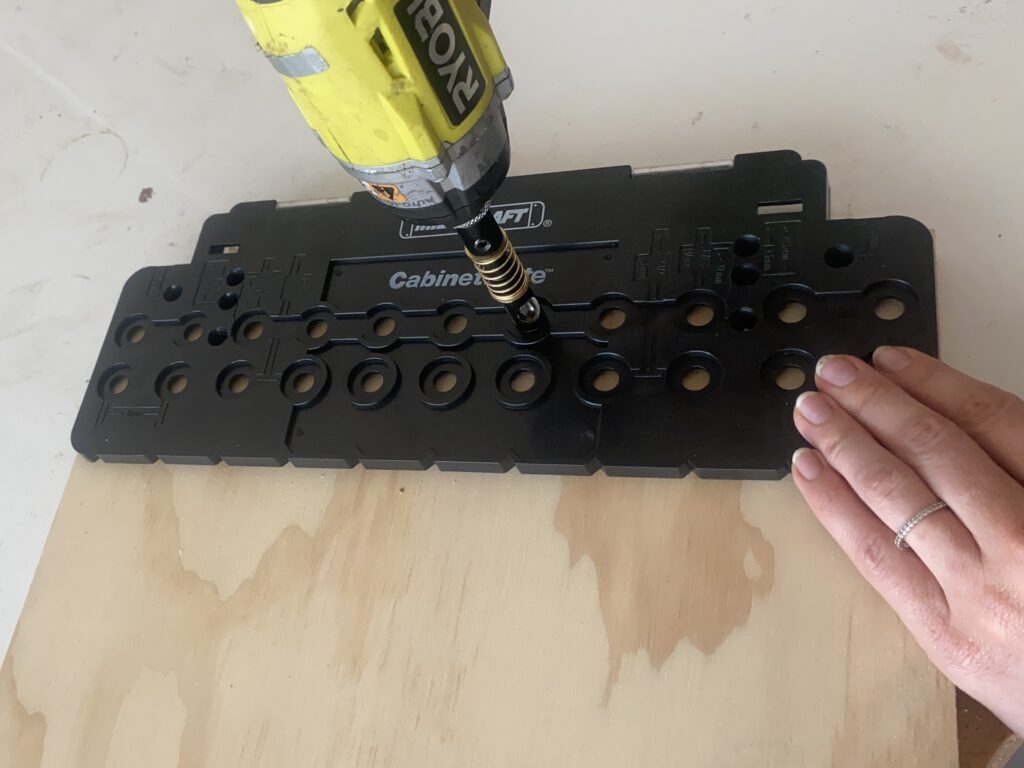
Step 1: Drill the Shelf Pins
The CabinetMate from Milescraft is an awesome shelf pin jig. True to Milescraft products, they thought through every step when it comes to installing shelf pins for adjustable shelves. The adjustable shelf panels create even more organization and function.
I will briefly touch on the process of using this jig to drill shelf pin holes, but you can find a more in-depth post on the best shelf pin jig here. For tips on how to use a power drill with a drill bit like this, check out this post!
This step was easiest to do before the upper cabinet was assembled.
Step 2: Assemble the Frame
Follow the provided plans to assemble the frame of the upper section of the hall tree. As always, use wood glue and pocket holes, taking care to hide the pocket holes when possible. To find more tips on how to hide screw heads, check out this post!

Step 3: Add the Face Frame and Backer
In order to match the style of the drawer underneath, build and install a face frame around the frame on the front edges. This will also come into play later when you install soft close european hinges for the cabinet doors.
Use an 1/8″ backer board for the back panel. I used smooth board, but it you prefer, you could use beadboard paneling for a different look.
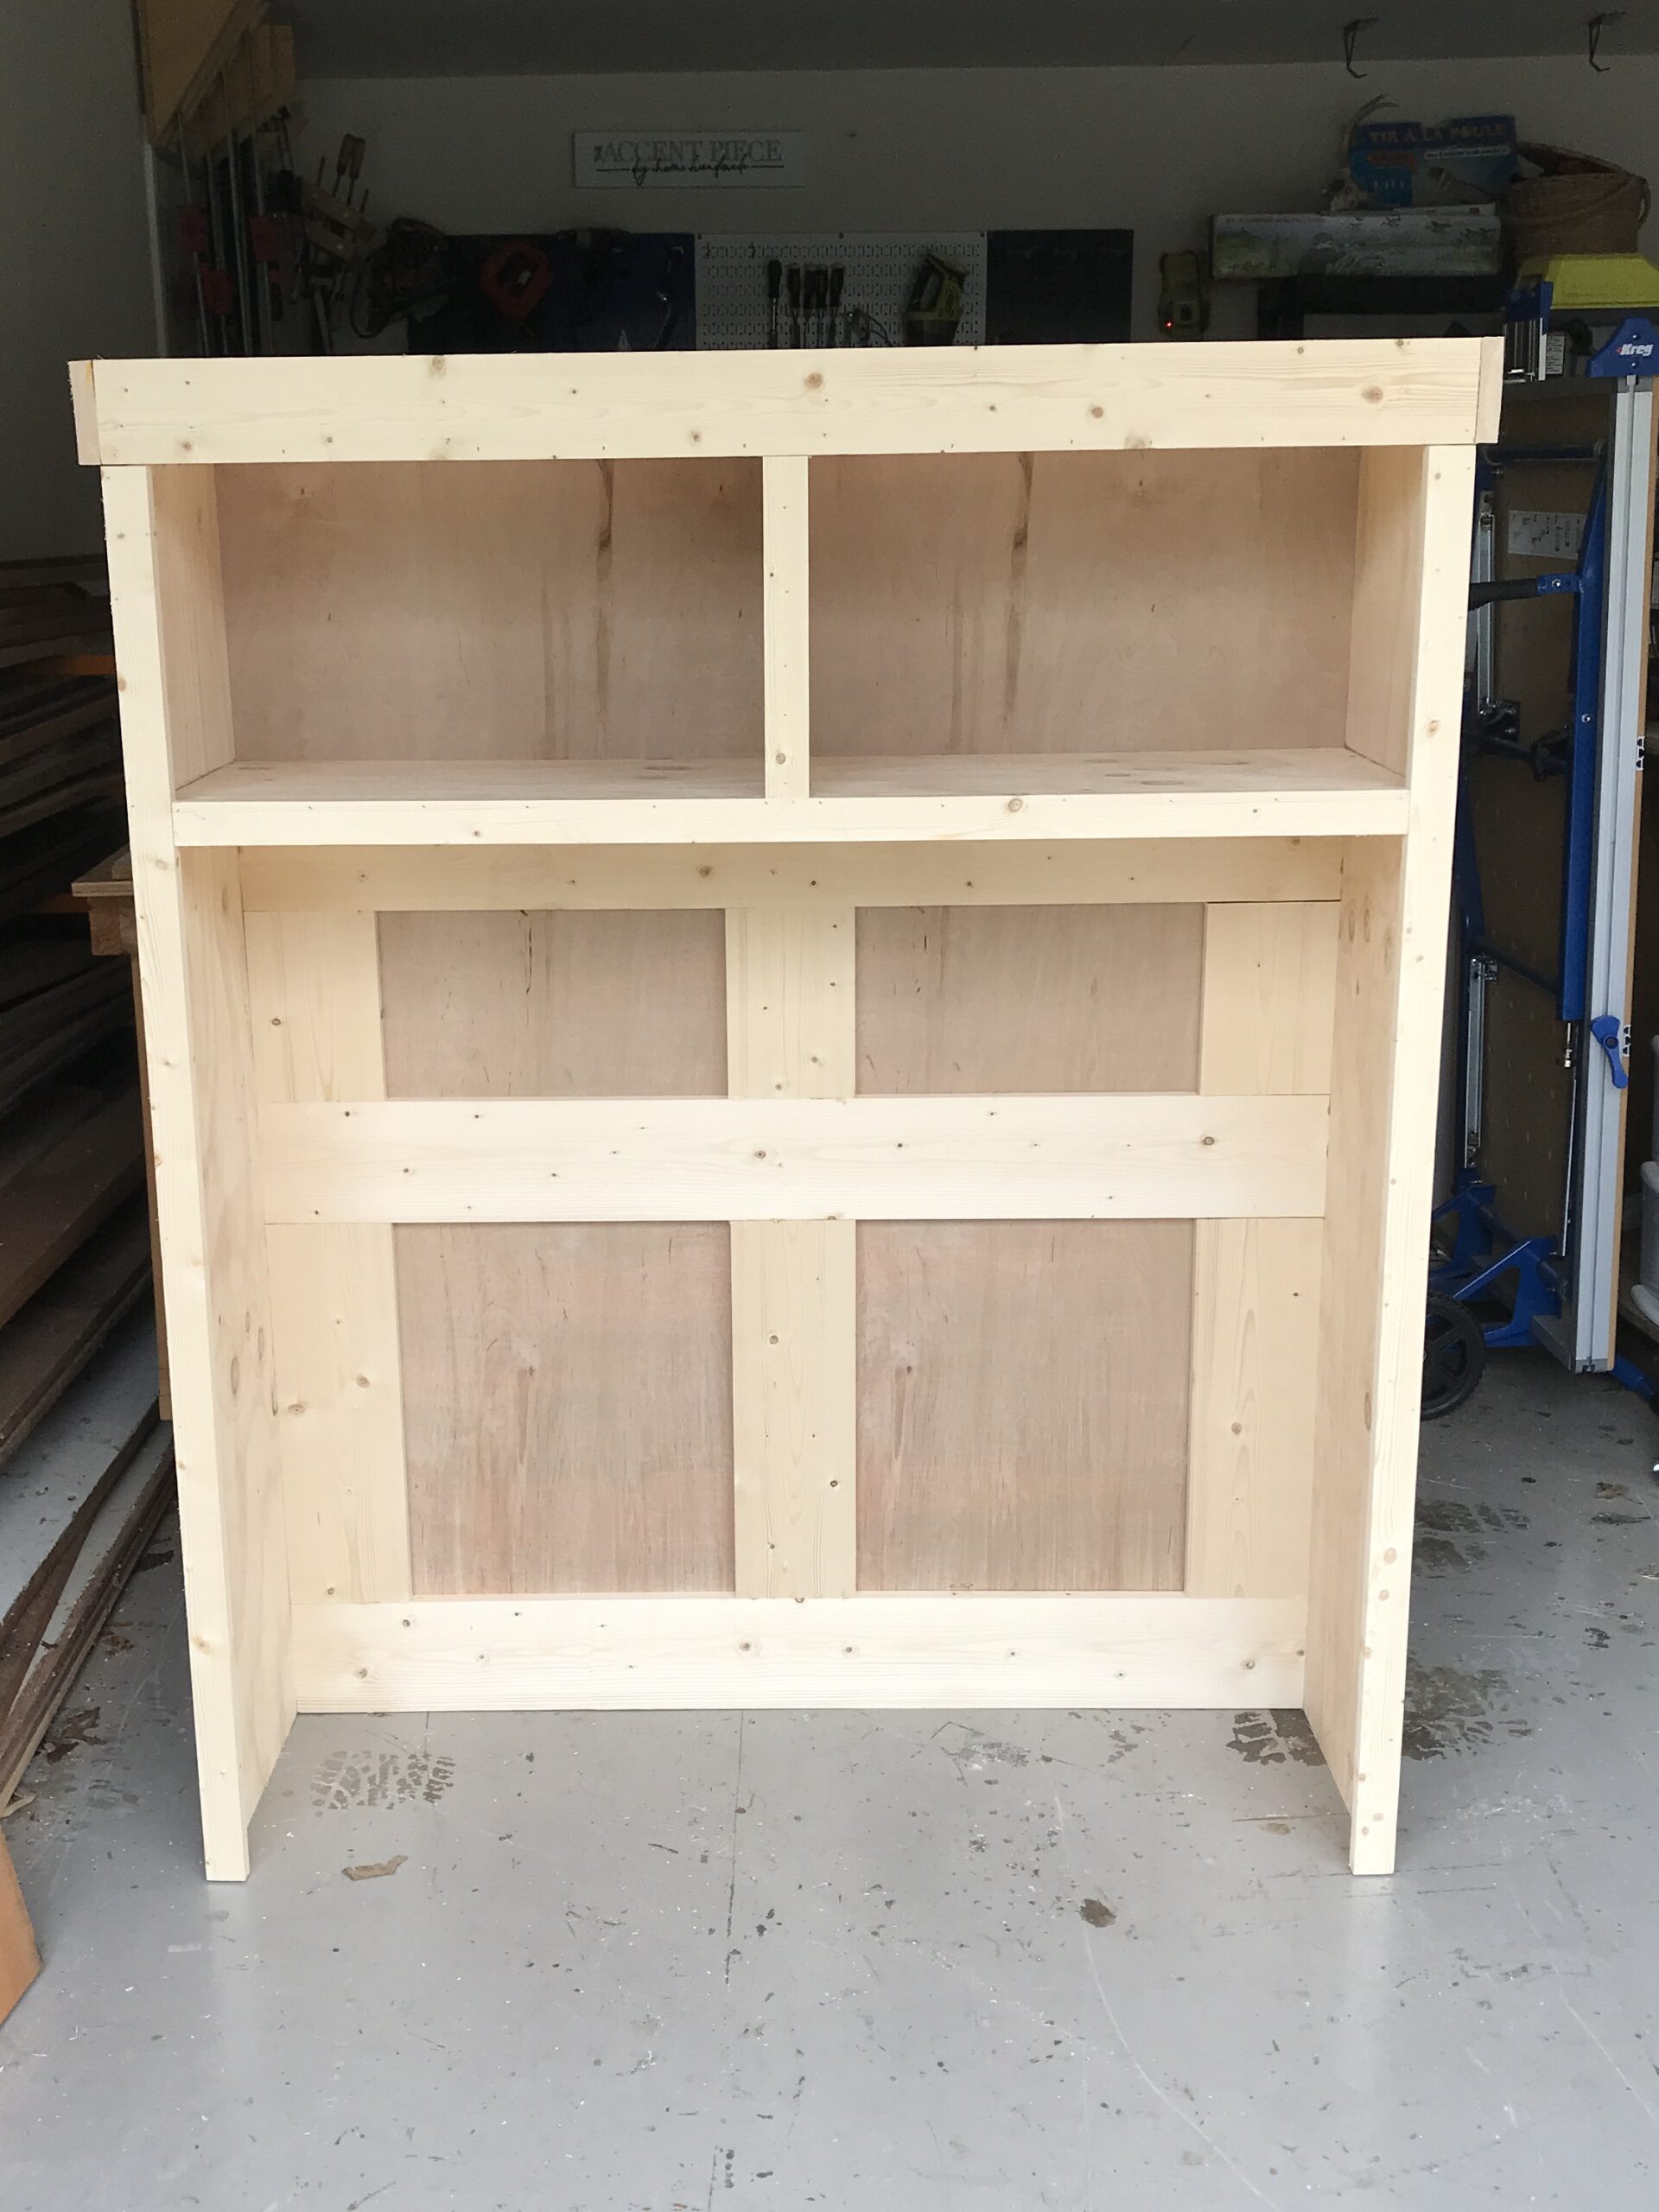

Step 4: Make the Cabinet Doors
I used pine to make the frame for the cabinet doors and it worked great. Just make sure you’re working with perfectly straight boards.
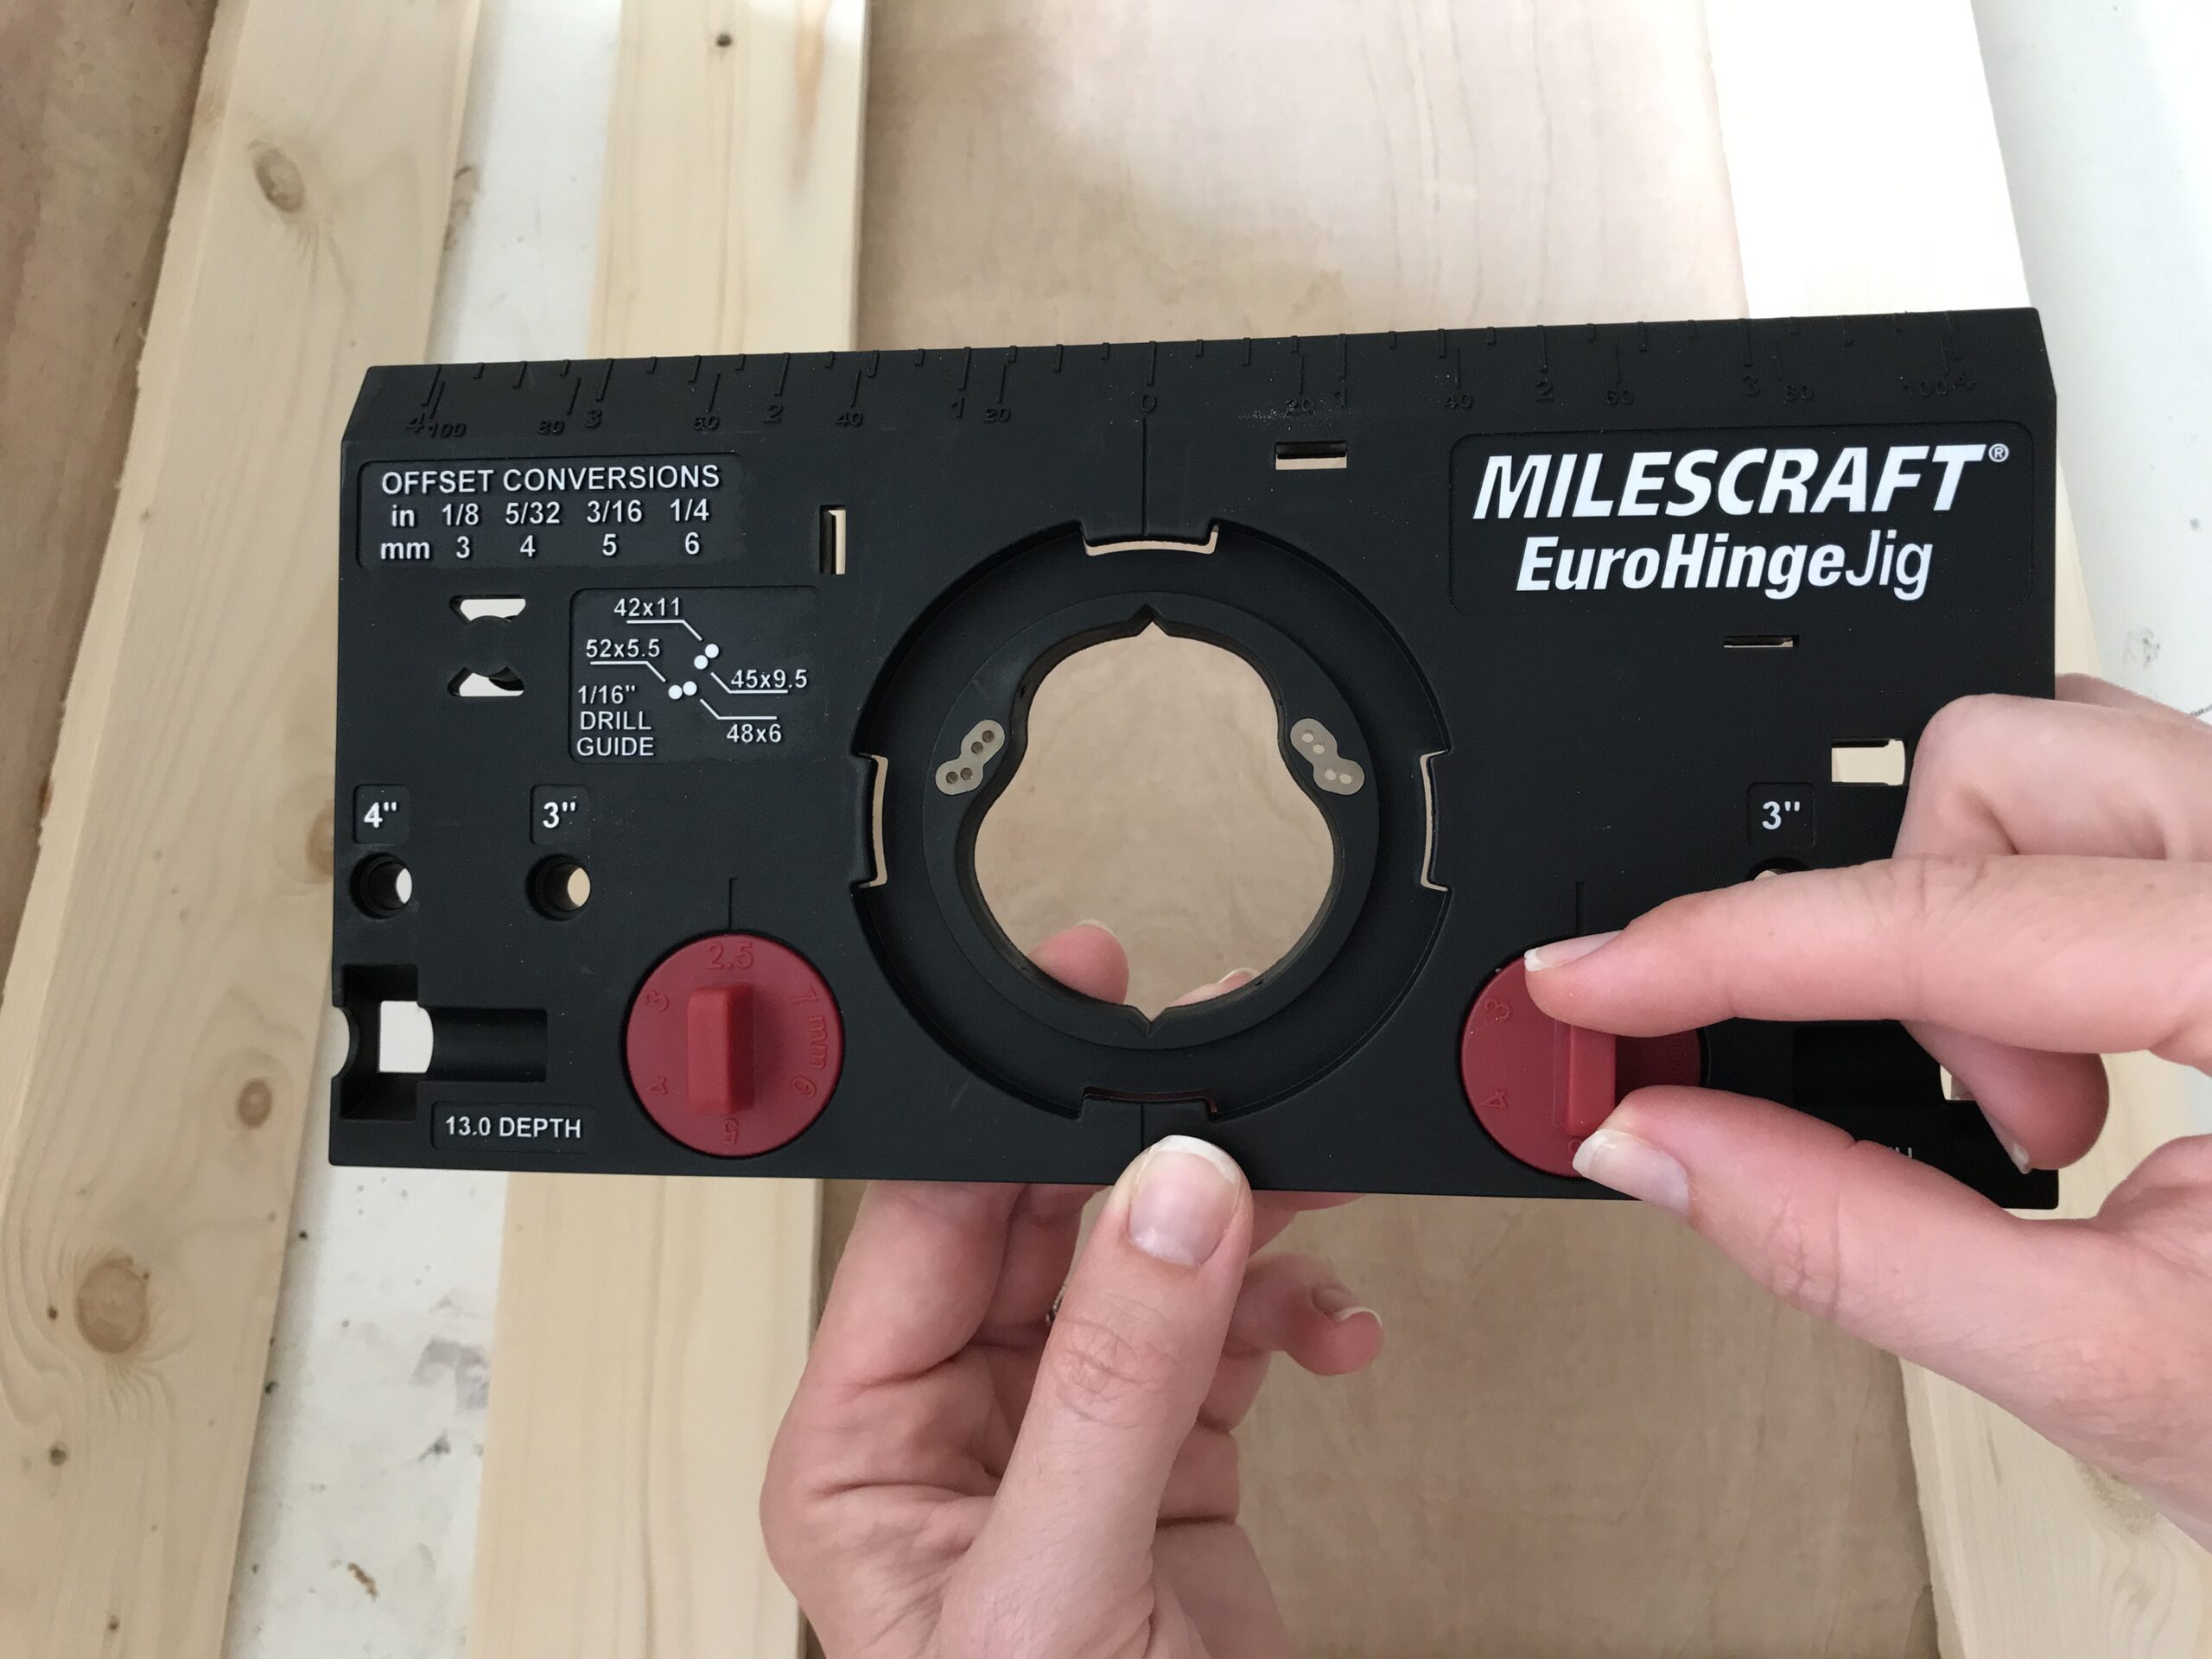
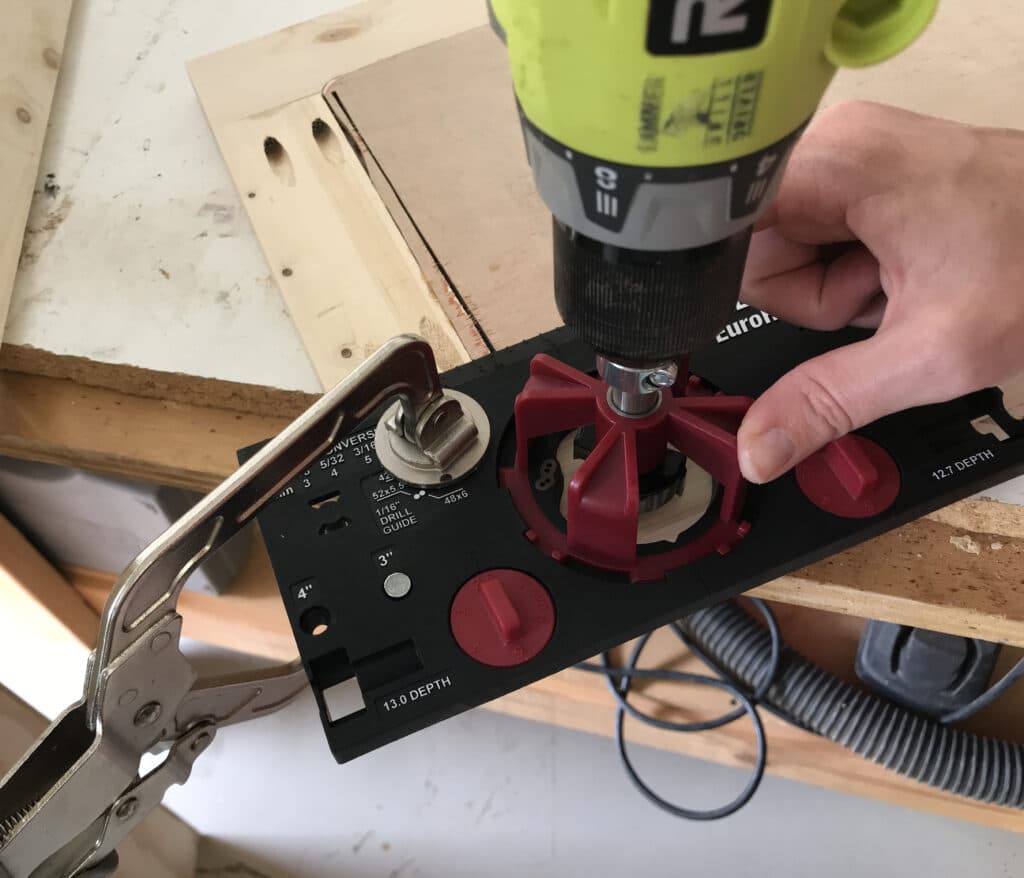
Step 5: Install the Concealed Hinge for the Upper Cabinet
And yet again, Milescraft comes in clutch with a product to make cabinet building so much easier. The EuroHinge Jig Jig made installing these soft close European style hinges very easy!
You can find a deep-dive post on how to install European hinges on face frame cabinets in this post!

Step 6: Fill Nail Holes, Caulk, Paint, and Seal
For seams that are flush, use wood filler. For inner corner seams, use caulk. Be sure to use paintable caulk.
Once the wood filler is dry, sand flush with 120 grit sandpaper.
Apply a couple coats of sealer so that this piece can have years of heavy use without any damage.

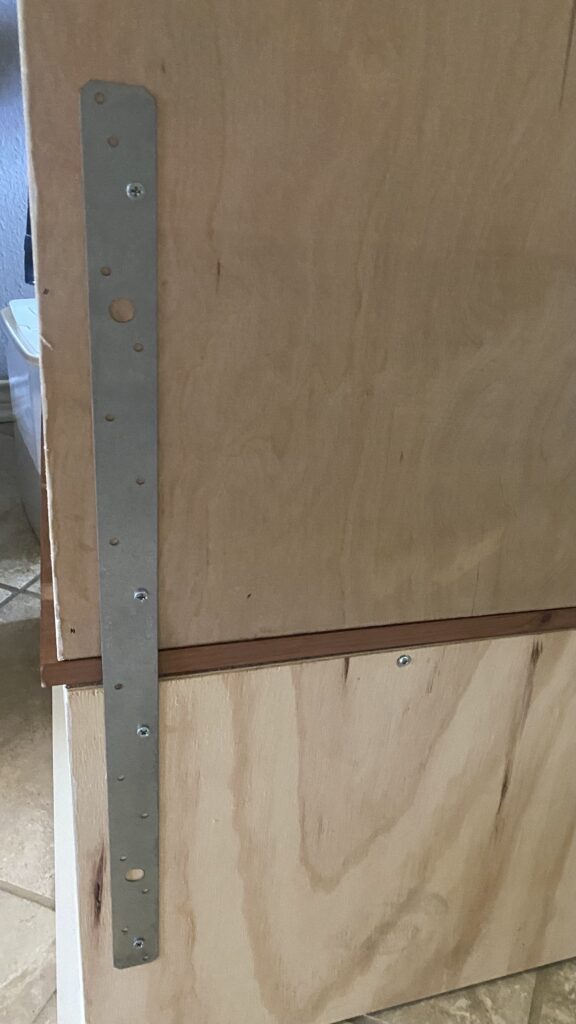
Now that both parts are done, you can secure them together from the back with a metal rod. This will ensure that it won’t tip forward.
Kudos to all who made it to the end of this post, and even more kudos to those who completed this hall tree build! Thanks to all the jigs from Milescraft, this proved to be an easy DIY mudroom bench project.
And now for the fun part! Decorate it with pillows, wicker baskets, or whatever fun stuff you can find! These mudroom lockers are perfect for a large family in need of some storage and organization.
I installed these matte black storage hooks and cabinet pulls, but brass hardware would be beautiful too.
For a similar project, check out this rustic square coffee table build or this post on how to paint a dresser black. I did the same finishing techniques in that post.
As always, let me know if you build this and have any feedback. I’d love to hear it!
For a related project, find out how to make mudroom locker built-ins from stock cabinets and a DIY custom closet!
You can find the web story for how to build a mudroom hall tree storage bench here!

Suzie Wible
Suzie has shared her knowledge for over 10 years about building furniture, painting techniques, how to build your dream home, and basic to advanced woodworking skills. Through this blog, readers will feel empowered to create a home and products they love too.