How to Build a DIY Custom Walk-In Closet on a Budget
When I began designing our custom home, the first room I designed was the closet for our primary bedroom. I was so excited about having my dream closet! We had always had a very small closet that we shared and I couldn’t wait to have an organized space with enough room to store all of our closet items.
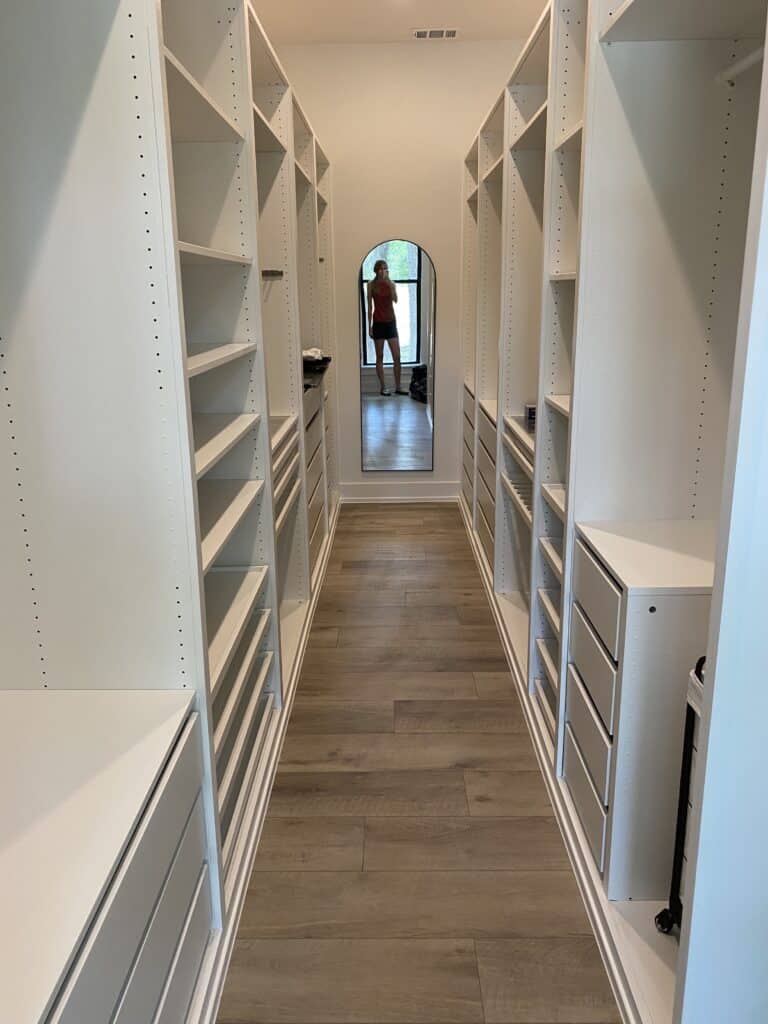
It was also very important for us that we build a custom closet on a budget. Building a new home is very expensive, so we wanted to cut costs anywhere we could. So, I set out to build what I could, and our closet was first on the list!
Basics of a Custom Closet
I did a lot of research while designing our DIY custom closet. I needed to figure out how to save money on building a custom DIY closet, but I didn’t want to sacrifice quality. I also needed something that wouldn’t take too long to build, as we were on a time crunch to finish our new home build on time.
The solution that I came up with is to use Ikea Pax Wardrobes as the base for the custom closet. I then trimmed out the Pax units to make it look built in and custom.
Using Ikea Pax Wardrobes to Make a Custom Closet
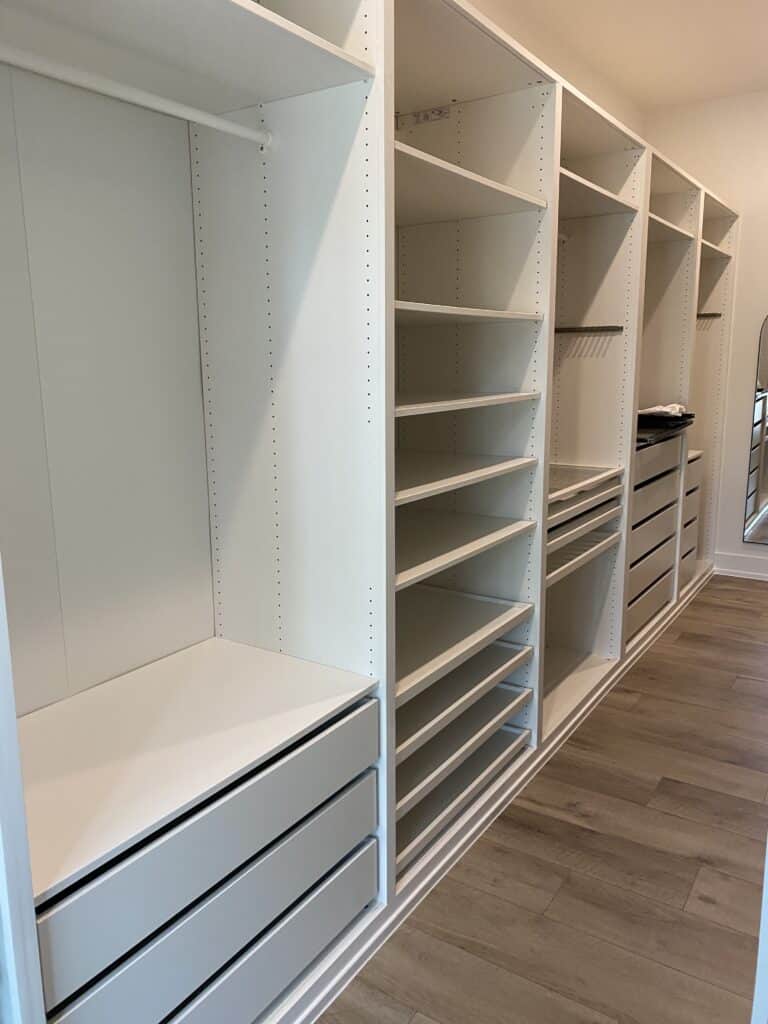
The Ikea Pax Wardrobe fits everything I needed when building out our custom closet. To do this, you will deck out every individual Pax wardrobe with organization modules that fit your needs. You can choose between hanging closet rods, drawers, shelves, pull out shelves, glass shelves, pull out pants organizers, and pull out trays for accessories.
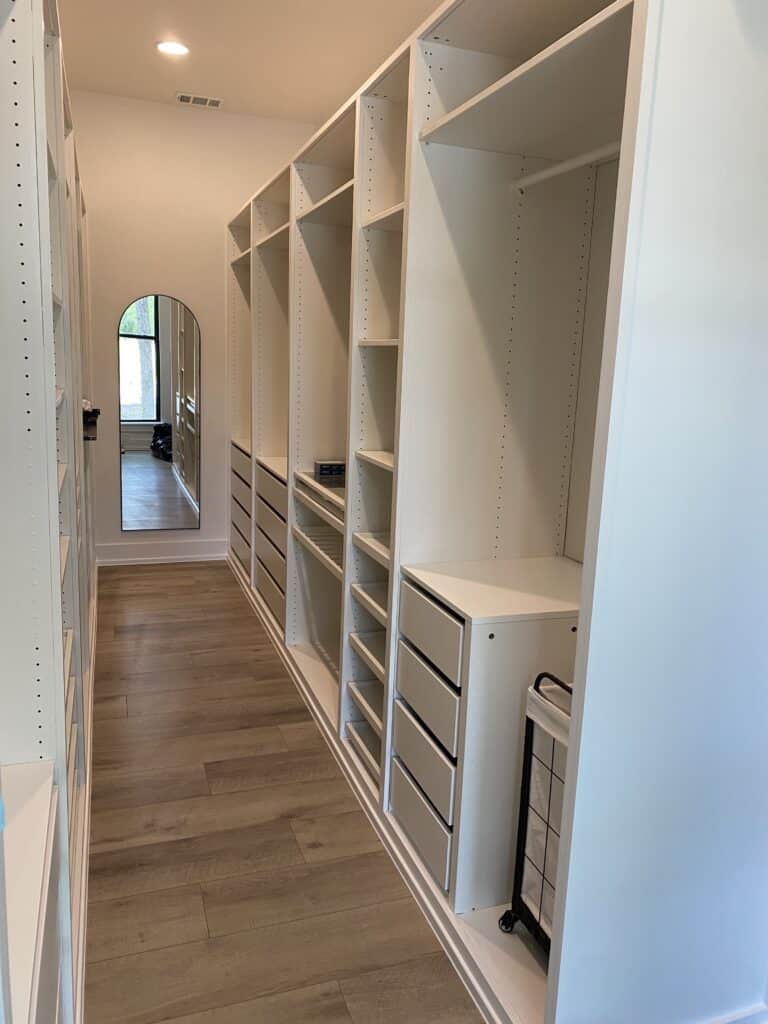
Once the wardrobes have been filled with the closet organizer modules to organize it, you will then trim out the wardrobes with trim. This will give it the custom, built-in look for a fraction of the price.
The end result of your DIY custom closet on a budget will result in a functional, affordable, beautiful, and organized closet!
Step by Step Guide to Building a Custom Closet on a Budget
One thing I love about this DIY project is how attainable it is for everyone to have their own custom closet. The most time-consuming thing is assembling all of the units. However, once they are installed, it comes together pretty quickly!
Gather Materials to Build the Custom Closet
Disclaimer: This site contains product affiliate links. We may receive a commission if you make a purchase after clicking on one of these links.
To complete this DIY project, you will need:
- Ikea Pax Units
- Ikea Komplement Accessories
- Pre-primed select wood trim
- nail gun
- caulking
- wood filler
- table saw
- miter saw
- drywall anchors
- wood shims for leveling
- drill
Step 1: Take Measurements of the Closet Space
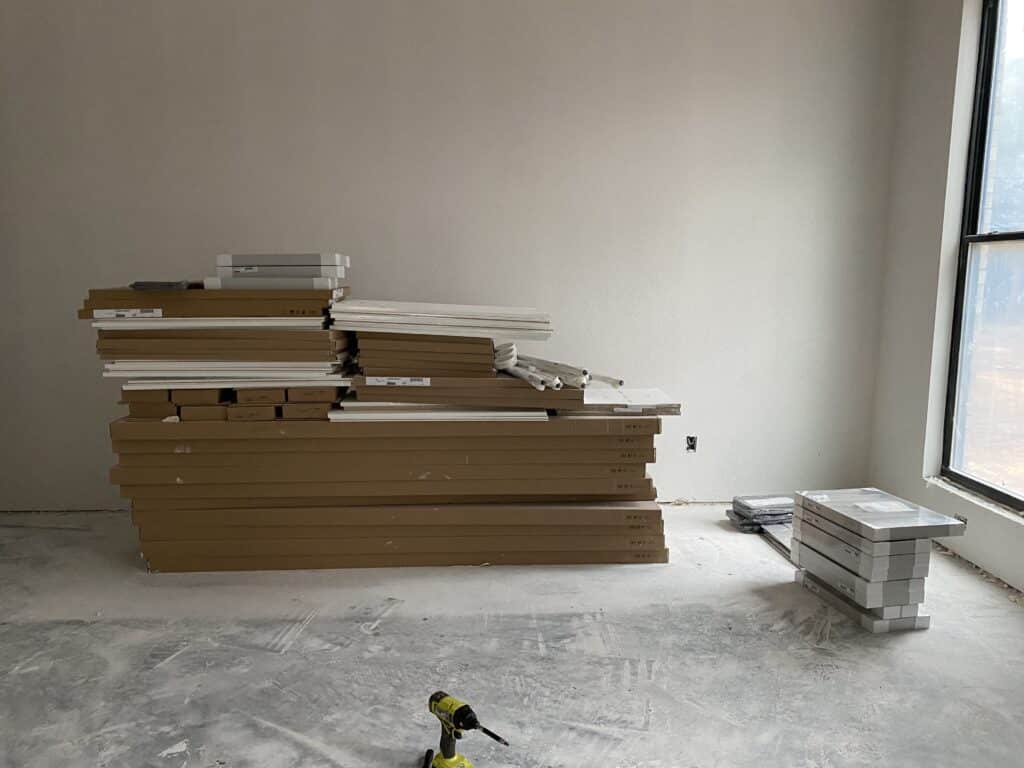
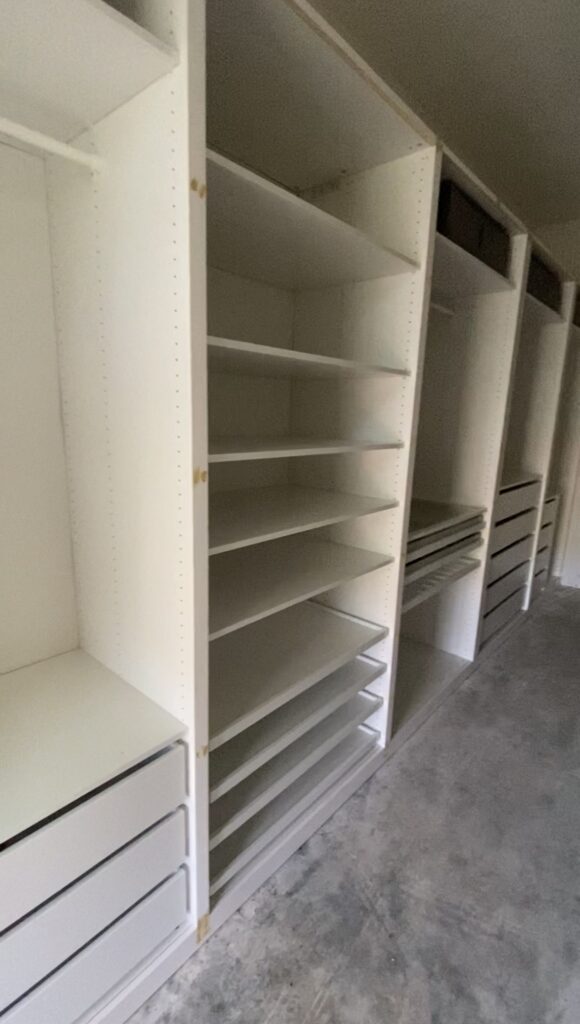
We have a very long, narrow closet, so we needed to purchase quite a few Pax units. In total, we ordered 11 units.
First, let’s talk about the basics of the Pax units. Ikea makes different sizes of their Pax units. There are 2 height options, 3 width options, and 2 depths options.
Measurement Options for Pax Units
The height options are 79″ and 92 7/8″ tall. The width options are: 19.8″, 29.5″, and 39.4″. The depth options are 13.7″ and 22.8″.
So, begin by taking detailed measurements of your space. You will then determine the best combination of all available unit options that will fit the size of your closet.
For our space, we used Pax units that are 92 7/8″ tall. We used 10 units that are 39.4″ wide and 1 unit that is 19.8″ wide. They are all 22.8″ deep, except for 1 unit that is 13.7″ deep. This is the unit that is directly next to the window. The deeper option would have hit the window trim.
Once you have decided which options fit your master closet space the best, head to Ikea to make the purchase! I ordered them online and did curbside pickup, which made such a bulky order much more manageable.
Step 2: Assemble the Pax Units
This step was the most time-consuming step for me. However, this is mostly because I had quite a few to assemble. This will be determined by how many units are needed to fit your space.
The Pax units come together pretty easily. There are a couple steps where having 2 people would be helpful. However, once you have assembled a couple, you will find that you will get a system down and can assemble them much more quickly.
Once the units are assembled, put them in place in the closet. Evenly space each unit laterally, so that the gap between each of them is equal. They are now ready to be attached to the wall.
Step 3: Attach the Pax Units to the Wall
This step is very important. Attaching them to the wall ensures that they will not topple over.
Ikea provides hardware to attach the units to the wall. However, the hardware that they provided didn’t work for our space. This is because our walls are off-square just enough that the provided hardware didn’t reach all the way to the back wall.
So, I purchased a set of drywall anchors. They worked great! They are a little deeper than what was provided by Ikea, which is what was needed for our closet to reach the back wall.
The Pax units will be very sturdy once they are anchored to the wall.
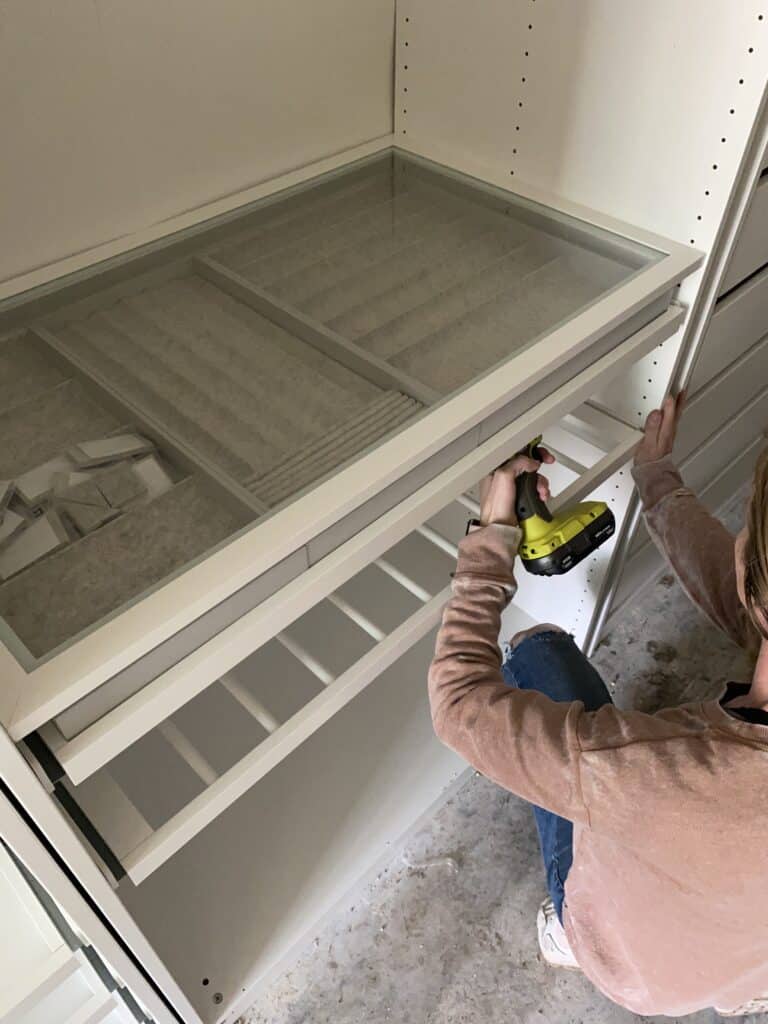
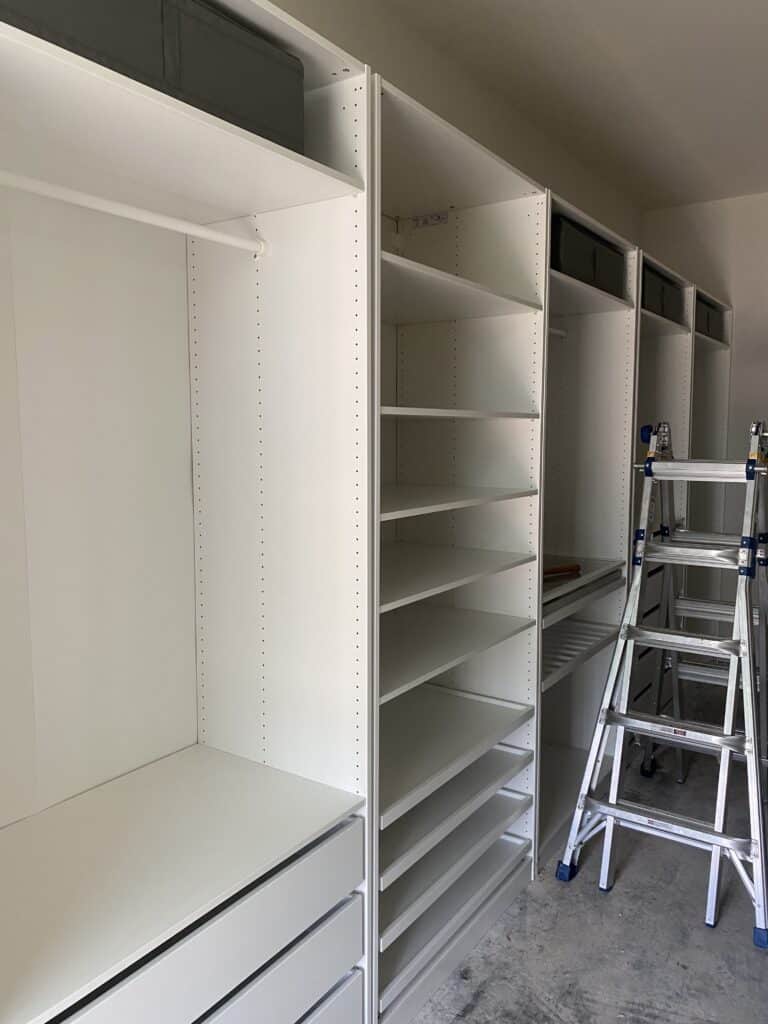
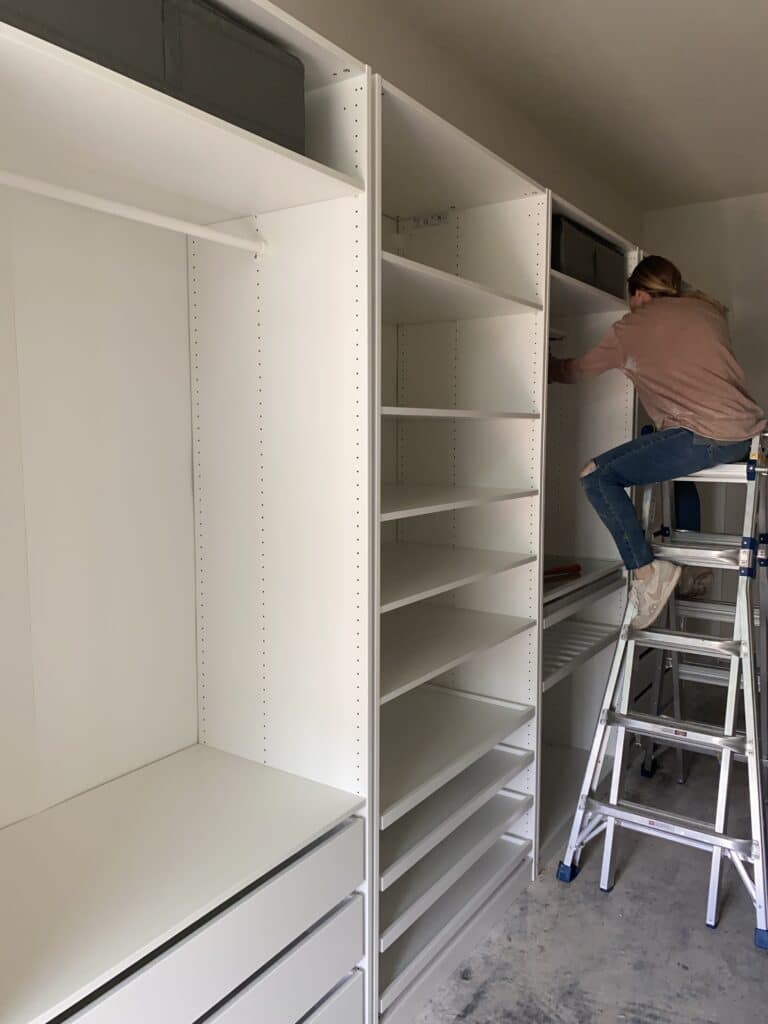
Step 4: Choose and Add Modules to Add to the Pax Units
This is the most fun step! Think through how you want to organize your clothes and decide what fits your space best.
Ikea offers many differs ways to deck out the Pax units. Some examples include clothe hangers, drawers, built-in shelves, pull out trays, pull out shelves, and jewelry organization drawers.
If you’re searching on the Ikea website, search ‘Komplement Accessories’. This will show you all of the options to outfit the Pax wardrobe.
Once you have made your shopping list, head to Ikea and make your purchase. Again, take advantage of that curbside service!
Each module will come with their own set of instructions, but true to Ikea form, they are very easy to put together.
When you are installing the accessories, it is helpful if you already have an existing closet to look at. I referred to another closet often to figure out how much space is needed for shirts to hang, dresses to hang, shoes to be stored, etc.
I added storage boxes to the top shelf. These have been so helpful in storing off-season items, or items that we don’t need very often. I purchased a lightweight ottoman that I can stand on if I need to access those items.
Another option with the Pax units is to add closet doors. I personally wanted to keep everything open, but you can easily add doors to some or all of the units.
Also, the ottoman is very useful for having a place to sit when putting on shoes! There wasn’t a designated space for sitting, so adding this ottoman was a must.
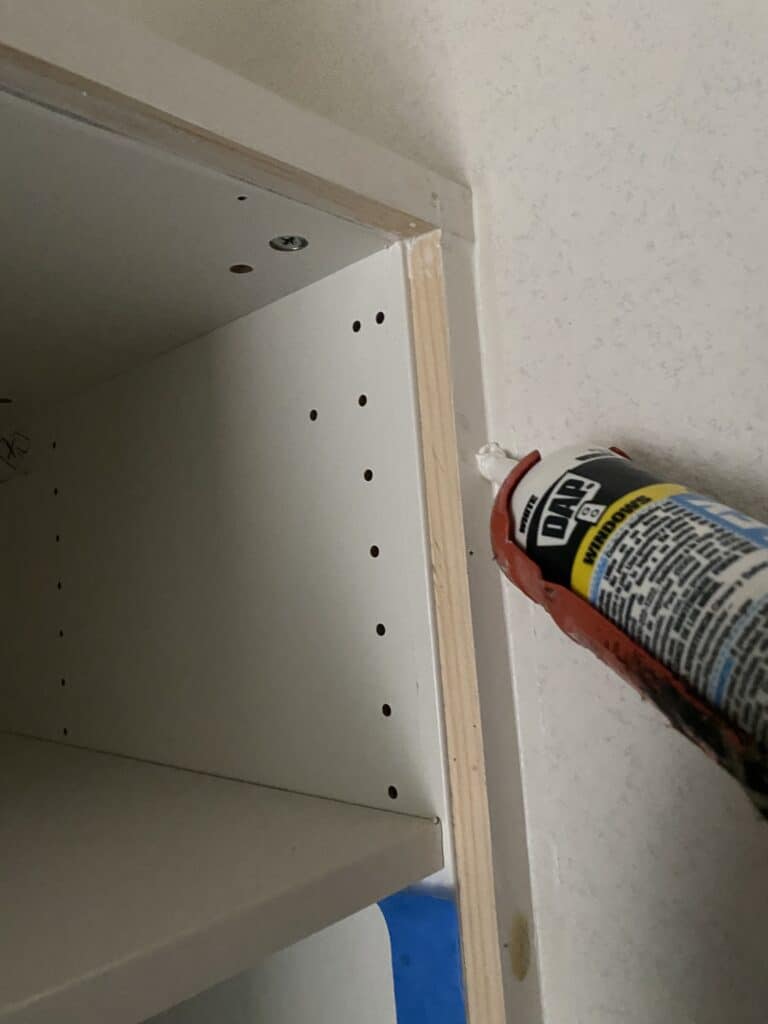
Step 5: Trim Out the Closet for a Custom, Built-In Look
Now that the basics of your closet is installed, it’s time to make it look built in and custom.
To do this step, I used pre-primed select pine board from Home Depot to trim out the Pax units. Using pre-primed boards saved me time from having to add a coat of primer later.
Using select pine, as opposed to just basic pine, ensured that there weren’t any knots in the trim to work around. The quality of the wood is much better, and therefore, a better choice for trim work.
I used my table saw to rip cut all of the pieces to size. I added a border to the top and bottom of the units first, going all the way across. I then made precise measurements for the vertical pieces to sit flush with the two horizontal pieces.
These vertical pieces covered the gap between each unit. I cut each of these to size, measuring each gap. Not every gap was perfectly equal, so it was important to measure as I went.
Note: when installing the bottom horizontal board, you might need to leave a gap at the bottom (between the trim and the subfloor) to add flooring later. This gap will allow the flooring to slide under the trim work.
To attach the trim, I used my nail gun. I alternately angled the nails so that the trim is more secure and can’t easily be pulled out. It’s also useful to use wood shims in an gaps.
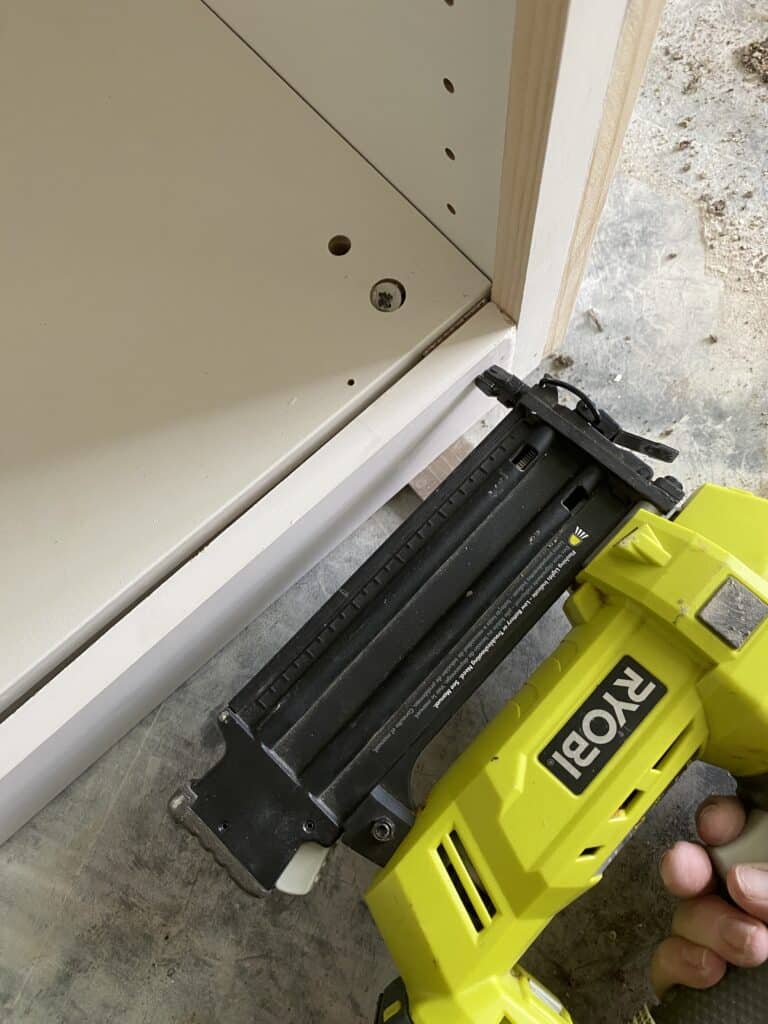
There is one area on the side of the closet where the side of the Pax unit is open. I added trim around that to make it look custom.
Step 6: Apply the Finish Work to the Custom Closet
Once all of the trim is added, it is now time to fill the nail holes. Use wood putty to do this. Allow it to fully dry, then sand it smooth.
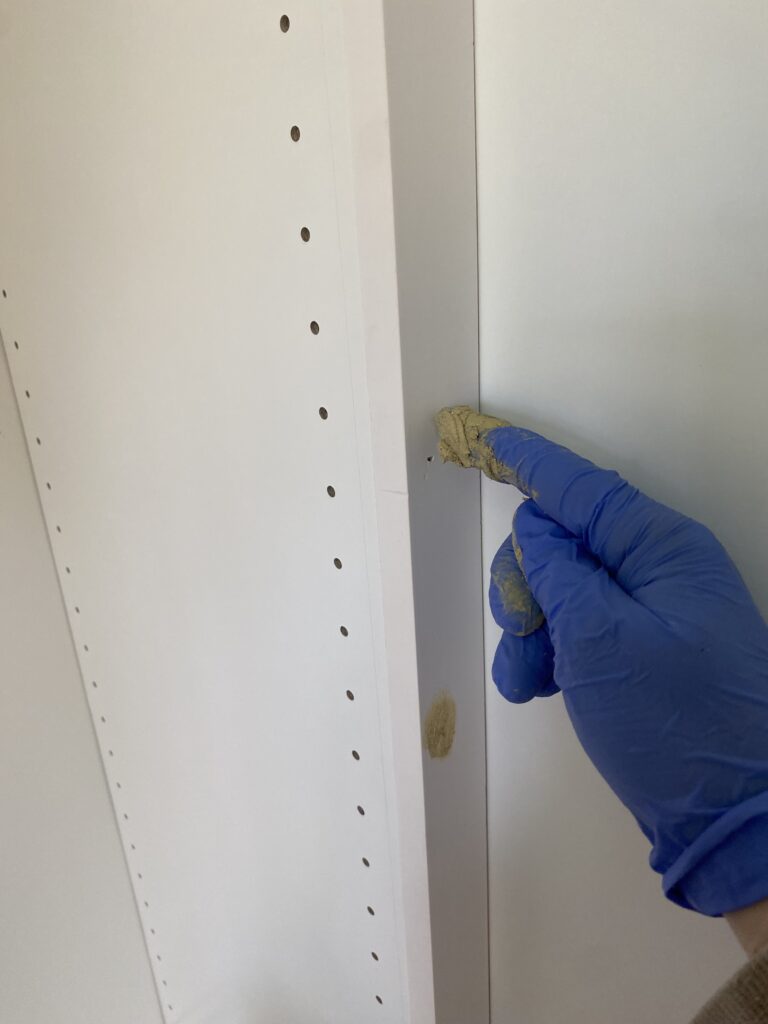
You can now add the caulking. This step really takes it up a notch and adds so much to the look of the closet. Hiding those seams make it look so much more built in!
I like to apply caulking with a packet of baby wipes on hand. I add a small seam of caulking, then run over it with baby wipes to smooth it down and remove the excess. Make sure you buy paintable trim caulk!
Ikea also sells white tabs that can fill all of the shelf pin holes. It’s a little time-consuming to do that, but worth it in the end. I have also seen people fill it with caulking, although that might shrink over time.
The color I used on this custom closet is called Snowbound by Sherwin Williams. To me, it’s the perfect white. It doesn’t pull many undertones. It is warm enough that it isn’t too stark, but it’s also not too brown. It’s the white color we have throughout our house and I love it! And as an added bonus, it matches the Ikea white well.
Cost of this DIY Custom Closet
All in all, the total cost for this DIY custom closet was around $4,000 in supplies. While that price is definitely a substantial purchase, it pales in comparison to what a custom closet costs when a professional is hired to build it.
Keep in mind that that price is for 11 of the large Pax units. If you have a smaller closet or a reach-in closet, the price will be substantially less.
In fact, we had two cabinet manufacturers price it out for us. One of them gave us a bid of $27,000. The other one wouldn’t even bid it out because he said it would be too much. So, that’s a savings of about 85% when you DIY the closet yourself!
This way of building a DIY custom closet is the best way to make your custom closet design dreams come true! This option is one of the best methods of DIY closet systems to achieve an organized, functional, and new closet.
If you found this article helpful, be sure to check out these other articles:

Suzie Wible
Suzie has shared her knowledge for over 10 years about building furniture, painting techniques, how to build your dream home, and basic to advanced woodworking skills. Through this blog, readers will feel empowered to create a home and products they love too.