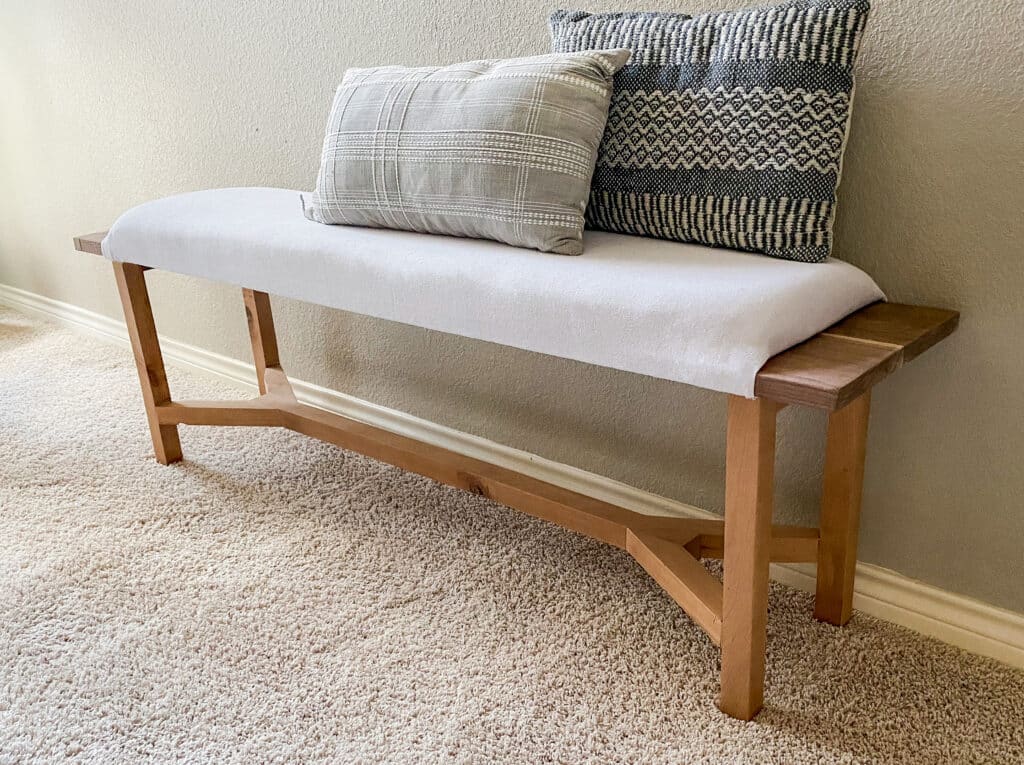
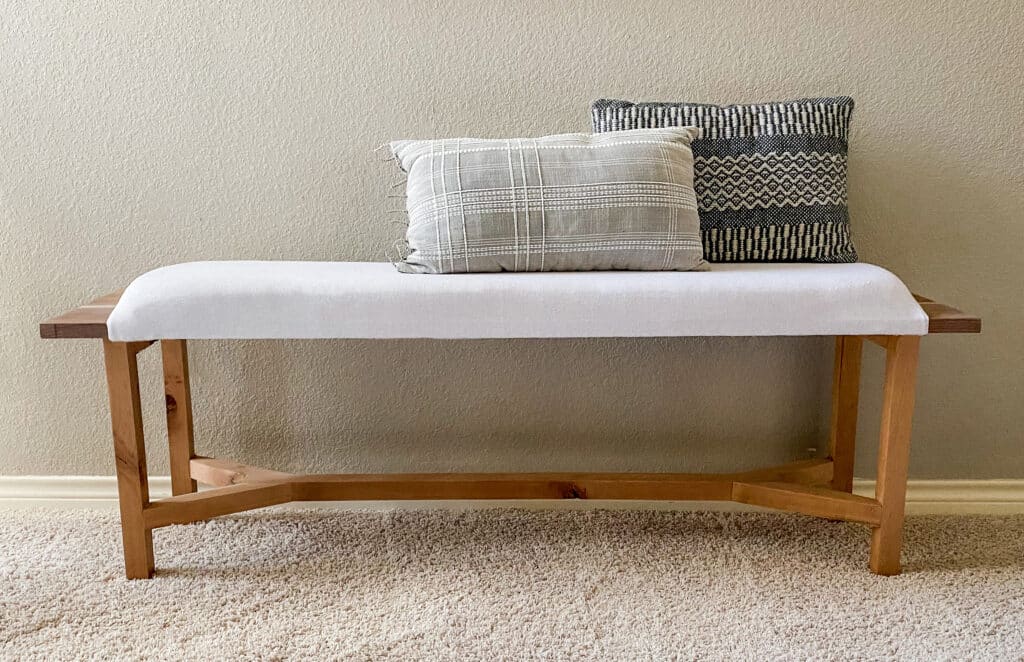
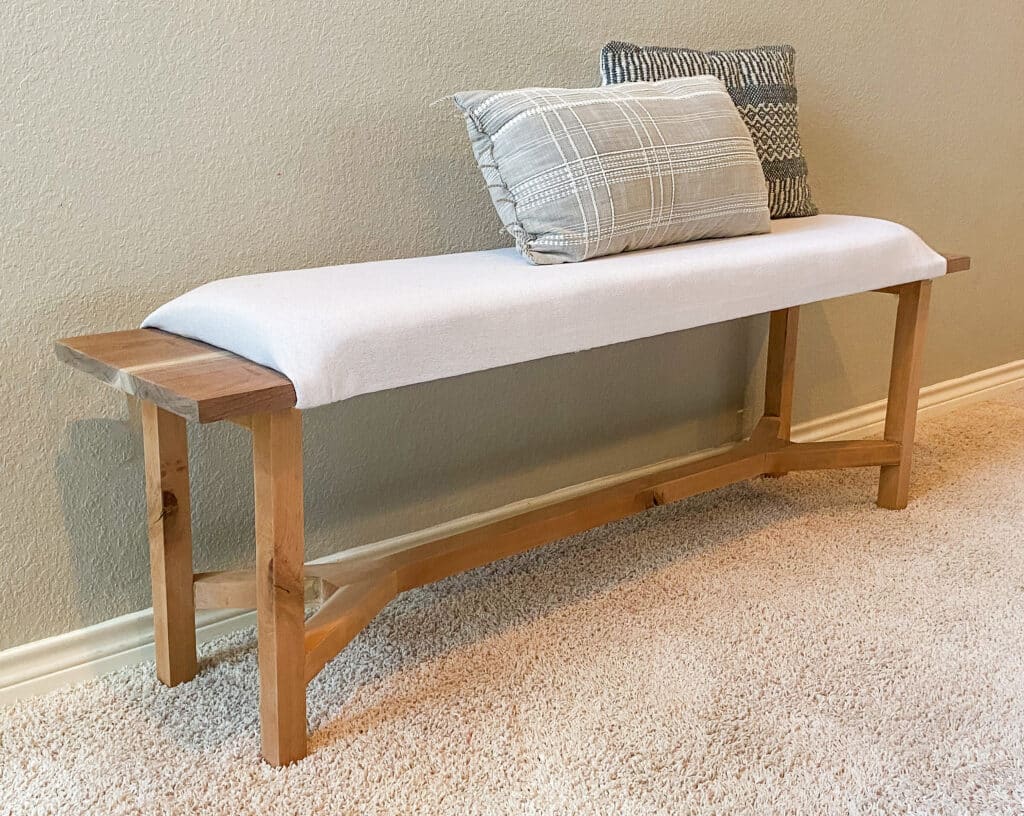
DIY Upholstered Sitting Bench: Free Plans
In this article, I will show you how to build your own sitting bench. You will find a detailed tutorial for how to make it, along with free plans to follow along with.
This particular sitting bench would look great in a foyer or entryway, at the end of a bed, or as extra seating at a dining table. It is also padded and upholstered, so it is extra comfortable! Keep reading to find all the steps to complete the upholstery portion of the DIY sitting bench project as well as the building steps.
All of the wood pieces for this bench are joined together using pocket holes. I used the Milescraft PocketJig200 to complete this. Because of this jig, I was able to hide all of the pocket holes, which created a cleaner look for all the joints. I’ll go into more detail below on how to use the jig below. It’s a handy tool to have around and I highly recommend using it for this project!
Disclaimer: This post is sponsored by Milescraft, but all opinions are 100% my own. This site contains product affiliate links. We may receive a commission if you make a purchase after clicking on one of these links.
The design of this sitting bench is inspired by the Madlen Bench by McGee & Co. I modified the upholstered part of the bench slightly, but the base is very similar. I love that it’s the perfect mix of rustic modern and farmhouse style as well! It would be a great addition to any space where you want to add a unique look and modern look.
The inspiration bench costs around $3,000 after tax and shipping, and this version will end up costing around $75, depending on the species of wood you use. This is a great example of a good DIY furniture dupe – a simple project that costs a small fraction of the original price!
DIY benches are great ideas for adding function and beauty to any space. Another thing I love about this build is that it is great beginner project as well!
DIY Sitting Bench Free PDF Plans
Tools and Materials Needed
To build this DIY sitting bench, you will need:
- Milescraft PocketJig200
- pocket hole screws
- miter saw
- table saw (if you’re dimensioning your own boards)
- planer (if you’re dimensioning your own boards)
- orbital sander
- wood glue
- face clamp
- power drill
- jigsaw
- speed square
- foam
- fabric
- staple gun
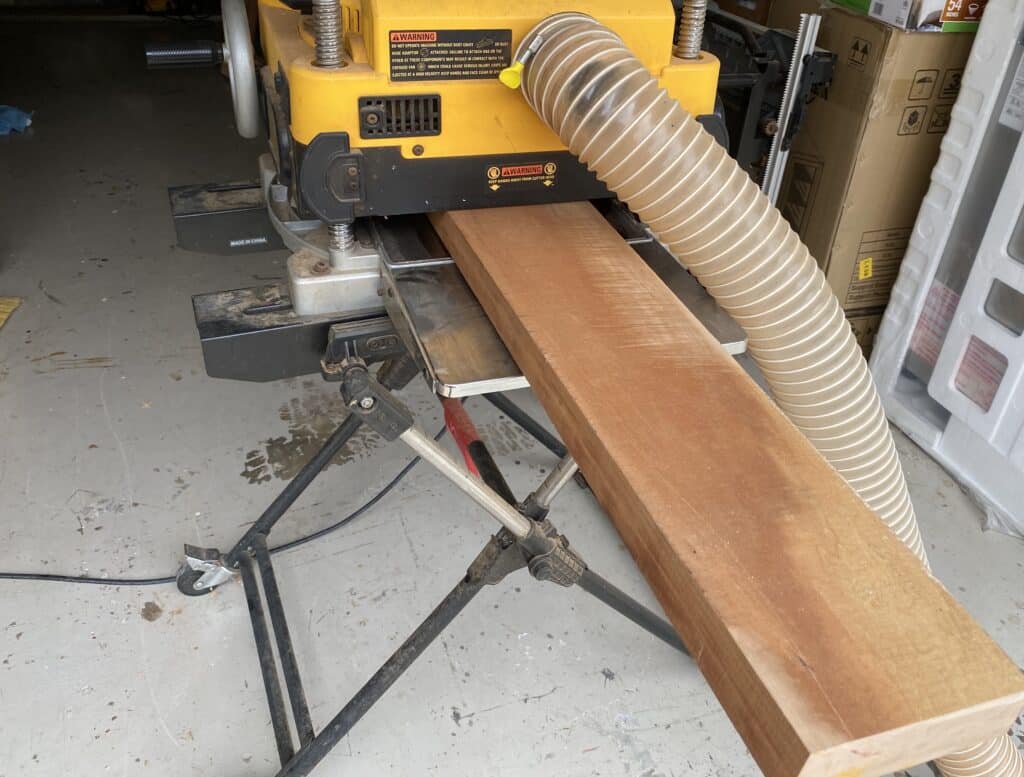
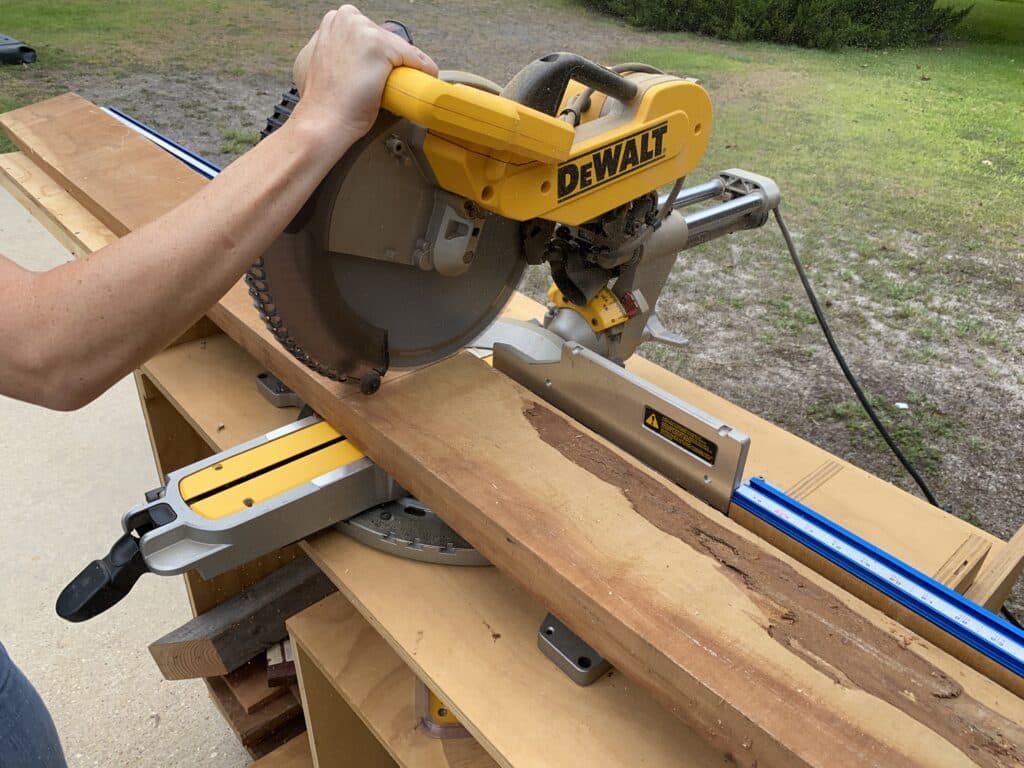
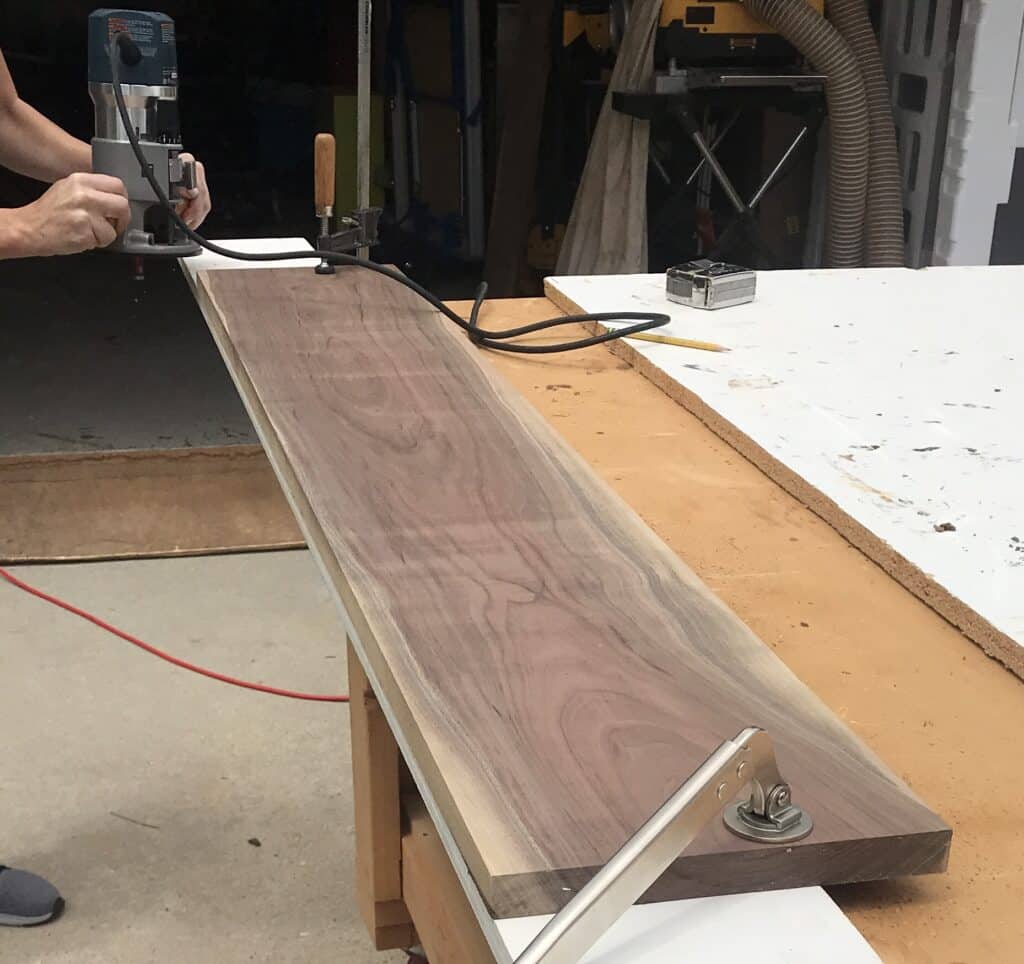
Step 1: Dimension all of the Lumber
The type of wood I used to build this simple sitting bench was 4/2 cherry wood stock leftover from a recent project. However, you could easily use lumber off the shelf from big box stores. This will make the build much more simple and easy, although the species of wood options will be limited.
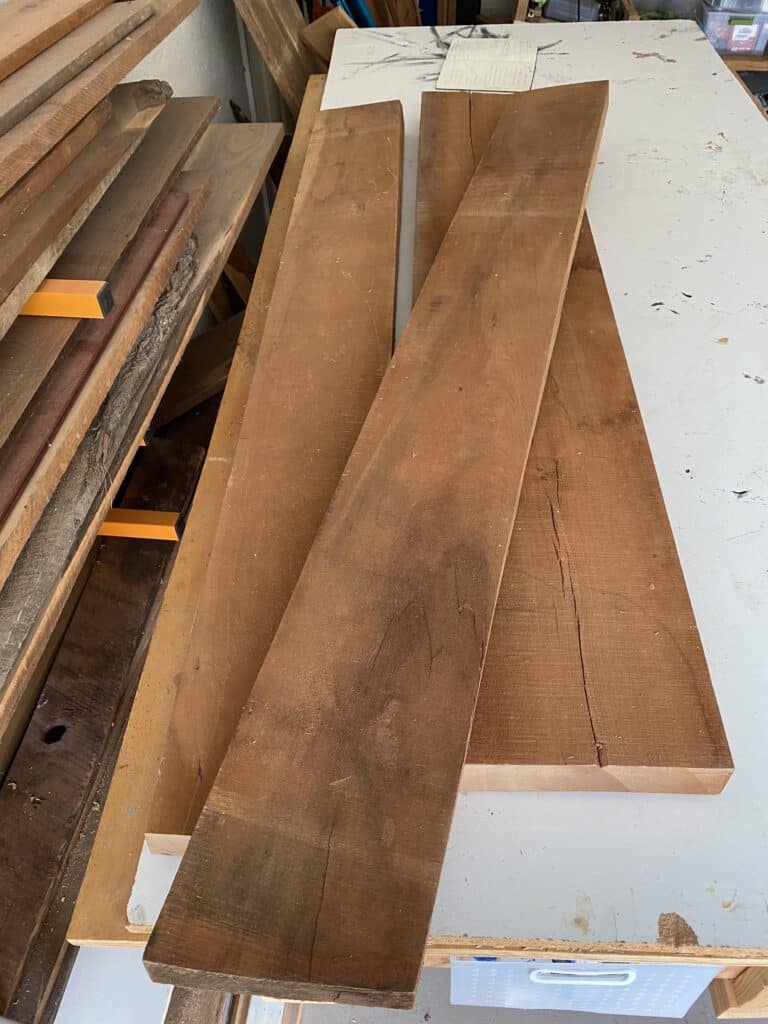
The first thing to do is to download the sitting bench PDF plans to find which boards to purchase. You will also find the exact dimensions the boards will need to be. Follow the plans for the cut list and materials list.
In order to cut all of the lumber to size, I first trimmed the pieces on my miter saw. You can find a tutorial on how to use a miter saw safely here. I then ran the pieces through my table saw to cut them to size lengthwise (also called ripping the boards). Lastly, I ran them through my planer in order to make them the correct thickness.
The bulk of the above steps can be simplified if you buy stock wood off the shelf, so don’t let those steps be intimidating!
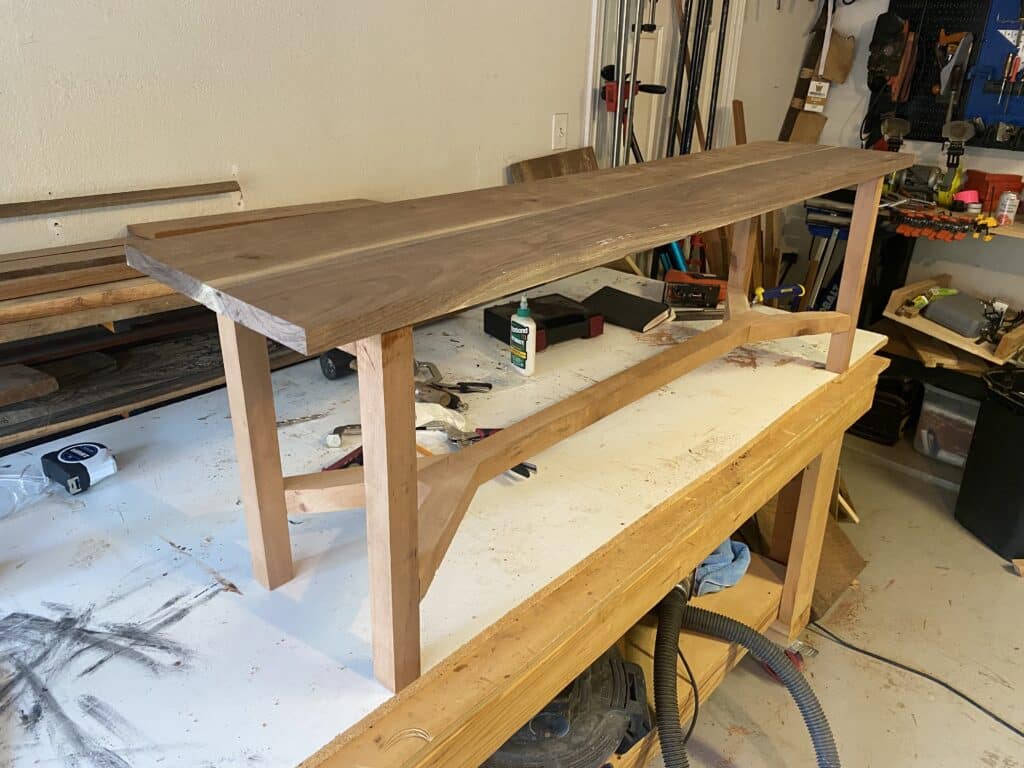
Step 2: Build the Sitting Bench Base
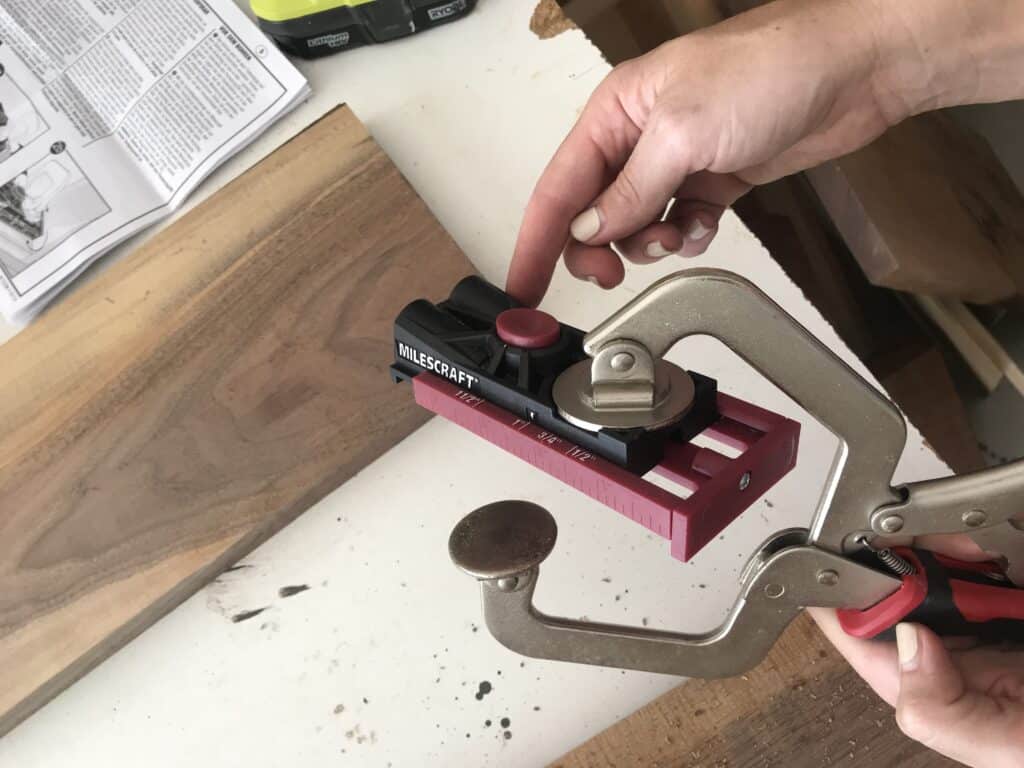
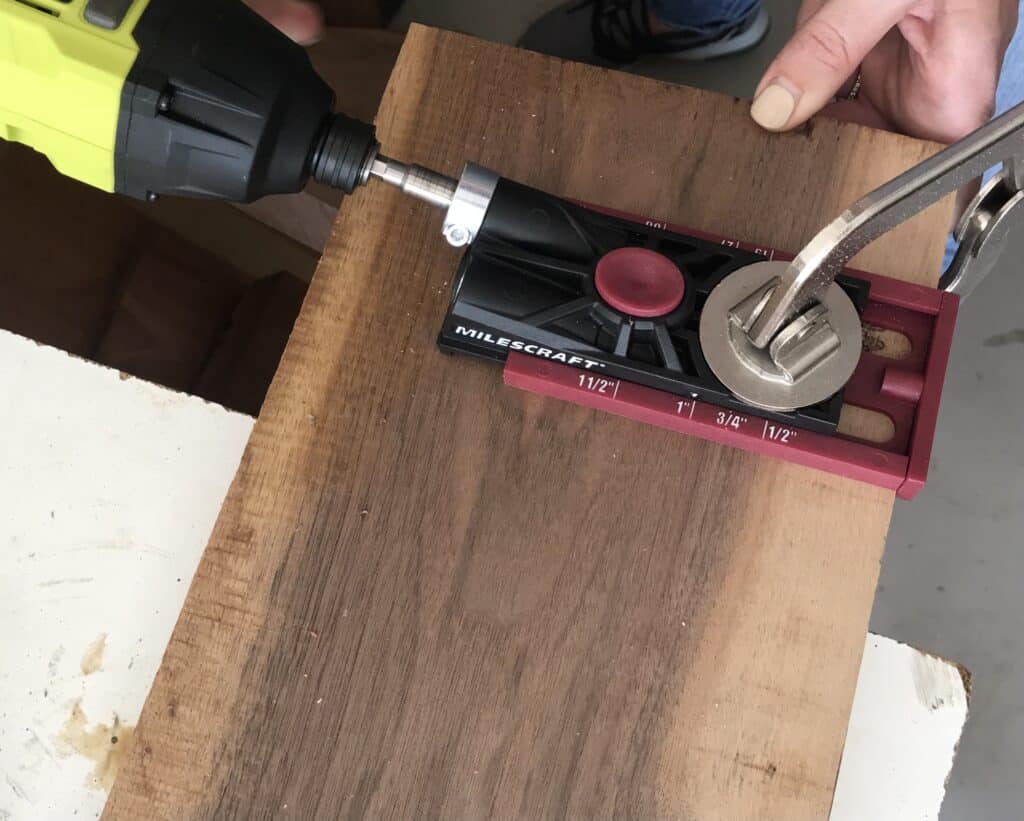
Like I mentioned earlier, all of the pieces are joined together using the PocketJig200 made by Milescraft. True to Milescraft form, all of the aspects of this tool are well thought out and made so simple. This jig made quick work on drilling all of the pocket holes and has quickly become a staple in my shop.
Aside from a power drill, all you need is in the kit – everything you need is in there! Pocket hole joinery is a such a great way to hide wood screws, along with creating a strong joint for DIY furniture. It is perfect for beginners and the PocketHoleJig200 makes the process even more simple.
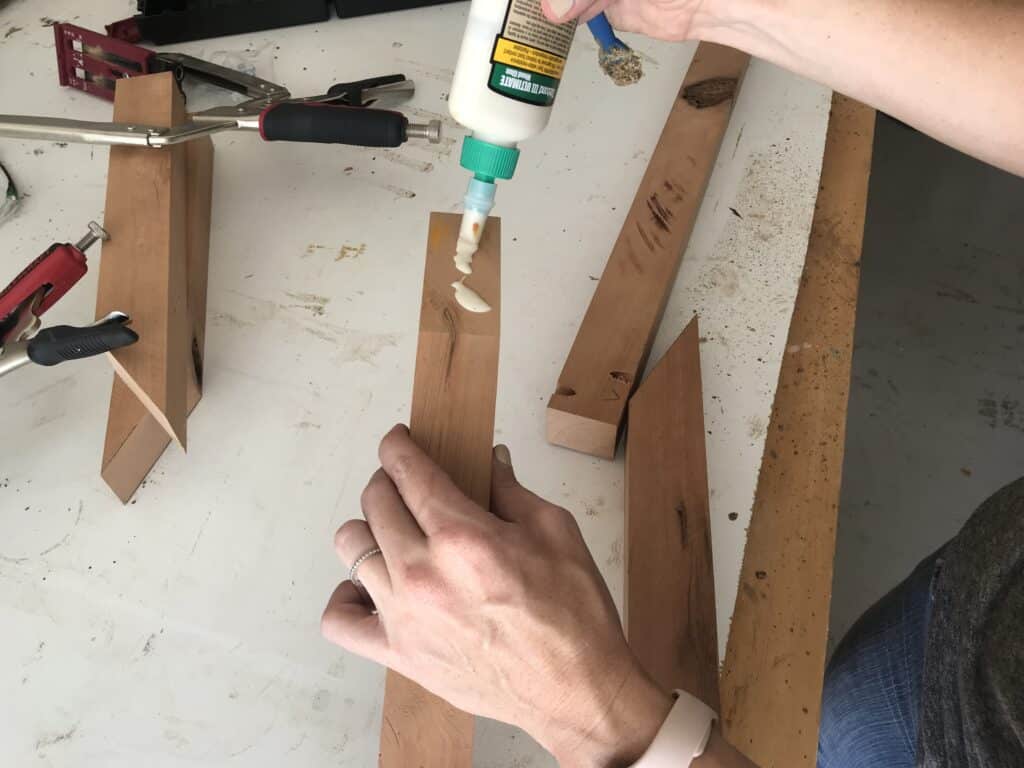
When using pocket hole joinery, it is important to reinforce the joints with wood glue, along with the pocket hole screws. This is especially important for something like a bench that will need to support the weight of people.
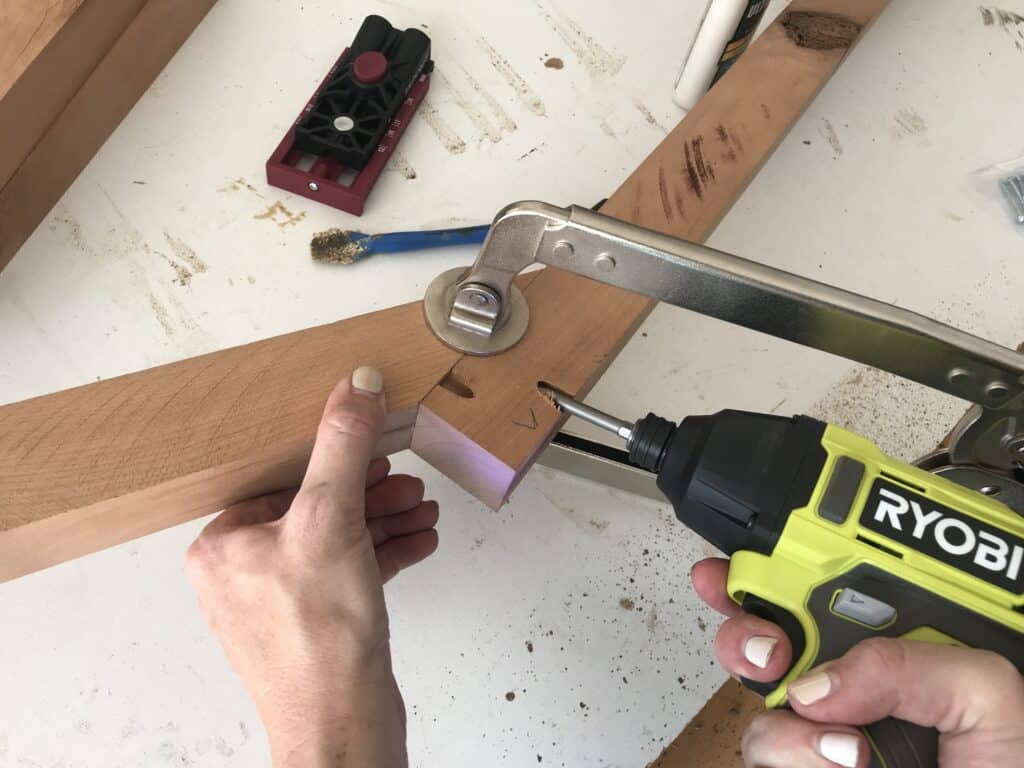
Drill the Pocket Holes with the Milescraft PocketHoleJig200
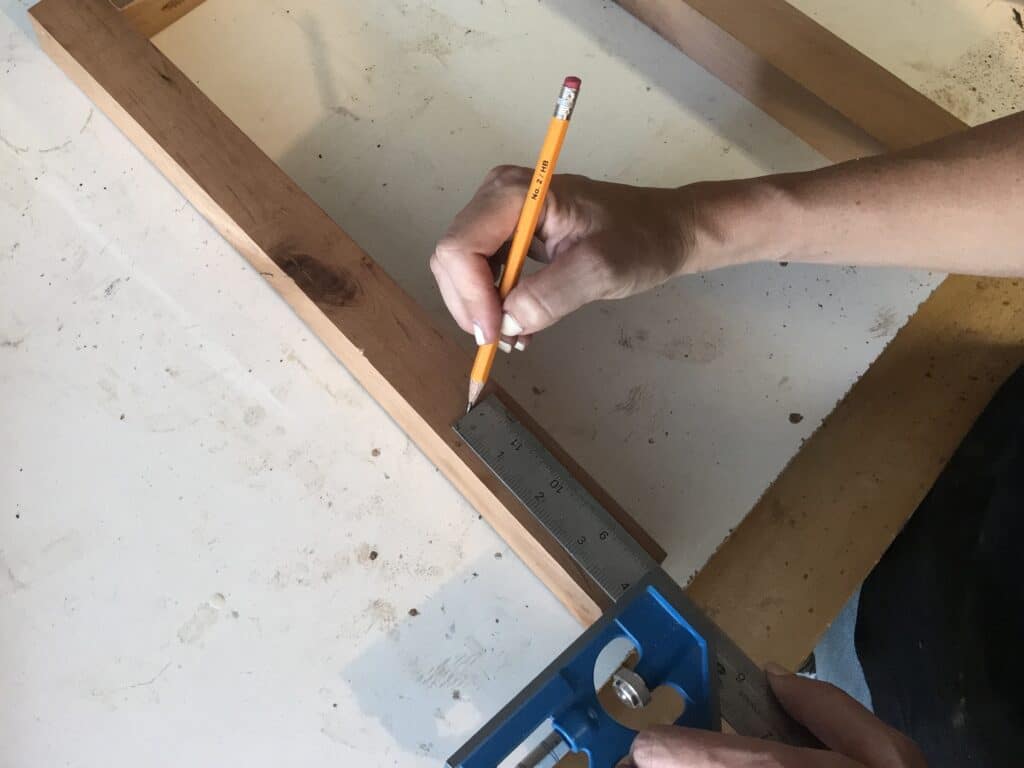
I find it easiest to lay out all of the wood pieces and mark where the pocket holes should go first, then drill all of the holes at one time using the pocket hole jig. Be sure to think through which is the best location of the pocket holes to where they won’t be seen. As a general rule, if you can drill them on the underside of a board in order to hide screw holes, choose that location.
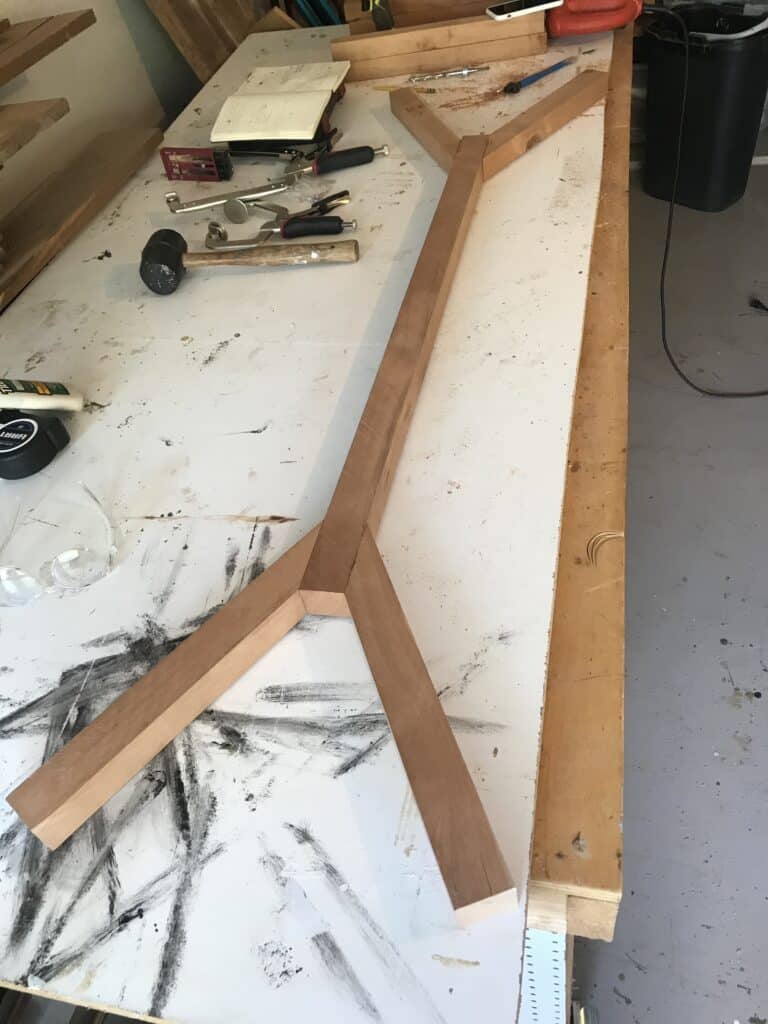
Assemble the Legs
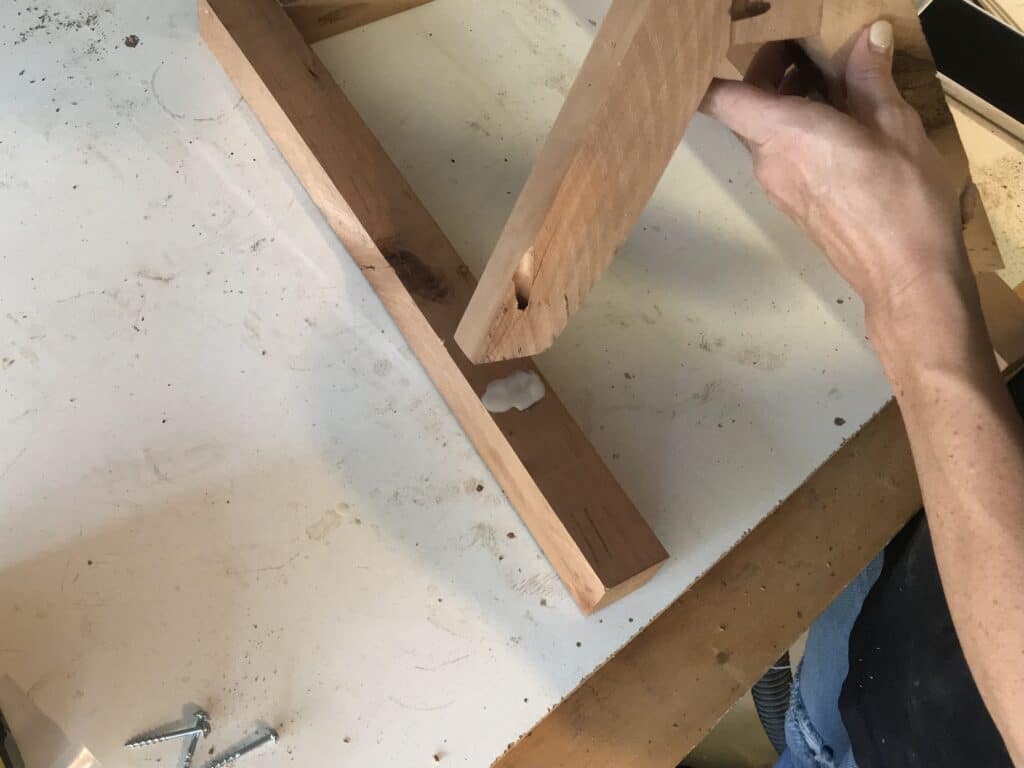
Using wood glue and pocket holes, assemble the 2 sets of leg pieces together.

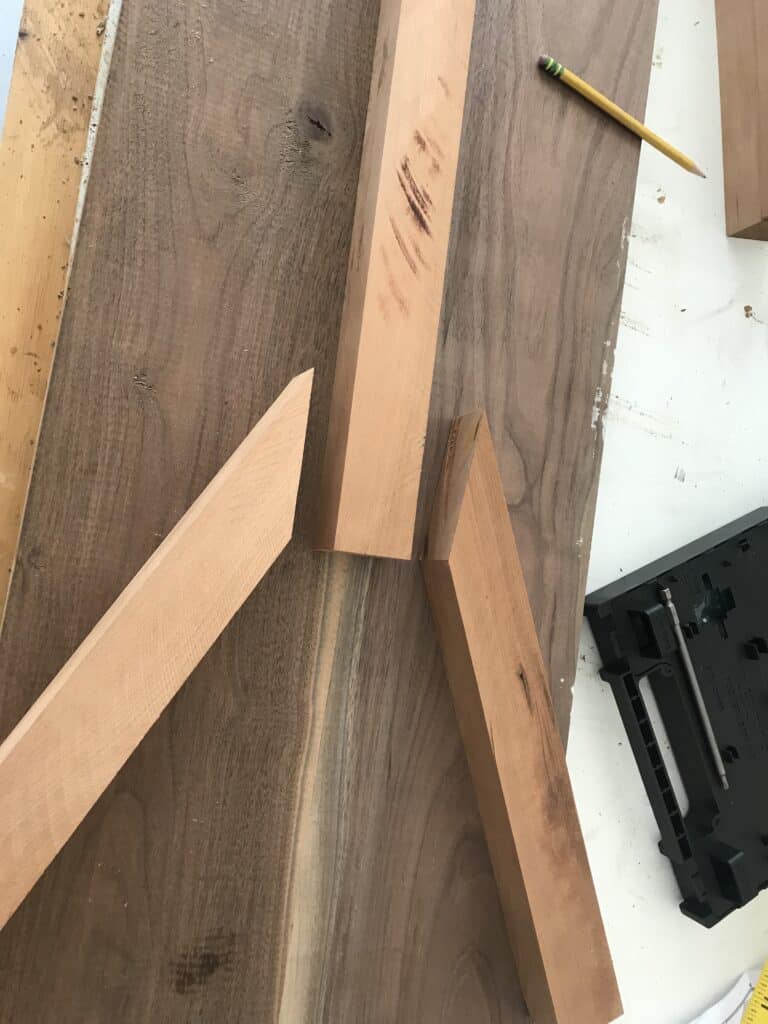
Assemble the Floating Stretcher and Trim to Size
Attach both of the 60-degree angled pieces to either side of the floating stretcher. The ends of these pieces of wood will be long intentionally, as they will be cut to size.
When assembling pieces like this, a face clamp is very helpful with keeping the pocket hole joints from shifting when you are drilling them.
I used this pocket hole jig on a recent square rustic coffee table build, so be sure to check that project out as well!
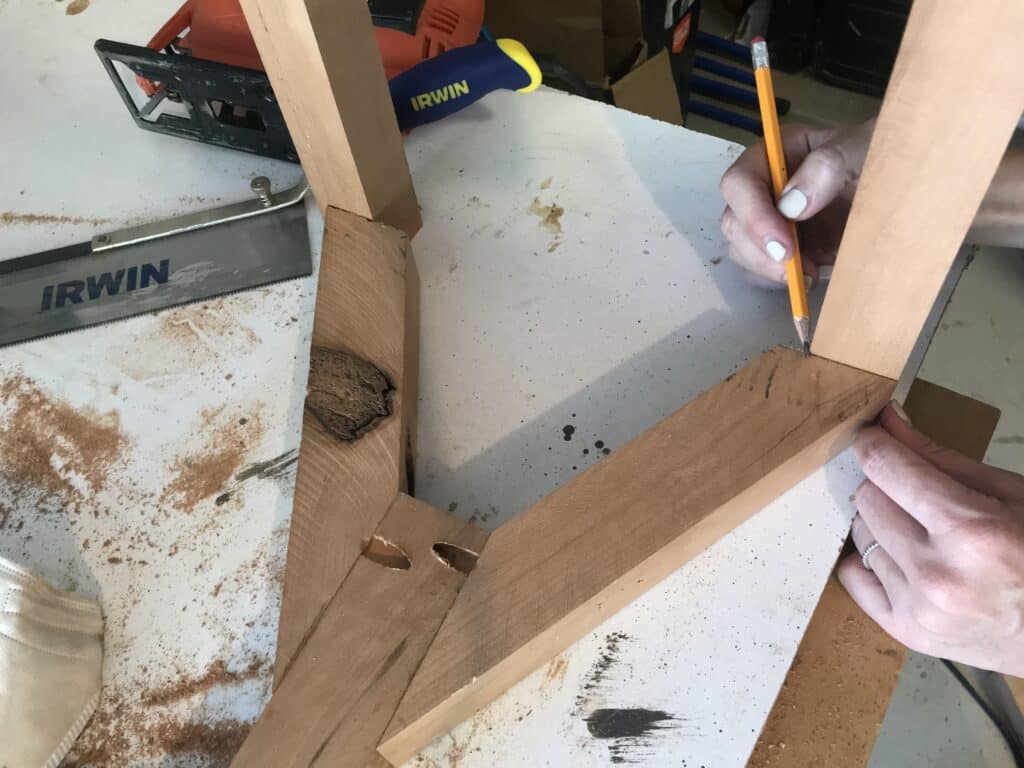
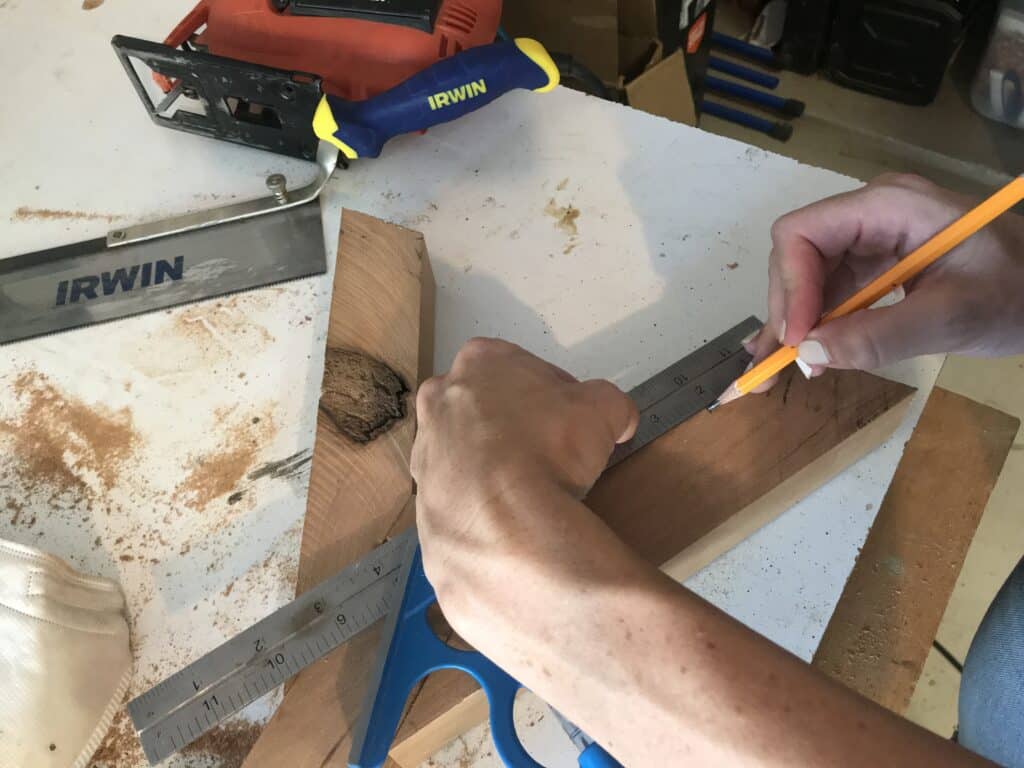
Now, you can place the 2 leg pieces over the angled piece of wood of the stretcher. Make sure the outside measurements line up. Draw a line where it should be trimmed.
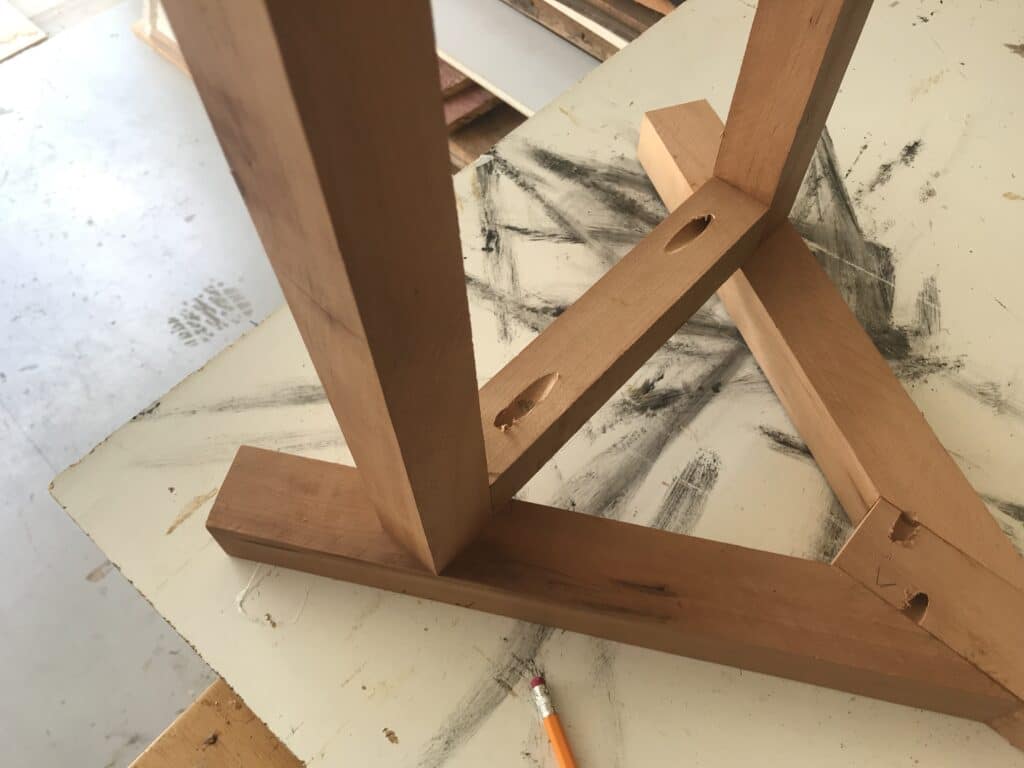

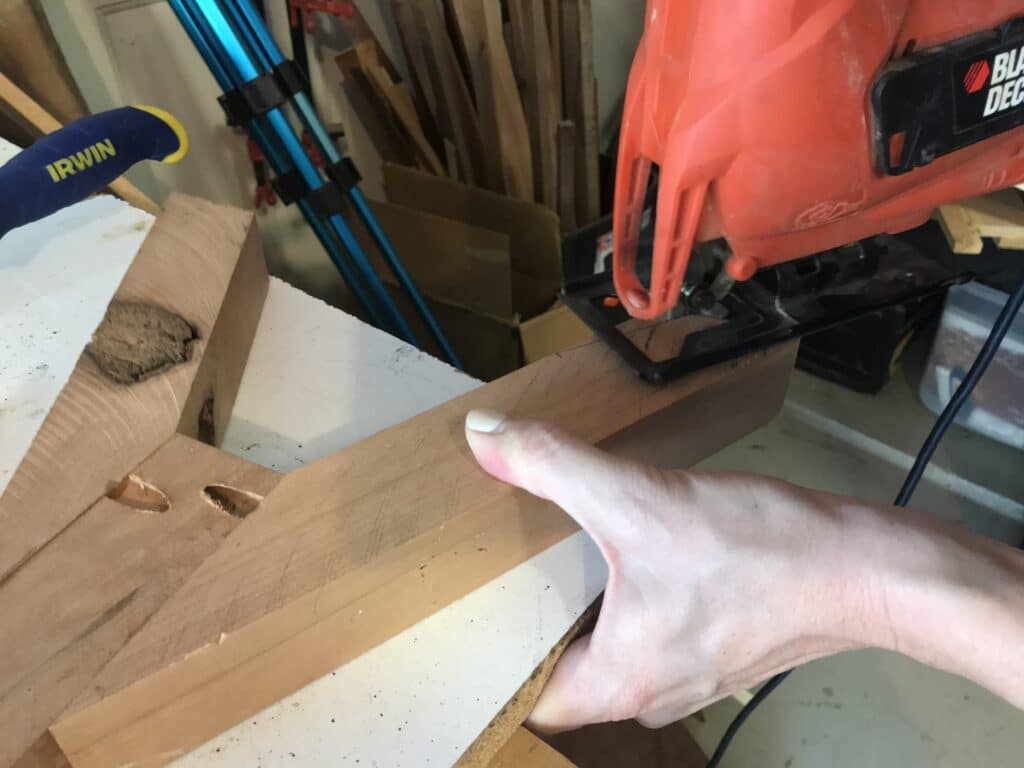
Use a jigsaw to cut along this line.
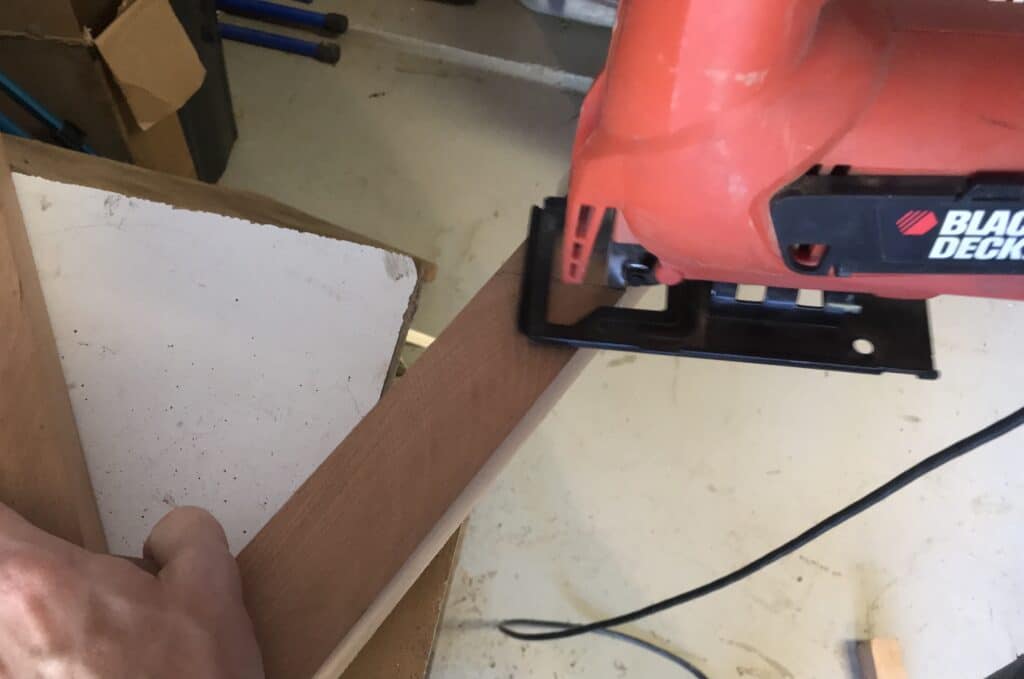
Because of the angles, you will need to trim the inside of the angled pieces as well. They can then be smoothed out later with a sander.
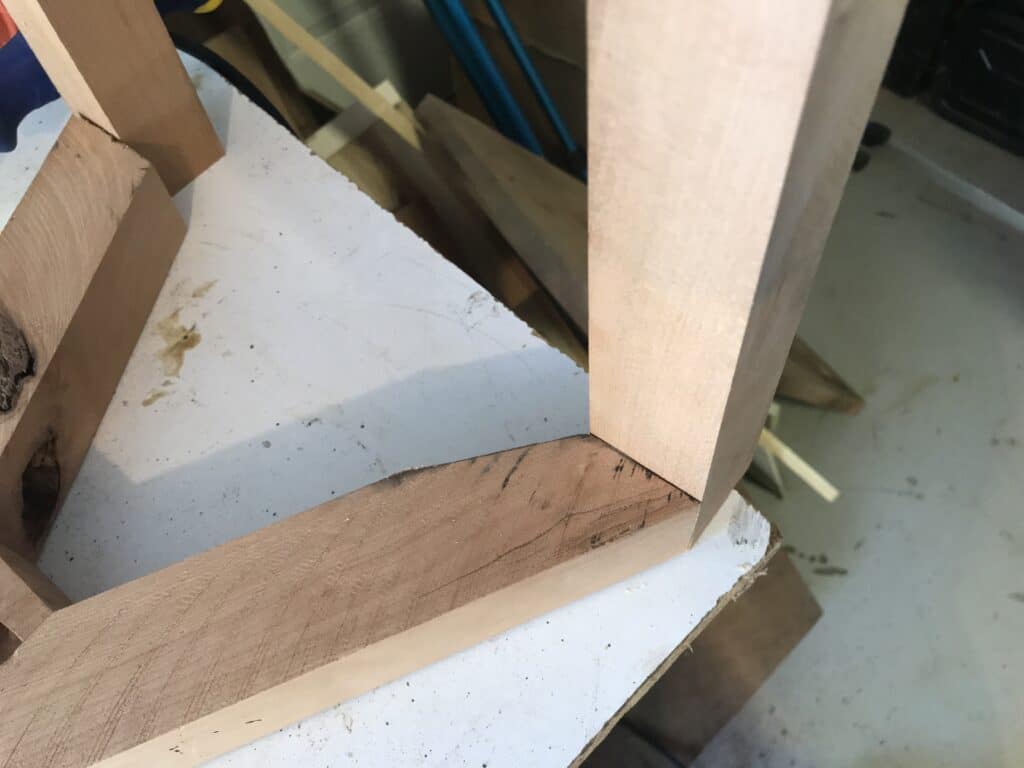
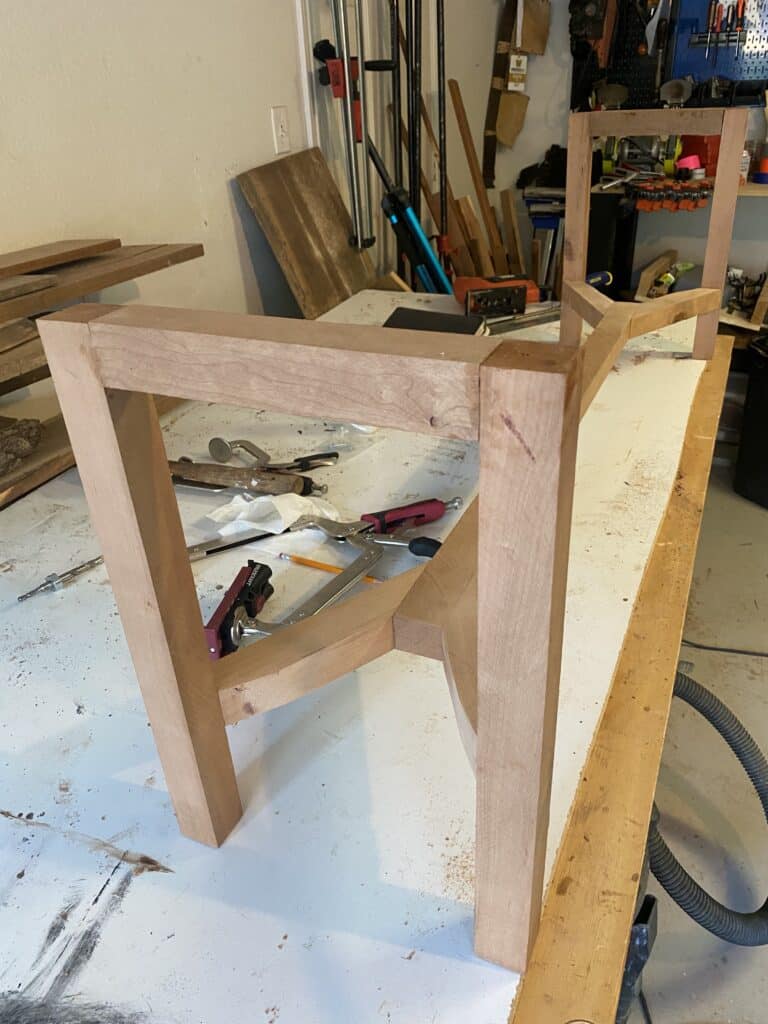
Once all of the pieces of the base are joined together, allow the wood glue to fully dry.
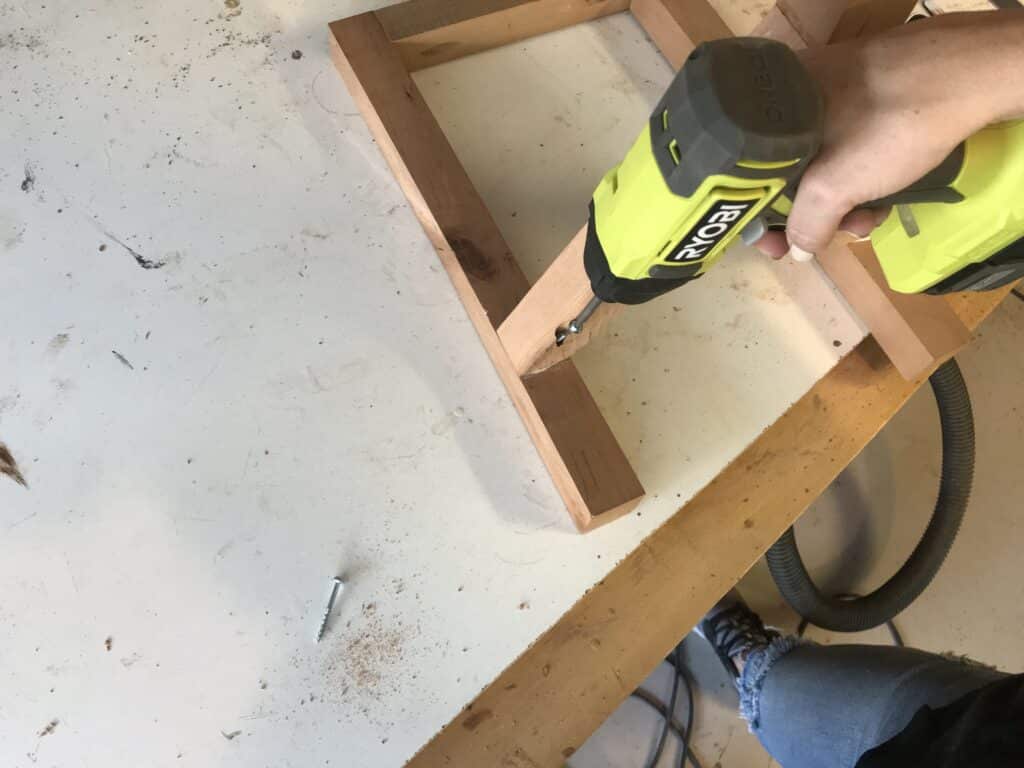
Attach the Stretcher to the Legs
Now that the angles are cut, you can attach the stretcher to the legs using wood glue and pocket holes. Attach them 4″ from the bottom.
The base of the DIY sitting bench is now complete!
Step 3: Build the Sitting Bench Top
Cut the two pieces for the top to size. In order to have a clean seam when they are joined together, I recommend the method found here to joint the edges together.
Cut them length-wise (rip cut) with a circular saw or table saw if needed as well.

Step 4: Attach the Bench Seat to the Base
Add a stretcher to the top of the base. Attach the top of the bench to the base from the underside by drilling pilot holes through the stretcher. Since the top stretcher won’t be seen, you can use scrap wood for this (I used leftover plywood from the hall tree build).
For another bench project, check out this live edge waterfall bench!
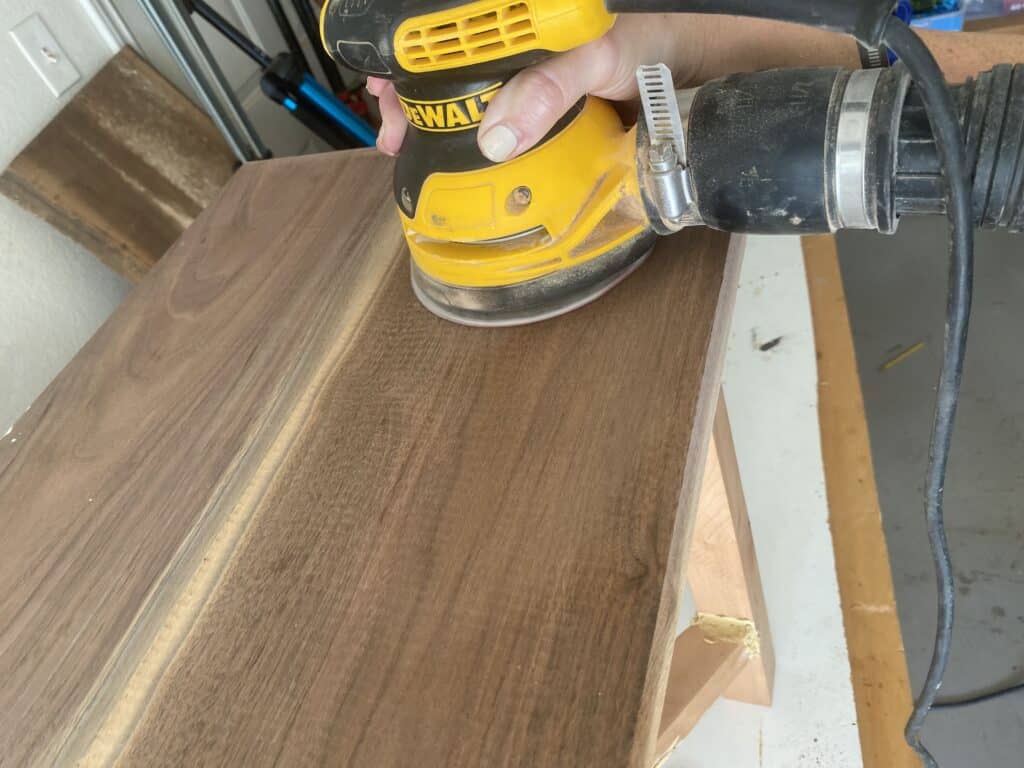
Step 5: Finish the Bench
This step is entirely up to you and your preferences. I personally love the look of unfinished cherry (similar to what I did on this DIY Round Side Table), so I chose to leave the bench unfinished. However, the options are endless when it comes to finishing it.
It will most likely need a good sanding with a belt sander or an orbital sander. Start with 80 grit, then move to 120 grit to get a super smooth finish.
If you would like to keep the natural wood look, check out this post on my favorite matte sealer. There are also lots of great tips on other finishes that work well as well.
If you would like to paint it, follow the instructions found in this post on how to get a smooth finish on cabinets. You will prime the piece, paint it, then seal it.
Simply staining it a different color would be a great option as well, as it is the perfect project for an all-wood look. It’s a good idea to test out the wood stain on a scrap piece before you apply it to your build. Again, this step is all about personal preference.
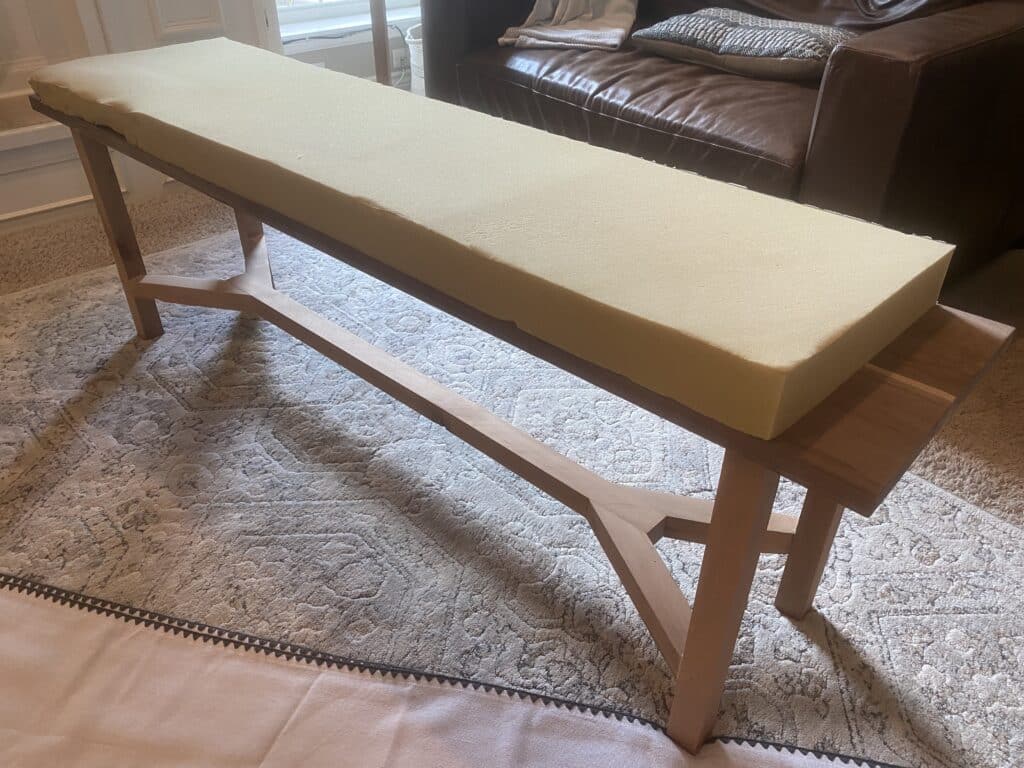
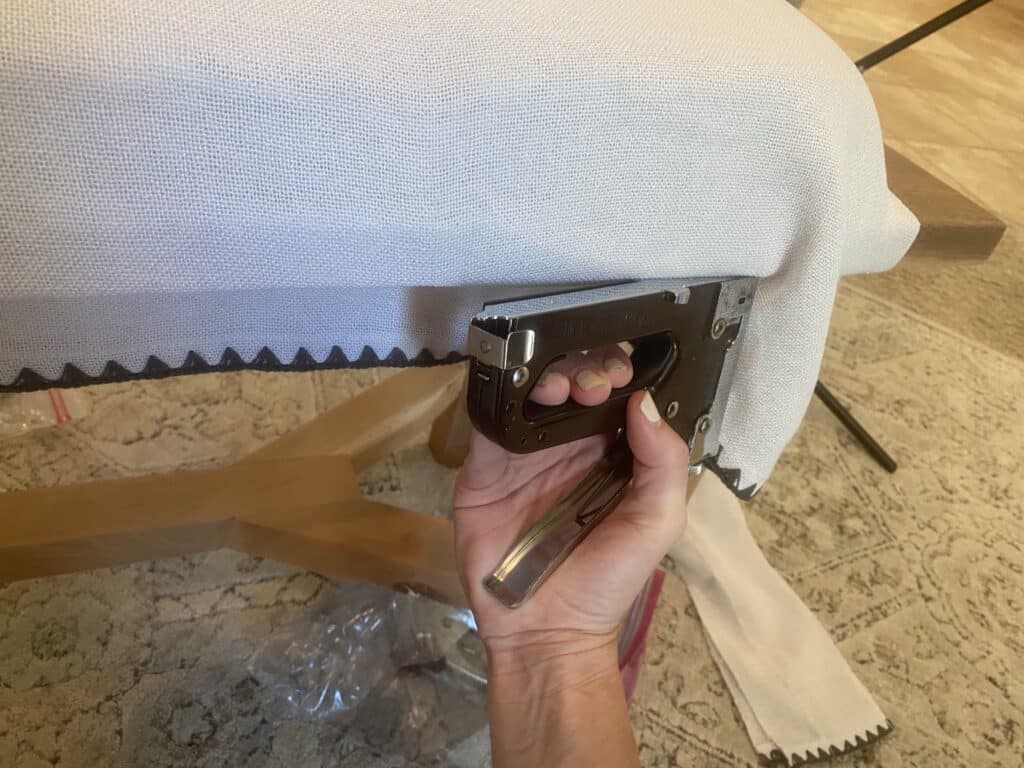
Step 6: Upholster the Bench
This is a beautiful rustic bench, so you can definitely leave it like it is. However, I wanted more comfort for this little bench. The foot of the bed is the perfect place for a bench like this, so I wanted to soften the lines up by adding upholstery. Omitting this step will cut out extra cost as well, of course.
To complete this step, you will need a staple gun, padding, and fabric to cover the sitting bench. The fabric that I used is actually an old linen curtain that I didn’t need. I loved the texture of it and it worked great for this bench.
Cut the padding to size. This was actually old mattress foam that we didn’t need anymore, but you can find upholstery foam at most home stores.
Next, cut the fabric to size. Wrap it around the bench and staple it on the underside with a staple gun. Be sure to fold and iron any seams. Cut off any excess fabric.
And that’s it! A simple tutorial for how to build an easy DIY bench with a beautiful, yet simple design. This is a great DIY furniture dupe based off a truly beautiful bench. Be sure to grab the free plans, the Milescraft PocketJig200, and let me know how your build goes!
For another project for the bedroom, check out this easy and cheap way to blackout a window and DIY Gas Fireplace Surround.
Common Questions
I will do my best to answer common questions I’ve seen about sitting benches, specifically benches at the end of beds.
Q: How wide should a bench be at the end of a bed?
A: This will depend on the size of your bed. As a general rule, benches should be around 3/4 the width of the bed. So, a king-size bed should have a bench around 60″ wide, and a queen-sized bed should have a bench 45″ wide.
Q: How tall should a bench be at the end of a bed?
A: Benches at the end of beds are typically around 20″ tall.
Find the webstory for how to build an upholstered sitting bench here!

Suzie Wible
Suzie has shared her knowledge for over 10 years about building furniture, painting techniques, how to build your dream home, and basic to advanced woodworking skills. Through this blog, readers will feel empowered to create a home and products they love too.