DIY Mudroom Locker Built Ins from Stock Cabinets
I recently completed a fun building project for our new custom home. The project is DIY mudroom lockers with doors and a bench. The best part is – everything besides the bench was made from pre-fabricated stock cabinets from the store!

The storage space from these built-ins has been one of my favorite things in our new house. I knew I wanted a space where we could hide all of the coats, backpacks, shoes, dog leashes, etc. So, having doors were a must.
I actually really enjoy building cabinets from scratch, but we were on a bit of a time crunch to get these done. Using pre-fabricated cabinets allowed us to cut the build and install time down quite a bit. This method will allow you to build your own mudroom lockers without the hassle of building them from scratch.
In this article, I will cover all of the basic steps to purchasing the correct size standard cabinets. I will also cover the basics of painting cabinets in order to create a smooth and durable finish. Lastly, I will cover how to install cabinets in your space in order to create custom mudroom lockers with doors and a bench.
Materials Needed for DIY Built-Ins from Stock Cabinets
Disclaimer: This site contains product affiliate links. We may receive a commission if you make a purchase after clicking on one of these links.
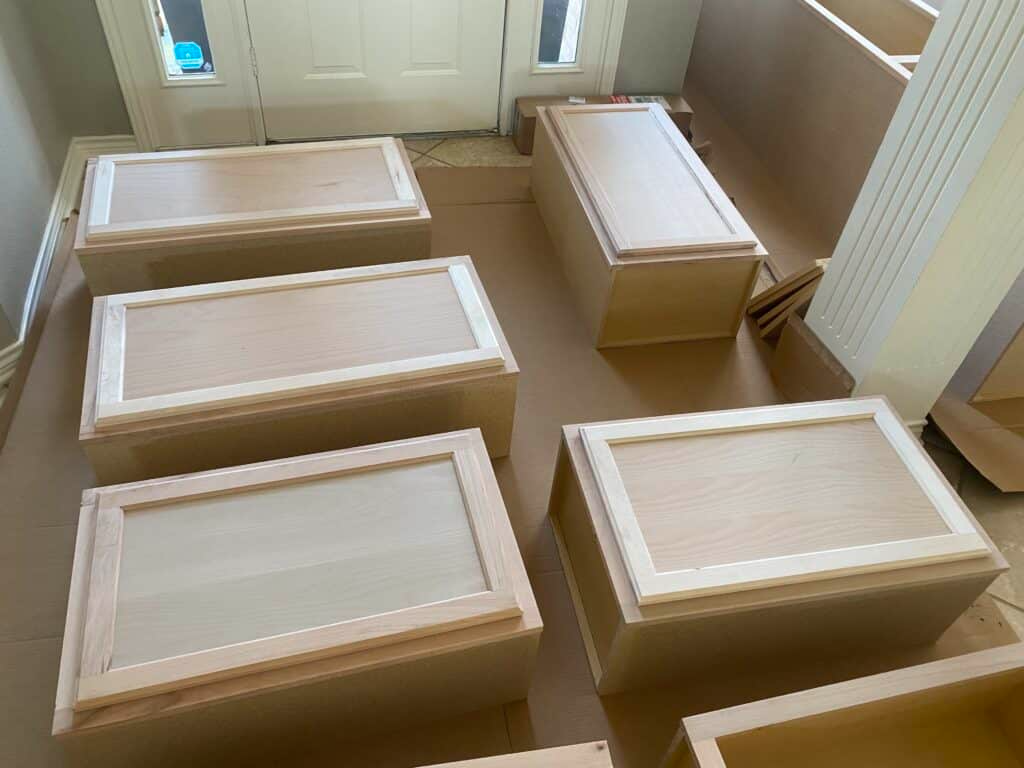
- Assortment of pre-assembled cabinets that fit your space. The ones we purchased from Home Depot were:
- (2) pantry cabinets
- (4) 18x36x12 wall cabinets
- (4) 18x30x12 wall cabinets
- (2) toe kick molding
- cabinet screws
- stud finder (my favorite is stud buddy!)
- drill (check out this post on how to use a power drill)
- painting supplies (check out this post on how to get a smooth finish on cabinets for all of the painting materials you need)
- scrap 2×4 board to use as a brace for upper wall cabinets
- crown molding
- optional, but SUPER helpful: crown molding cutting jig
Step 1: Determine Which Combination of Stock Cabinets Fits Your Space the Best
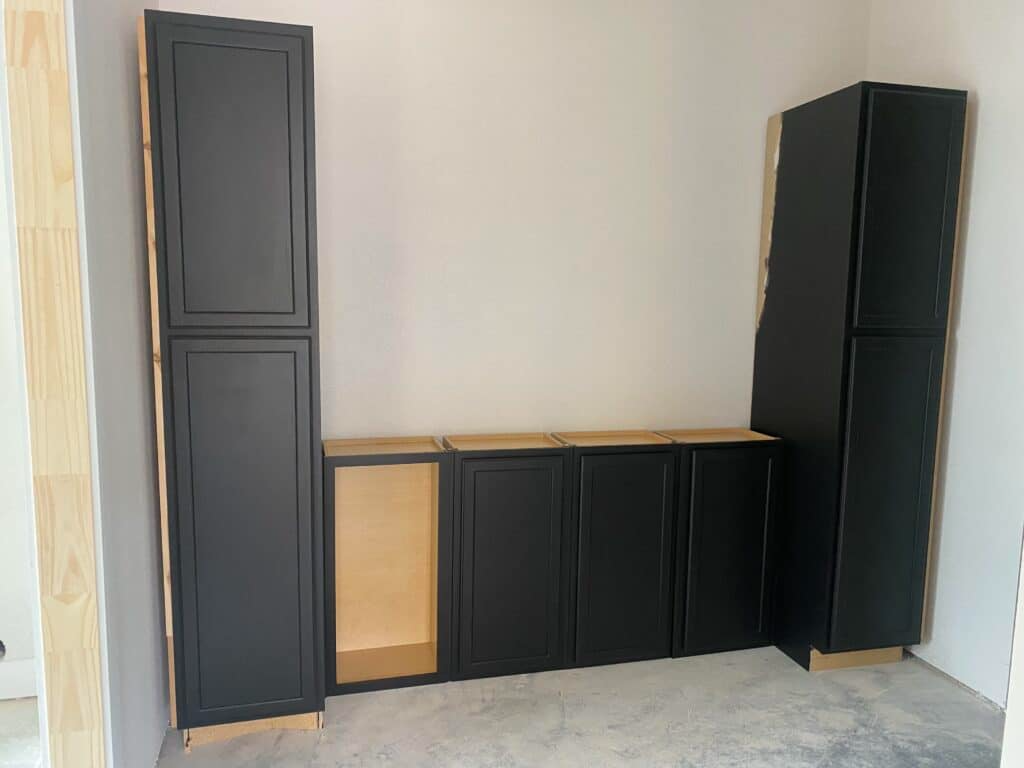
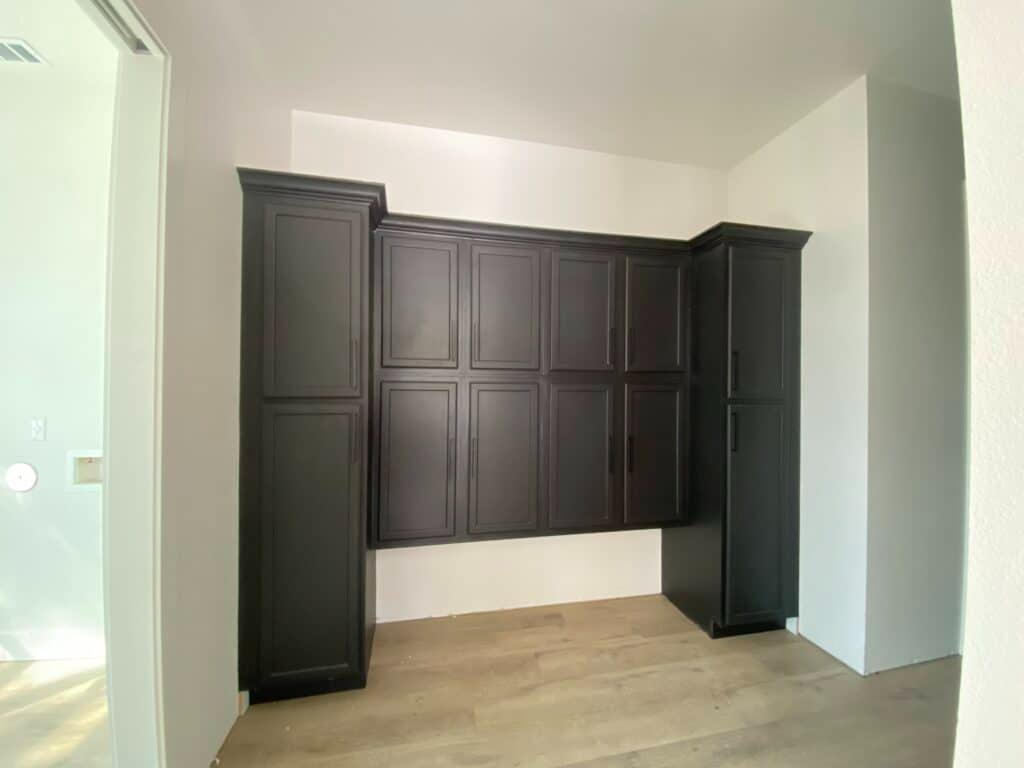
The first thing to do is to take some measurements and do some planning. The mudroom design you come up with be be dependent on the space you’re working with.
The picture below shows the space we were working with. When determining which cabinets will best fit your space, it’s best to just take a pencil to paper and do some math.
You can find stock wall cabinet dimensions in this post on upper kitchen wall cabinet dimensions.
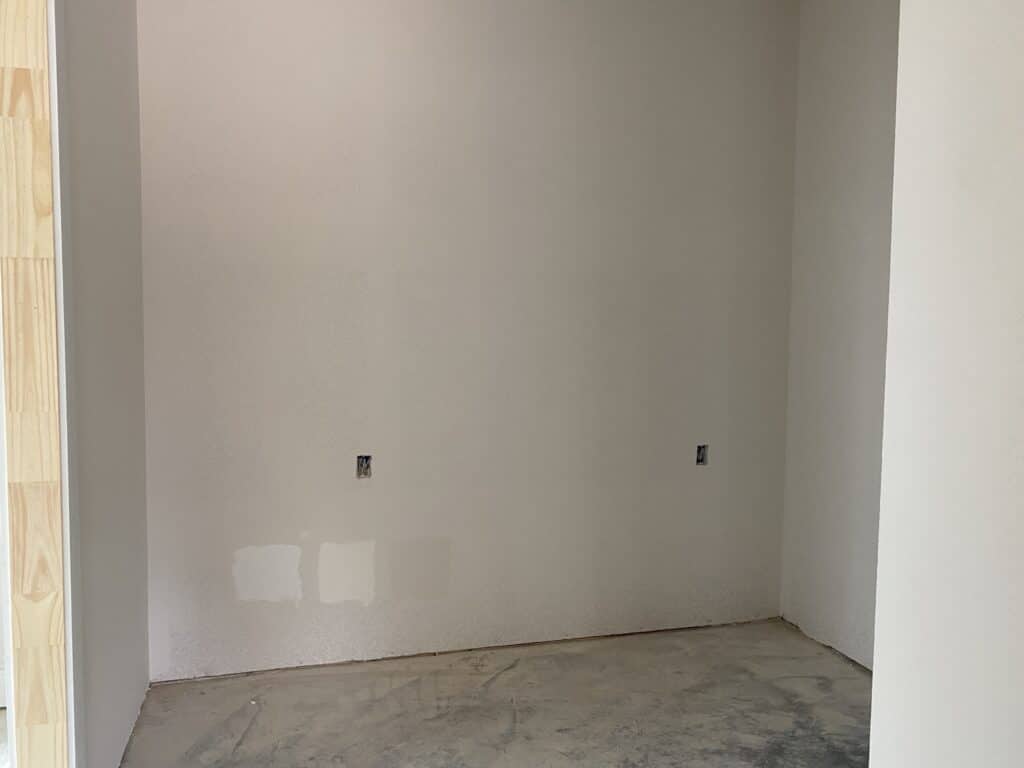
New Home Building Tip: Our painters didn’t allow us to sample paint colors on the wall because they said it will show through and ruin the final finish. So, we painted sample swatches on the walls that will be covered by cabinets!
Stock wall cabinets typically come in widths of 12″, 18″, 24″, and 36″. We chose cabinets that were all 18″ wide. This left about a 2 inch gap on either side of the cabinets. This will be filled in in a later step.
The depth of the cabinets (besides the pantry cabinets on the ends) are 12″ deep. This provides plenty of room to hide backpacks, coats, and similar items.
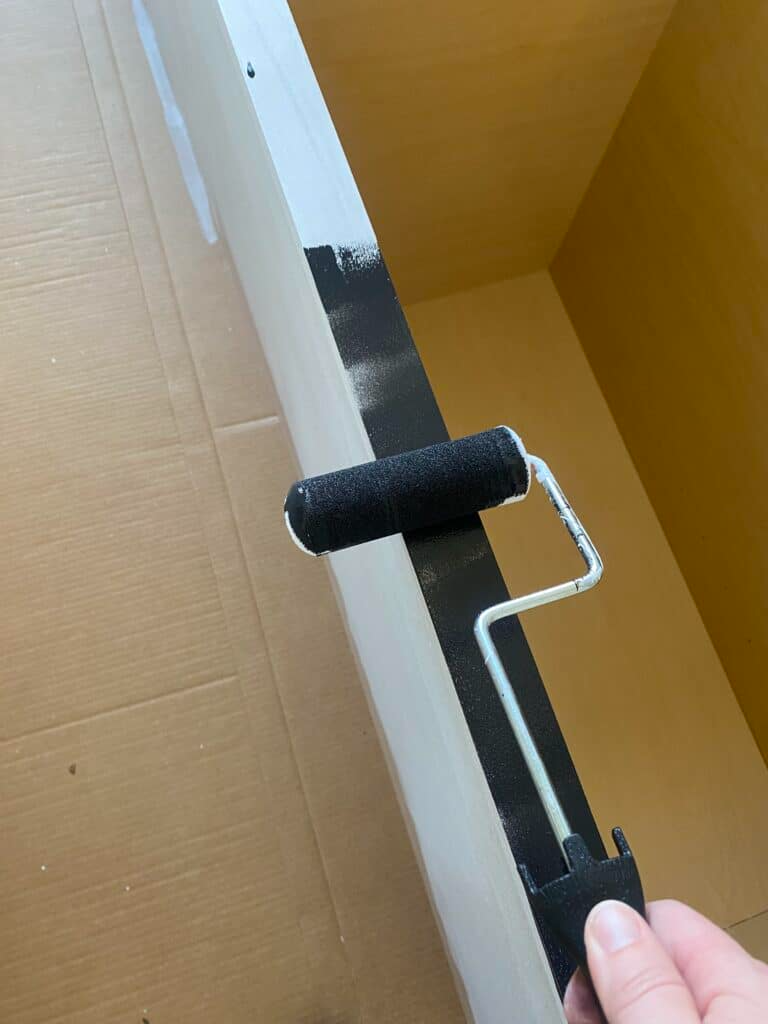
Step 2: Paint the Unfinished Cabinets
I went in to great detail in the following posts about my process for painting cabinets or furniture, so be sure to check those out:
- how to paint built-in bookshelves
- best way to get a smooth and durable paint finish

The general process for painting furniture or cabinets that I use is:
- Apply 2 coats of primer
- Lightly sand and wipe clean
- Apply 2-3 coats of paint
- Lightly sand if needed
- Apply the top coat
It’s best to use a super smooth foam roller for both the primer and paint.

Apply the first coat of primer and allow it to fully dry. After two coats of primer have completed dried, run a 220 grit sandpaper over the surface to smooth it out. Once you are finished, be sure to clean off all of the dust with a microfiber cloth.
This will ensure that the paint finish is smooth and durable.
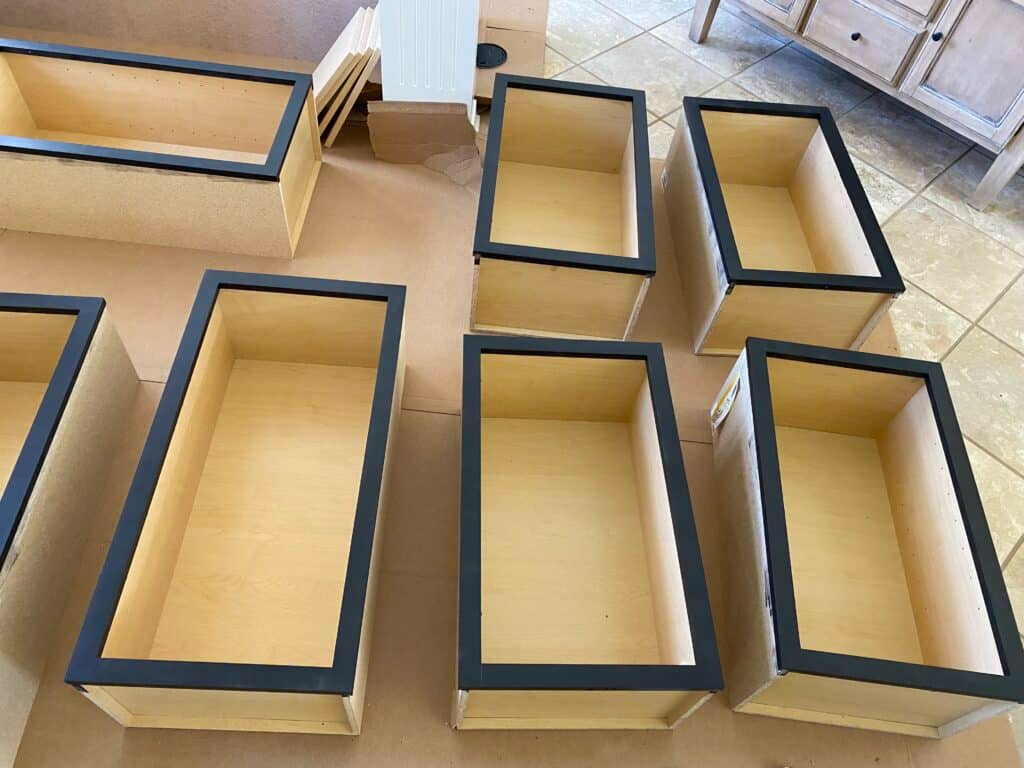
I chose to paint the mudroom built ins Caviar by Sherwin Williams. Find out why I think it is the best black paint color for furniture here!
I chose to leave the interior of the cabinets unpainted. They’re hidden by the doors. Additionally, the cabinets came with a sealer coat on the inside that works wonderfully in guarding against stratches.
Once the paint has dried, apply 2 coats of finish.
This is my favorite matte sealer for cabinets. I have used it on so many pieces like our kitchen table, black painted dresser, pull-out drawers in existing cabinets, and a square coffee table. It creates a beautiful and durable finish!

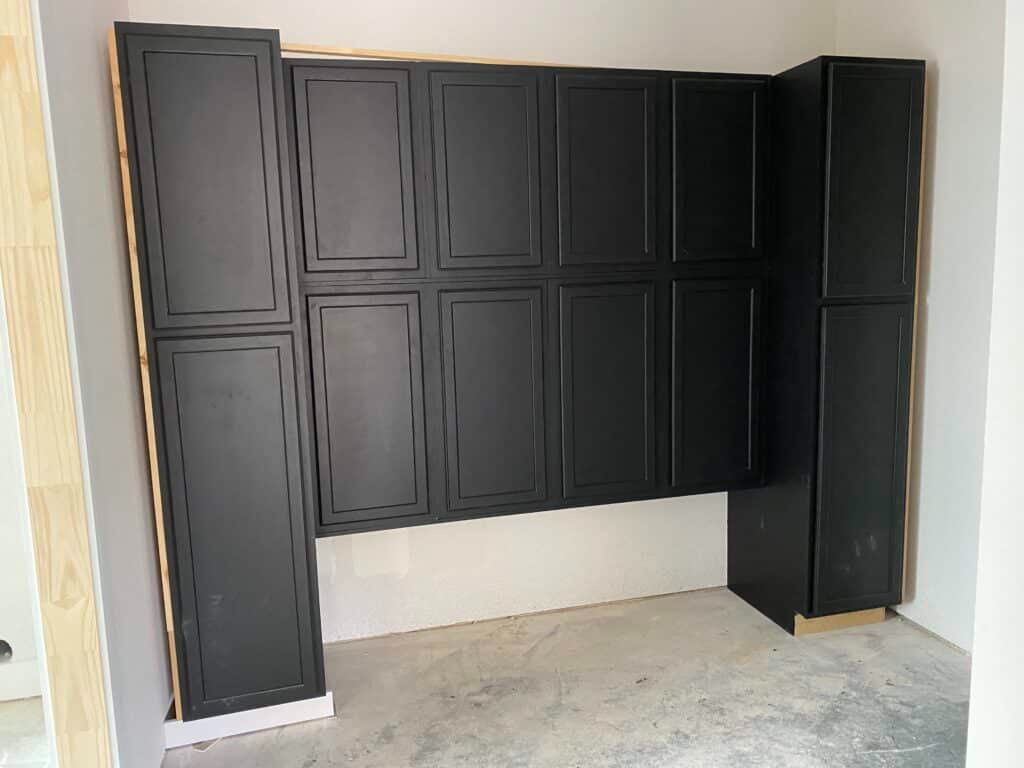
Step 3: Install the Cabinets
Place the cabinets in the space they will go in to make sure everything fits.
All of the cabinets need to be attached to the wall, even the ones that sit on the ground. This will make everything more secure and safe. If things are off-square, you can use wood shims to square it up.
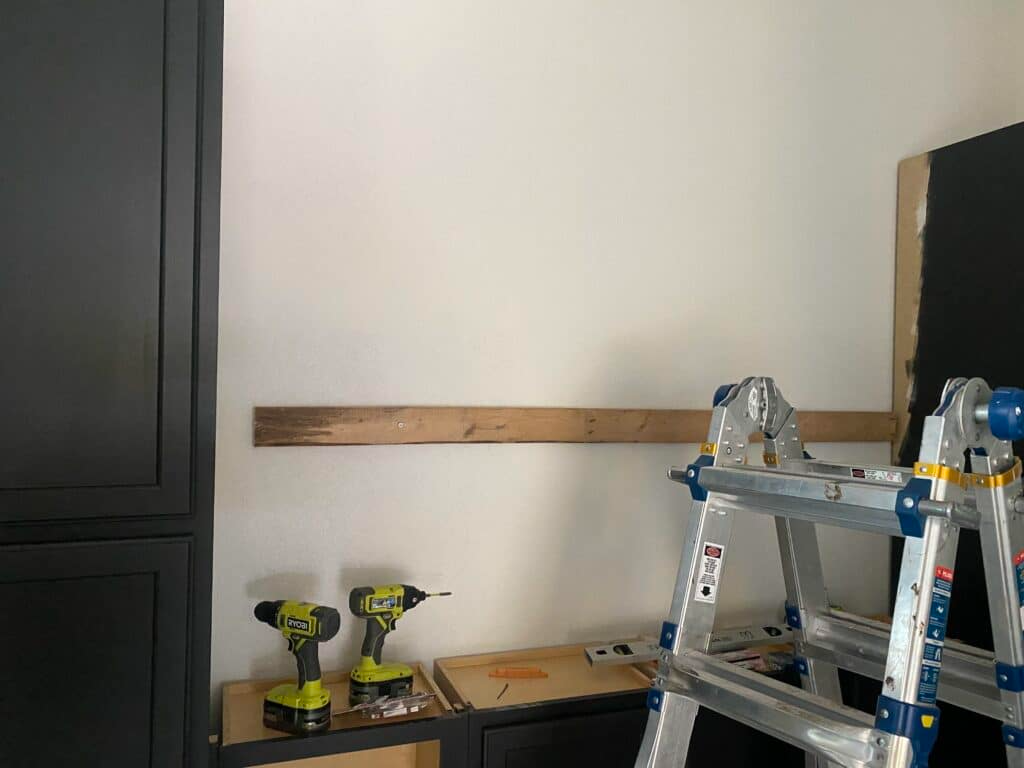
Use a stud finder and cabinet screws to attach the upper cabinets directly to wall studs. Stud finders can be purchased at any hardware store.
In order to attach the wall cabinets to the wall, install a temporary brace to the wall. This will allow the wall cabinets to sit on a level surface while you attach the cabinets to the wall. We used a 2×4 for this.
Make sure the brace is level and at the correct height.
Place one cabinet at a time on the brace. Pre-mark on the inside of the cabinets where the screws should go in order to attach the cabinets directly to a stud.
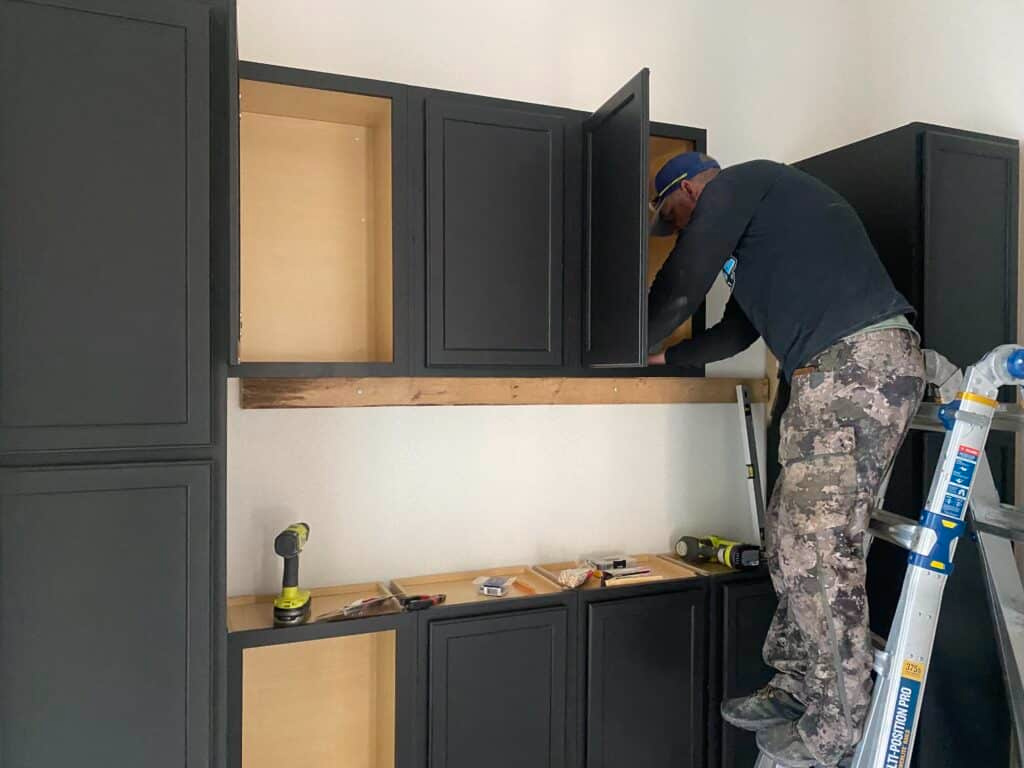
Once all of the wall cabinets are installed, remove the temporary brace from the wall. Repeat this process for the remaining wall cabinets.
Step 4: Trim Out the Built-Ins for a Custom Look
The best way to make these DIY lockers look more custom is to trim them out.
If you have space on either side of the cabinets, you can use toe kick trim molding as filler pieces. Scribe the filler strip to fit the wall, since most walls aren’t perfectly square.
In order to attach this, I added a vertical board going up the sides of the cabinets. I then used a nail gun to attach the molding to the wall/base board and cabinet to fill the space.
You can fill the nail holes with wood filler. Once the wood filler is dry, sand it smooth.
Adding crown molding to the top of the cabinets really makes a huge difference in the quality of the finished work. Crown molding is notoriously tricky to cut and install. My best advice is to purchase a crown molding cutting jig to use on your miter saw.
If you’re new to using a miter saw, check out this post on how to use a miter saw safely!
I attached the crown molding to the top of the lockers with wood glue and brad nails.
Once these trim pieces are added, they will need to be painted. Follow the painting steps above to finish them out.
Step 5: Build the Bench
I knew I wanted a bench that contrasted in color to the black mudroom built ins. So, I chose to make a white oak bench.
To build the bench, I used a white oak sheet of plywood. I laminated two pieces together using wood glue. This made the bench thicker, coming in just under 1/5″ thick.
I then added edge banding to the front to hide the seams. I used a kreg jig to drill pocket holes and kreg pocket hole screws to join all the pieces together. I hid the screw holes so they aren’t visible.
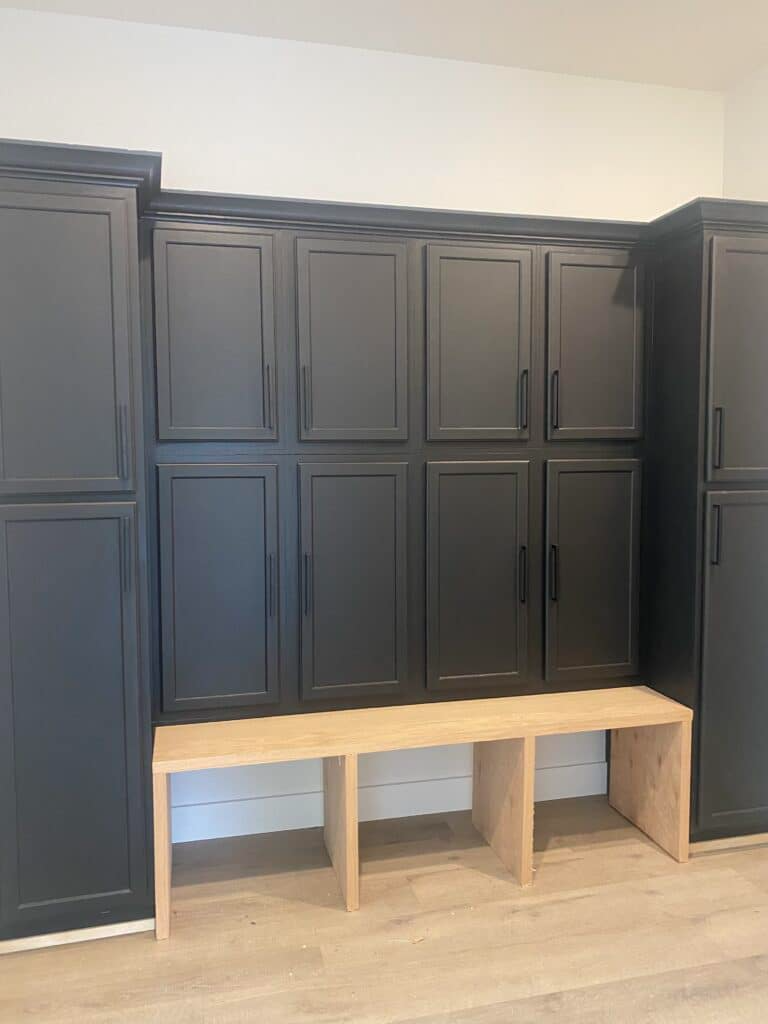
I decided to paint the legs of the bench black to match the cabinets. I left the bench top white oak and I love the contrast.
Finished Black Mudroom Built-Ins from Stock Cabinets with a Bench
The storage that these built-ins provide is awesome. We have never had a drop zone like this in our home before and it has quickly become a favorite part of the house!
And here it is!
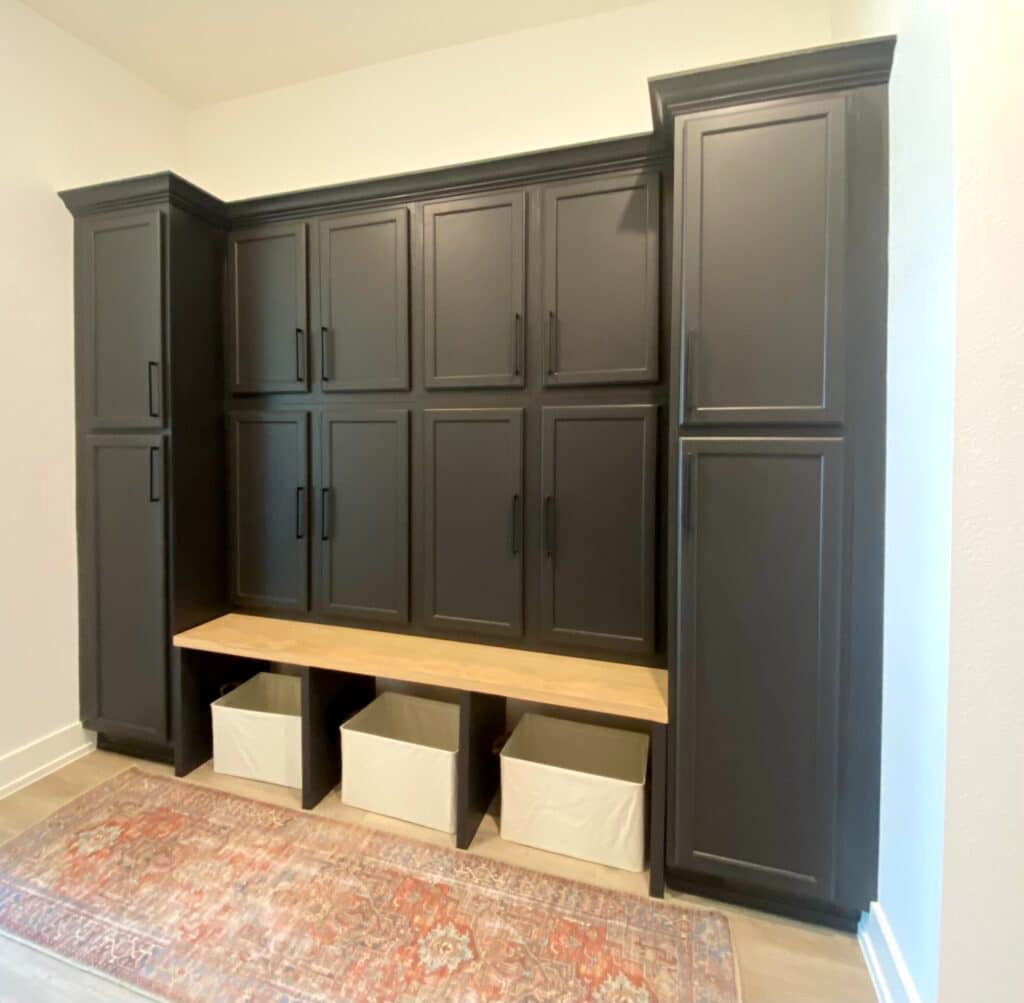
I installed coat hooks to the interior of the cabinets. They’re great for storing those backpacks and school supplies! It can, of course, work as a coat closet and is a great way to add some organization there.
There are also shelves that came with the stock cabinets. These act as sort of cubby dividers or locker dividers. I added baskets on the shelves in order to hide and store all the little things like keys for every member of the family.
I love the versatility that this DIY project provides. There are so many mudroom locker designs you can come up with when using stock cabinets!
Using pre-made cabinets to build things like dining room buffet, storage in a family room, home office, tv stand in the living room, or built-in bookcases is such a good option for those who don’t want to build cabinets from scratch. They could also be used in a laundry room for added storage.
This is such a great project for those who want to make their own diy built-ins and might be new to building projects. If this is you, check out these posts on building basics!
Custom built-ins are usually very expensive, but this method allows you to save time and money. The cabinet doors allow you to hide that mess. Additionally, every family member gets their own locker space to store their items.
If you do find yourself building mudroom cabinets or built-ins on your own, you might find these articles helpful:
- how to build mudroom built ins
- Best RTA Cabinets Made in the USA
- mudroom shoe storage
- how to install drawer slides on face frame cabinets
- best shelf pin jig
- how to install european hinges on face frame cabinets
- Where to Put Knobs and Handles on Kitchen Cabinets
- Popular Shaker Kitchen Cabinet Hardware Ideas
- DIY Gas Fireplace Surround
- DIY Custom Closet on a Budget
- Bedroom Closet Dimensions

Suzie Wible
Suzie has shared her knowledge for over 10 years about building furniture, painting techniques, how to build your dream home, and basic to advanced woodworking skills. Through this blog, readers will feel empowered to create a home and products they love too.