Getting a Smooth Paint Finish on Cabinets: Easier Than You Think!
Over the years of completing many DIY projects, I have found the perfect step-by-step formula to get a super smooth finish when painting things like cabinets, built-in bookcases, or mudroom hall trees, for example. I found this process after many years and many DIY projects of trial and error, and today, I will share with you the exact process of what I do to achieve a professional look on cabinets.
There is nothing more frustrating than completing a build, then ruining the look of it with a poor paint job. The finishing part (prepping, painting, and sealing) of a DIY project is just as important as perfecting the skills of building quality furniture.
Thankfully, you can achieve a look similar to professional painters on your cabinets, built-ins, or bookcases with minimal supplies. All it takes is a little elbow grease and patience to achieve the best results when painting on your own. It’s always a satisfying thing when you can create quality pieces and not have to spend a small fortune on supplies.
If you’re just getting into building your own furniture or home projects, start with my post on how to build furniture for beginners. I outline the exact basic tools I use that will get you started in making your own furniture. Once you perfect that, hop back to this post to find out how to apply a smooth paint finish to the furniture you build!
The basic question I set out to answer in this article is:
Q: What is the best way to paint cabinets – a brush or roller?
A: In order to get a factory finish look on cabinets when you paint them yourself, you will actually use both a brush and a roller. However, the majority of the painting will be done with a roller.
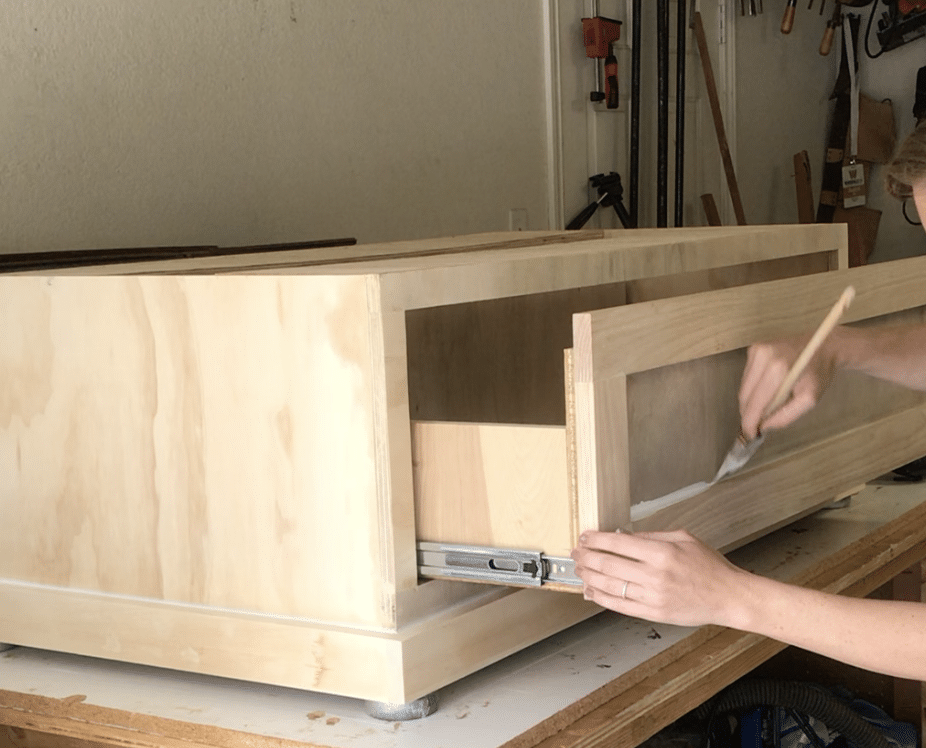
Specifically, a foam roller with give you the smoothest finish when painting cabinets. However, a brush is required for the small spaces that a roller can’t reach. An example of this would be the inside edges of shaker cabinet fronts.
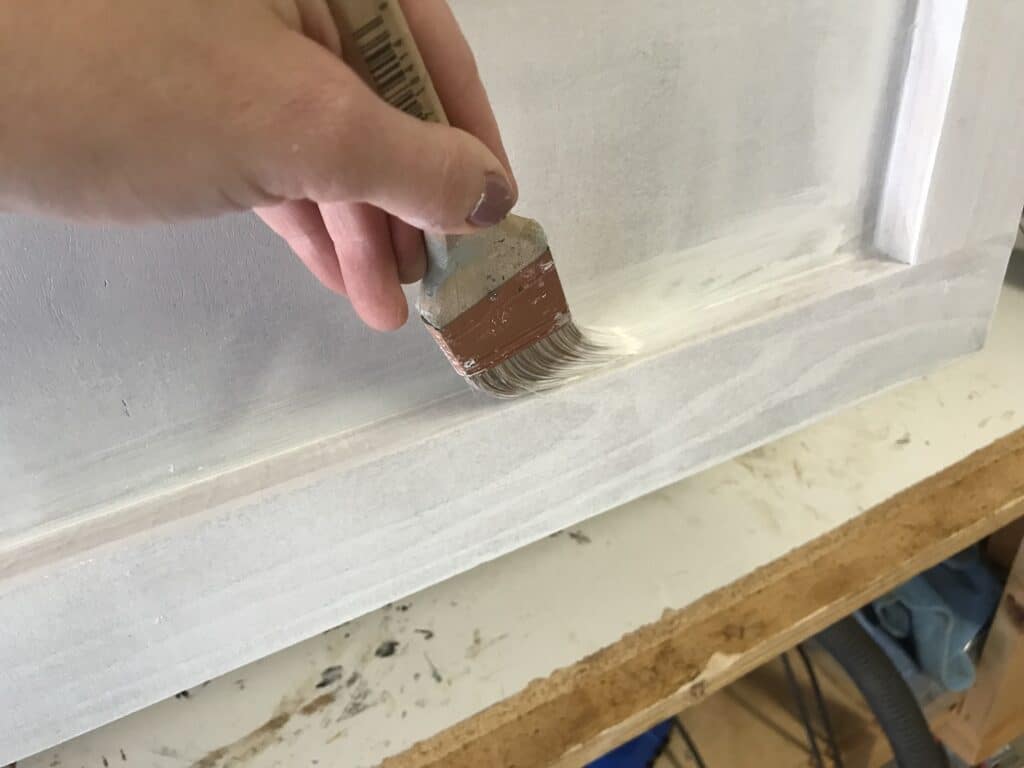
You will start by cutting in the nooks and crannies with a high-quality angle brush, then you will follow it up with a foam roller.
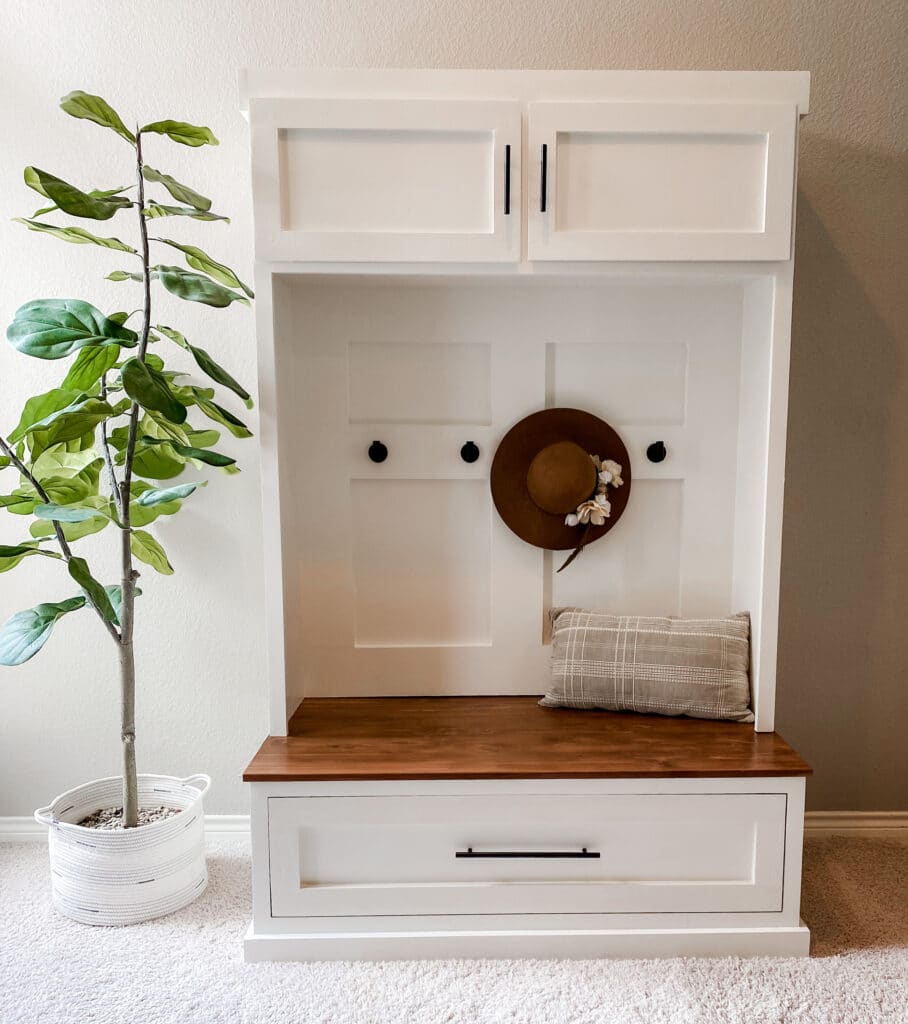
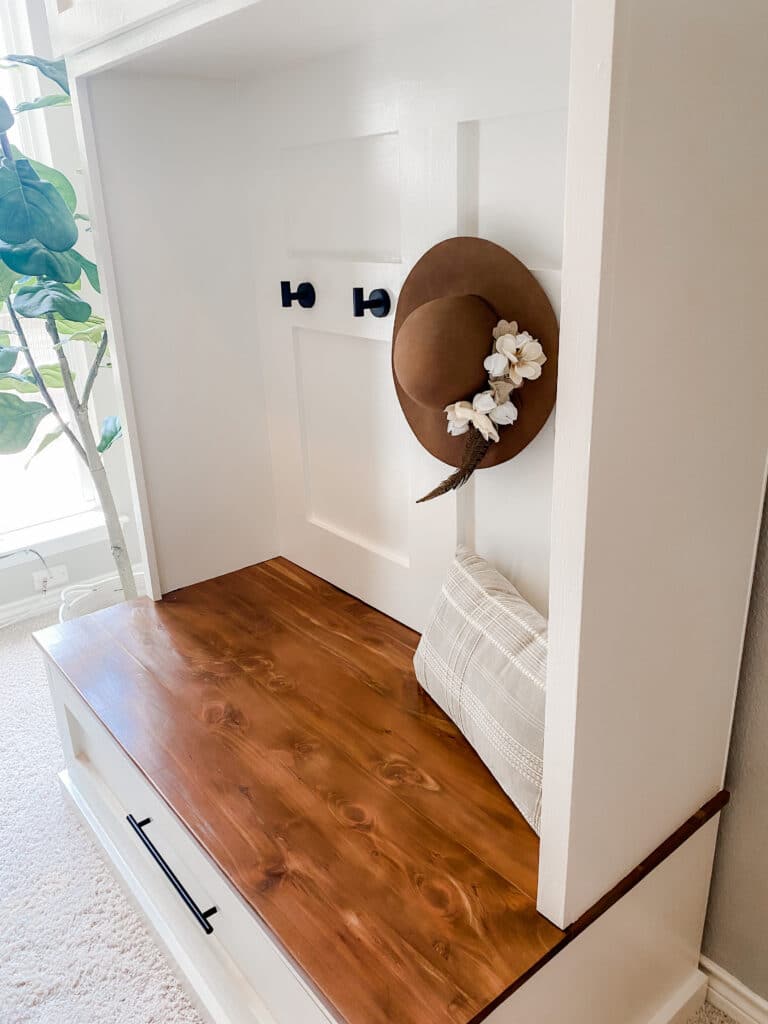
I did this method in a recent mudroom hall tree build, mudroom locker built-ins from stock cabinets, fireplace surround, and DIY rustic coffee table build and I loved the outcome. It ended up being very smooth!
Q: How do I paint cabinets without brush marks?
By using a high-quality foam roller, you will have minimal brush strokes. Since the majority of the painting is done with a roller, and only small sections of the piece will be painted with a brush, you will have minimal (if any) brush marks. Follow the steps below to achieve a very smooth finish when painting cabinets.
There are a few details you need to know in order to achieve a super smooth finish when painting kitchen cabinets. I will outline the basic steps below and go into further detail for each step below that.
Materials Needed for a Professional Looking Finish on Cabinets
Disclaimer: This site contains product affiliate links. We may receive a commission if you make a purchase after clicking on one of these links.
General Process for How to Get a Super Smooth Finish on Cabinets
- Lightly Sand with 120 grit sandpaper
- Apply Primer
- Lightly Sand with 220 grit sandpaper
- Paint the first coat of paint
- Lightly Sand Again with 220 grit sandpaper
- Paint the Second Coat
- Apply the Sealer
And that’s it! It is pretty basic stuff. It is my tried and true formula for a super smooth and durable finish on your painting project. Due to the drying time, it can be time-consuming sometimes. However, it is worth the wait and elbow grease to achieve a smooth finish that will last for years!
Before we get started on the details, I wanted to mention your work space when painting. It is incredibly important to do this painting in a clean area. Things like paint tents help immensely with this. It is very frustrating to achieve a beautiful finish when painting cabinets, only to have dust or debris settling on your piece! So, take care to find a clean space to paint in.
Alright, let’s dive into the details and what you need to know for each step.
Step 1: Sand with 120 Grit Sandpaper
If you are building a cabinet out of raw wood like this mudroom hall tree build, the plywood will need to be sanded first. This is assuming that the plywood is in good condition. There will be splinters from the cuts you made while building, plus a generally rough surface of the plywood off the shelf.

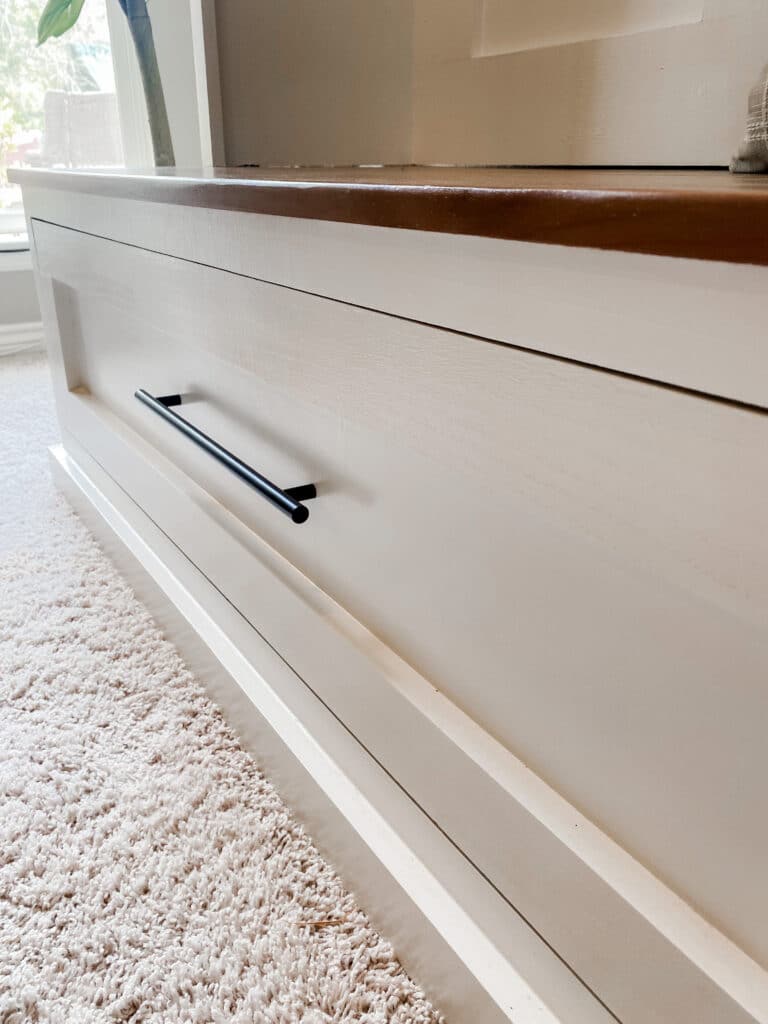
Just FYI, the white paint color I used for this mudroom hall tree build is Benjamin Moore brand in the color White Dove. The actual paint is the Premium Semi-Gloss Interior Paint and Primer in Base 1. I love this color and use it often, like on the trim in my house! It is the perfect white – not too stark, but also no yellow undertones. I love it.
Achieving a smooth finish starts with sanding the piece well to give it an even and smooth surface. 120 grit sandpaper is the perfect grit for this. It will remove just enough, but not too much.
Once it is sanded, remove all of the dust from sanding with a tack cloth.
Step 2: Apply Primer
The best primer I have found is Kilz primer. I bought a gallon of it a long time ago and it has lasted me for countless projects.
The primer gives the paint something to adhere to, which is extremely important. When you are painting something that will be used frequently, applying a primer is key to preventing chipping. It also prepares the surface for a super smooth finish.
Even if you are using paint with primer in it, it is wise to use this as extra primer as well. This is especially important if you are painting a piece that will get heavy use or traffic.
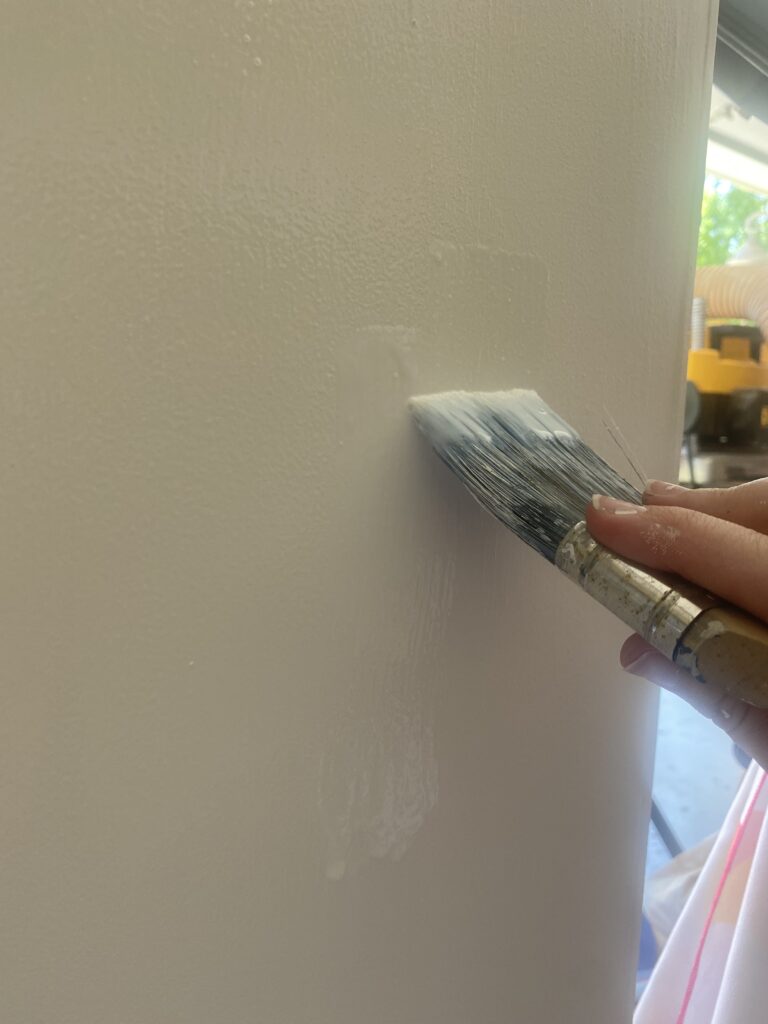
Use a brush to apply the primer to all of the corners that the roller can’t reach. Use a roller to apply primer to the rest of the piece. Be sure to smooth everything out as much as possible. A light coat is much better than a heavy coat in order to achieve a smooth finish.
Step 3: Lightly Sand with 220 Grit Sandpaper
Depending on the scope of your project (like how many cabinet doors, cabinet frames, size of the bookcases, etc) you might be able to do this by hand. You can purchase a hand sanding block to do this by hand. A benefit of this is you will have much more control over the pressure of sanding and therefore, not remove too much primer.
However, if you don’t have a sanding block, just a piece of sand paper will work fine.
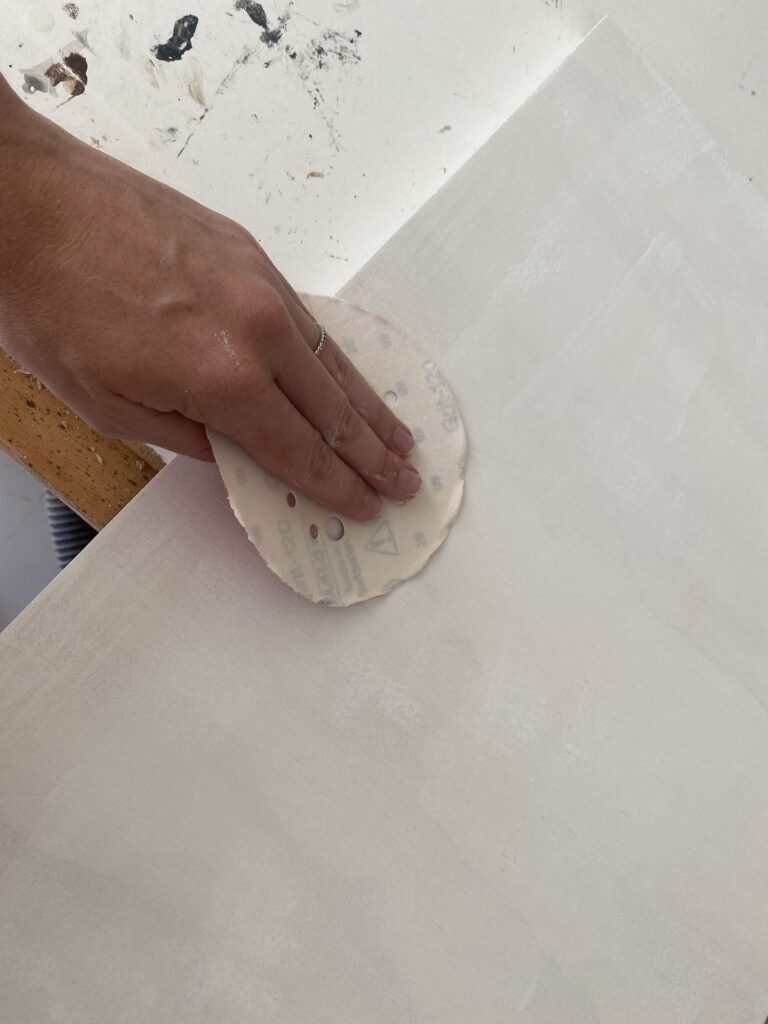
You do not want to remove a ton of the primer. You will want to lightly sand the surface of the primer. Doing this by hand instead of using an orbital sander, for example, will give you much more control over the pressure applied to the piece.
So, if it is possible to do this sanding by hand with a sanding block, I recommend that.
Note the change in grit from step 1. The higher the grit number, the smoother the surface of the sandpaper is. 220 grit is perfect for this step, as 120 grit would remove too much primer.
After you sand it, there will be dust that needs to be removed. Use a tack cloth or a microfiber cloth to remove the dust. If you skip this step, the finish will not be as smooth, since the dust will be under the coat of paint you will apply in the next step.
Step 4: Paint the First Coat of Paint
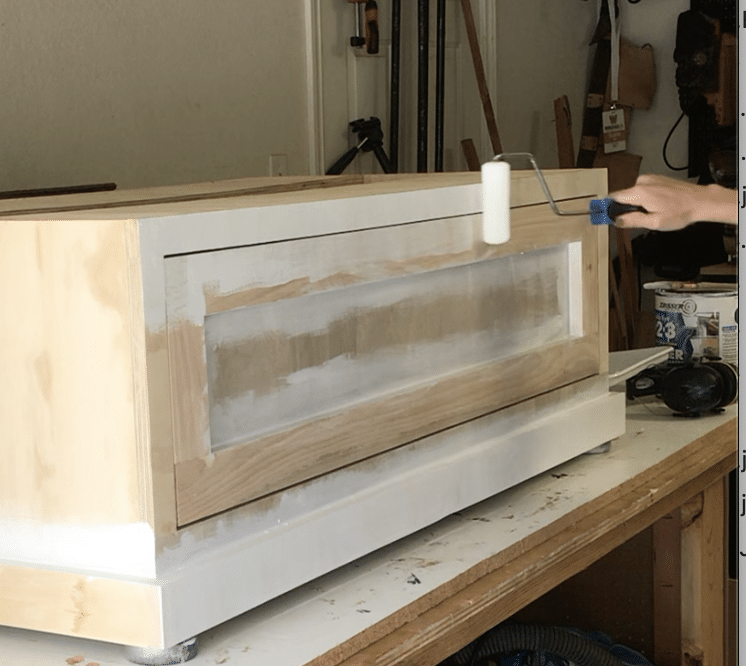
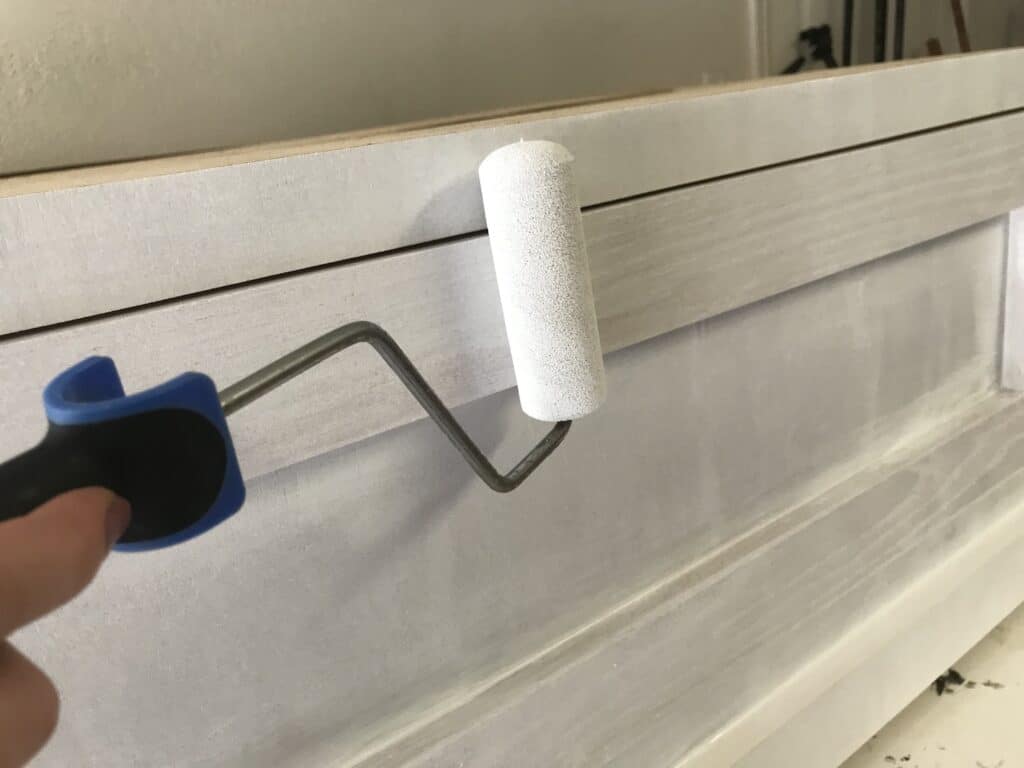
Like I mentioned earlier, the answer to the question of whether a brush or roller is the best for a smooth surface is: both! However, the bulk of the paint will be applied with a roller.
Q: What is the best paint roller to use when painting cabinets?
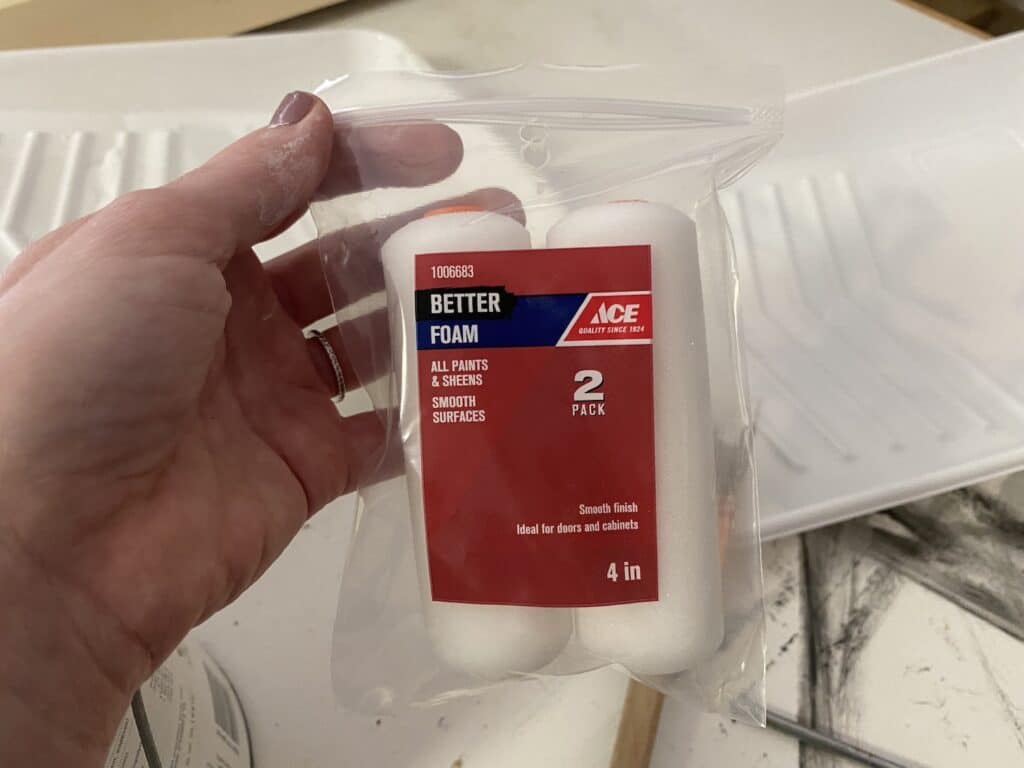
A: This is the best foam roller I have found for painting things like kitchen cabinets, built-ins, bookcases, etc. It is a foam roller that applies the perfect amount of paint for a smooth finish. Clean-up is simple and it is a great price point. I personally like that it is a mini roller because I don’t end up with too much paint on the roller itself.
This is the best paint brush to cut in. It also provides the smoothest result.
I also used this method when I added pull out drawers to existing kitchen cabinets. I also cover this method in this post where I talk about the best black paint color for furniture.
The best paint for cabinets that I have found is the latex paint I mentioned above. It has great coverage, great work time, and always dries smooth. Selecting the right paint for projects like this is important, and this is a great option.
The paint brush will be used to apply the paint only to the places that the roller cannot reach. For example, the inside corners of a bookshelf, or the edges of shaker-style cabinets. Apply a light coat of paint with the brush to the corners and edges that the roller can’t reach.
Then, use the roller to apply a thin layer of paint to the remainder of the piece. This is for places like the cabinet boxes and the majority of the cabinet surfaces. Although this is a light coat of paint, be sure to have even coverage, taking care to not miss any spots. You do not need much paint to fully cover the piece. Since you are doing a light coat, this will also cut down on potential roller marks.
Allow this coat of paint to fully dry. Read the back of the can for the suggested dry time, as it will depend on the paint you are using. On average, it will be dry to the touch at 2 hours, and ready for another coat after 4 hours, but be sure to double check your specific paint.
Step 5: Lightly Sand Again with 220 Grit Sandpaper
Repeat the process from step 3. Use a hand sanding block if possible. Be sure to remove all of the dust with a tack cloth or microfiber cloth once you are done sanding.
Step 6: Paint the Second Coat
Repeat the process from Step 4. Use a brush for all of the nooks and crannies (like on drawer fronts) and use a roller for the rest of the piece.
After applying this second coat, you should have full coverage without a need for a third coat. However, if you feel that more coats of paint would be better, repeat steps 5 & 6 one more time.
Step 7: Apply the Sealer
Make sure to wait to apply the sealer for the cabinets or bookcases you are painting until the paint from the previous step is completely dry. If it is not fully dried and cured, the sealer will not adhere correctly.
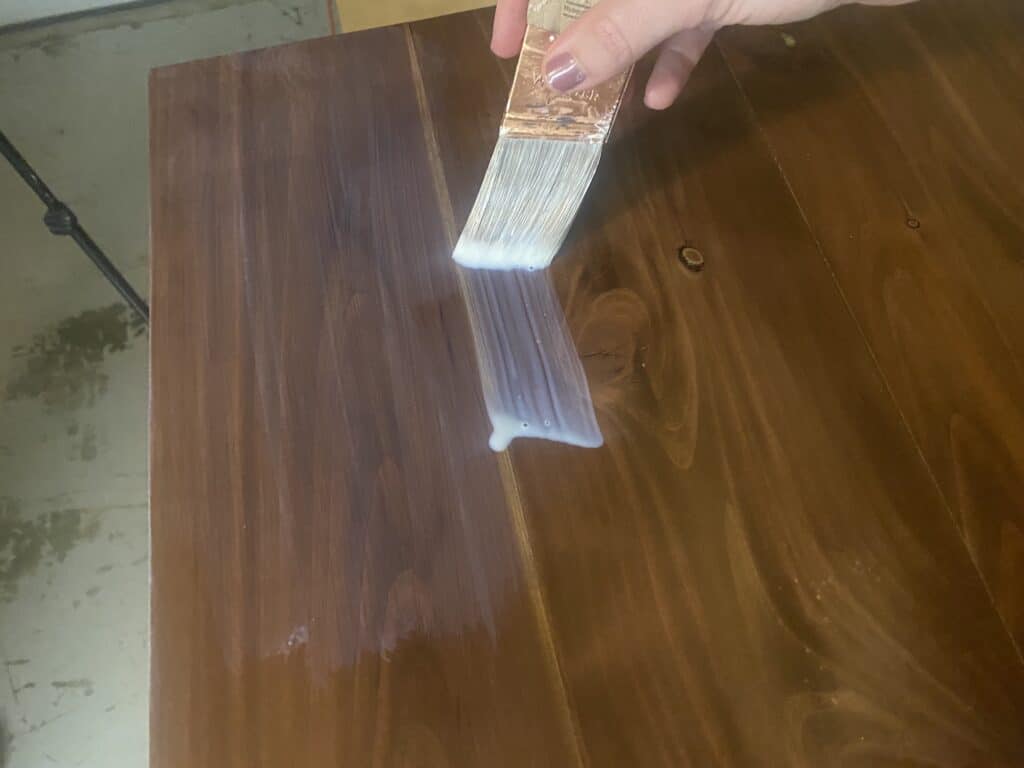
My absolute favorite sealer I have found is this matte finish polyurethane sealer. It goes on milky, but dries clear. I apply a light coat with a quality brush. The finish is always so smooth.
Once that is dry, I like to apply a second coat. Again, check the can of your specific sealer, but the typical wait time is 4 hours.
You never want to shake a can of polyurethane before use. This will cause air bubbles to form, which will cause the surface not to be smooth. Use a stir stick instead.
It is also very important to use a clean, new brush for this. One mistake I have made in the past is using an old brush that had small bits of paint on it. Although it was a quality bristle brush, the polyurethane caused the bits of paint to flake off from the brush into my finish. I had to wipe it all off and start again, which was a huge headache!
So, learn from my mistake and use a new, clean brush that has no old paint on it for this step.
What I love about this particular polyurethane is the sheen. I have never been a huge fan of glossy or even semi-gloss finish on things like cabinets or bookcases. The shine tends to show imperfections. This matte sheen is beautiful and durable.
It also provides incredible protection for your piece. I have used this on many pieces, but most notably, I have used this on our kitchen table. Our table gets daily heavy use and it has held up wonderfully. I was even able to wipe off permanent marker bleed-through with just a little rubbing alcohol! I stock up on this polyurethane because it is truly the best product to keep cabinets or tabletops from chipping!
This method would be great if you were to paint your own custom kitchen cabinets. You can also check out Best Sherwin Williams White Paint Colors for Kitchen Cabinets. I also used this method to paint a dresser black.
This whole process would work great on bathroom cabinets or kitchen cabinets as well. If you’re designing kitchen cabinets, be sure to check out this guide on the dimensions of upper kitchen cabinets.
The finish will ensure that you are protecting your cabinets from changes in temperature and moisture due to in being a bathroom.
Conclusion
I have outlined the exact process I have used for countless projects to achieve a smooth finish. By using a roller for the majority of the painting, you will be able to achieve the best finish possible. This formula for a smooth finish has provided years of use for pieces like our Ikea Rast Hack with no damage from heavy use and easy clean-up. This is the easiest way and the most cost-effective way I have found to achieve professional looking results!
Let me know if you give this process for achieving a smooth paint finish a try!
If you’re doing cabinetry projects, you might find the following articles helpful as well:

Suzie Wible
Suzie has shared her knowledge for over 10 years about building furniture, painting techniques, how to build your dream home, and basic to advanced woodworking skills. Through this blog, readers will feel empowered to create a home and products they love too.