Kitchen Cabinet Hardware: Where to Put Knobs and Handles
Kitchen cabinet hardware placement is such an important part of designing a kitchen. Knobs, handles, and pulls are not just functional but can also be beautiful decorations for cabinets.
There was a lot of thought put into our kitchen cabinet hardware. We had to decide what finish for the hardware, like matte black, brushed nickel, or brass. We had to decide if we wanted knobs, pulls, or handles. And then we needed to decide where to place them!
There are so many tiny decisions that need to be made when building a new home. I poured over every last detail of our build. During the process, I loved to see what other people did in their homes, so I could see it in real life.
So, that is my goal with this post. I will outline all of the details of our kitchen cabinet hardware. Hopefully, you will find some inspiration. Also, I hope that these details will help you in your decision making.
In the end, kitchen cabinet hardware is, of course, all up to personal preference. There are no hard and fast rules when it comes to cabinet hardware. So, I will share our picks for hardware, with the hopes that you find some inspiration.
Updating kitchen cabinet handles is a great and easy way to quickly update the look of a kitchen. The cost is minimal, compared to all new cabinets, for example.
Kitchen Cabinet Knob and Handle Inspiration
I will first begin by showing pictures of our actual kitchen and going over the details of our choices.
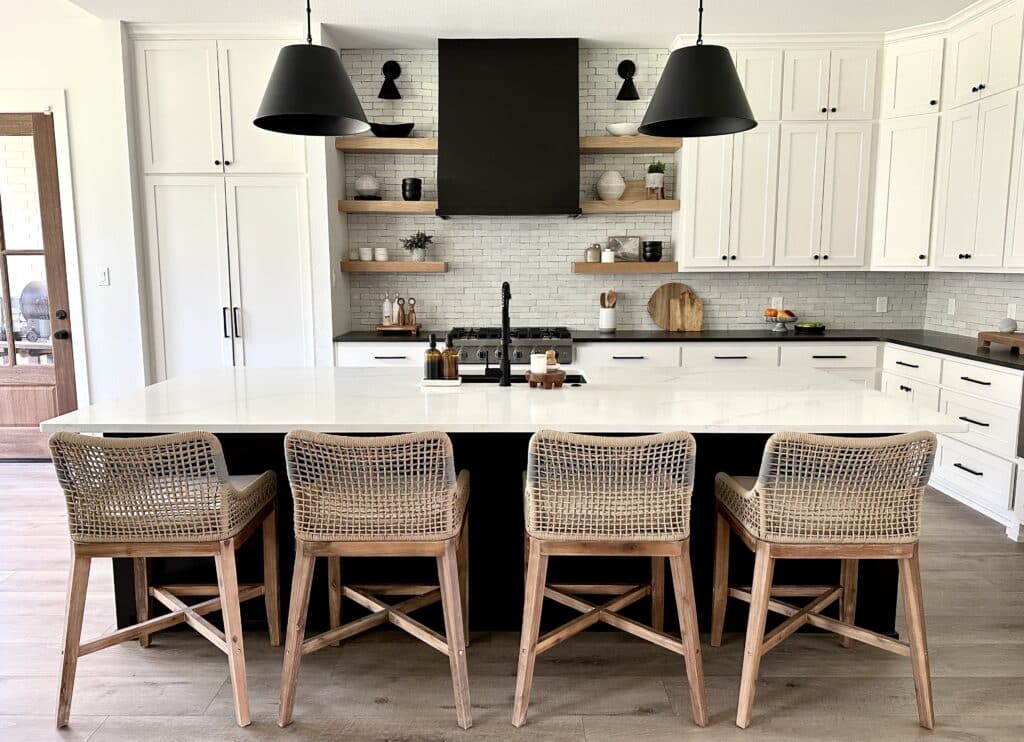
The cabinets on the surround of our kitchen are white shaker cabinets. They are painted Snowbound by Sherwin Williams. The base cabinets are a mixture of cabinets and drawers.
The kitchen island is painted Caviar by Sherwin Williams.
We chose 1 1/4″ matte black knobs and matte black handles on all of the cabinets in our kitchen.
We have knobs on the upper cabinets and lower cabinets. We put handles on all of the cabinet drawers.
Knob Spacing on Kitchen Cabinets
As a general rule, you will want to place the knobs equal spacing from both up to down and left to right. So, measure the thickness of the shaker cabinet border, if this is what you have. Then, divide that measurement in half. This will be how far from the side and the bottom the knobs will be.
For a quick shaker cabinet lesson – the vertical pieces of the shaker cabinet are called stiles. The horizontal borders of the shaker cabinets are called rails. So, the cabinet knobs and handles are installed on the door stile.
For us, we centered the knobs on the cabinets with the horizontal line made by the bottom of the shaker border. We then centered the knobs on the vertical border of the shaker.
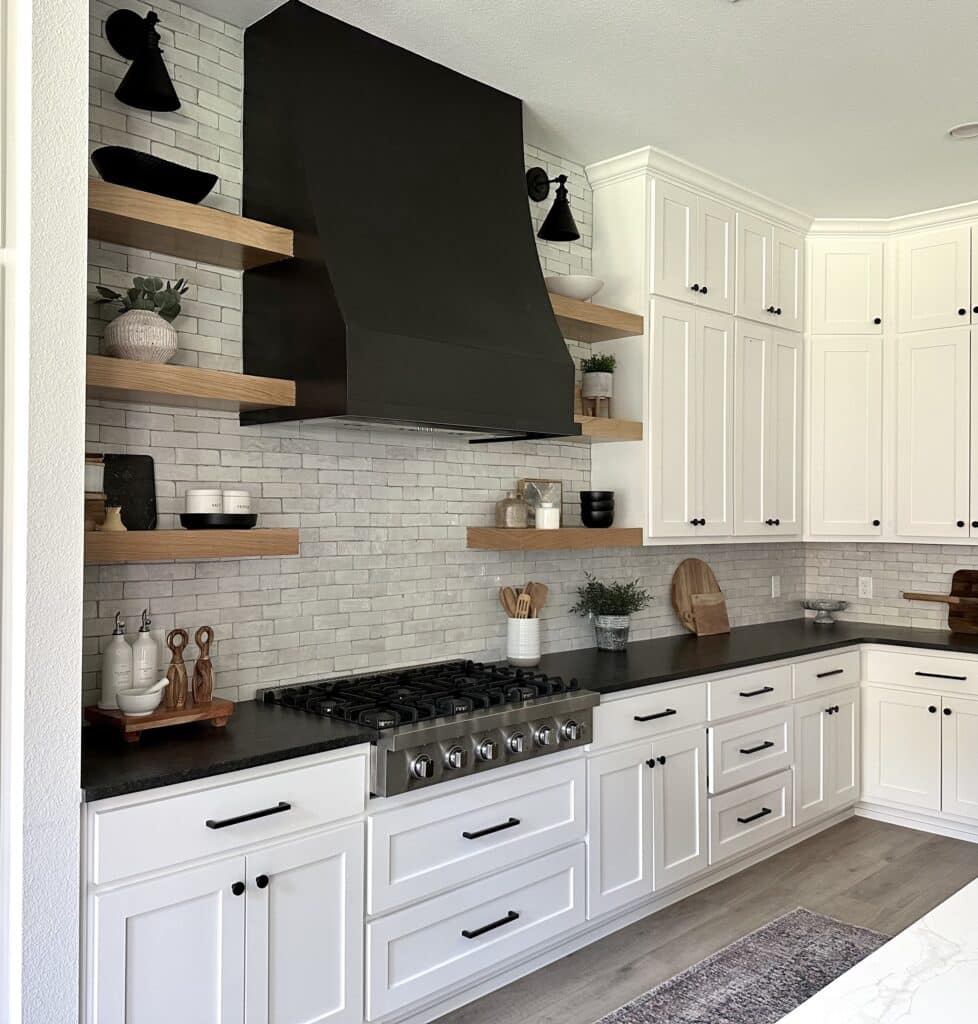
We put knobs on all of the upper kitchen cabinets in our kitchen.
The upper doors have knobs on the bottom border so we can easily reach them. For those cabinets way up high, we purchased a telescoping ladder to use. This allows us to easily access the items in those cabinets, although we only keep rarely used and seasonal items up there.
The ladder is very lightweight and takes up very little room when it is stored. I highly recommend it!
Handle Spacing on Kitchen Cabinets
Handles on kitchen drawers should be perfectly centered, both vertically and horizontally. I will cover a handy tool for installing hardware later in this article, so be sure to check that out.
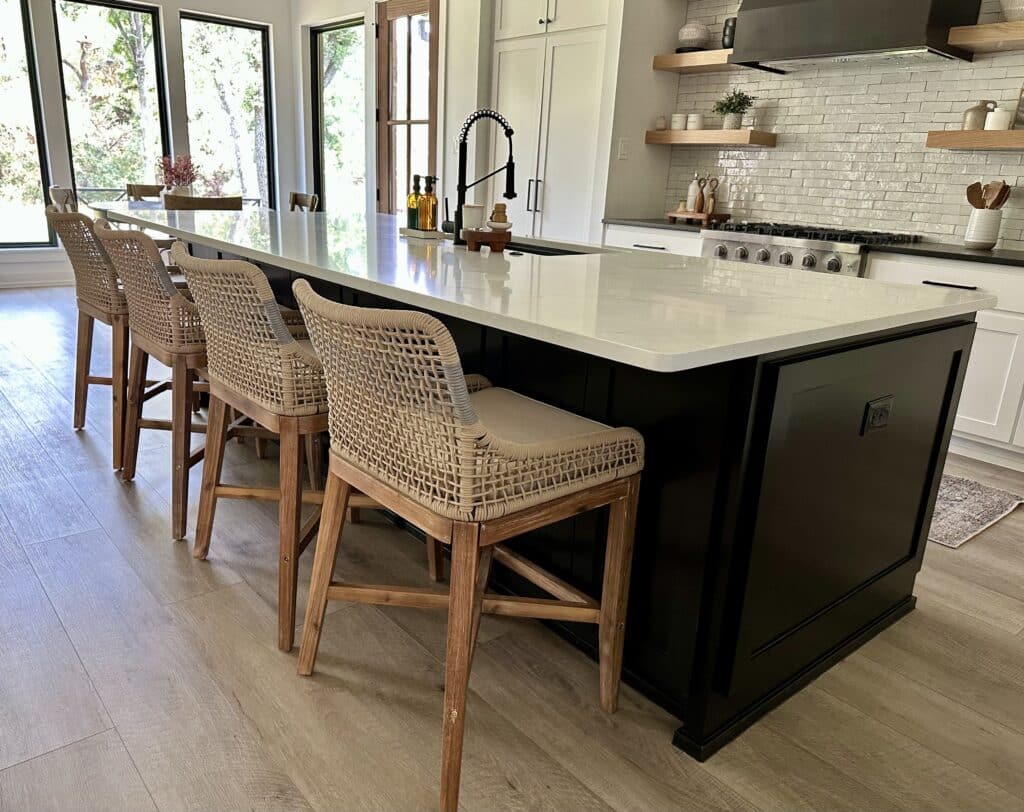
I personally like the look of longer pulls on drawers that are wide. They help fill the space and look more custom.
We chose 8 inch wide cabinet pulls for drawers that are 24 inches wide. Being that they are large drawers, wide pulls were the best option, rather than standard pulls.
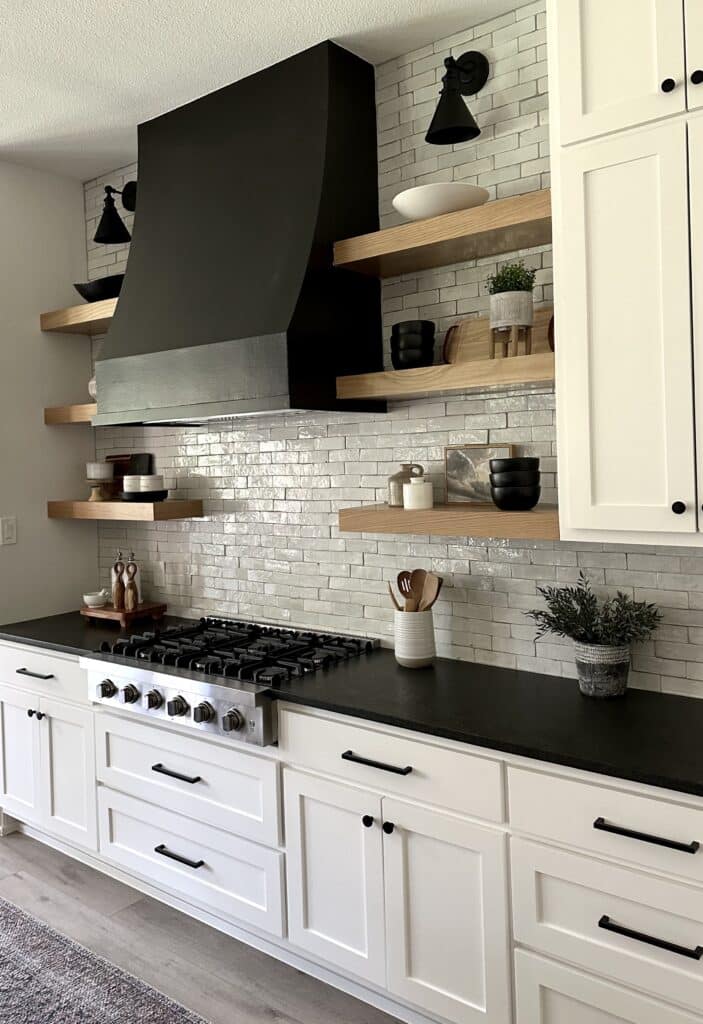
We have shaker style drawers, except on the top drawer. I wanted to switch it up and do something different on the top drawer. So, the top drawers in our kitchen are flat faced and the drawer front is not shaker syle.
However, if you have a smaller drawer, a cup pull could be a great choice. Cup pulls can be beautiful, sophisticated, and when done well, can be very classy looking. They are typically only done on drawers. They are also commonly found in traditional kitchens.
If you are going for more of a modern look, consider using finger pulls. Finger pulls are placed on the top of the drawer or cabinet. They can look great, especially if you’re going for a minimalist vibe. Finger pulls create sleek and clean lines.
When handles are used on cabinet doors, be sure to center the screw holes on the border of the cabinets. The bottom of the pulls should be about 1 inch from the bottom of the cabinet.
Knobs vs Handles on Kitchen Cabinets
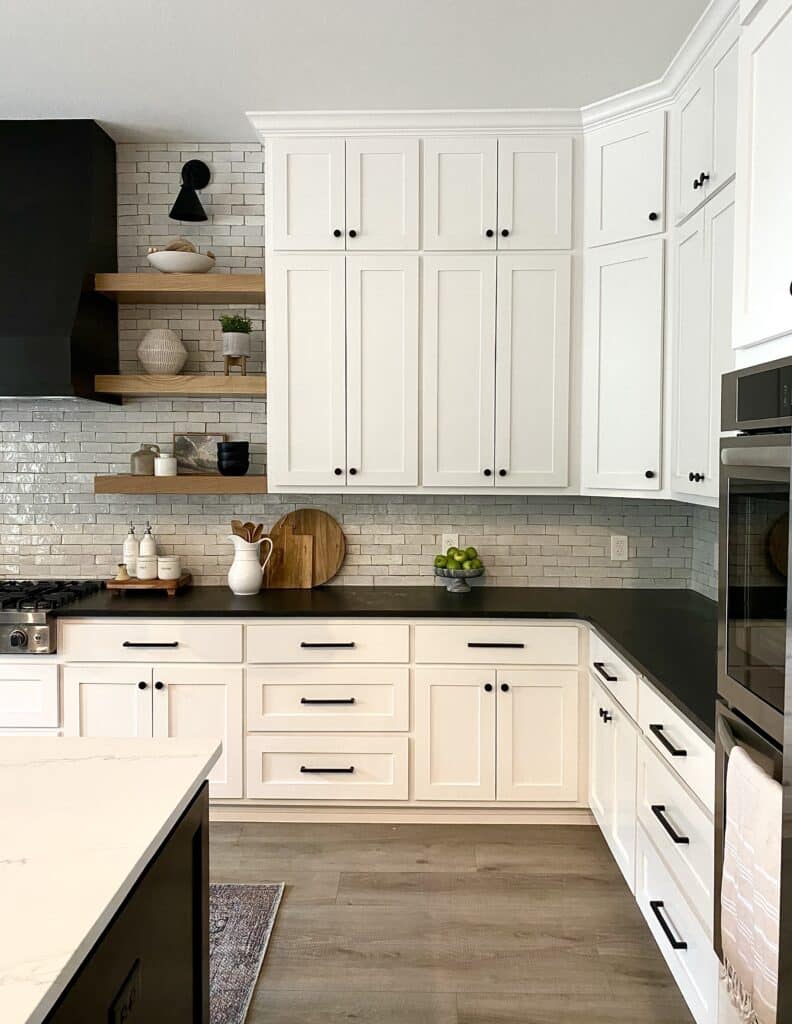
For our kitchen, we installed knobs on all cabinet doors. They were all placed in the bottom corner of the door, or on the top corner of the door. The placement depended on whether we were putting them on base cabinets or upper cabinets,
We installed handles, also known as cabinet pulls or pull handles, on all drawers. When visualizing the hardware placement for our kitchen, this made the most sense.
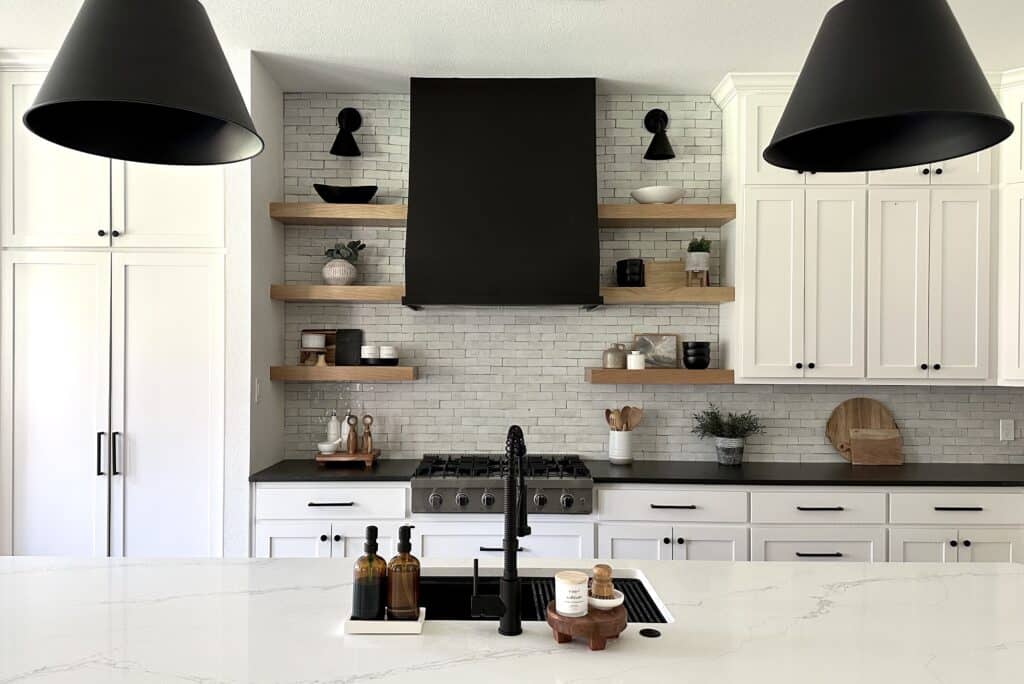
The only place we put a handle on a cabinet door was for our hidden pantry. It is a very large cabinet door, coming in at 77 inches tall. So, we filled the tall space with cabinet handles, rather than small knobs.
These doors can be found to the left in the picture below. You can walk through those doors in order to access the pantry, which runs the length of the whole back wall.
Considerations When Choosing Kitchen Hardware
One area that we had to pivot was this corner space of our lower cabinets. The handles we chose would hit each other when the drawers were open. So, I found a shallow handle that allows the space for the drawer to be open without hitting the hardware.
From the front, it looks just like the other handles and blends in well.
So, be sure to measure your cabinet handles before installing them, especially in the corners.
Visualize the Kitchen Hardware First
It’s a great idea to visualize your choice of handles or knobs before you drill holes in your cabinets. An old hole can be hard to cover up if you change your mind later.
A great way to do this is to apply painter’s to the desired location of the hardware, and generally use the same size of tape as the handles.
So, apply a line of tape for handles, and a small section of tape for knobs. It’s amazing how well this helps visualize the space. It’s much easier to move tape around rather than repair holes and re-drill holes later on!
Best and Easiest Way to Install Kitchen Hardware
I can’t talk about kitchen cabinet hardware and not mention my favorite jig for installing cabinet hardware.
It’s the Hardware Jig by Milescraft and I have used it countless times. It makes the job of installing cabinet hardware so easy.
You can quickly center handles or knobs and drill repeating holes with ease. It’s easy to spot errors when it comes to cabinet hardware, and this tool takes the accuracy up a notch or two. It’s hard to mess up!
You will only have 1 small pencil mark in order to place the jig in the right spot. This can easily be erased.
Another quick tip – place painters tape on both sides of the cabinet where you will be drilling. You will then drill through the tape.
Be sure to do this the first time you’re drilling holes for new hardware. This will help prevent tear out in the wood. Also, make sure your drill bit is sharp in order to get the best results.
If you’re doing cabinet work, do yourself a favor and spend the money on this handy tool.
Whether you are designing a new kitchen or updating an old one, there are quite a few considerations when installing kitchen cabinet hardware. Hopefully you found some helpful tips and kitchen inspiration here.
While we are on the subject of cabinets, be sure to check out these articles that you might find helpful:
- How to Install European Hinges on Face Frame Cabinets
- How to Install Drawer Slides on Face Frame Cabinets
- Installing Shelf Pins
- Mudroom Locker Built Ins from Stock Cabinets
- How to Add Pull Out Drawers to Existing Kitchen Cabinets
- Best Way to Get a Smooth Paint Finish on Cabinets
- Best RTA Cabinets Made in the USA
- Upper Kitchen Cabinet Dimensions and Size Guide
- Average Cost of Custom Kitchen Cabinets
- Kitchen Island Overhang Dimensions
- Popular Shaker Kitchen Cabinet Hardware Ideas

Suzie Wible
Suzie has shared her knowledge for over 10 years about building furniture, painting techniques, how to build your dream home, and basic to advanced woodworking skills. Through this blog, readers will feel empowered to create a home and products they love too.