Painting Built-In Bookshelves the Easy Way
Painting bookshelves is a great way to completely change the look and feel of a room. Adding paint can quickly and easily transform and update old bookcases with a finish that will last for years to come. In this article, I will outline the best process I have found to paint built-in bookcases.
I have used this method for painting a durable finish many times over the years of DIY home decor projects. I have done it on Ikea Billy bookcases built ins around french doors in our dining room, mudroom hall trees, kitchen tables, and end tables, just to name a few. When done correctly, the finish has lasted for years without scratching or chipping.
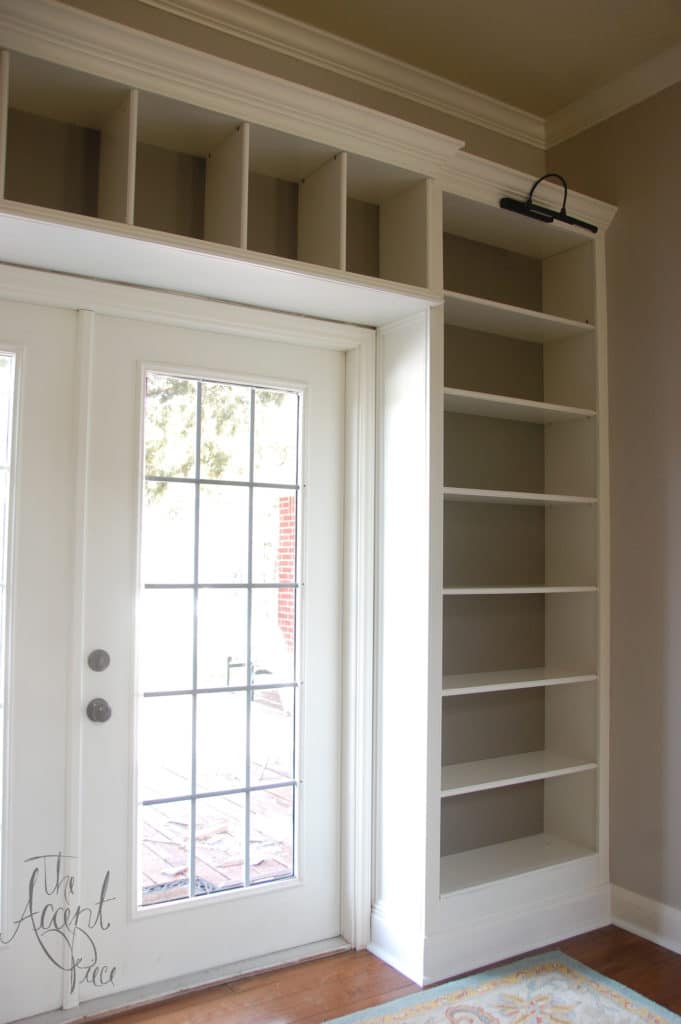
Typically, built-ins are in a living room. For those that are looking for the best results to update the look of the entire room, painting built in bookshelves is a great place to start. The cost of supplies is minimal and after a little patience and elbow grease, you can have a beautifully updated space to enjoy.
Materials Needed to Paint Built In Bookshelves
Disclaimer: This site contains product affiliate links. We may receive a commission if you make a purchase after clicking on one of these links.
- Krud Kutter
- Microfiber Cloth
- Drop Cloth
- Mask
- Sanding Block in 120 grit and 220 grit
- Primer
- High Quality Latex Paints
- Foam Roller
- Angled Paint Brush
- Polyurethane Sealer
General Steps to Paint Built-In Bookshelves
These are the general steps for painting built in bookshelves, and I will go into further detail in each step below. Although this process would be quicker with a paint sprayer, I prefer to do it by hand. I find that it produces better results.
Don’t let the sanding part scare you away! It is a light sanding and therefore, minimal dust. However, it is imperative to achieve a smooth, durable finish.
- Wipe Down Everything with Krud Kutter Degreaser and Cleaner
- Lightly Sand with a 120 Grit Sanding Block
- Apply Primer
- Lightly Sand with 220 Grit Sanding Block
- Apply First Coat of Paint
- Lightly Sand with 220 Grit Sanding Block
- Apply Second Coat of Paint
- Apply Polyurethane Sealer
Now that you know the general steps, keep reading to find out the details for each step. These steps are very similar to the process I outlined in a post about whether to use a roller or brush when painting cabinets. In that post, I also go into further detail and give great tips about how to achieve the best paint finish on cabinets.
Step 1: Wipe Down Everything with Krud Kutter Degreaser and Cleaner
Krud Kutter is the best degreaser and cleaner I have found. This cleaning step is especially important if the built in bookcases are especially old and well used. Grime on the surface of the cabinets with cause chipping in the finish later on, so it is important to start with a clean surface. This cleaner degreaser is non-toxic and bio-degradable and is a great option to clean the old bookcases.
Evenly spray Krud Kutter on the surface and let it sit for about 4 minutes. After the 4 minutes are up, wipe everything down with a microfiber cloth. Do this on all surfaces, including cabinet doors if your bookshelves have them. If there are any especially dirty spots, repeat this step until it is clean. You can also wipe it down with a damp rag after the Krud Kutter, but only if it is necessary to cut through the grime.
If you are painting new or unfinished cabinets, you can skip this step. For example, I painted built-ins made from new Ikea Bookshelves, so this step was unnecessary. However, if you are painting existing bookshelves, be sure to clean them well before moving on to the next step.
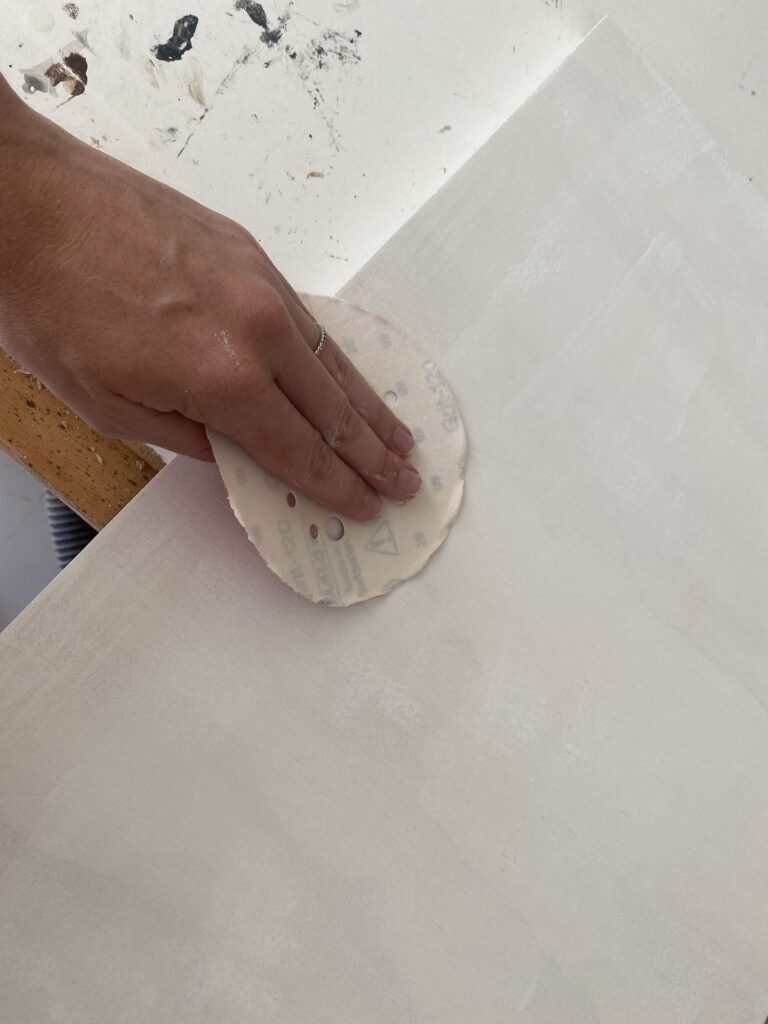
Step 2: Lightly Sand with a 120 Grit Sanding Block
By sanding the surface, the primer will adhere much better to the existing surface. Be sure to note the recommended grit for this step. 120 grit is a great option for this because it won’t remove too much, but it will remove just enough to prepare the surface for the primer.
Add a drop cloth below your work surface in order to cut down on clean up later.
I prefer doing the sanding by hand with a sanding block because I have more control over how much of the surface is removed. If you use an orbital sander, for example, too much could be taken off. Since you aren’t trying to sand all of the paint off, sanding by hand is a great option in order to have better control.
If you do decide to use an orbital sander, you can connect a shop vacuum in order to cut down on dust.
Once you are done sanding, it is very important to clean the surface to prepare for the primer in step 3. By cleaning the surface, you will ensure that your finish will be smooth when you are done. If not, the dust particles will be trapped under the surface and cause the finish to not be as smooth. Wipe everything down well with a microfiber cloth.
If your existing built-ins contain lead paint, do the research to take the necessary precautions to remove it. Be sure to wear a mask when sanding.
Step 3: Apply Primer
This step is very important. It gives the paint something to adhere to and is also a great stain blocker. So, don’t skip this step as it will ensure that your paint job lasts for years to come with heavy use.
My favorite primer is Kilz. A little goes a long way and it will last for a long time. I have used it on countless painting projects.
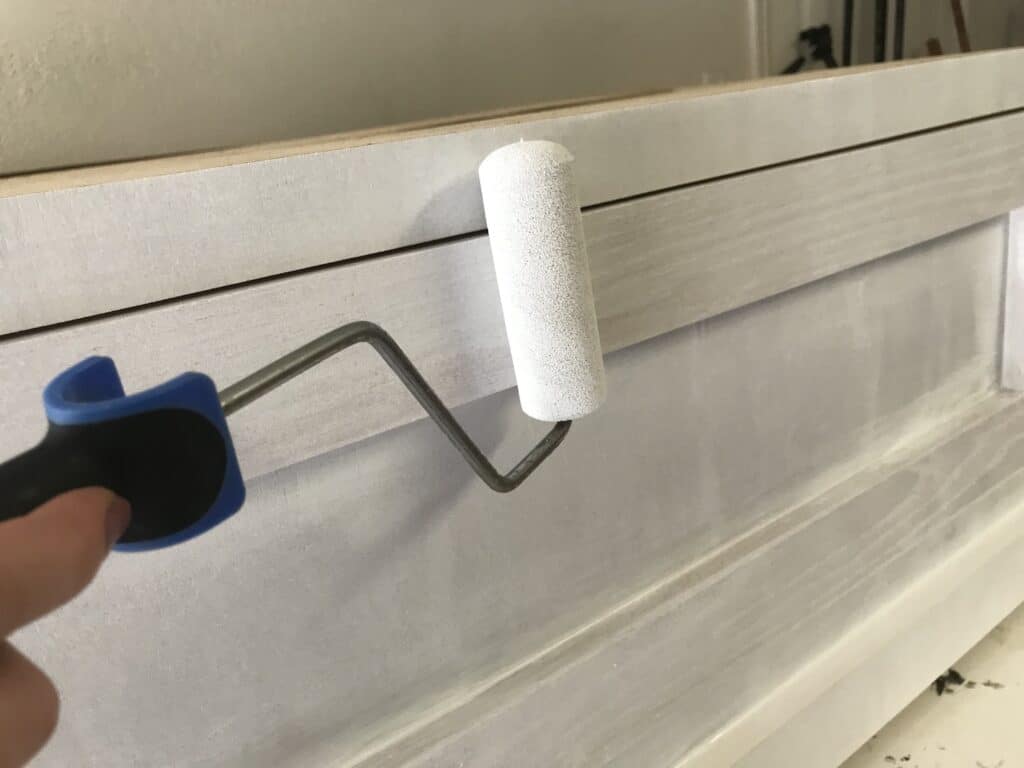
Use a foam roller to apply a light coat of primer over the sanded surface. You don’t have to add a thick coat, as that might cause roller marks. Be sure to smooth out any roller marks.
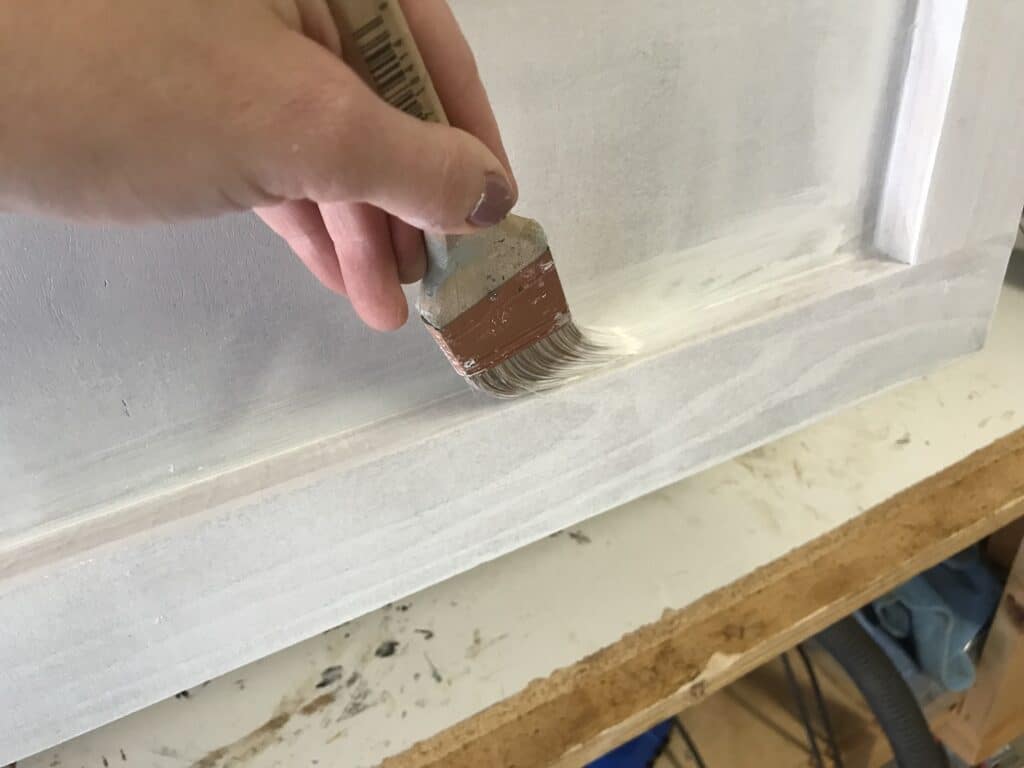
Use an angled paintbrush to cut in with paint where the roller doesn’t reach. You will want to cover as much of the surface with the foam roller as possible, as this will give the smoothest finish and cut down on brush strokes.
Allow the primer to fully dry before moving on to the next step. Check the back of the can for cure times; it will usually be around 4 hours.
Step 4: Sand with 220 Grit Sanding Block
The purpose of this step is to smooth out the surface after priming. You are not trying to remove much of the primer, just lightly sand.
Note the change in grit on the sanding block from step 2. The higher the number of grit, to smoother the surface of the sanding block is. So, 220 grit is smoother than 120 grit. This is the perfect grit for this step as it further prepares the surface for paint.
Once it is lightly sanded, wipe it all down with a microfiber cloth.
Step 5: Apply First Coat of Paint
This step will be very similar to the process in step 3, except you will use paint. I have had great luck with paints that are Premium Interior Paint and Primer in 1 in semi-gloss finish. It is a durable paint, low odor, and a nice smooth finish for built ins.
Picking the Paint
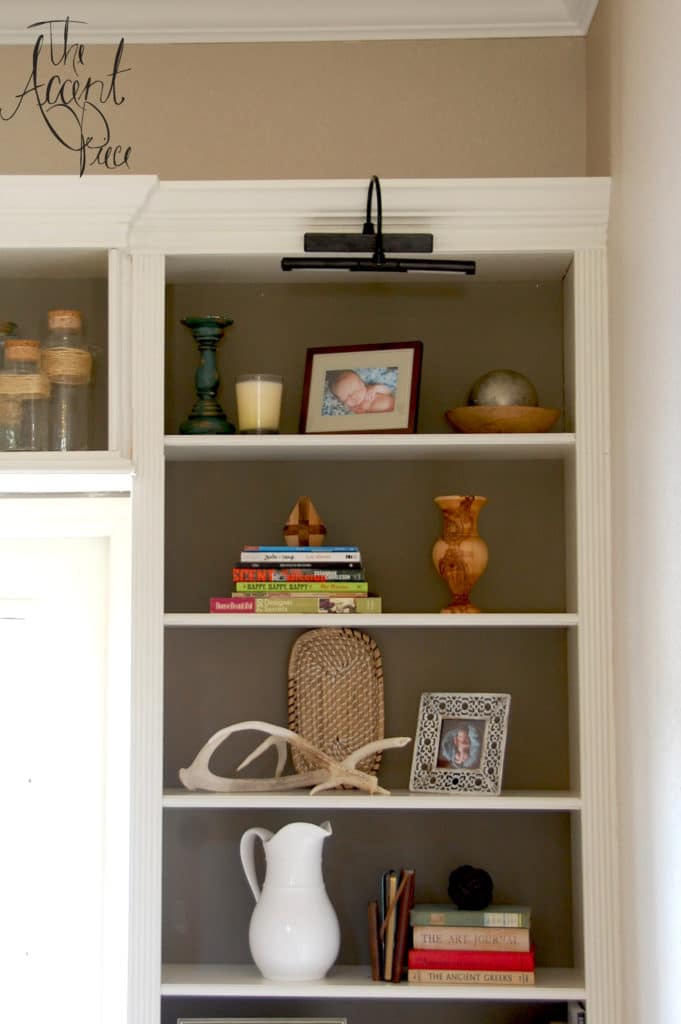
Choosing the right paint is very important in a project like this. My favorite white paint to have it tinted to is Benjamin Moore’s White Dove. I did this color in a recent mudroom hall tree build and I also use it on the trim in my home.
I love the look of bookshelves that also match the wall color. In order to do this, I recommend changing the sheen of the walls. So, if your walls are painted the color Benjamin Moore White Dove in Satin finish, paint the bookshelves Benjamin Moore White Dove in Semi-Gloss. That way, the whites won’t clash, but each piece will have its own look.
I have also painted the back of the bookcase a slightly darker color than the walls and I love the outcome. You can read the details on how I painted the bookshelves here. If you’re painting your bookshelves black, be sure to check out my favorite black paint color for furniture!
Use a foam roller for the flat surfaces. Use the angled paint brush to reach the spots that the foam roller can’t reach.
Thin coats are a good option in order to cut down on brush strokes and roller marks.
Allow the paint to fully dry. Read the back of your paint can to verify the wait time, but on average it is 4 hours.
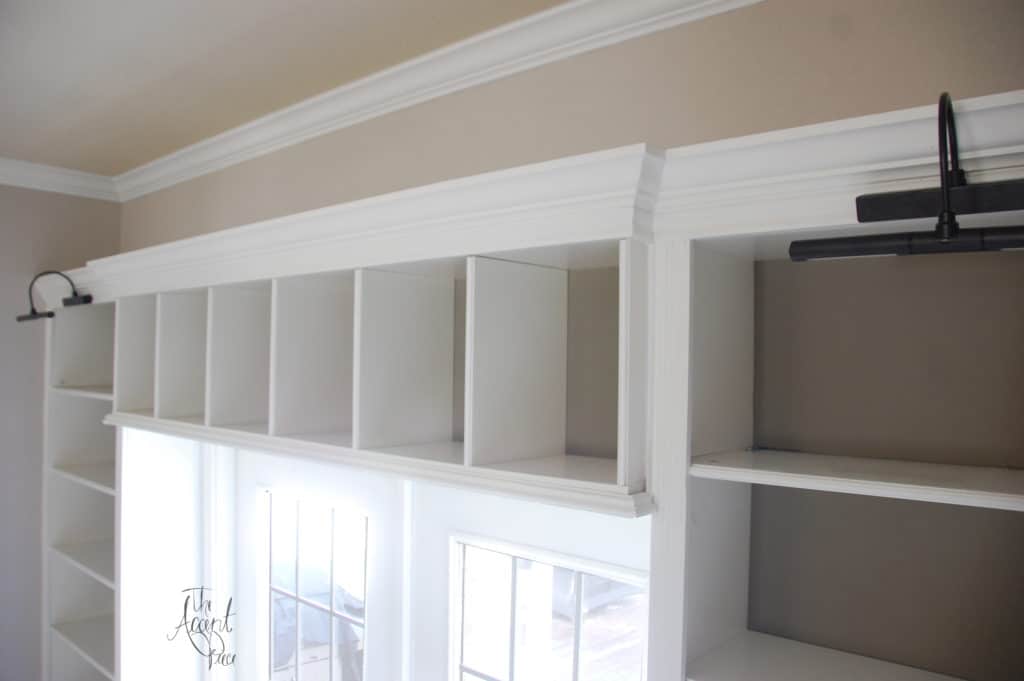
What color matches Ikea’s white finish?
The closest match to Ikea’s white that I have found is the color Parchment White by Glidden. When crown molding is added to the bookcases, it ends up looking like a beautiful custom piece of furniture.
Step 6: Lightly Sand with 220 Grit Sanding Block
You will again sand the piece again with 220 grit (not 120 grit like step 2). You are just brushing the surface to smooth it out, not trying to sand the whole finish off. Just lightly sand it by hand.
Be sure to clean the surface when you are done with a microfiber cloth.
Step 7: Apply the 2nd Coat of Paint
Repeat step 5. Use a roller for as much as you can, then use a paint brush. Allow this coat to fully dry.
Step 8: Apply Polyurethane Top Coat
This step is crucial to achieving a finish that won’t chip and will last for years to come. Make sure that the 2 coats of paint have fully cured (not just dry to the touch).
My favorite polyurethane finish is this matte finish. I love the sheen it gives. However, if you personally prefer more of a shiny finish, I have had great luck with this finish in satin and gloss.
Apply the polyurethane with a quality bristle brush in multiple light coats. I usually put 2-3 coats on in order to protect the piece well. It will go on milky, but dry clear.
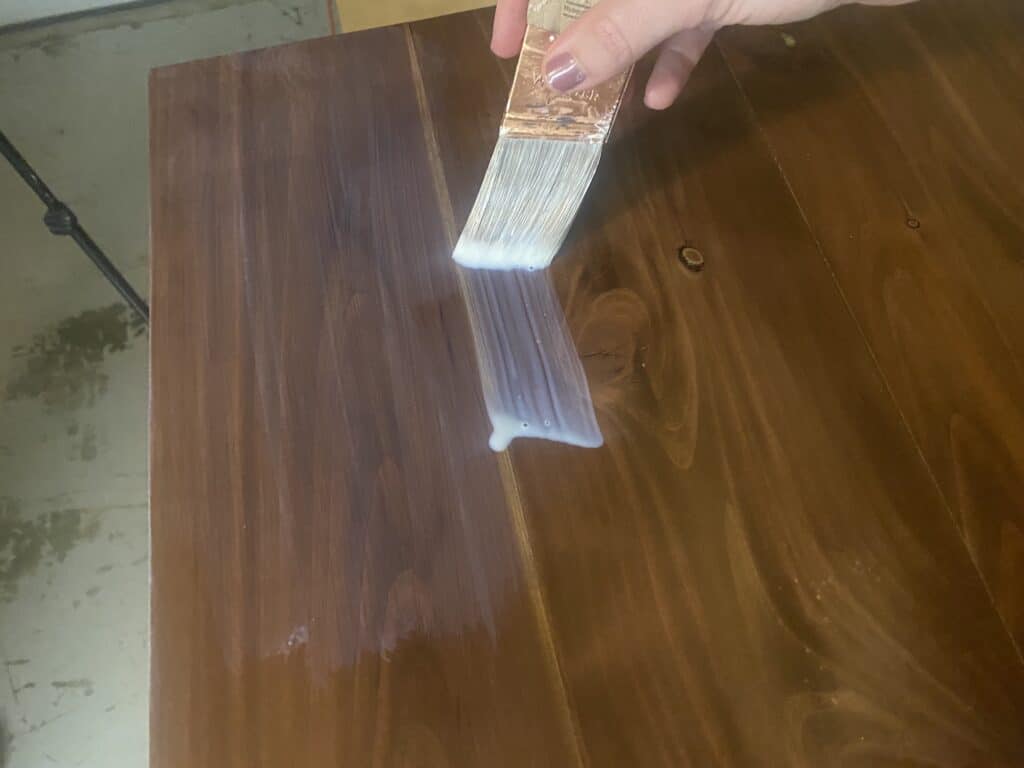
This finish not only protects the piece, but it makes it much easier to clean in the future. This is what I put on our kitchen table, which gets heavy use and is easily wiped down daily.
Conclusion
This process is the best way I have found to paint built in bookshelves.
In addition, I have used this process to paint other types of furniture like end tables, coffee tables, mudroom hall trees, built-in lockers from stock cabinets, and kitchen tables. This process would also work great for kitchen cabinets. It is a versatile method to create a super smooth and durable finish for those built-in cabinets!

Suzie Wible
Suzie has shared her knowledge for over 10 years about building furniture, painting techniques, how to build your dream home, and basic to advanced woodworking skills. Through this blog, readers will feel empowered to create a home and products they love too.