How to Build a Side Table: Free Woodworking Plans
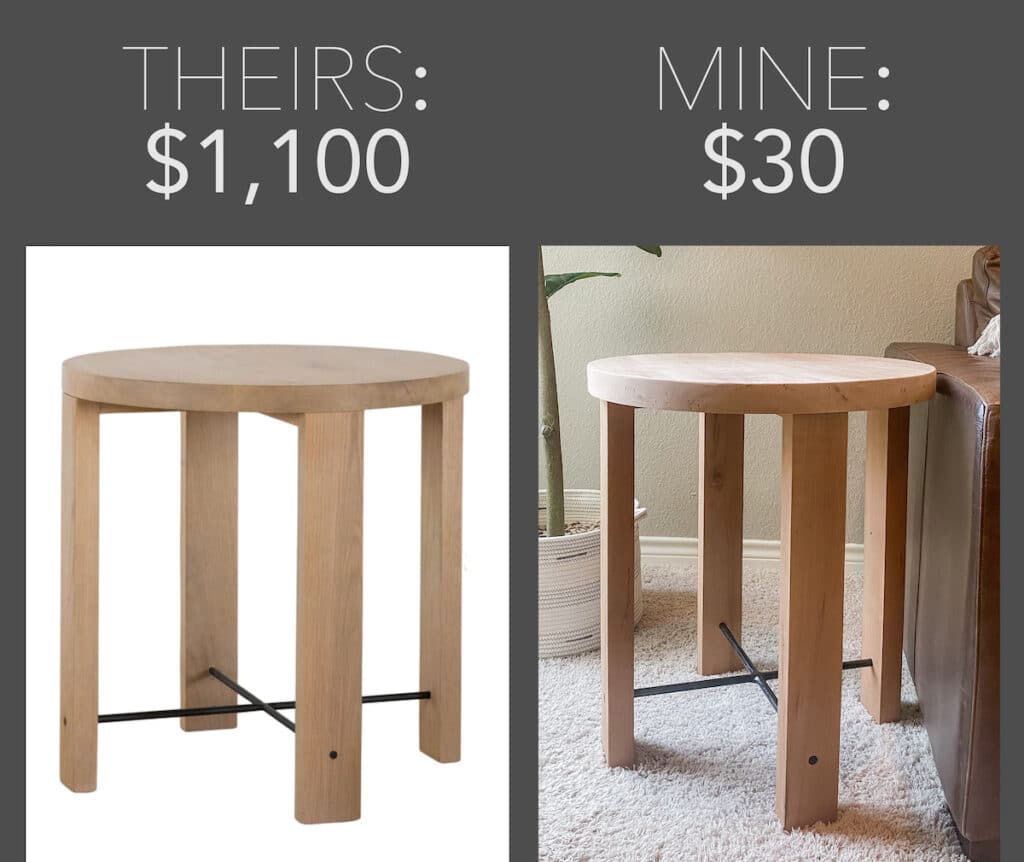
I always love a good furniture dupe and this round end table project did not disappoint! I drew up free PDF plans for you and you can also find all the details for how to build this DIY round side table in this post.
The end table I made is inspired by the Cora Side Table from McGee & Co. I love the simplicity of it and the contrast of the black and wood. It turned out to be a fairly simple build!

I was able to recreate the look of this expensive, high end table for a fraction of the cost. I used cherry wood that I had leftover from a different build project, so the cost was minimal for me. However, you could make this simple circle side table for around $30, depending on the species of wood you buy.
I learned some fun new things while completing this build, too! The first was how to cut a perfect circle in wood for the tabletop. I used the CircleGuideKit from Milescraft to do this. The kit made quick and easy work of cutting a circle for the tabletop. You can find the details for how to do that further down in this tutorial. I’ll definitely be using this kit again in the near future!
Disclaimer: this post is sponsored by Milescraft. All opinions are my own.
The second thing I learned for this project was how to make wood look like metal. I’m really happy with how this look turned out. It was a simple process to create a high end look for the metal rod part of the round end table at a fraction of the price.
Download the free PDF plans for this DIY Round Side/End Table below:
Tools Needed
Disclaimer: This site contains product affiliate links. We may receive a commission if you make a purchase after clicking on one of these links.
- Milescraft CircleGuideKit
- Router
- Table Saw
- Miter Saw
- Planer
- Pocket hole system
- Power Drill
- Orbital Sander
- combination square
- drill press
- clamps
Materials Needed to Make this DIY Round Side Table (Studio McGee Dupe)
- (3) 2×4, 4 ft long boards
- (1) 2×6, 8ft long boards
- (1) wood dowel, 1/2″ diameter, 4 ft long
- Screws
- Wood Epoxy
- Faux metal spray paint
- black stain
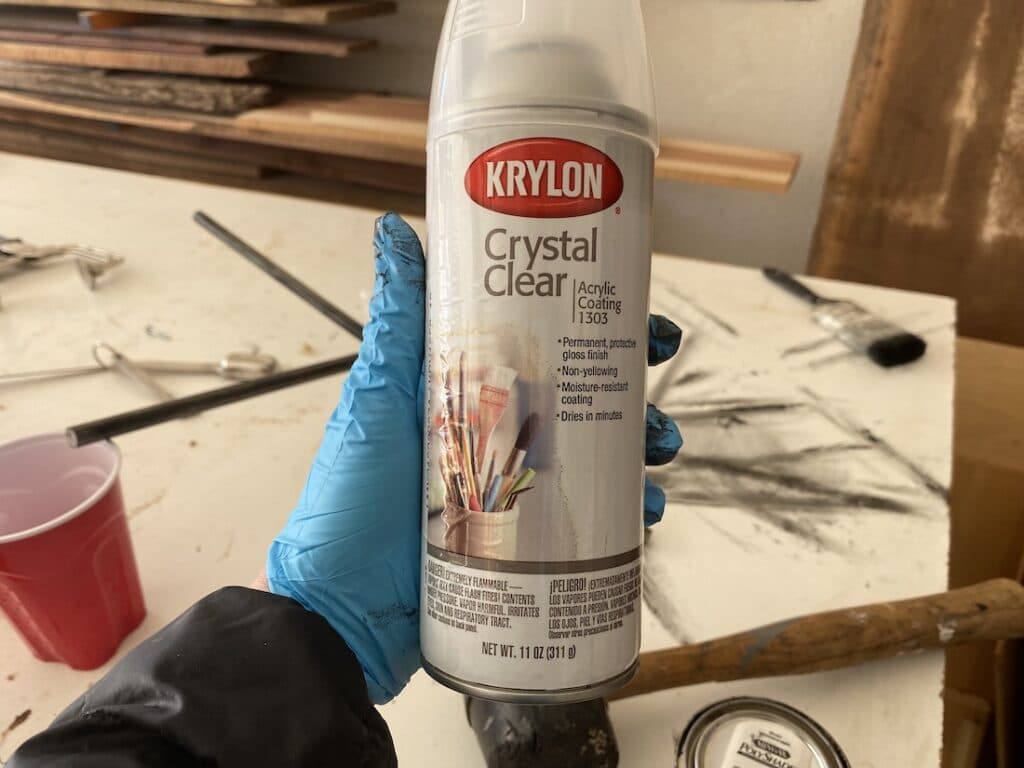
- Acrylic Spray
- Wood glue
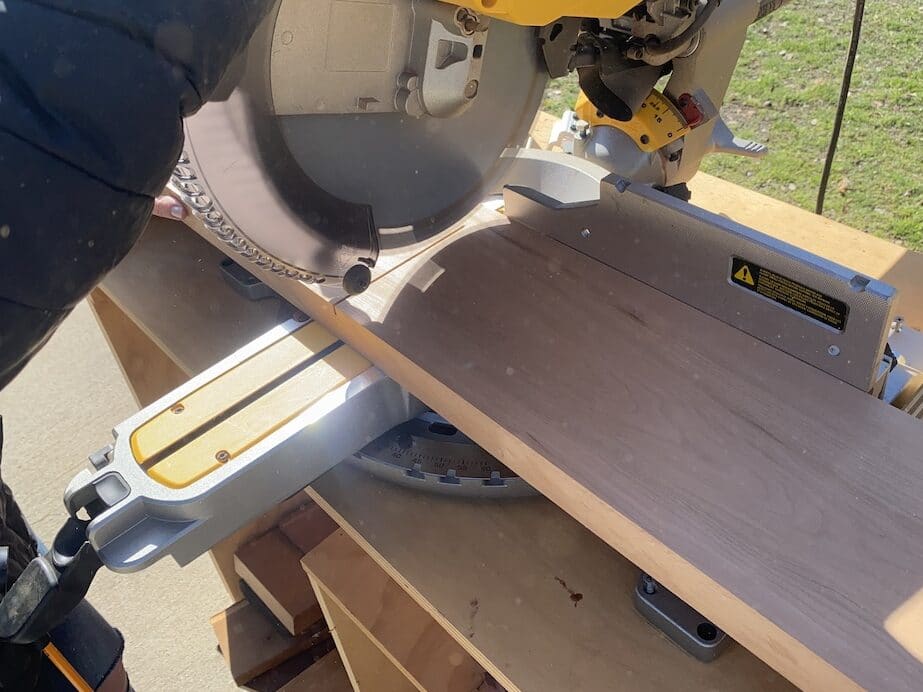
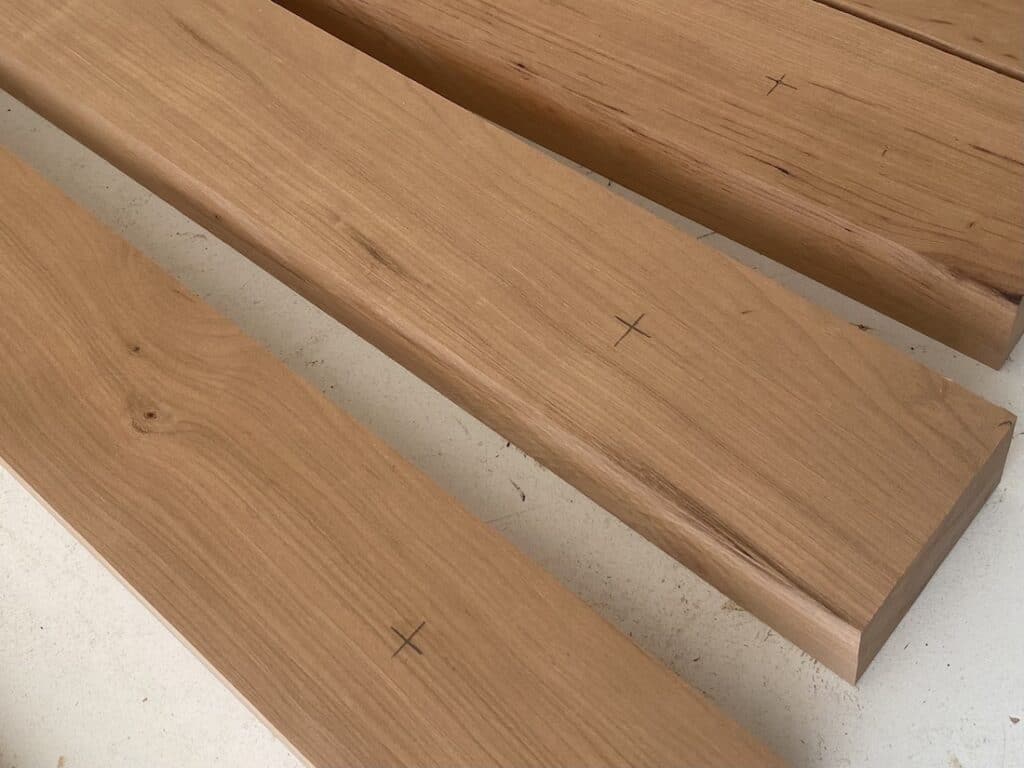
Step 1: Dimension Your Boards
In order to create this round end table, follow cut list on the free PDF plans provided in order to dimension all of the boards listed. I used leftover cherry wood that I had, so it took a little extra work to dimension the rough lumber.
However, if you buy your wood off the shelf, it will be a pretty simple process.
I started with planing the wood to the desired thickness. I then used my miter saw to cut the boards to length. Next, I use my table saw to finish dimensioning the boards.
If you are just getting started with miter saws, check out this post on the basics of using a miter saw!


If it’s an option for you to use hardwoods for this project, I highly recommend it. It will cost more than pine, but the end result will be much more professional and sturdy. The inspiration piece is made with white oak, which can be found at most big box stores.
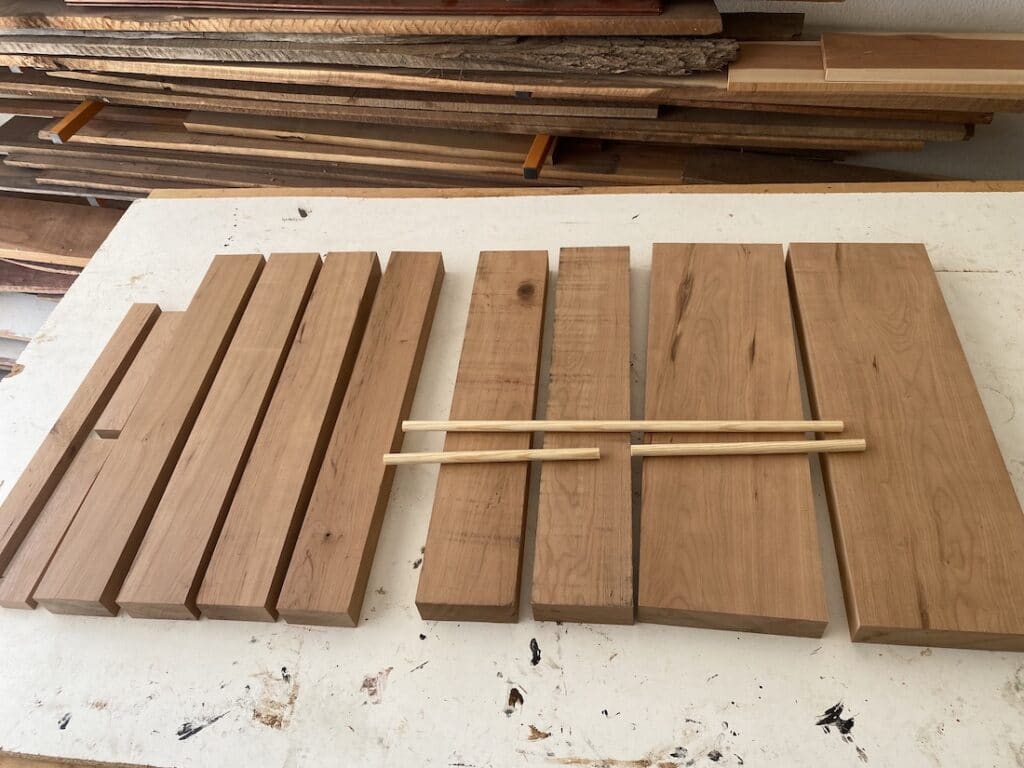
Since I used cherry wood, I tested out quite a few finishing products to replicate the look of the original end table made of oak. In the end, I actually ended up just using keeping the wood unfinished! Sanded, unfinished cherry wood is very similar to the look of finished white oak.
If you ever get a steam stain or water stain on your end table, check out this post on how to remove steam stains from wood tables.
Step 2: Glue Up the Boards for the Circle Tabletop
It is important to make sure that the edges of your boards are perfectly square (jointed). I took a deep dive into different methods of how to straighten long boards in this post. In another post, I detailed my favorite method of jointing edges with a router that you might find useful as well.
Once the edges of your tabletop are square, you can glue them together. If you use enough wood glue, using only glue is enough for the joints to be strong. However, if you want to reinforce them a little more, you can add pocket holes and wood glue to join them together.
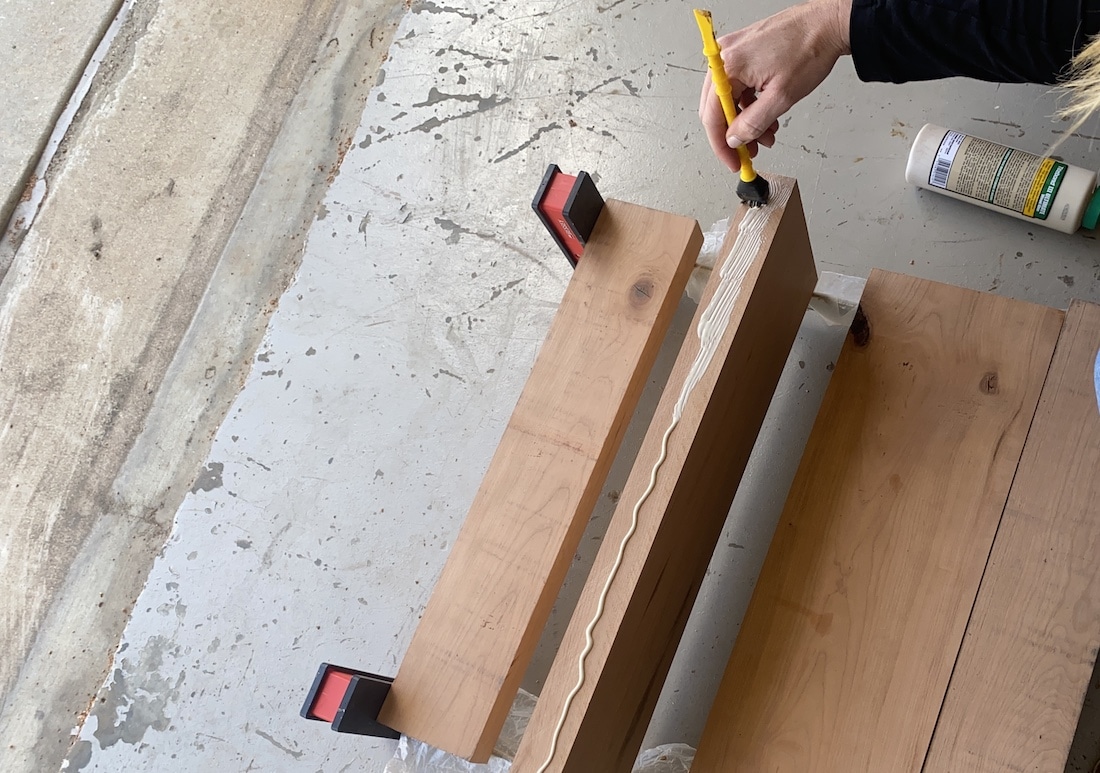
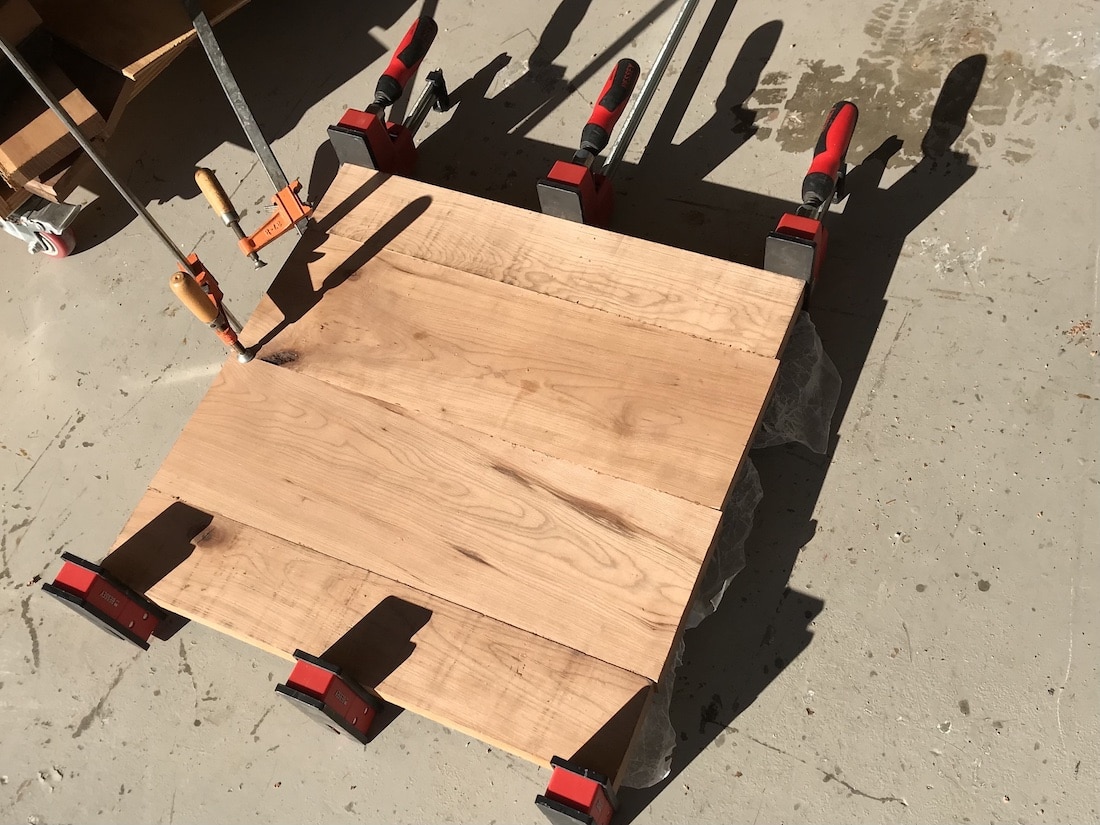
Clamp the boards together after you add glue and allow it to completely dry. Remove the clamps. The boards are now ready to be made into a circle with the CircleGuideKit!
Step 3: Cut the Circle for the Tabletop
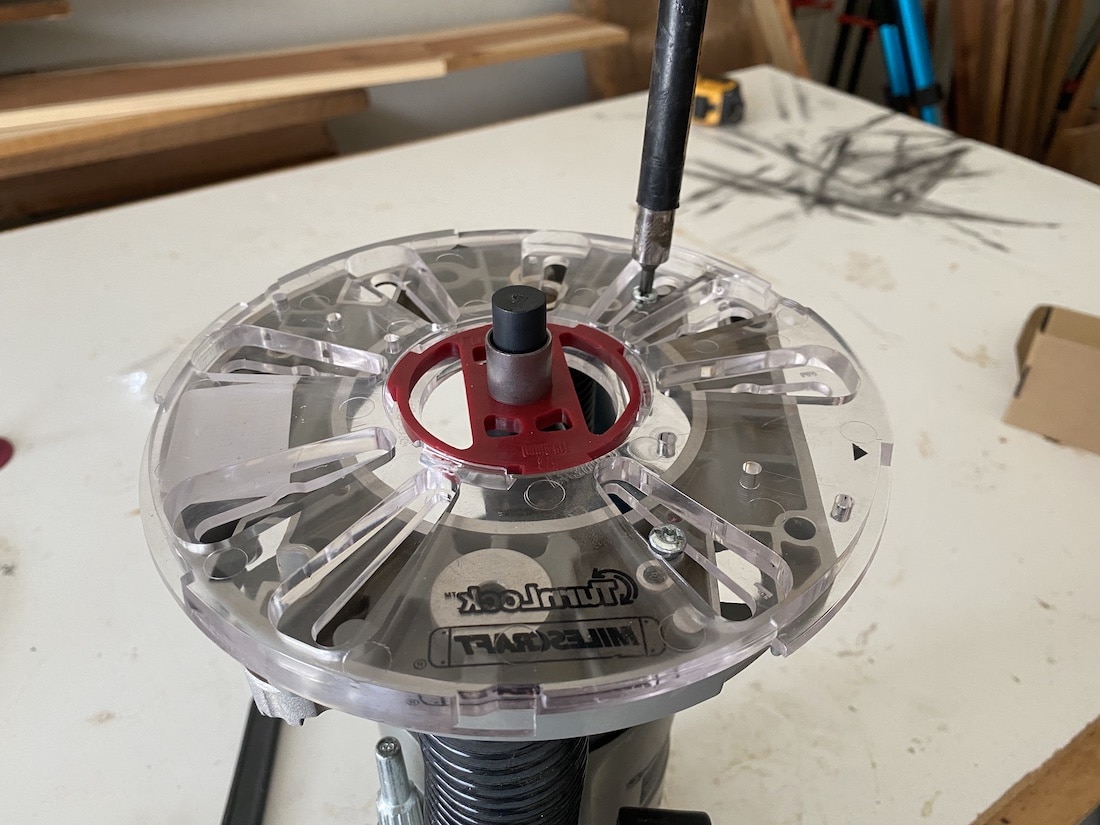
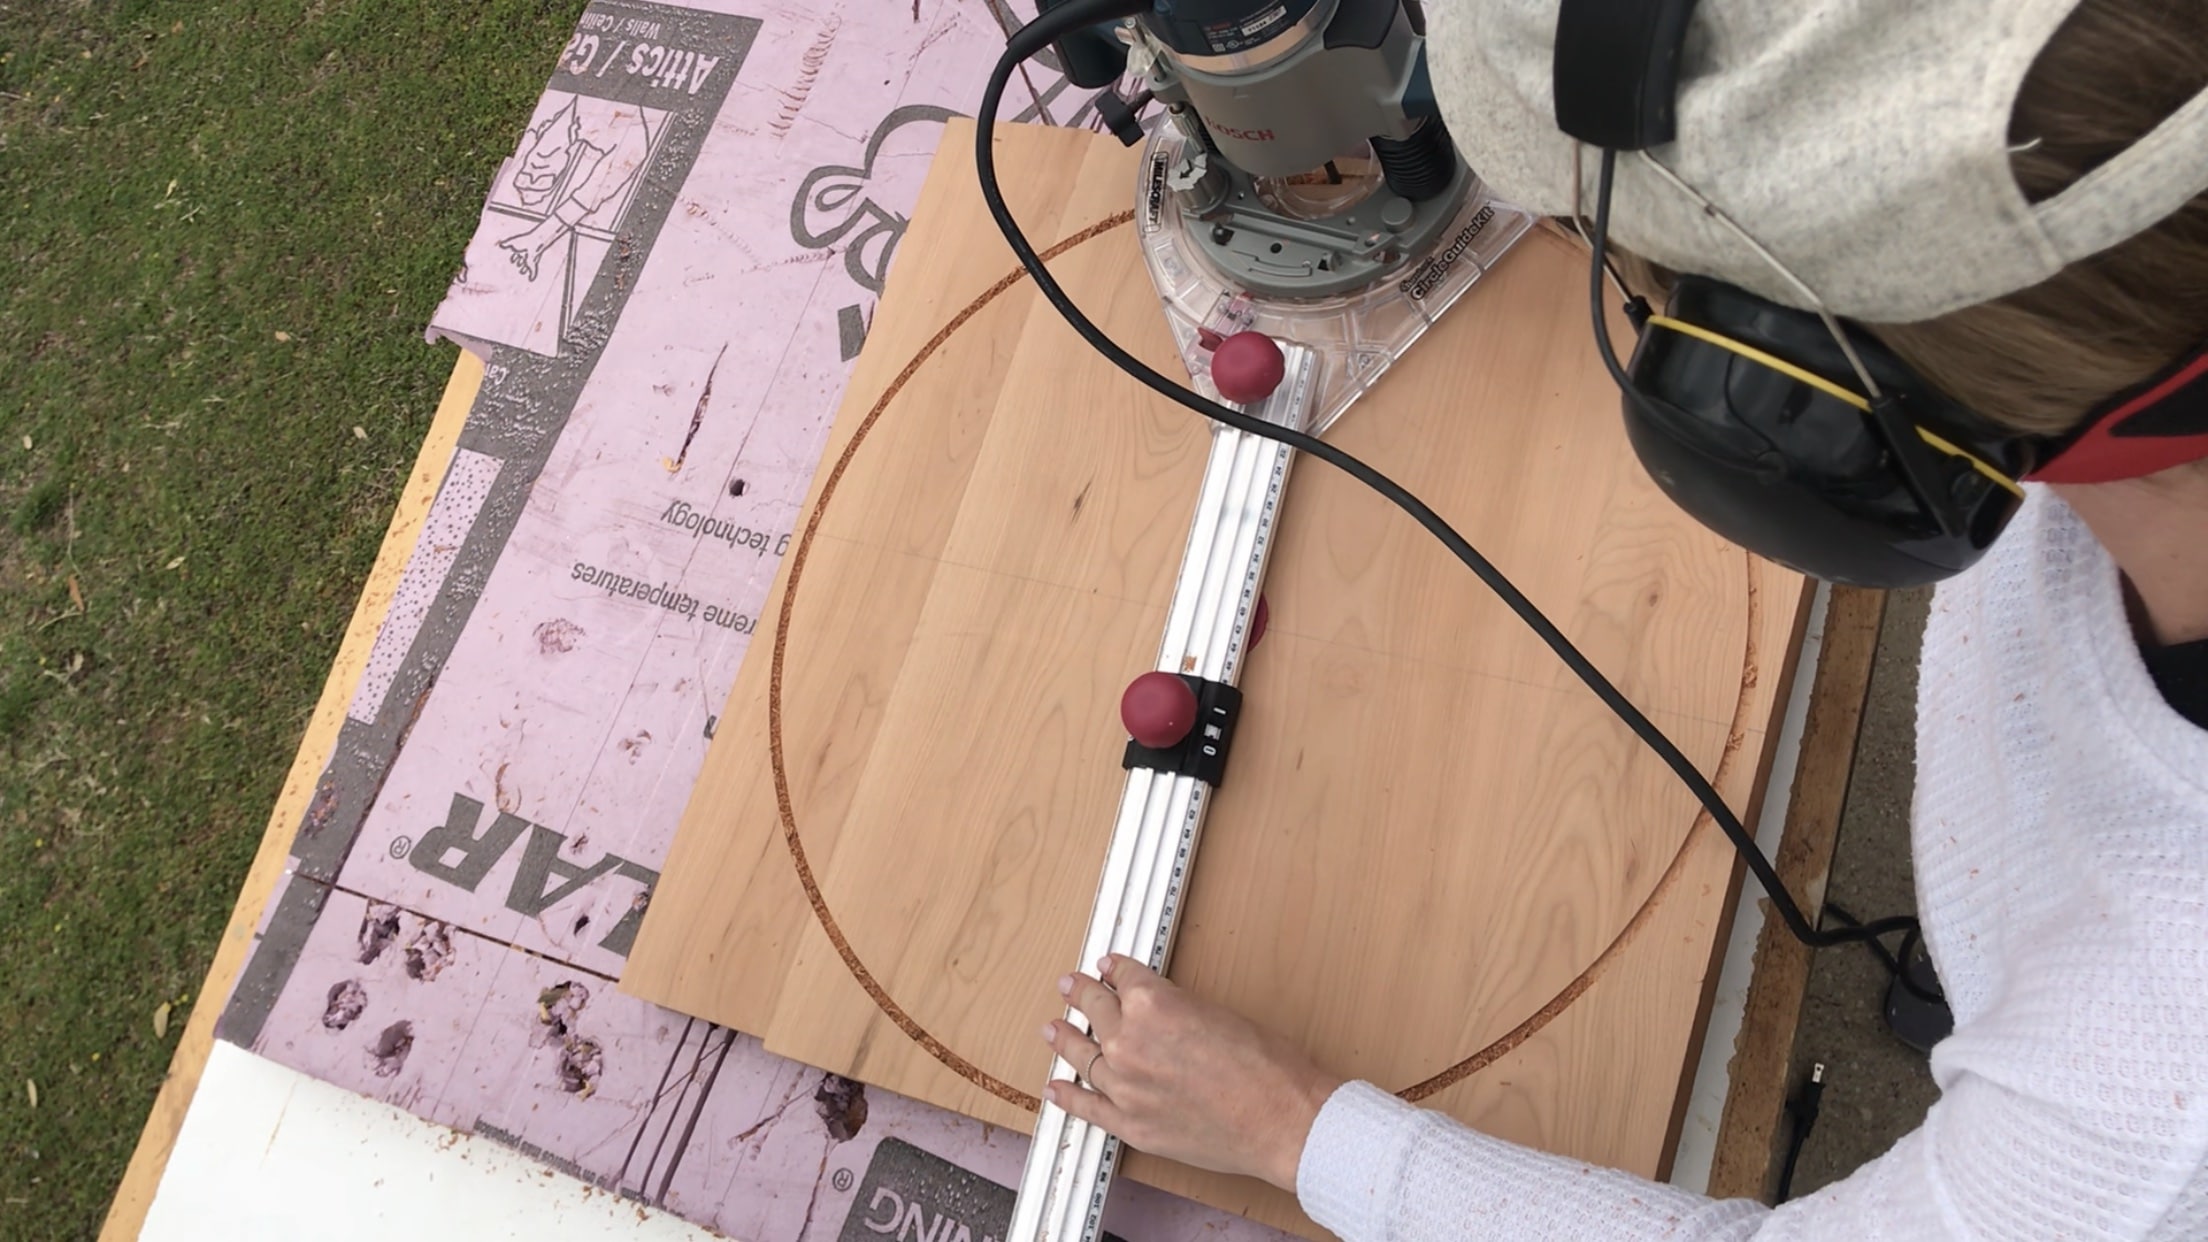
To cut a perfect circle in the wood for the table top, I highly recommend the CircleGuideKit made by Milescraft. It is a kit that attaches to your router and makes quick and easy work of cutting circles.
For a deeper look into how to cut perfect circles in wood, check out this post.
With this kit, you are able to cut circles from 1.5″ to 52″. The circle I cut for this project was 22″ in diameter.
To begin, assemble the CircleGuideKit and attach it to your router. Locate the center of your piece and place the jig on your piece.


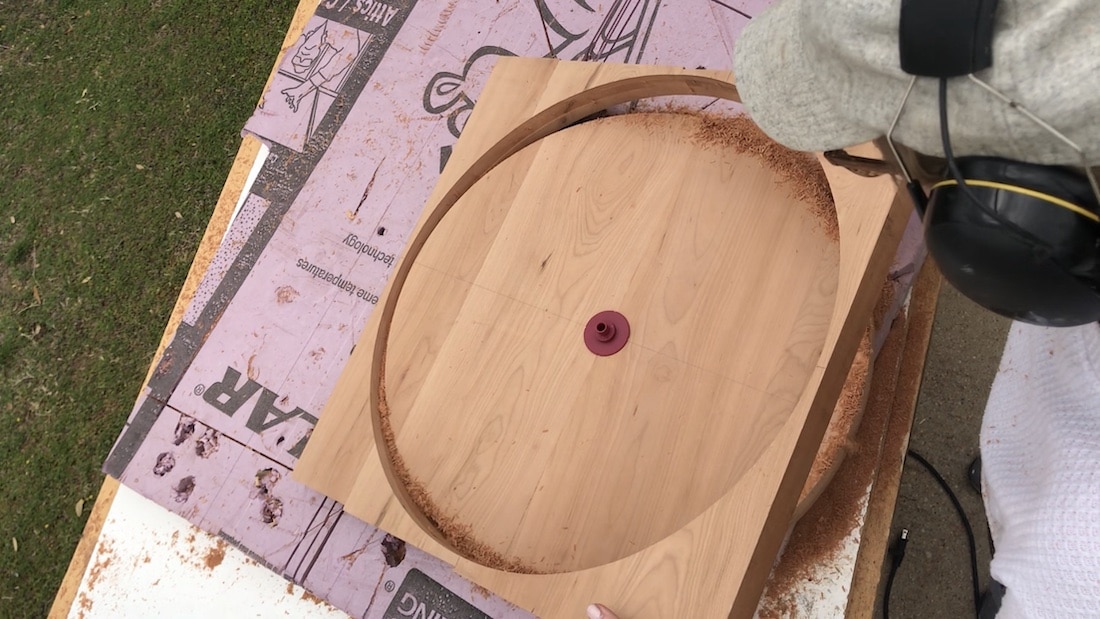
Slowly make your way around the circle with your router. Make multiple, shallow passes until you have cut it all the way through.
For more router projects, check out these related posts:
- Make a Juice Groove on a Cutting Board: No Jig Required
- How to Route a Cutting Board Handle & Finger Groove
- How to Make a Router Flattening Sled
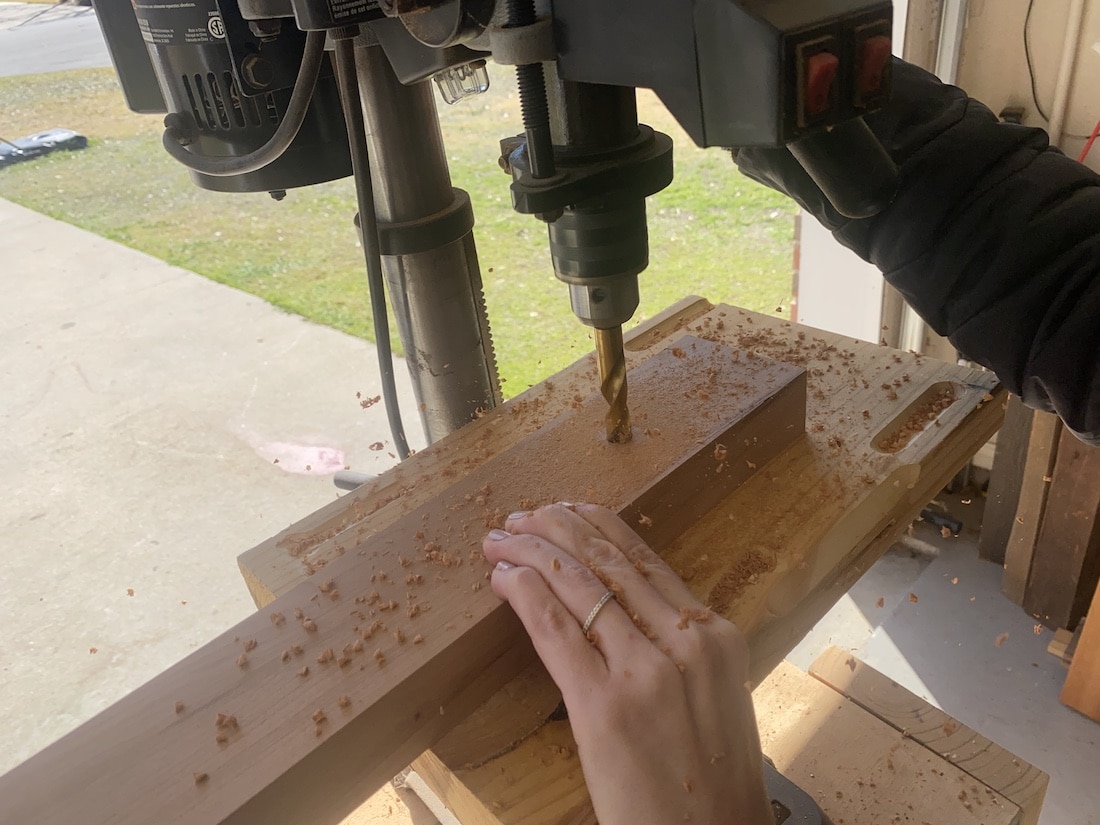
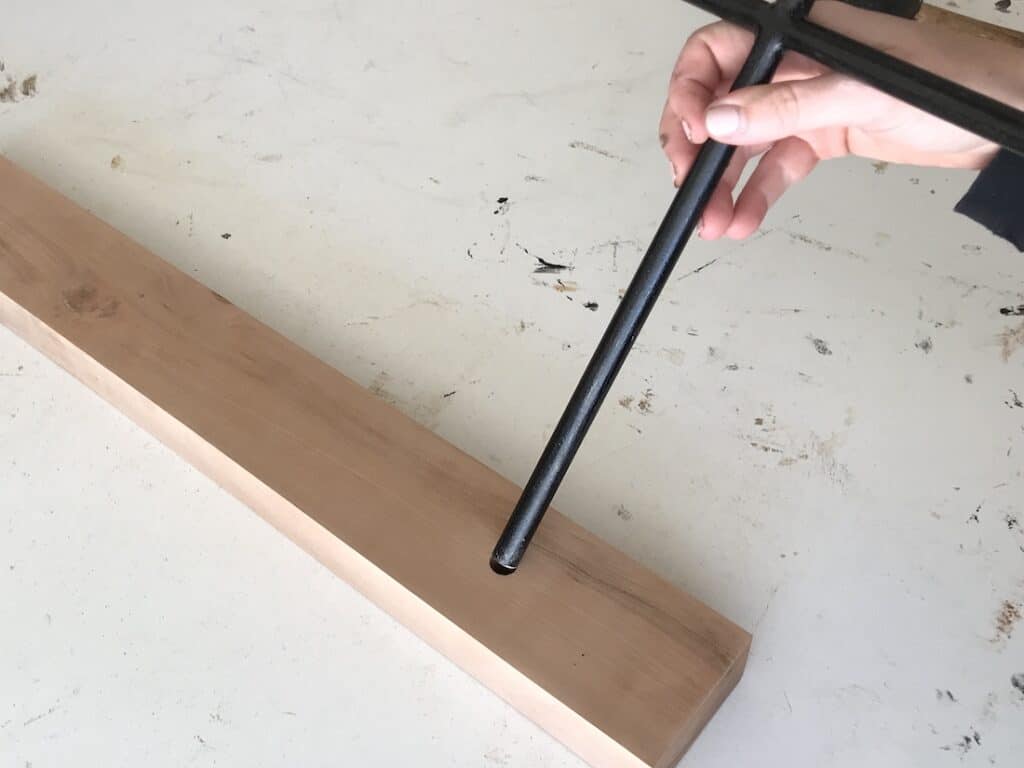
Step 4: Drill the Holes for the “Metal” Rod
Use a combination square to mark where the holes for the wood dowels to go through.

I centered the hole laterally and placed the hole 4″ from the bottom.
Once your boards are marked where the hole will go, use a drill press to drill the holes. You can also use a power drill, however, a drill press will ensure that the hole is drilled perfectly square, which is important for this piece.
If you do use a power drill, check out this post on how to use a power drill for beginners.

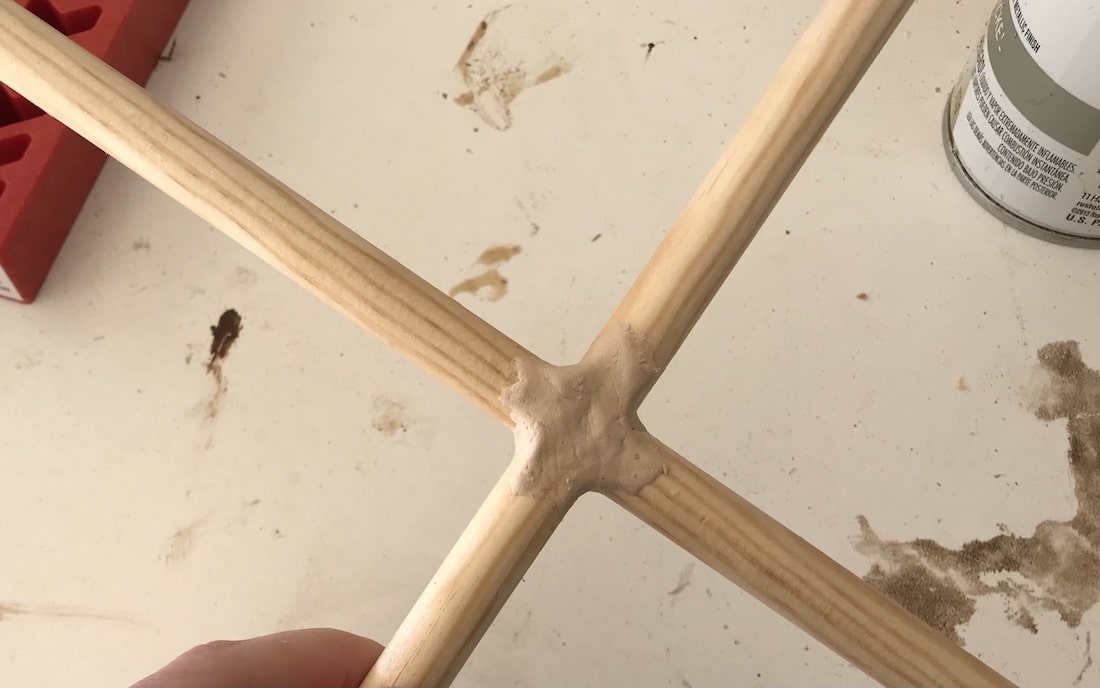
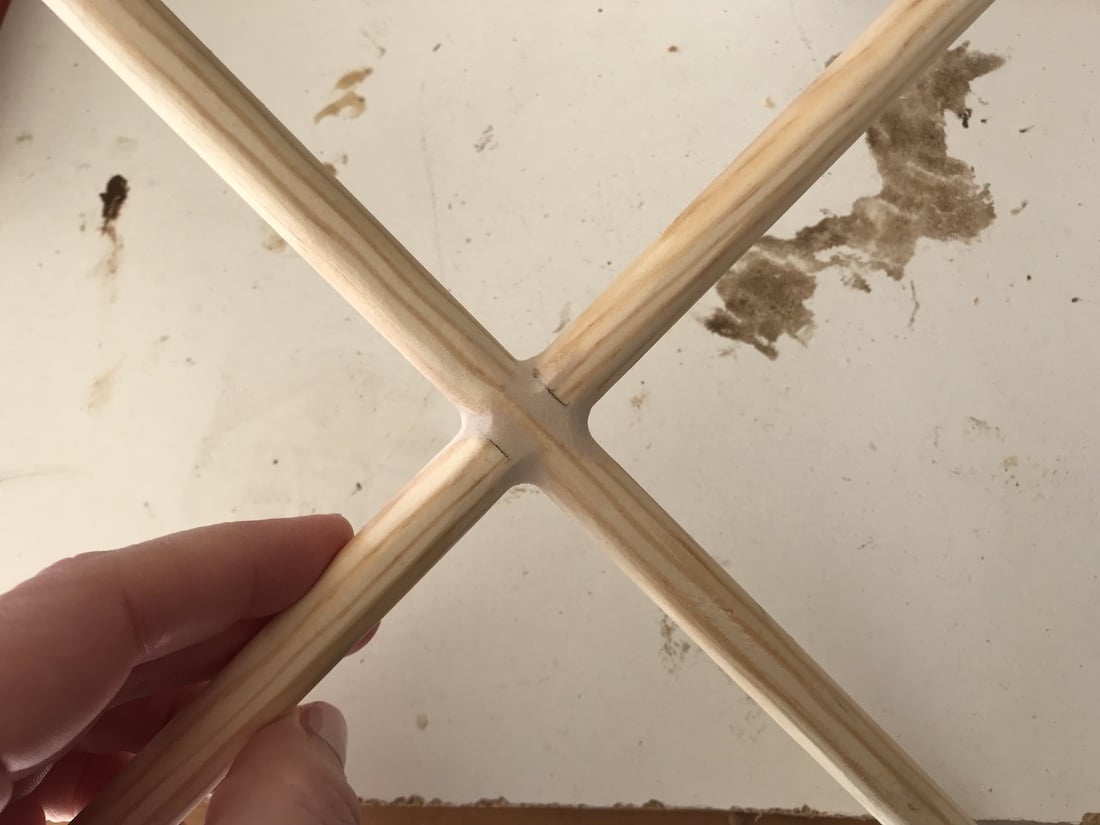
Step 5: Create the “Metal” Rods
For a more in-depth look at how to make wood look like black metal, check out this post.
Glue the two short dowels to the center of the long dowel and allow it to dry. Make sure they are square.


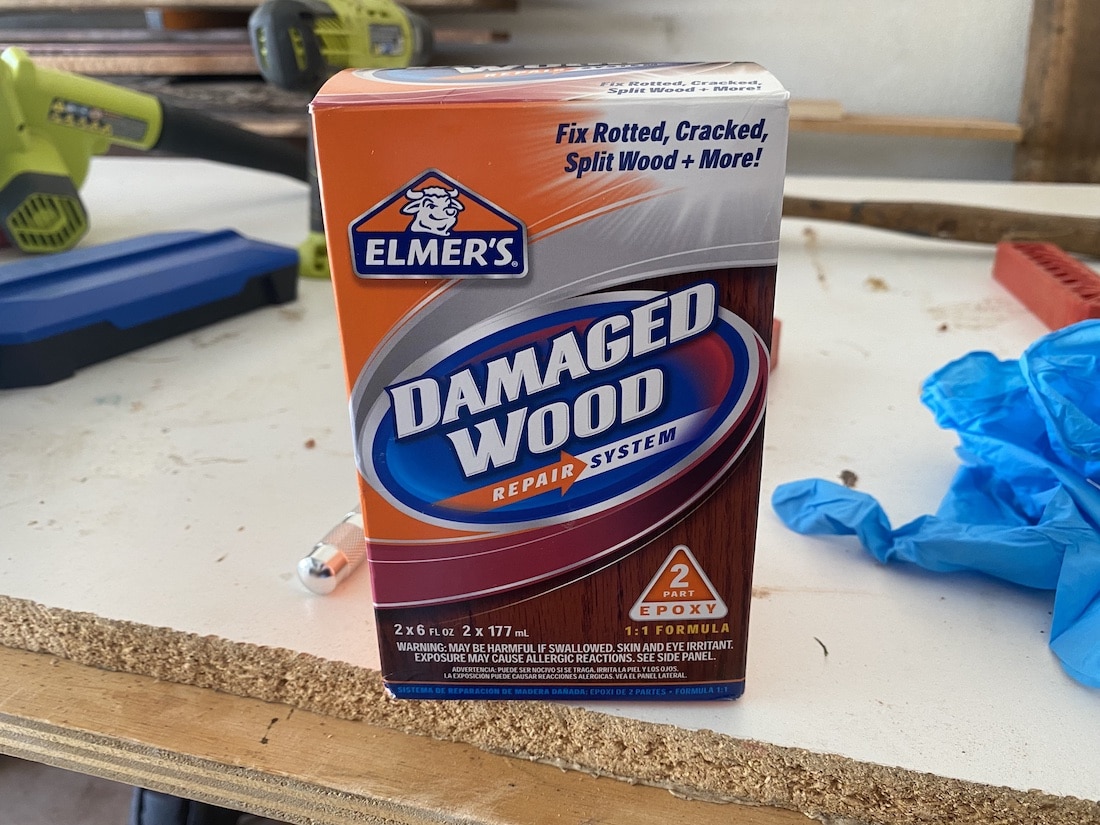
Once it is dry, you will reinforce that joint with wood epoxy. We used this same product to repair wood damage and rot around our garage door and it’s awesome. It’s like a putty that dries very hard, but it’s also sandable and stainable.

Once the epoxy is dry, sand it smooth. Your wood dowels are now ready to be painted to look like metal!
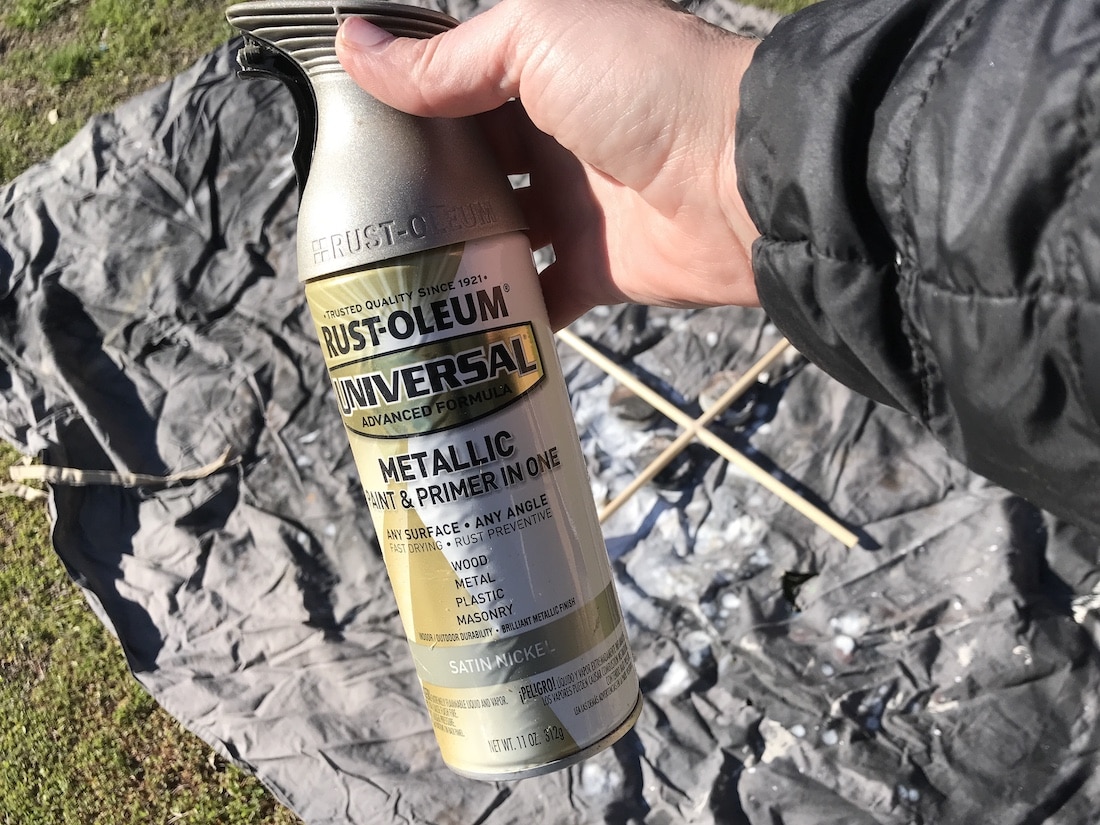
Spray the first coat with this faux metal spray paint. It is a 2 in 1 paint and primer and gives it a metallic look.

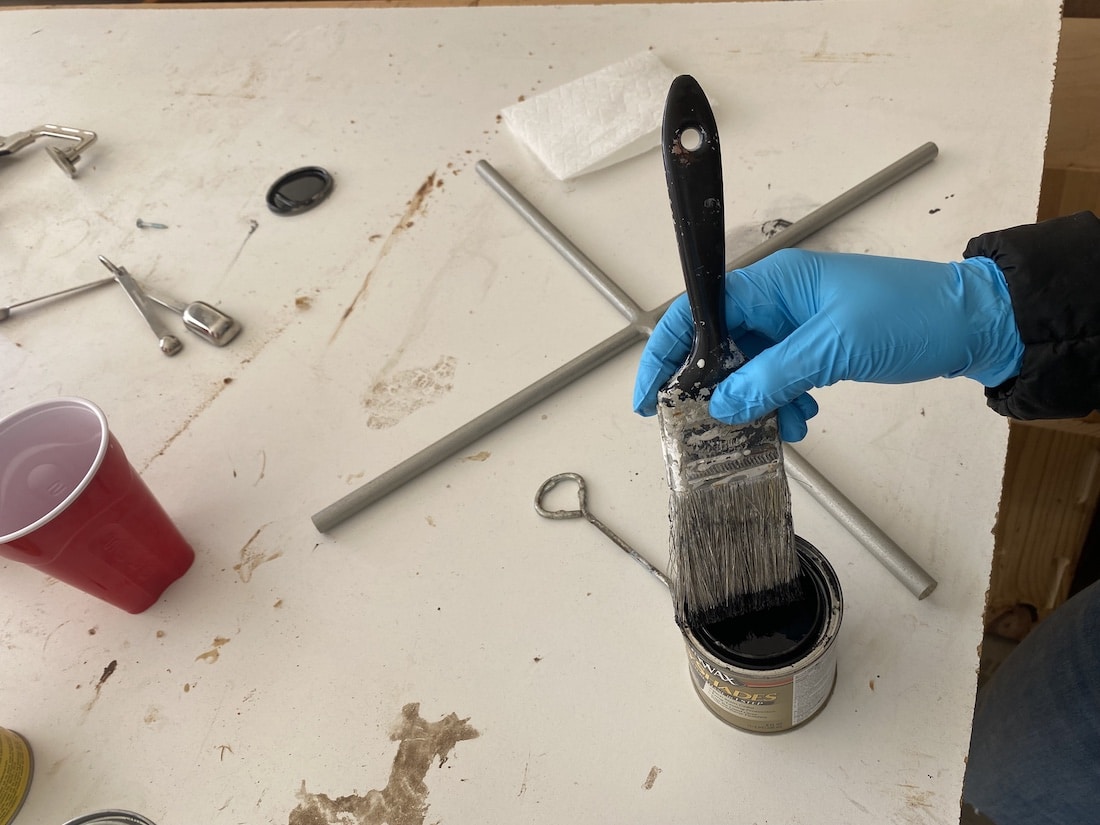
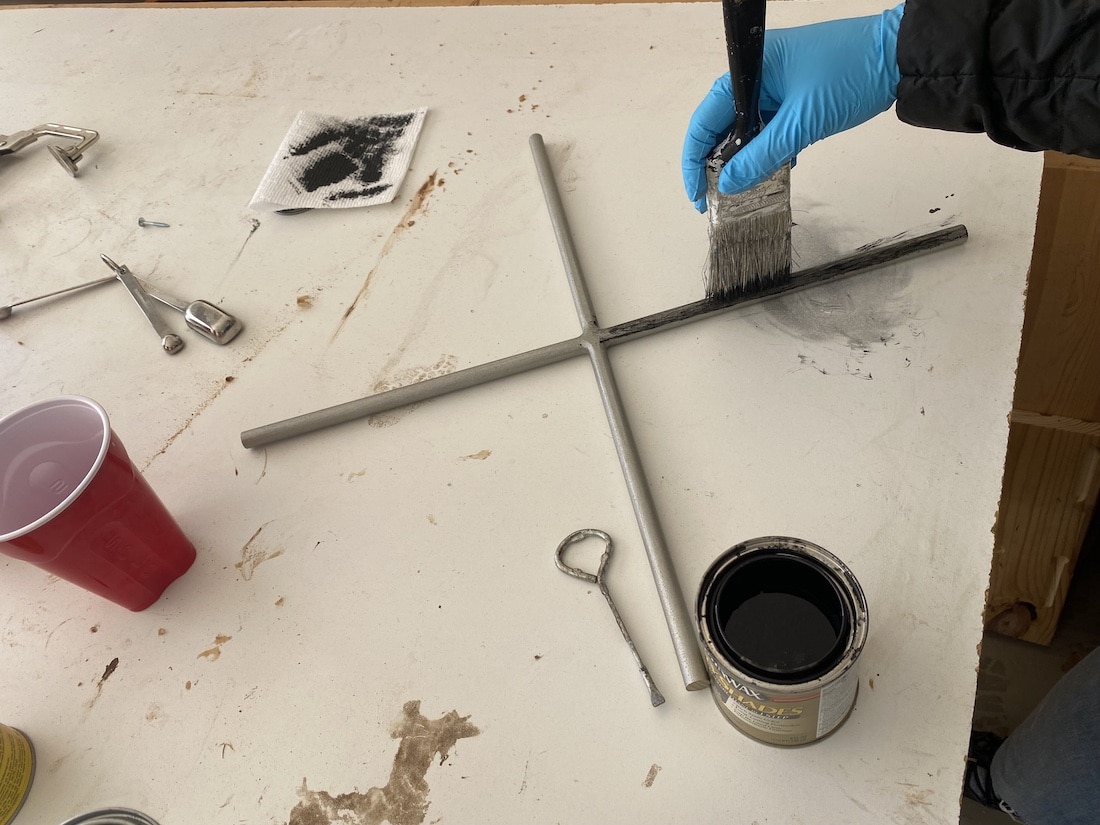
Once dry, you will use black stain to do a dry brush technique to go over the paint. This method is similar to this 2 layered dry brush finish I did on a dresser.


Seal it with an acrylic finish spray with a clear finish. This mimics the sheen of metal very well.
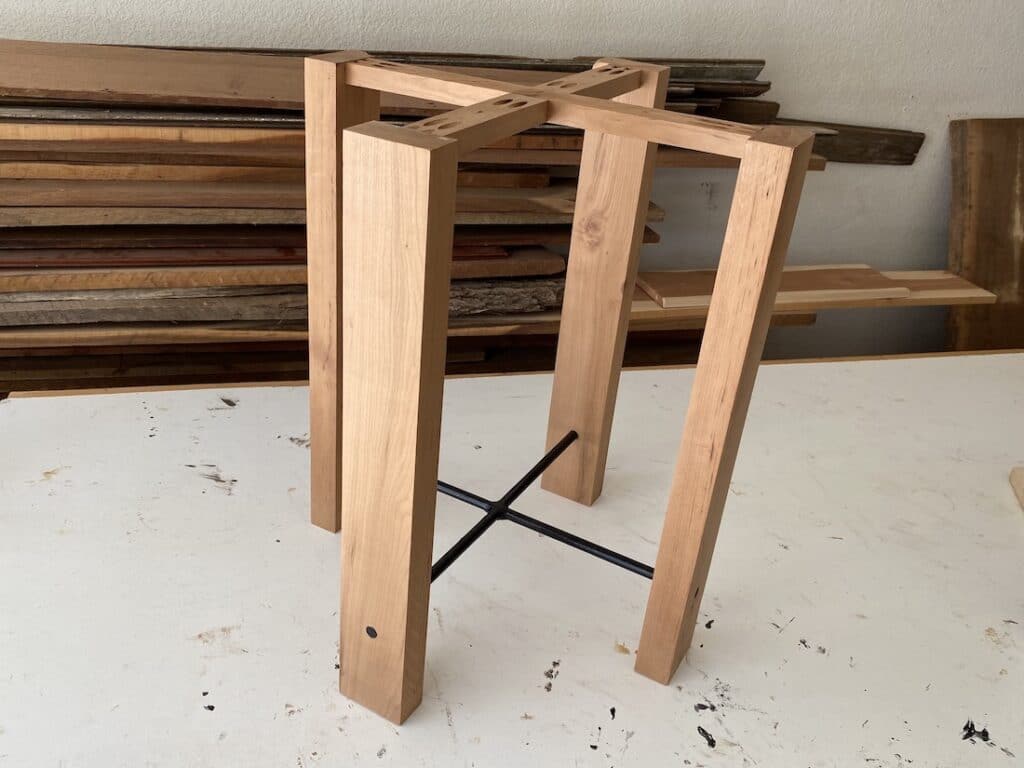
Step 6: Assemble the Round End Table
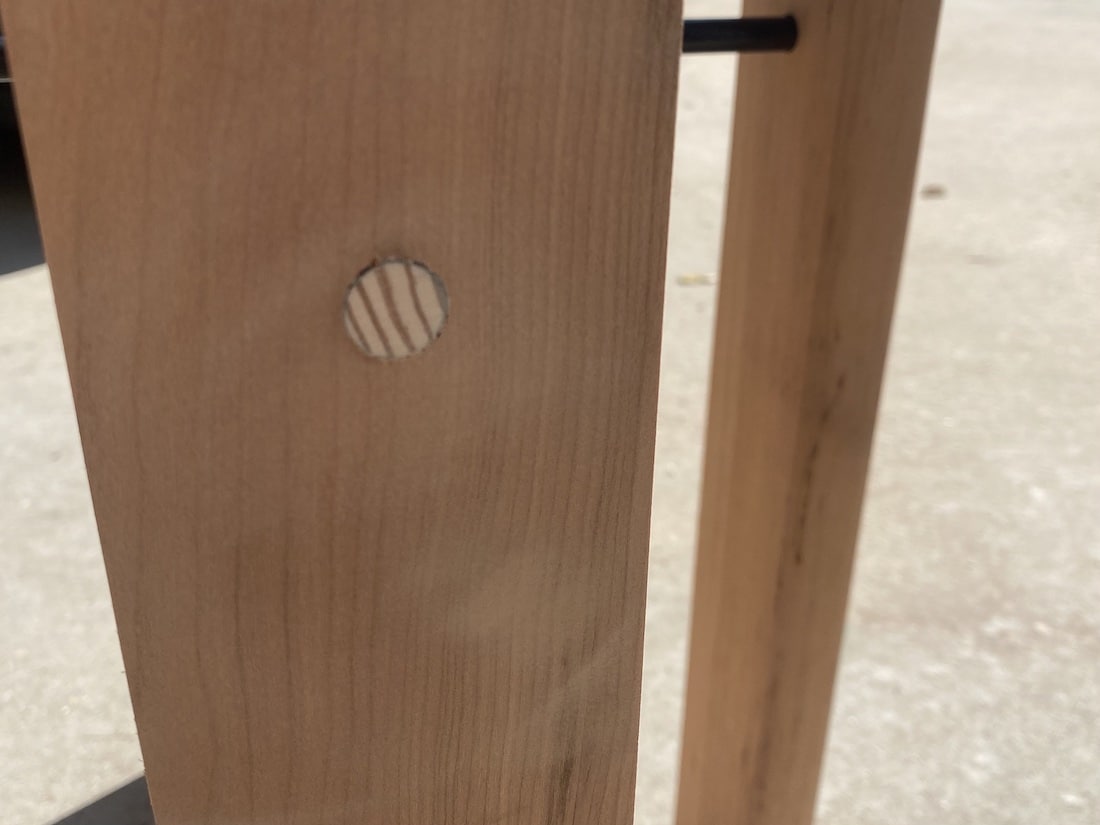
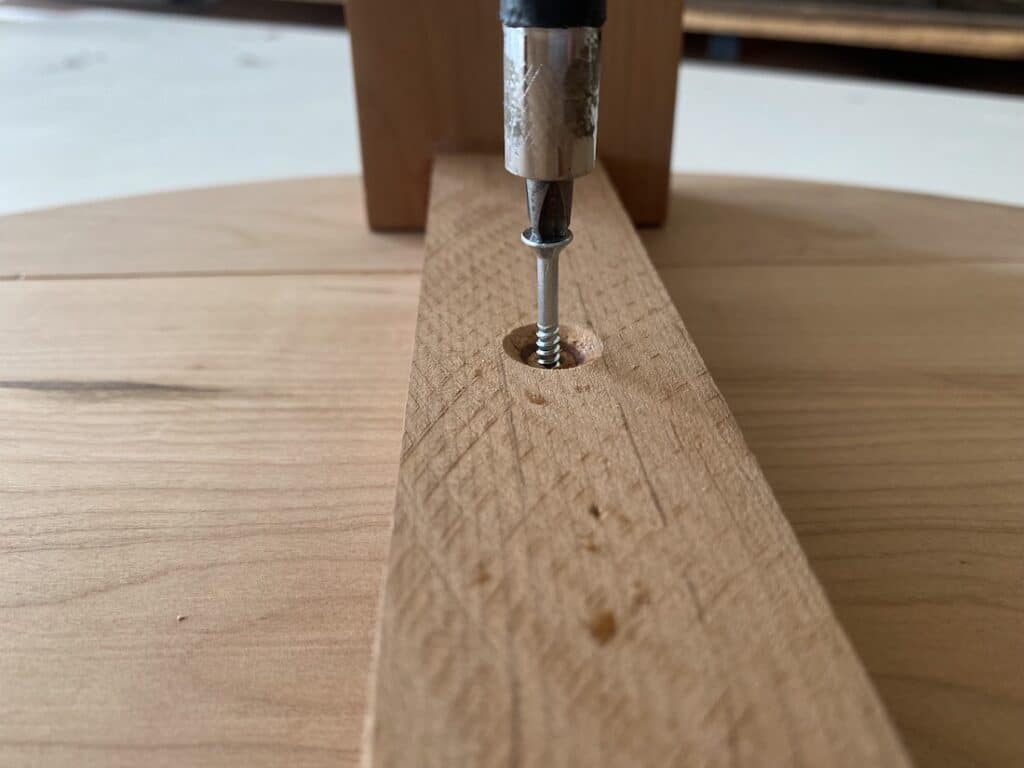
Put some glue in the hole, then insert the wooden dowels into the holes previously drilled.
You can insert the dowels so that they slightly stick out on the outside of the end table. This will allow you to sand it smooth.
Once it is sanded smooth, apply black stain to the end of the dowels.
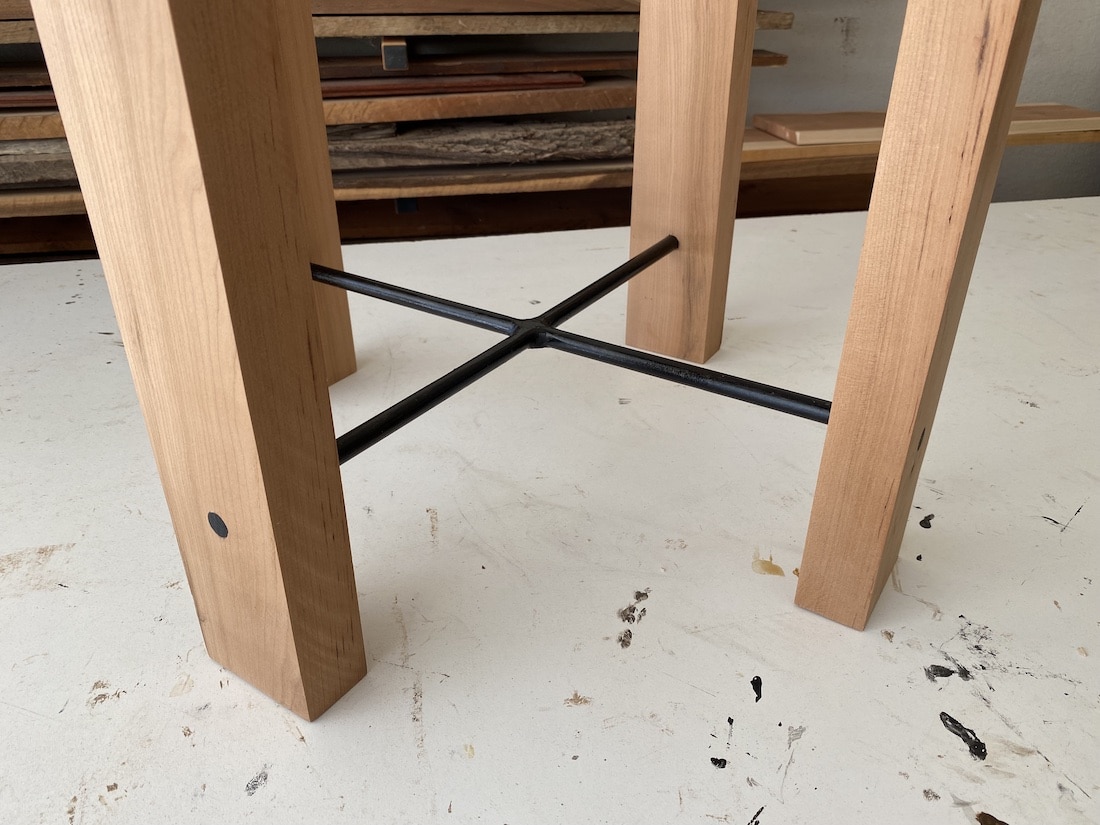
Using wood glue and pocket hole joinery, attach the top braces to the legs.
And now for the last step! Attach the round tabletop to the end table base from the underside of the base. Be sure to use a countersink bit in order to hide the screw head.
For another McGee and Co furniture dupe, check out this DIY upholstered sitting bench!
If you’re interested in a similar end table upcycle project, check out this Ikea Rast Hack! This table would also look great paired with this rustic square coffee table.
And that’s it! A simple round end table build that will get you a designer look for a small fraction of the price. Be sure to snag the free woodworking build plans for this DIY side table if you haven’t already!
You can find a tutorial for the lamp in the picture in this post on how to make an aged faux stone pottery finish on a lamp!
The real MVP of this project was the CircleGuideKit from Milescraft! I love the simplicity and accuracy this kit provides when cutting the circle in the wood for the round end table. I can’t recommend this kit enough!
As always, let me now if you have any questions and I’ll do my best to help!
Check out the webstory for how to build a round end table here!
For a similar article, check out:

Suzie Wible
Suzie has shared her knowledge for over 10 years about building furniture, painting techniques, how to build your dream home, and basic to advanced woodworking skills. Through this blog, readers will feel empowered to create a home and products they love too.