Built Ins Part 2: Assembling, Painting, and Visualizing
If you missed part 1 (the planning) check it out here.
In that post, I talked about how I’m planning on adding DIY built in shelves on either side the french doors in our home. I’m going for the custom built-in look with Ikea Billy Bookshelves as a starting point. This post will be all about how to paint Ikea billy bookcases, assembling them, and what color I painted the back of the bookcases.
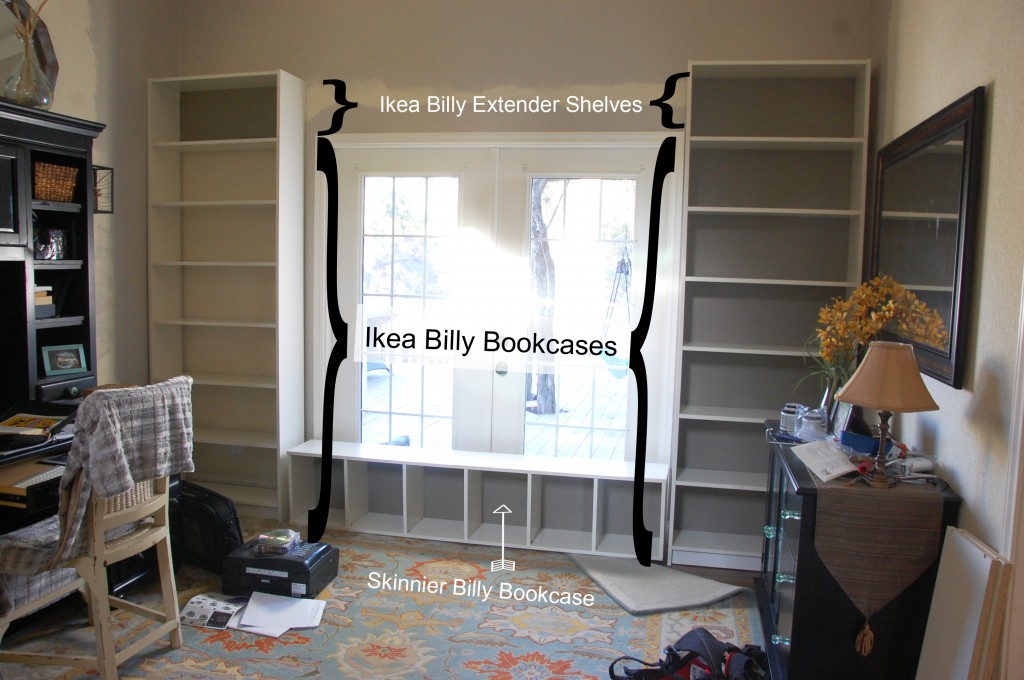
SO. Before I get to the details, let’s start out with what we bought at Ikea: 3 Ikea Billy bookcases (one of them is the skinny one), and 2 Billy bookcase extender shelves.
Now…for how we got there.
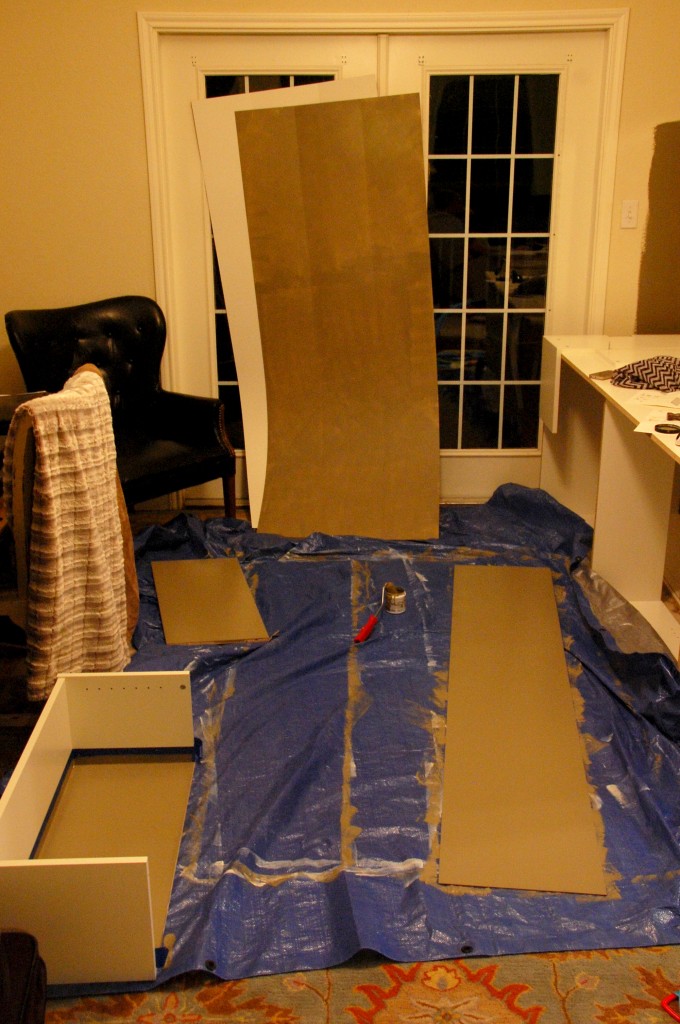
I thought it would be fun to paint the back of the billy bookcases. That way, the white of the shelves would pop more, and it gives it a more custom built in look. It is a great way to update an Ikea bookshelf.
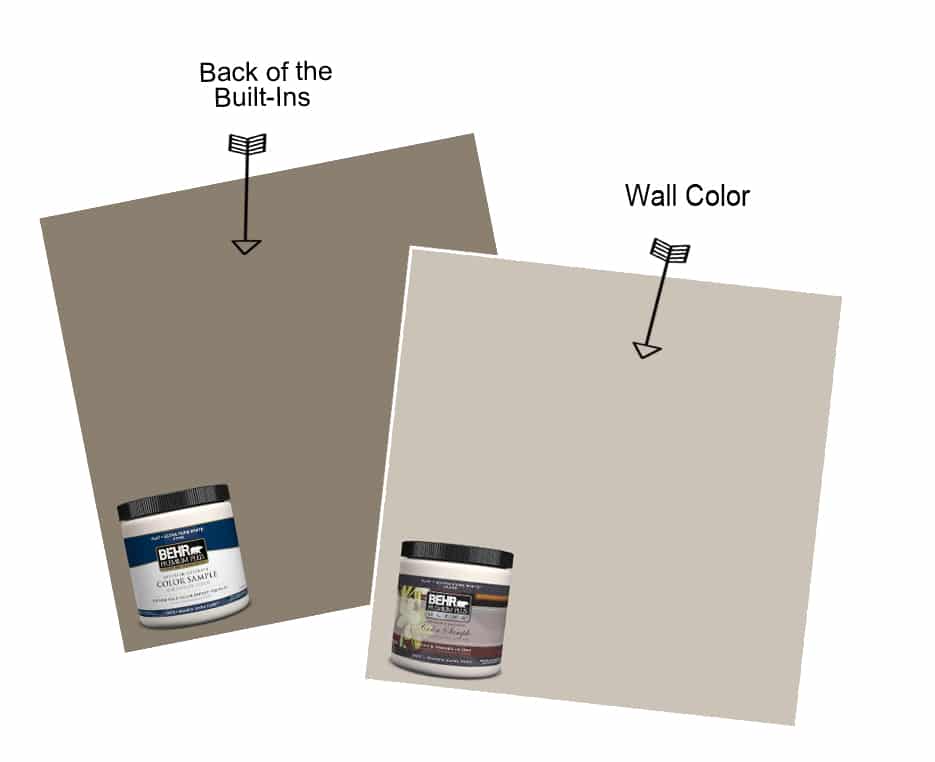
I decided on Mocha Accent by Behr for the back of the built-ins and Wheat Bread by Behr for the wall color. I really like how white custom built in bookcases look with darker backs.
We had an assembly and painting party in order get the bookshelves ready to be installed. I painted the back of the shelves before we assembled them so I didn’t have to tape and paint them when it was assembled.
For more tips on how to paint built in bookshelves, check out this post!
Q: How do I paint the back of the Ikea Billy Bookcase?
A:It’s easiest to paint it before you assemble them. Be sure to use primer. After that, it took two thin coats of paint applied with a foam brush to get a smooth finish.
This was the state of the office for way too long because LORD KNOWS Micah has an anti-DIY sixth sense that is triggered anytime he goes down for a nap and I try to get anything done. And then he wakes up and smiles when he sees me and my heart melts and I tell him he can take a 6.5 minute nap any time he wants because those smiles are so worth it.
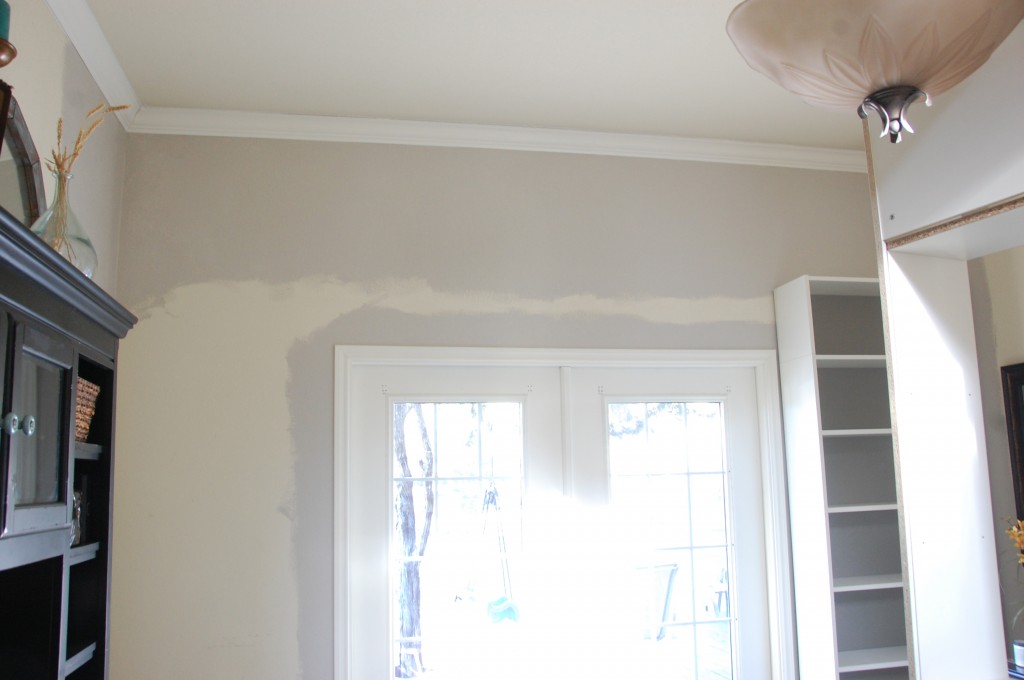
Somewhere in the midst of it all, I got the room painted. I didn’t bother to paint behind the shelves because hey…might as well not waste paint, time, and effort! Yeah just say it…I was being lazy. Whatevs.
I didn’t like how the shelf adjusting holes would be showing. Once I add trim, the shelves won’t be adjustable anymore so we don’t need the holes. So I filled them with caulk, used a straight edge to wipe away the excess…and yeehaw…no more ugly holes.
For tips on how to paint cabinets, like whether to use a brush or roller, check out this post!
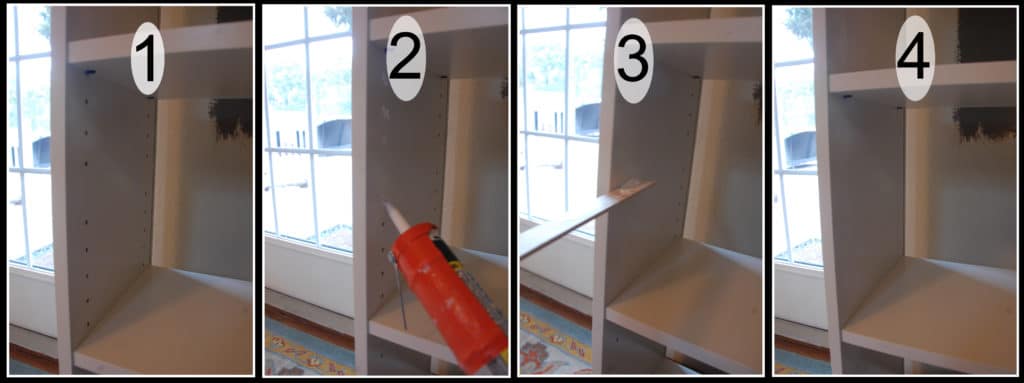
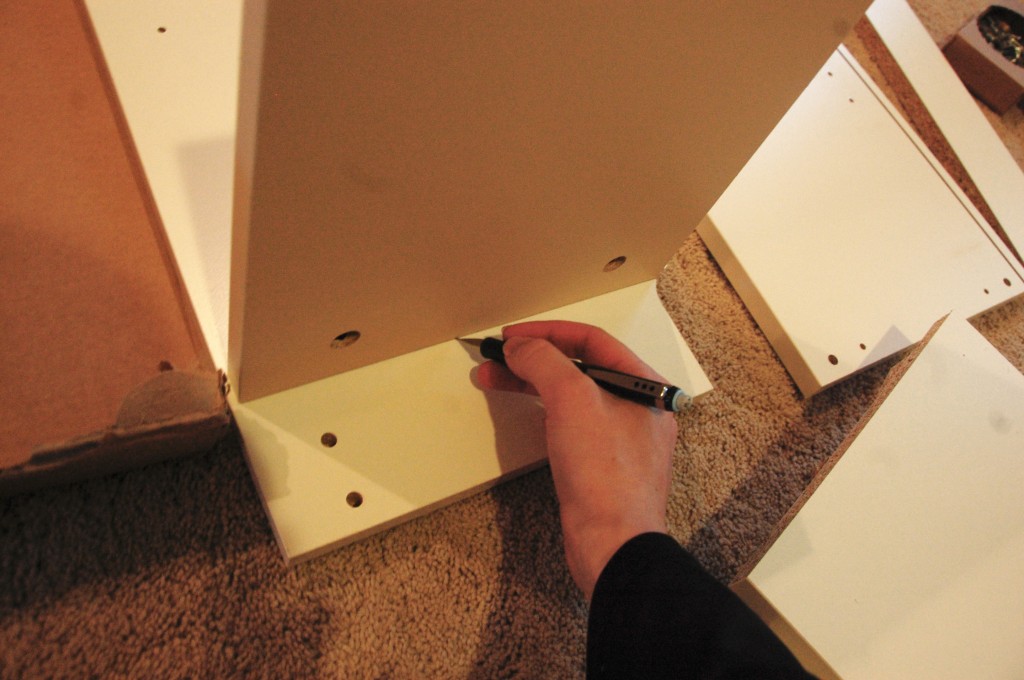
Since the top Ikea Billy bookshelf needed to be evenly spaced, we had to cut off the bottom. So I just traced a line that marked the excess, cut it off using a miter saw, and reassembled it.
So here’s the current state of the office (with our junk everywhere…just keeping it real) #sorrynotsorry
By the way, can I get an amen for how randomly perfect the bookshelf dimensions are!?

The left bookshelf’s back was drying so that’s why it isn’t installed yet.
Next up: making these DIY Wall built ins truly custom looking. We will start with installing the overhang, building bases, learn how to attach a built in bookcase to the wall, and add moulding!!
To view the rest of this project, check out Part 1 | Part 3 | Part 4
For another Ikea hack project, check out this Ikea Rast Hack here.
Check out the web story for how to make custom built-ins using Ikea Billy bookcases here!

Suzie Wible
Suzie has shared her knowledge for over 10 years about building furniture, painting techniques, how to build your dream home, and basic to advanced woodworking skills. Through this blog, readers will feel empowered to create a home and products they love too.
Hi there, just became alert to your blog through Google,
and found that it is really informative. I’m going to watch out for brussels.
I’ll appreciate if you continue this in future. Numerous people will be benefited from your writing.
Cheers!
Love what you did. I do have a question, I just can’t seem to understand what you mean. “Since the top bookshelf needed to be evenly spaced, we had to cut off the bottom. So I just traced a line that marked the excess, cut it off using this table saw, and reassembled it.” Do you mean on the Billy extensions?
Christine
Christine, I just found this and noticed your comment. The bookshelves come with a base on the bottom and it looks like that’s what she cut off. I’m wondering how much she had to cut off.