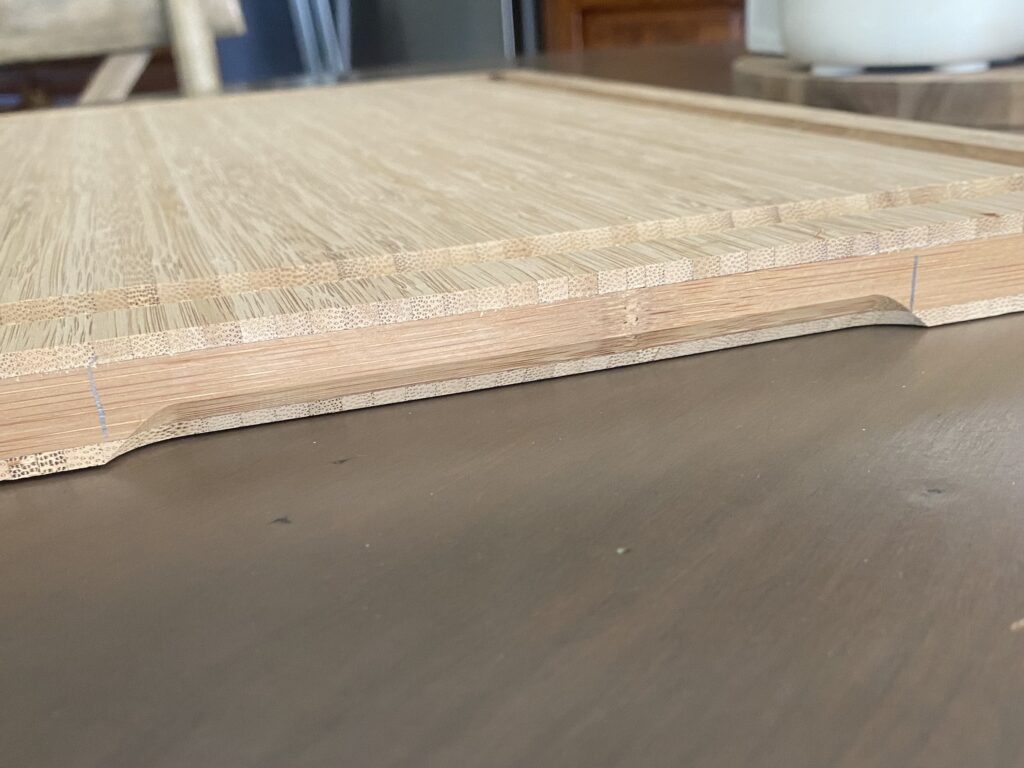
How to Route a Cutting Board Handle & Finger Groove
When my husband recently got a Traeger Grill, he started making some delicious briskets. We didn’t have a cutting board large enough to carve the brisket, so I made him a massive one! I decided to add a couple features to the cutting board that would take the quality up a notch. One of those features was to route out finger grooves on the sides of the cutting board to make handles.
Handles on a cutting board are so incredibly useful, especially when you have a board that big. This particular process to add inset cutting board handles is a pretty simple process if you have the right tools. Keep reading to learn my process for how to make these handles!
Safety When Using Power Tools
I want to mention safety before we get started. Power tools are dangerous, and especially a router. There are inherent risks in using a tool like this, so please educate yourself on how to safely use it. Use yours only if you feel confident and safe in using it.
There are a few safety items that I always use, and they are to protect my eyes, ears, and lungs. I highly recommend you do the same!
Materials Needed to Route Cutting Board Handles
Disclaimer: This site contains product affiliate links. We may receive a commission if you make a purchase after clicking on one of these links.
- Router
- Chamfer Bit
- Cutting Board (here is a great tutorial for how to make a cutting board)
- Clamps
- Combination square or ruler or measuring tape
Step 1: Clamp your Board to your Workbench
You will want your cutting board to be securely clamped down. This will make your cut much safer.
Clamp it upside down, so the bottom of the board is facing up.
Make sure the router can freely move, without running into the clamps when you move it. It’s smart to play out the full cut before you make it, so you can spot any potential problems or risks.
My favorite clamps use dog holes in the workbench and quickly clamp and release when needed.
In addition, make sure your workbench is stable and not going to move. My workbench is mobile, so I can remove it from my garage easily in order to cut down on sawdust in my garage. So, I always need to make sure the casters on the workbench are locked before I make cuts like this.
Step 2: Insert the Router Bit and Set the Depth
To make this specific style of inset cutting board handle, you will use a chamfer bit. This bit has a bearing that will run along the edge of your board when you are routing the handle.
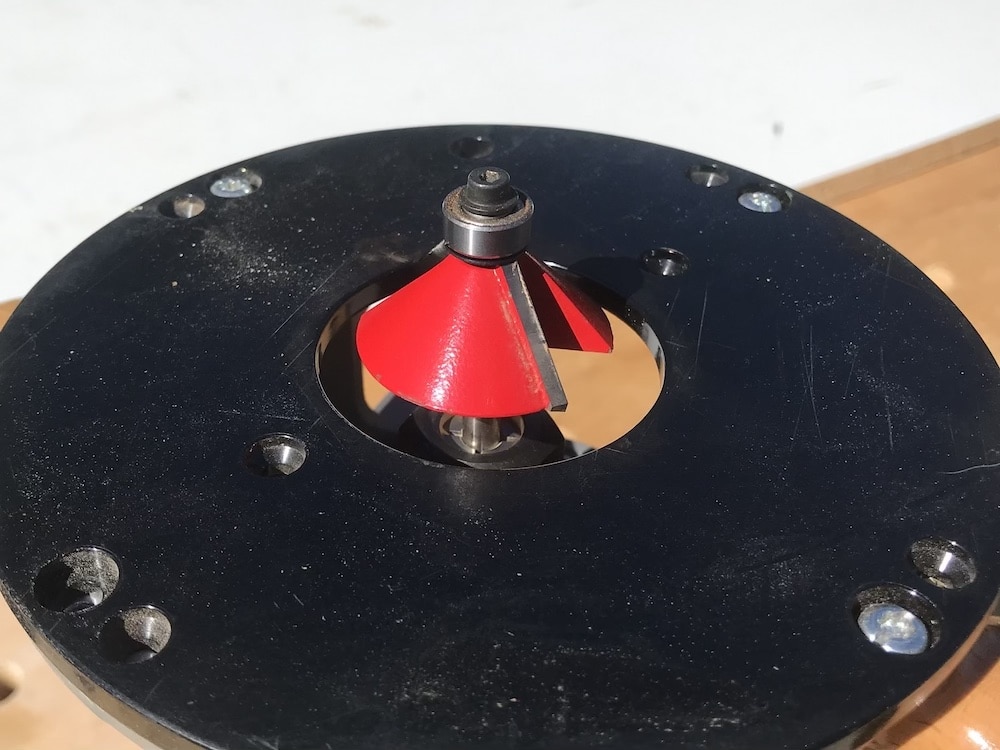
Adjust the depth of the bit so that the bearing will run along the bottom half of your board.
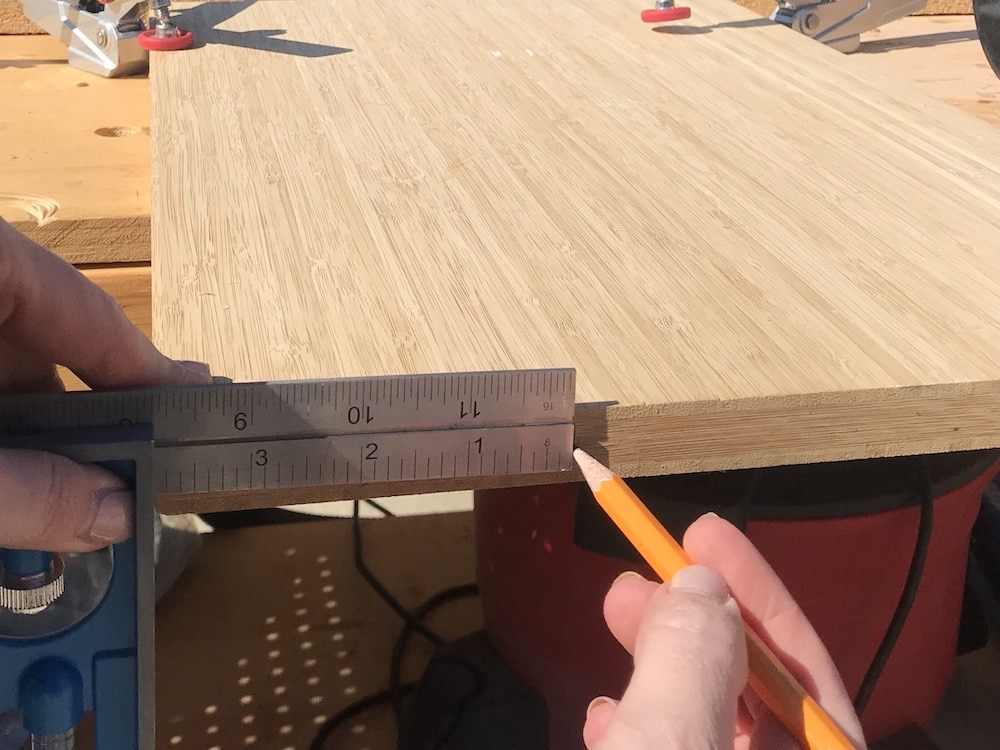
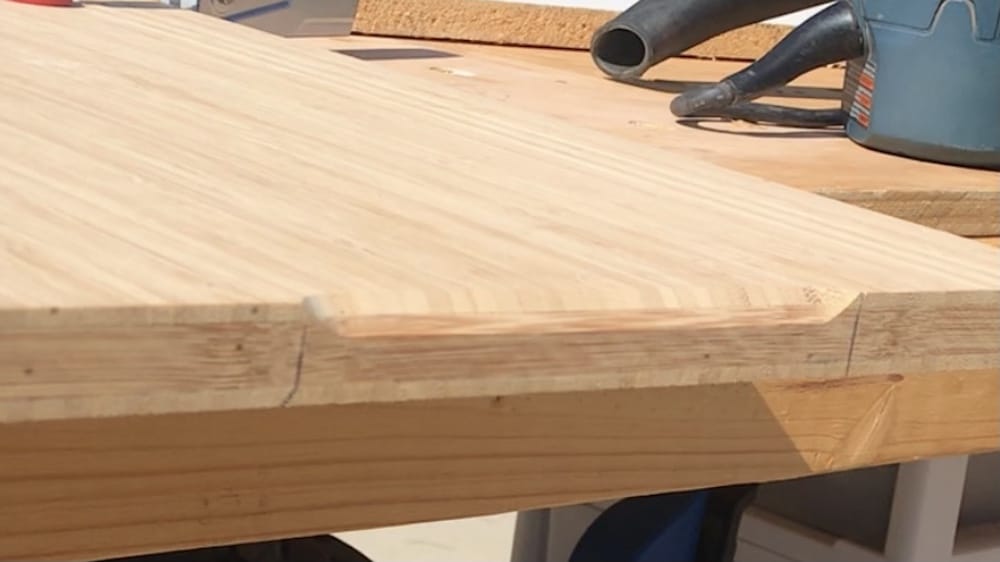
Step 3: Mark your Board
Make equal marks on either side of the edge of your board. This will be where you start and stop when routing the finger groove. Be sure to make these marks prominent so you can easily see them while routing. There is a lot of sawdust, so don’t be afraid to make prominent marks! You can always sand out whatever you mark.
I just eyeball this distance, but I do make sure that it’s equal on both sides. When you are making this measurement, it will depend on the dimensions of your board.
As a general rule, I leave about a quarter of the width of the edge on either side of the handle. This is a method that looks most aesthetically pleasing in my opinion.
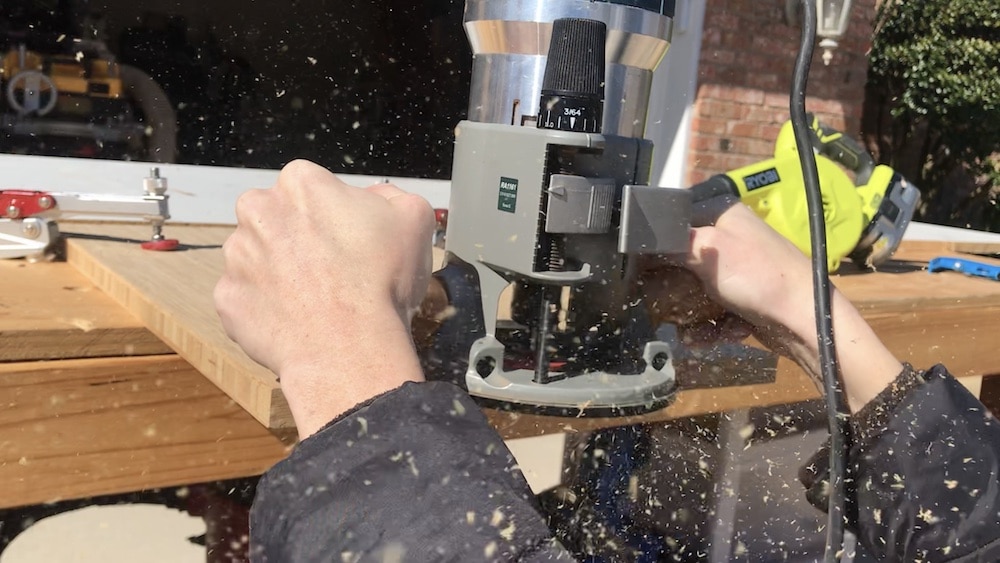
Step 4: Route the Handles on the Cutting Board
Get about eye level with your board. Start the router and allow it to reach full speed.
Make sure the face of the router is flat on your board. Slowly and steadily cut into your board at your mark. Move the router to the other mark.
Turn your router off and allow it to fully stop, then remove the router from your piece.
As a general rule, if you are getting burn marks, you are moving too slow. If you are chipping your board, you’re going too fast, or you need a new and sharper router bit.
And that’s it! Repeat the previous steps for the other side.
If you’re just getting started and want to try this out on an affordable router, check out this article on the best budget wood router.
These finger groove handles create so much functionality in your boards. And I really love how simple it is. You don’t have to have a router table or make any complex measurements.
You can find another example of how to route handles in this post on how to make an end grain cutting board from scrap wood.
A similar upgrade to a cutting board is adding a juice groove. Check out a tutorial for how to route a juice groove on a cutting board here. I also love to upgrade my boards with inlays. My favorite is to add a Texas inlay and you can find a tutorial for how to make perfect inlays here!
For another router project, check out these tutorials for how to make a router flattening sled, how to build a round side table or how to cut a perfect circle in wood!
Now, you can seal and sand your cutting board! I have a great method for getting a super smooth finish on your board:
- sand (80 grit sandpaper)
- spray with water to “water pop” the board. This will make the surface rough again
- allow it to completely dry
- sand (120 grit sandpaper)
Now, you can seal the cutting board. My favorite sealer is Odie’s Oil. It is food safe, creates great protection for the cutting board, and smells amazing! Check out this post on why I think Odie’s is the best finish for wood cutting boards.
And that’s it! I love this simple way to route finger groove in a cutting board to create handles. This simple little addition helps up the functionality of your board and creates a more custom board!
While you’re at it, check out this post on all the best tips and tricks for making your own cutting board, end grain vs edge grain cutting boards, and the best wood to use for a cutting board!
Find the web story for how to route a handle in a cutting board here!

Suzie Wible
Suzie has shared her knowledge for over 10 years about building furniture, painting techniques, how to build your dream home, and basic to advanced woodworking skills. Through this blog, readers will feel empowered to create a home and products they love too.