Juice Groove on a Cutting Board: No Jig Required
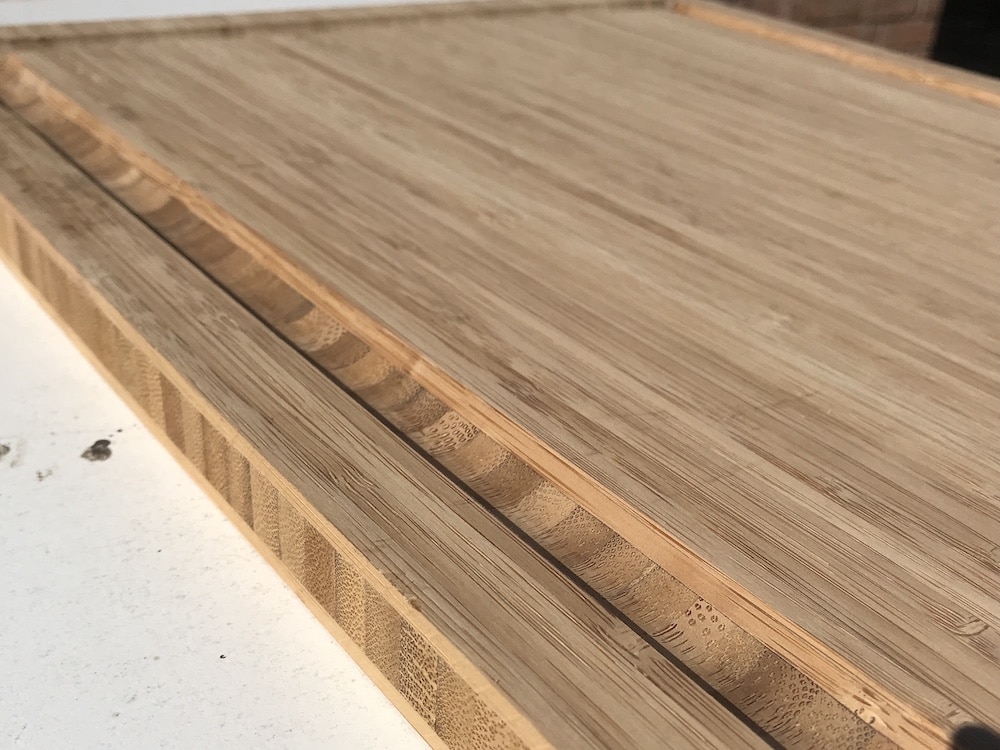
I have recently been making quite a few cutting boards, and I have cut a juice groove into all of them. So, I wanted to share with you my method of routing out a juice groove.
This method doesn’t require a CNC, router table, or a complex jig that fits on your cutting board. Instead, all it uses is a palm router and an edge guide. That’s one of the main things I love about this method of making a cutting board juice groove – the simplicity!
CNC machines are amazing when you have one, but they definitely aren’t a staple in many shops (mine included). I also didn’t want to build a complex jig that has to be adjusted for every new board I make. So, after testing out this method on many, many cutting boards, I can safely say that this is my favorite method.
So, whether you call it a meat juice groove, a blood groove, or a drip edge; keep reading to find out a simple method of how to route one!
Safety When Using a Router
First, let’s talk about safety. Like I mentioned, this method uses a palm router. Just by the nature of this, there are inherent risks in using a power tool like a palm router. Use yours only if you feel safe and confident in using it.
Wear all of the proper safety equipment. Read your owner’s manual and fully acquaint yourself with the power tool before you use it.
Step 1: Gather your Materials
The first thing to do is to gather everything you need. Most everything can be found at your local hardware store, but I have provided links as well.
Disclaimer: This site contains product affiliate links. We may receive a commission if you make a purchase after clicking on one of these links.
- palm router
- edge guide that fits your router
- 3/8″ roundover bit
- clamps
- combination square
- cutting board
Step 2: Attach Router Bit and Edge Guide
This step is assuming you have already made your cutting board. For a tutorial for how to joint long boards without a jointer, check out this post. Straight edges are imperative when making your own wooden boards!
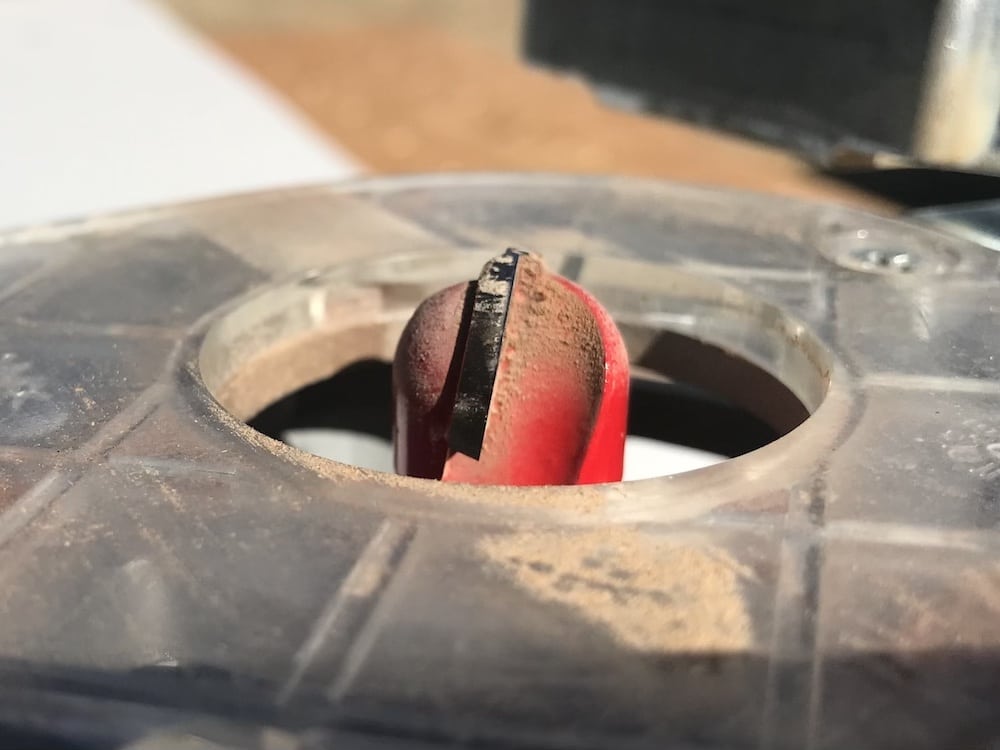
Q: What is the best router bit for a juice groove?
The correct router bit to use in order to cut a juice groove is a 3/8″ round nose bit.
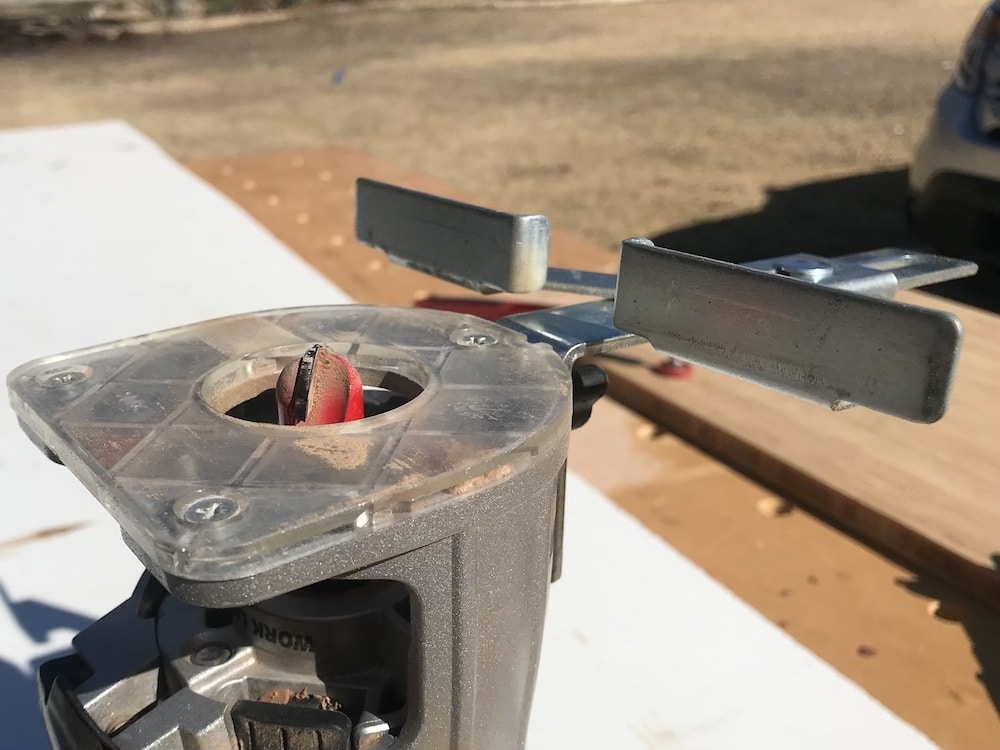
This is the edge guide I have. It attaches to the side of your router and provides a fence for the router to push against.
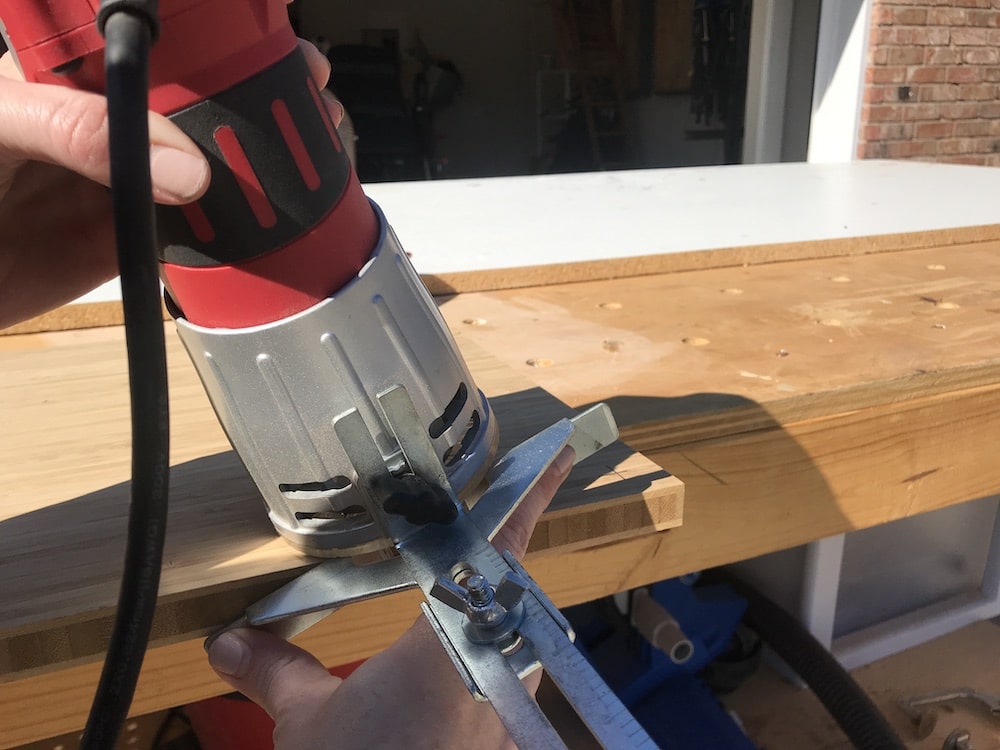
Step 3: Set the Depth
Q: How far from the edge should a juice groove be?
A: A good distance for a juice groove to be is 3/4″. This is the distance from the edge of the board to the closest edge of the juice groove and is the right place for a juice groove.
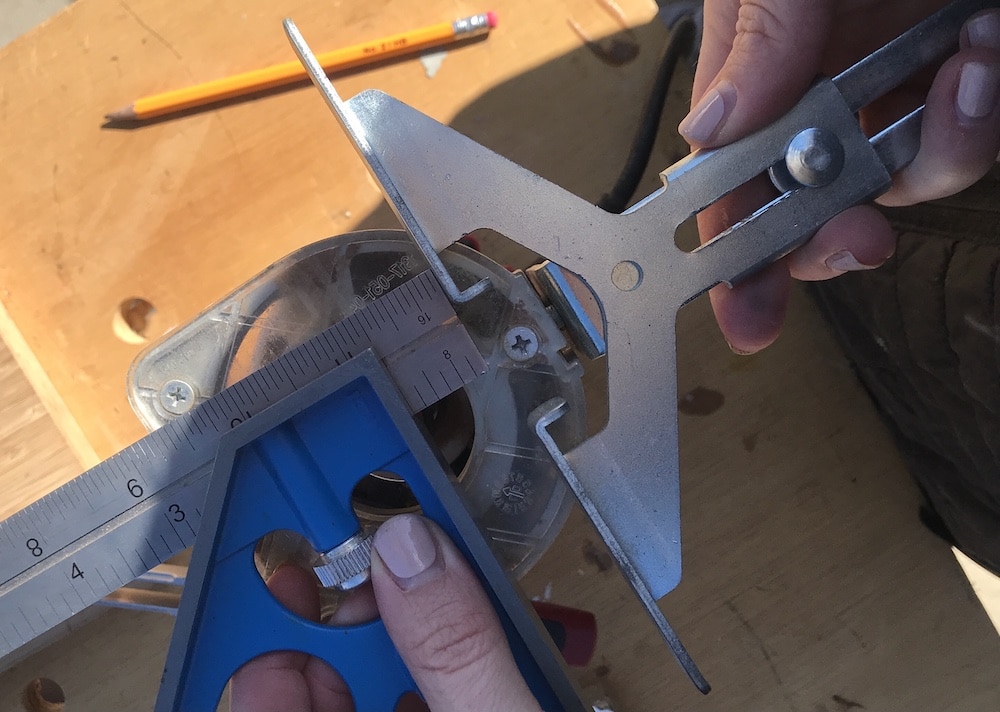
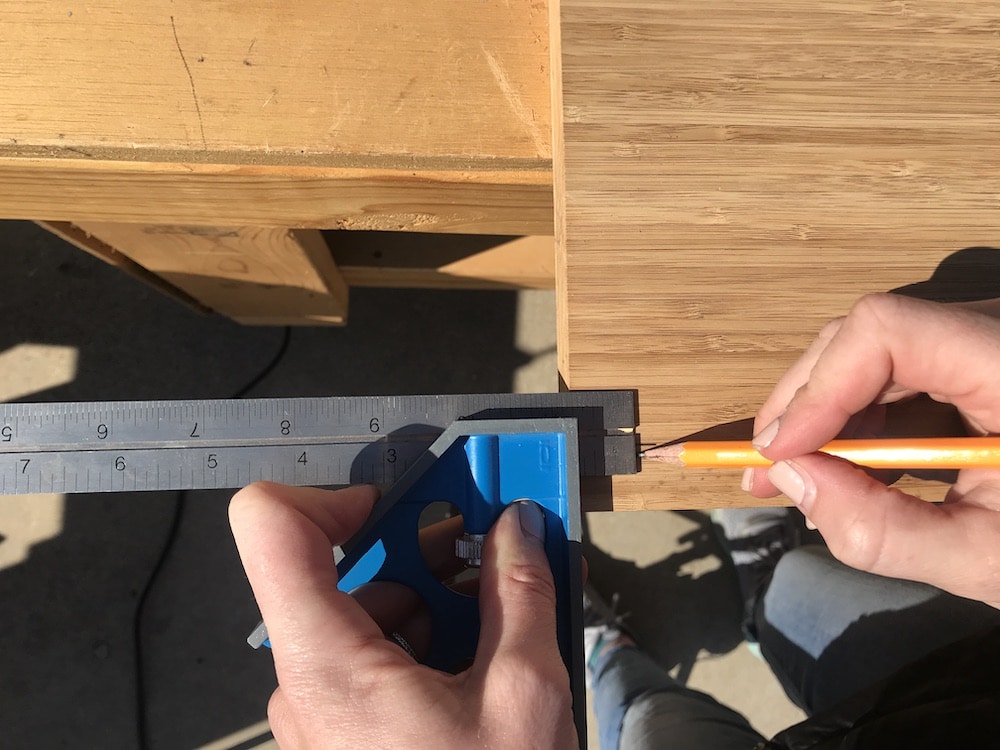
I set my combination square to 3/4″. This will be the distance from the edge of the board to the edge of the juice groove.
Put your combination square on the router bit, flush with the edge guide. Tighten the edge guide to where the edge of the bit equals the 3/4″ measurement on the combination square.
If you would like to try this out with a very affordable router, check out the best budget wood router I have found.
Step 4: Mark your Board
Using your combination square set to 3/4″, mark that distance on every corner of the board. Make your marks prominent, because this is what you will be looking for while you are routing. You will stop at these marks.
Just to make sure that you are happy with the depth of the groove and how far from the edge it is, it might be a good idea to do your first attempt on plywood scraps.
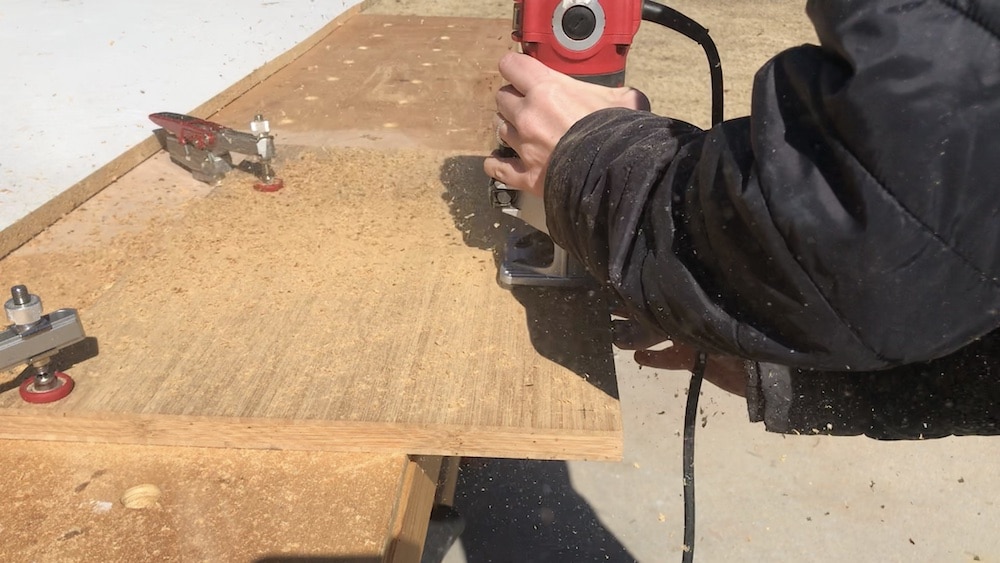
Step 5: Route the Juice Groove
Clamp the cutting board to your workbench. Be sure to leave room for the router to move freely.
Start by plunging the router with the edge guide flush against the edge. Tilt it to the side, wait for the bit to reach full speed, and slowly lower the router bit into the piece. By doing it this way, you don’t need a plunge base.
For another router project, check out this post on how to flatten slabs with with a router or how to build a round side table or how to cut a perfect circle in wood!
Inch your way to the right, until you meet the mark that you previously made. Then, slowly and steadily, work your way left until you reach the other mark on the left side.
A couple tips when you are routing the blood groove – if you are getting burn marks in your groove, you are probably going too slow. If the wood is chipping, you are probably going too fast, or you need a new router bit.
Also, make multiple shallow passes. Start shallow and gradually go deeper. While this does take longer, it is safer and you will get a better result in the end.
Turn off the router and allow it to fully stop before you lift it off the cutting board.
Repeat this on the other 3 sides.
I also did this same method to make a cigar rest when I made this wooden cigar ashtray.
Another great way to upgrade your board is to add a handle. Find a tutorial for how to route a finger groove handle on your cutting board here! I also love to add an inlay to my cutting boards.
You can find another example of a juice groove in this post on how to make an end grain boards from scrap wood.
You can now sand and seal your board. My favorite method of sanding to create to smoothest finish is this:
- sand with 80 grit sandpaper
- spray with water to “water pop” the board
- allow it to dry
- sand again with 120 grit sandpaper
Seal it with Odie’s Oil. It is food safe, creates great protection for the cutting board, and smells amazing! I prefer this product over mineral oil.
And that’s it! I love this simple way to cut a drip edge on a cutting board. It’s even better that no CNC is required. And not only that, but you don’t have to make a complex router groove jig that fits the board. All you need is an edge guide for your router! Both new woodworkers and skilled woodworkers alike can find this method useful.
While you’re at it, check out this post on the best tips and tricks for making your own cutting board, end grain vs edge grain cutting boards, and the best wood to use for a cutting board.
Find the web story for how to route a juice groove on a cutting board here!

Suzie Wible
Suzie has shared her knowledge for over 10 years about building furniture, painting techniques, how to build your dream home, and basic to advanced woodworking skills. Through this blog, readers will feel empowered to create a home and products they love too.