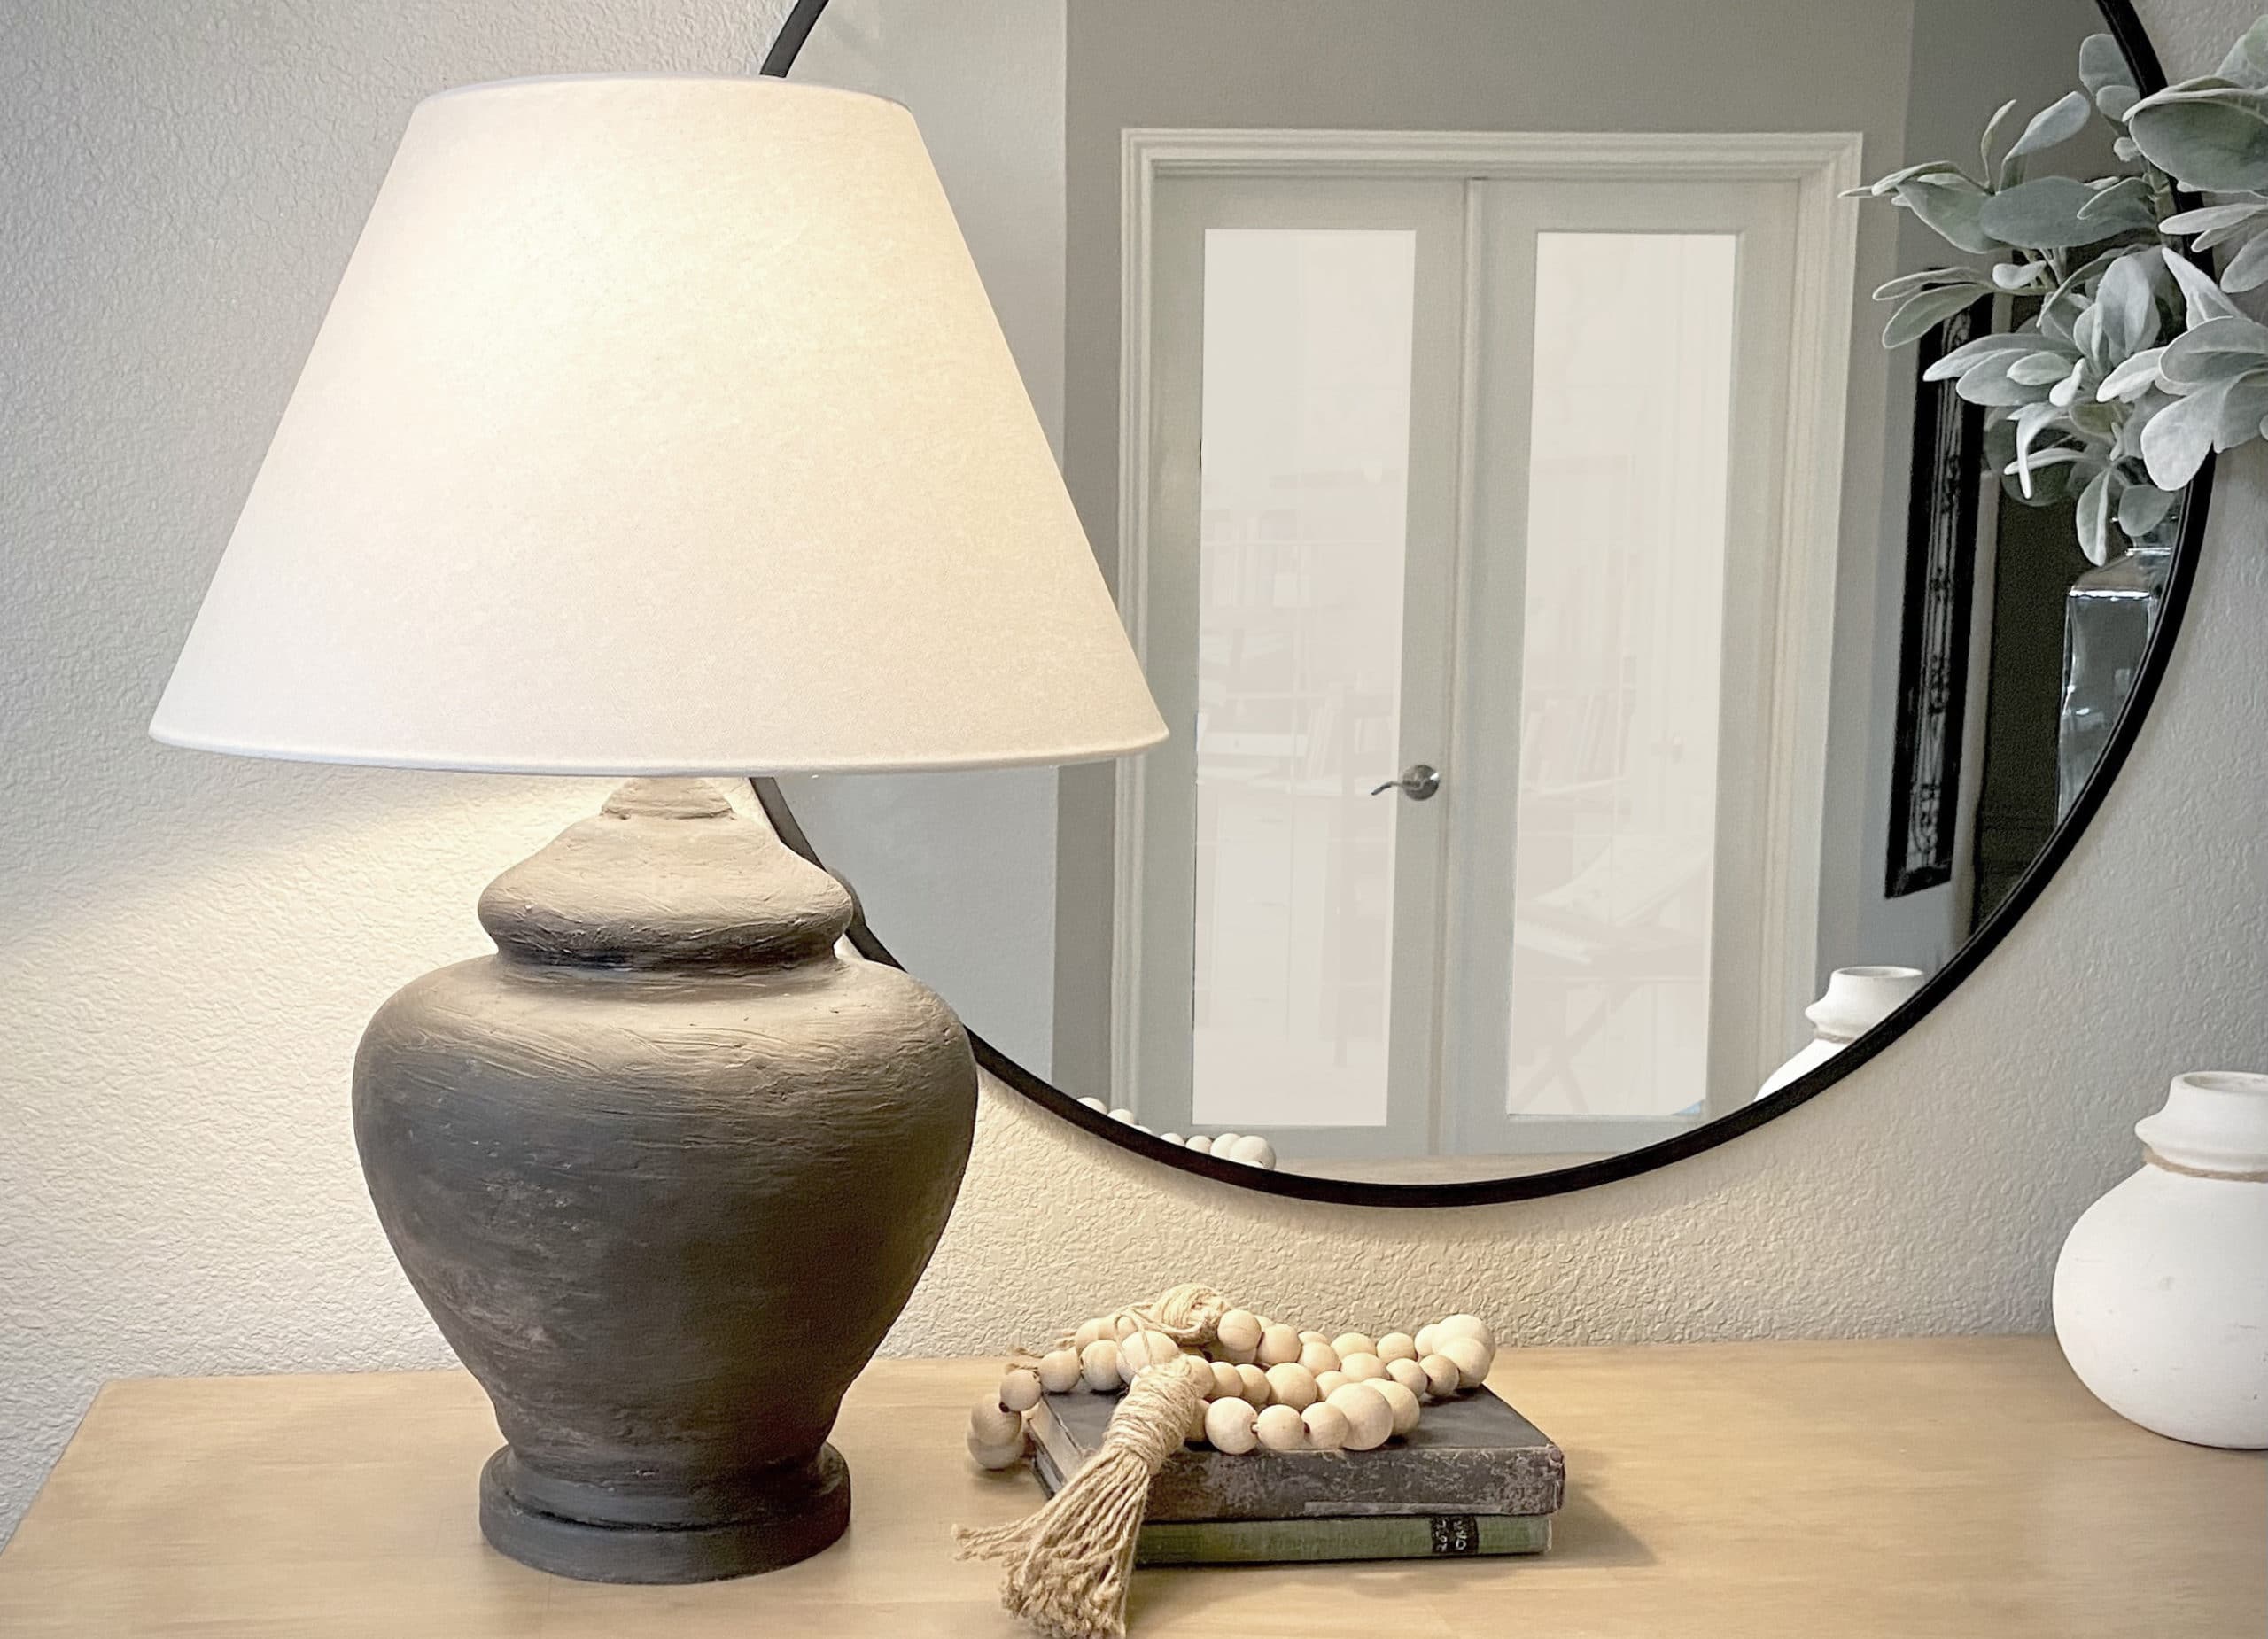
How to Make an Aged Faux Stone Pottery Finish on a Lamp
In this post, I’m sharing how I made over an old lamp from a thrift store to create an aged stone pottery finish on it. I was able to take a dated lamp and create this “found” pottery look for a fraction of the cost of other aged pottery lamps I’ve seen for sale.
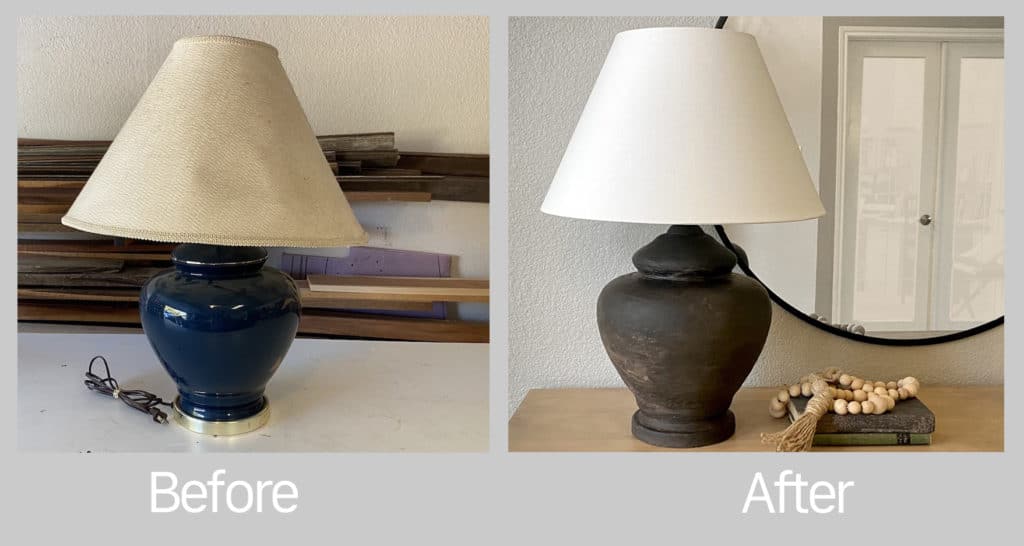
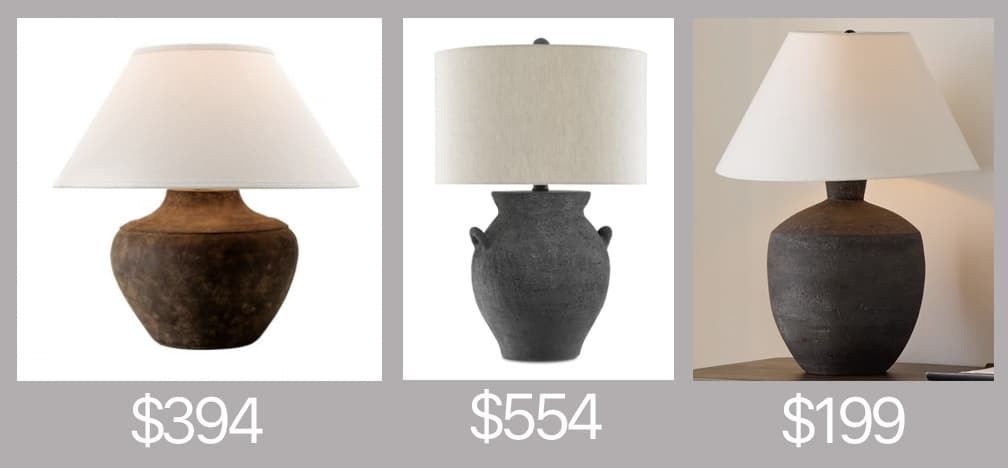
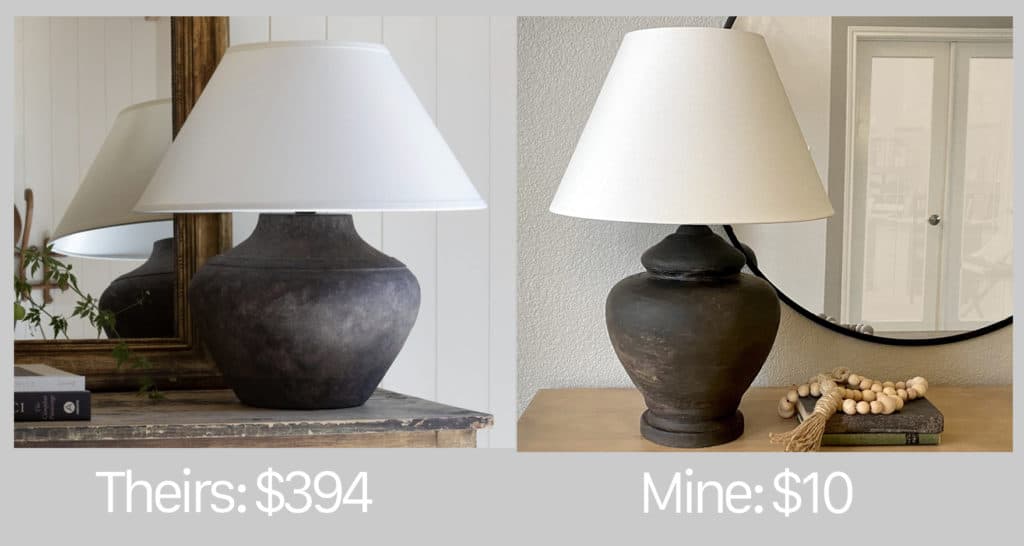
It took just about a couple hours (plus drying time) to make the lamp look like an old, vintage vase lamp. I have been eyeing this style of lamps for awhile now. I love the aged pottery look, but I wasn’t loving the price tag on most every one I saw:
Giving this old lamp an aged pottery look was a fun and quick little project. I’m so excited to show you how to make one on your own!
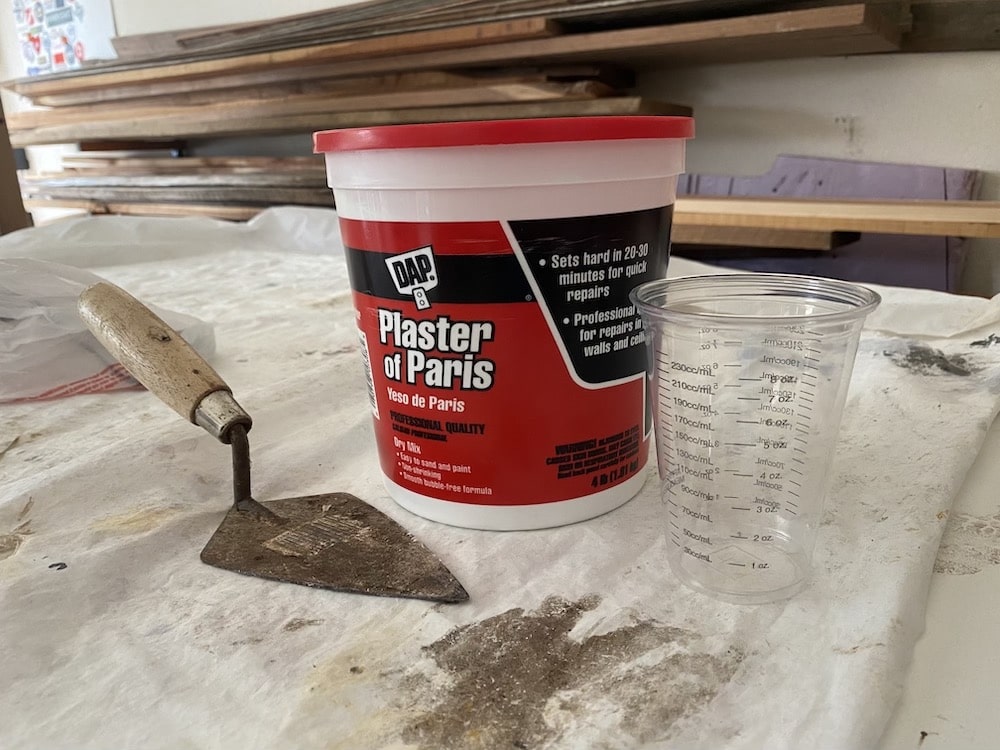
Materials Needed to make this faux aged stone finish on a lamp:
- lamp with a vase-like shape (I found mine at a local thrift store for $5)
- sandpaper
- primer
- plaster of paris
- paintbrush
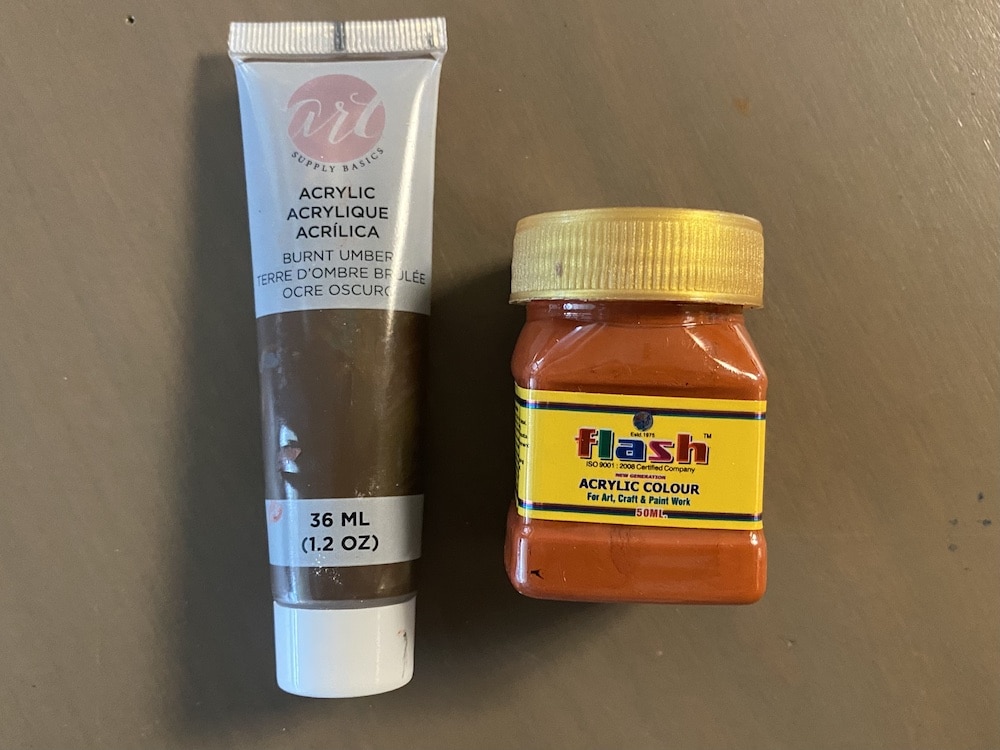
- black acrylic paint
- brown acrylic paint
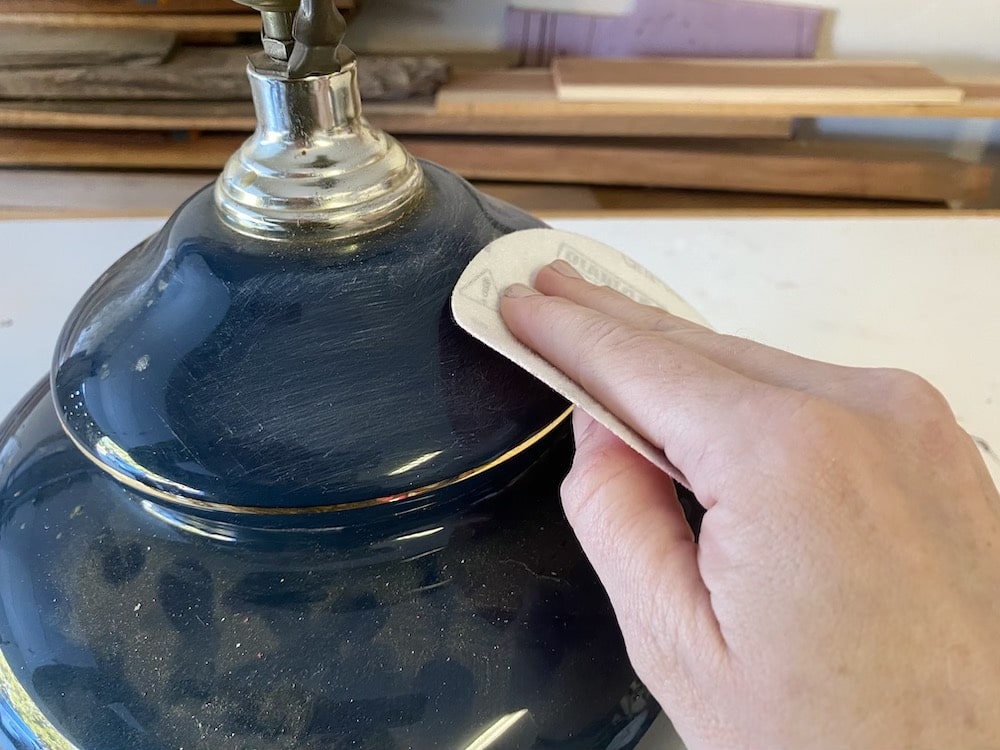
Step 1: Sand and Clean
In order to help the primer adhere to the lamp, run sandpaper over the lamp a few times just to roughen up the surface. This will give the primer something to grab on to.
When you are done, wipe down the lamp well with a damp cloth. Make sure it is completely dry before moving on to the next step.
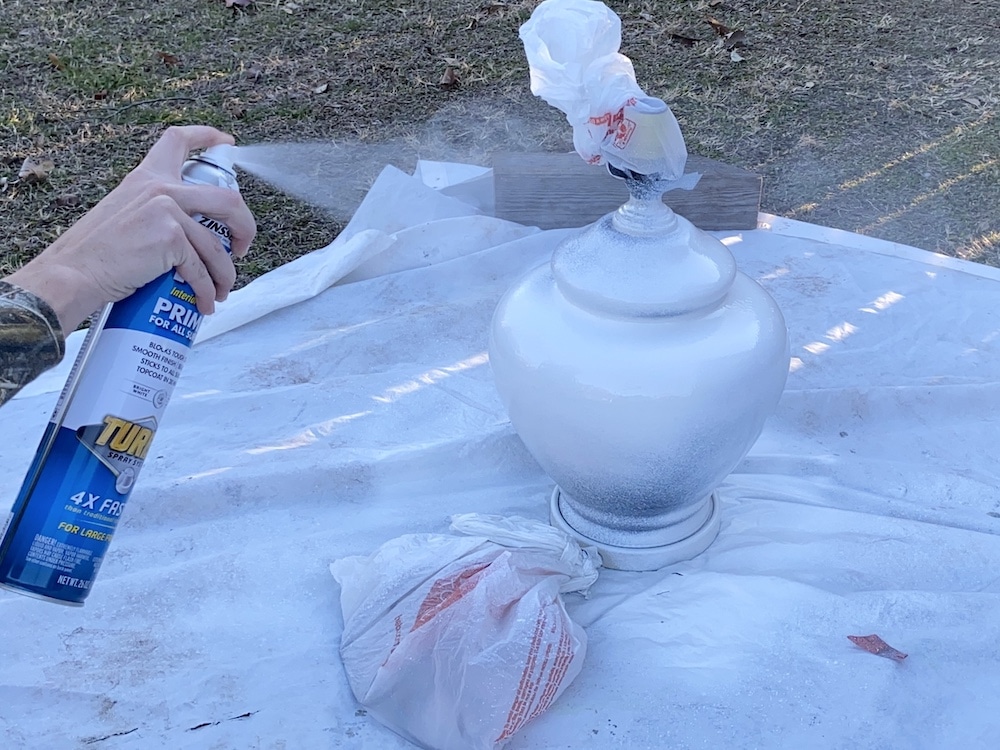
Step 2: Prime
Before you spray primer, cover all of the electrical parts of the lamp. I used painter’s tape and a plastic bag.
Using spray primer, spray an even coat over the whole lamp.
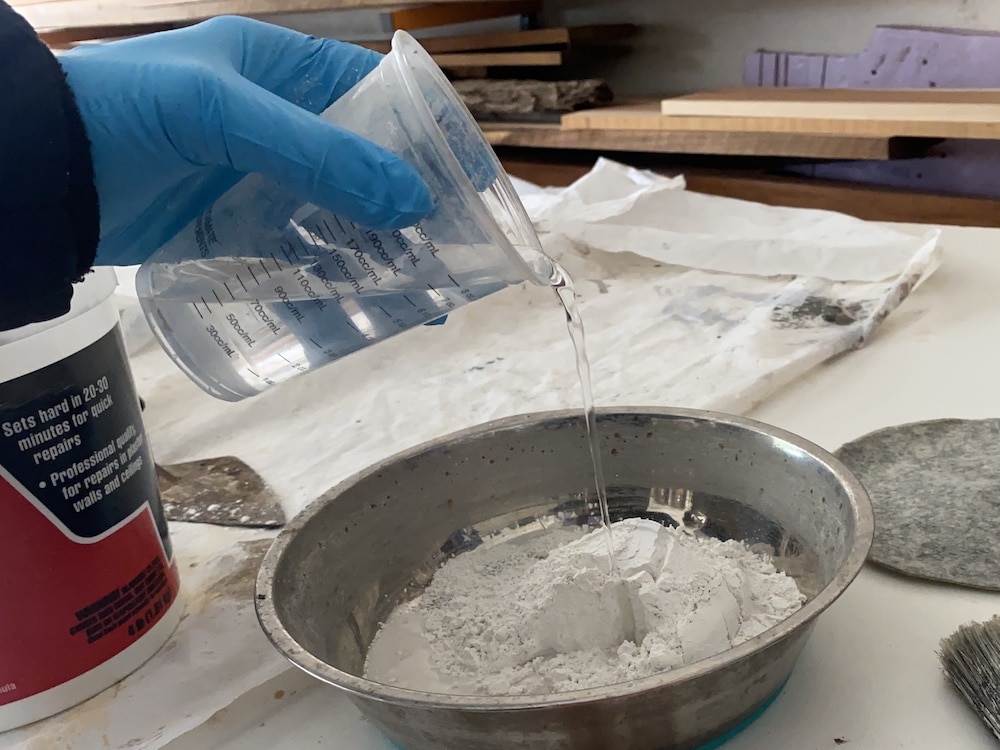
Step 3: Plaster of Paris
You will now mix up the plaster of paris. Be sure to wear gloves so you don’t get it on your hands!
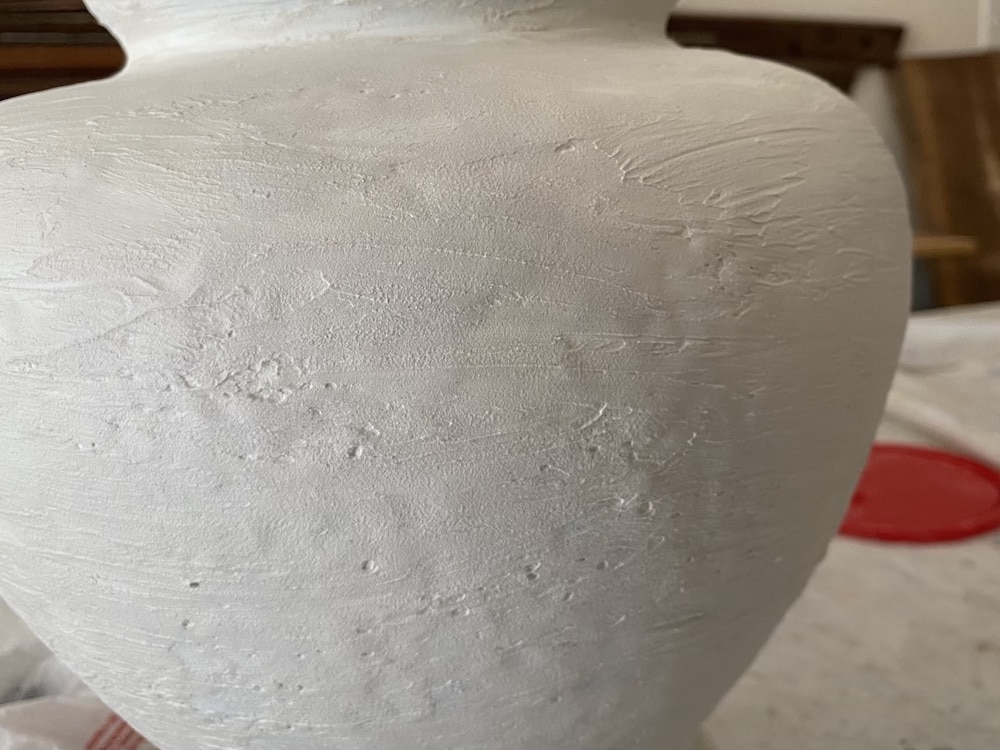
I did a 3:1 mix of powder to water. This gave it a little thicker consistency, which helped adhere to the lamp and gave it the stone and concrete texture.
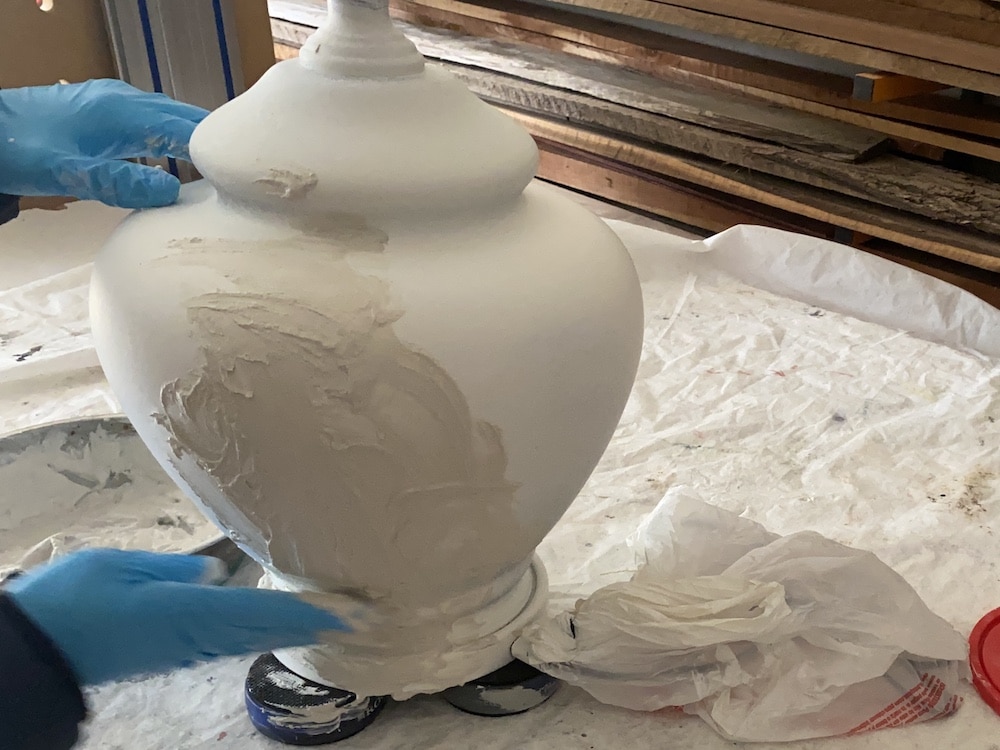
Apply the plaster to the lamp. I just wiped it on with gloves.
The goal for now is to just cover the whole lamp with the plaster, leaving no surface uncovered.
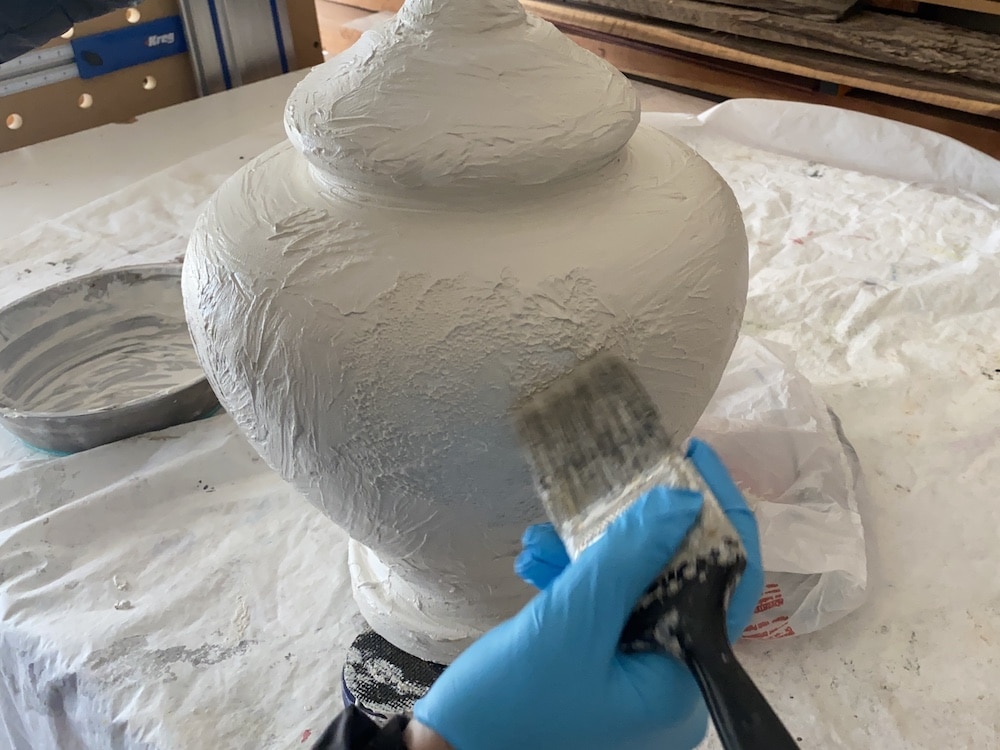
Once the lamp is completely covered with the plaster, use a paint brush to stipple the surface of the plaster. This will make indentions that will create more character and give it a vintage look.
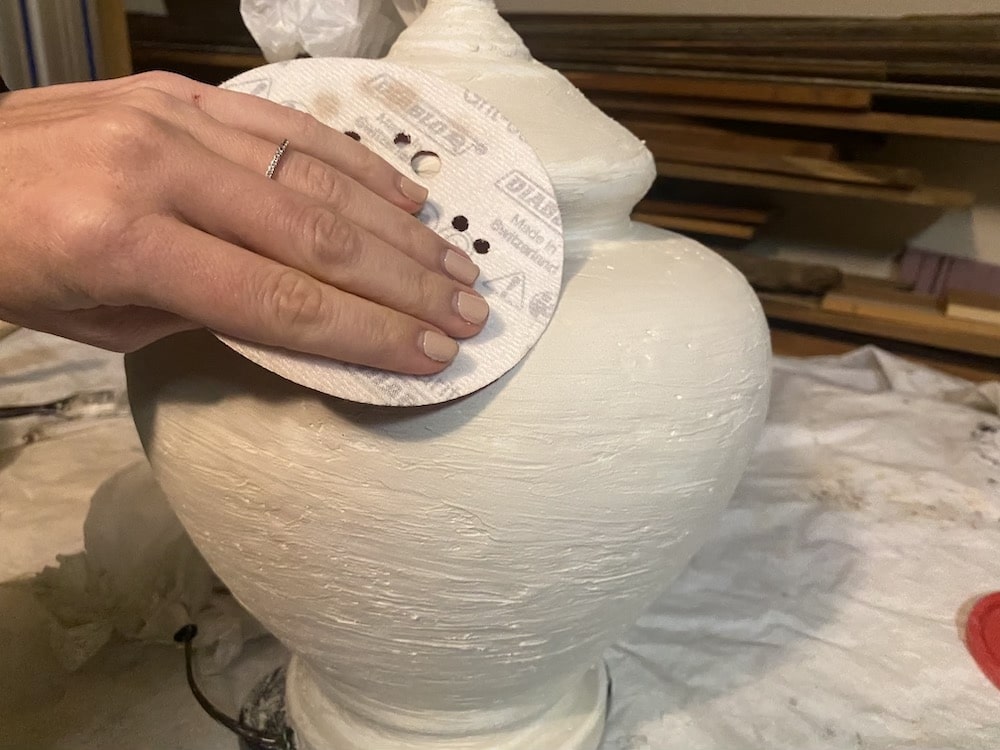
After letting the plaster dry on the lamp for about 30 minutes, I ran my hands (with gloves) over it lightly to smooth it out a little more.
After it dried for about 2 hours, I lightly sanded it with 220 grit sandpaper just to further smooth it out.
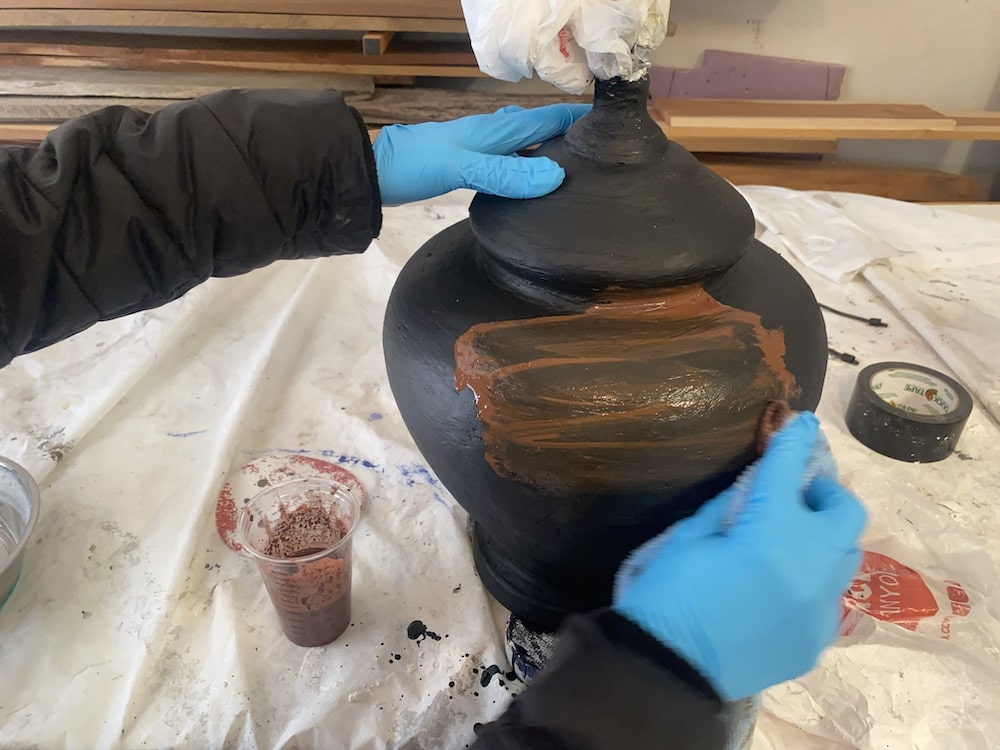
Step 4: Paint
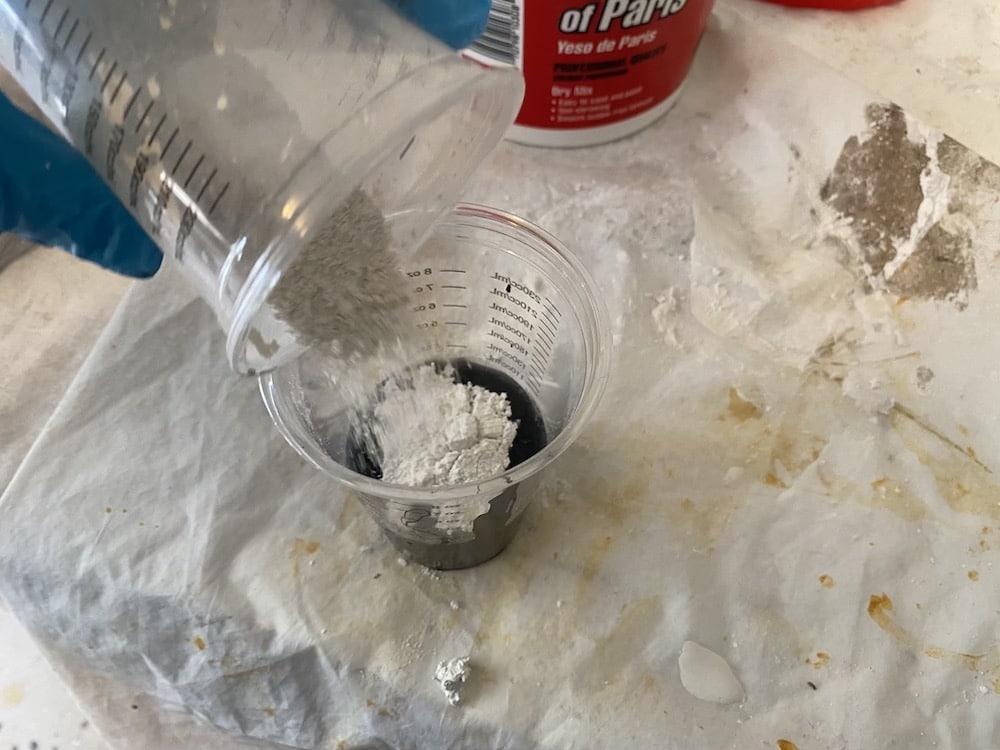
To make the base coat, I created a chalk paint. I made this so that there would be more texture in the paint, and also a matte finish.
Q: How do you make chalk paint?
A: Mix 1 part paint, 1/2 part plaster of paris, 1/3 part water. Mix thoroughly. Apply with a bristle brush.
This is just the base coat, so just simply black is ok. You will add another layer to give it dimension.
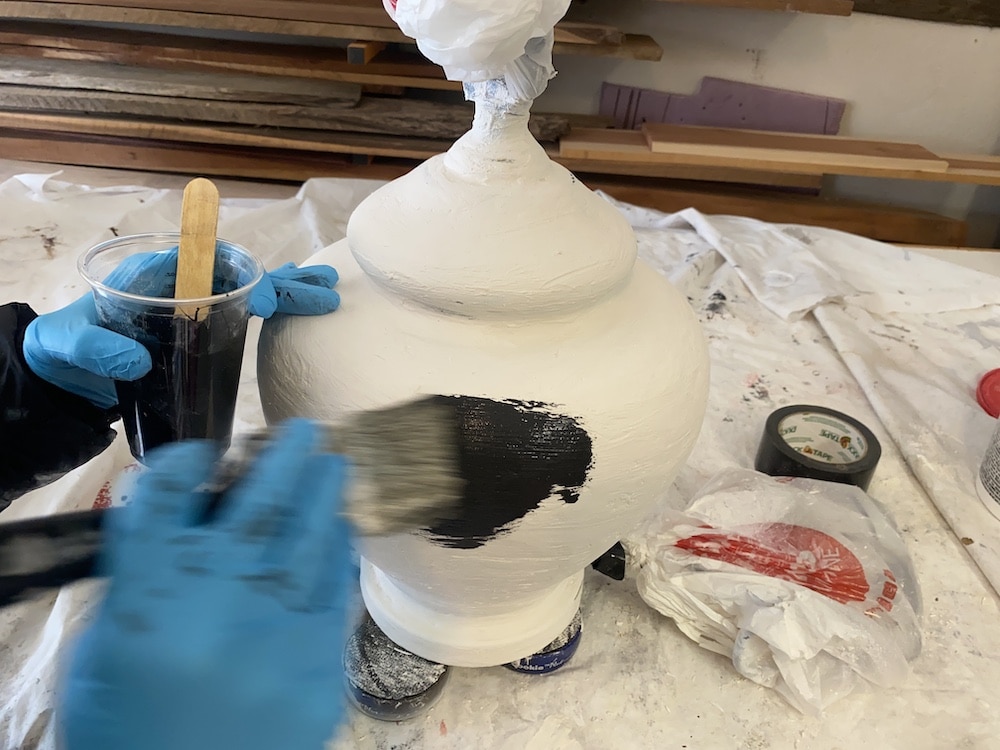
Next, I made a watered-down version of chalk paint. I used these acrylic paints I had on hand – burnt umber and burnt sienna. Mix 1:1 paint to water. Add in 1/3 part plaster of paris.
Since this mixture is so watered down, you can wipe it on with a cloth. So, wipe it on, then immediately wipe it off.
Allow this to dry, then add another coat. Do this as many times as needed; I did this twice. Allow these additional coats to completely dry.
For another faux stone project, check out this Airstone Review. You can also find another faux finish technique in this post on how to paint wood to look like metal.
And that’s it! The biggest expense for this project was a new lamp shade.
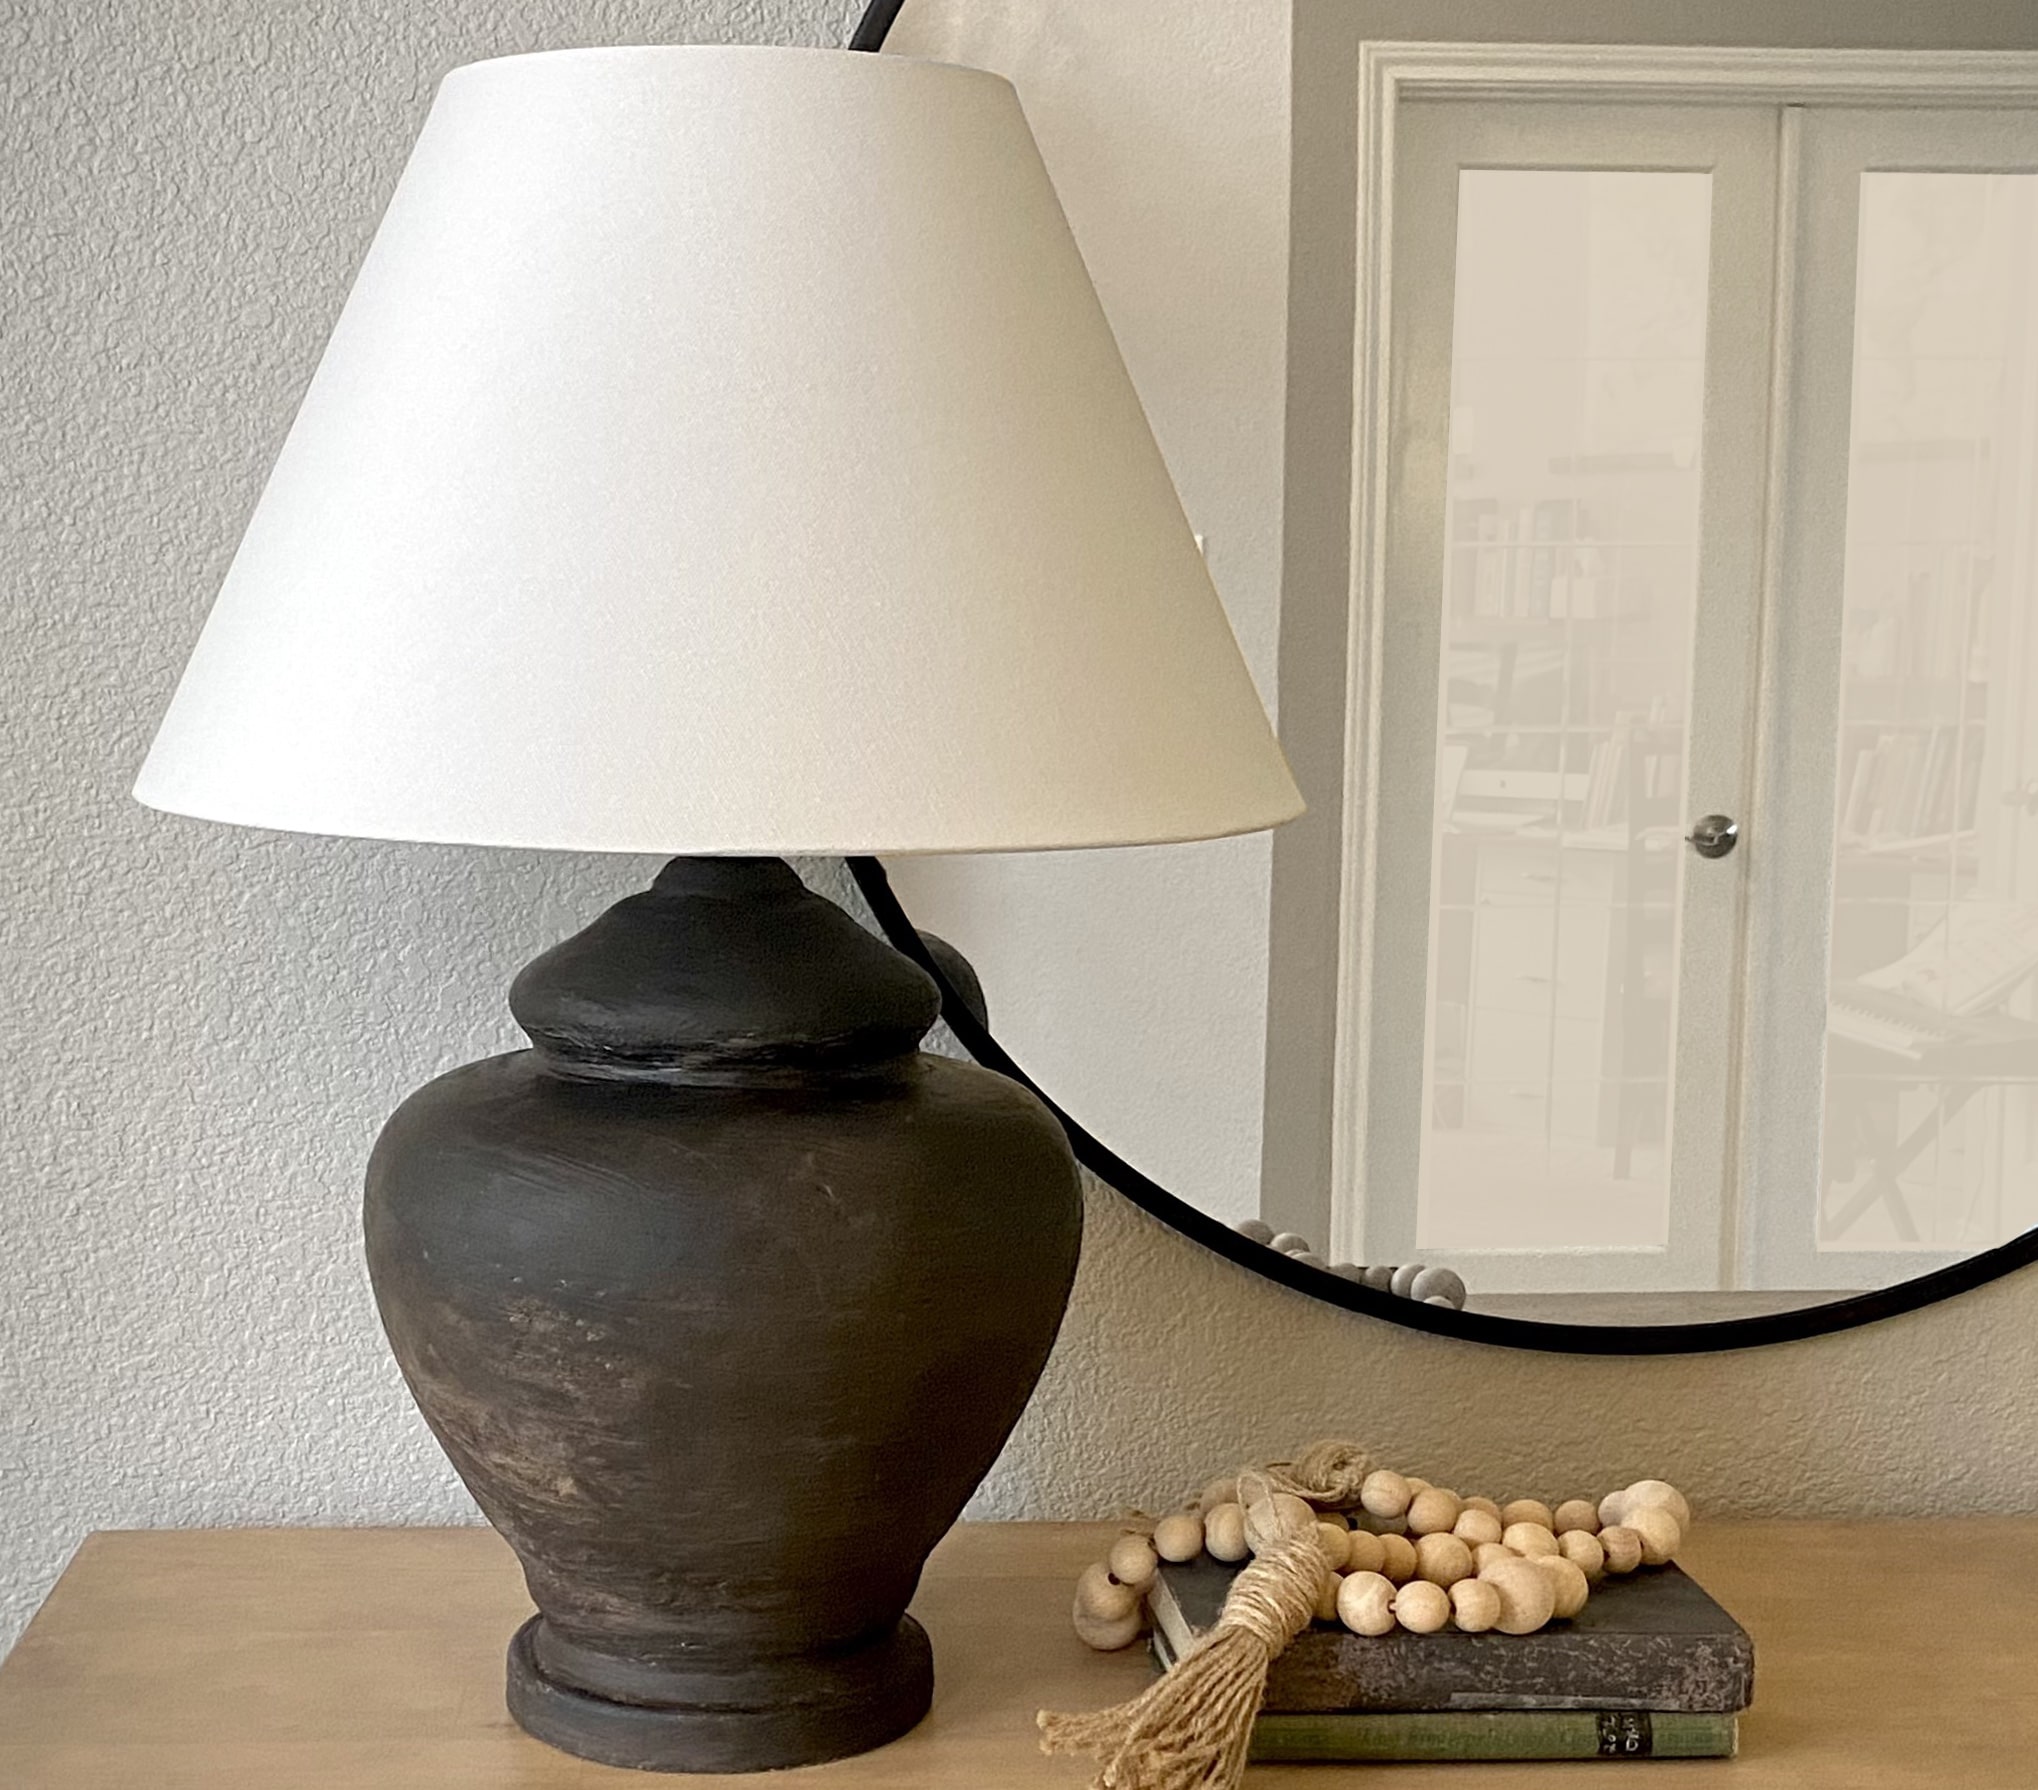
I love how quick, easy, and fun this project was! I’m now looking around my house for more things I can create this finish on.
If you make this aged stone pottery lamp, I’d love to hear about it!
Find the web story for how to make an aged pottery finish on a lamp here!

Suzie Wible
Suzie has shared her knowledge for over 10 years about building furniture, painting techniques, how to build your dream home, and basic to advanced woodworking skills. Through this blog, readers will feel empowered to create a home and products they love too.
That’s really cool! Thanks for sharing!