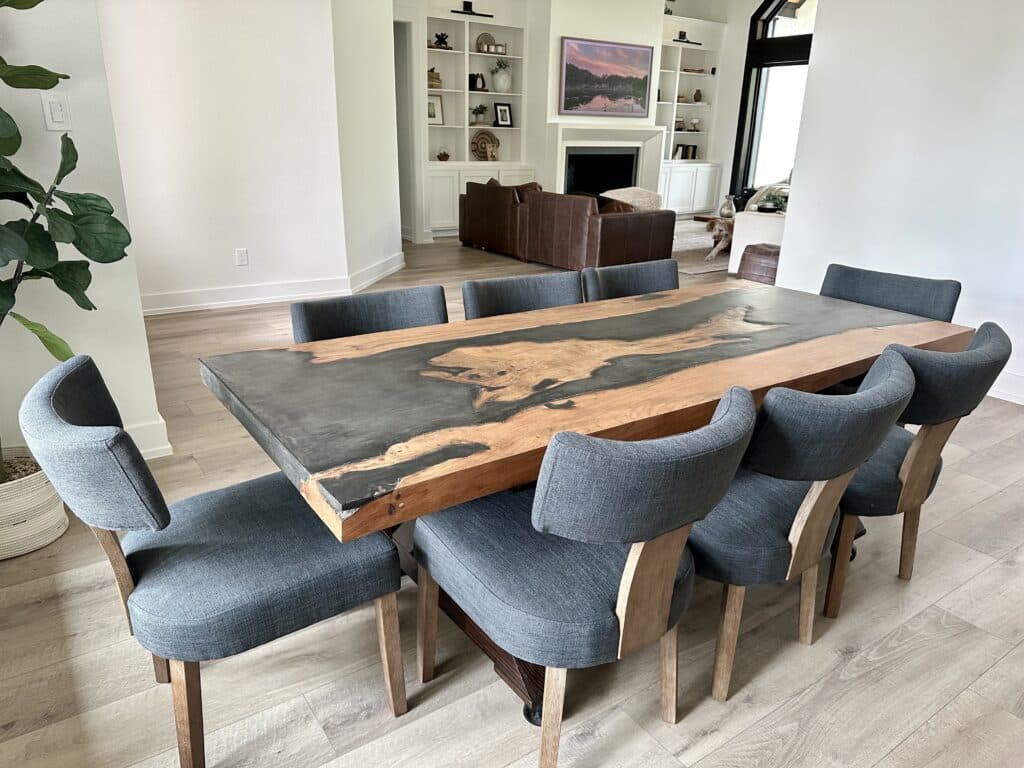
River Table with Mesquite Wood and Black Concrete
River tables are beautiful and unique tables that look great in so many homes and spaces. I recently made a river table made out of concrete and wood and I’ll be sharing my process with you.
In this tutorial, I have created detailed step-by-step instructions for building a DIY river table. I will also cover a few tips and tricks that I have picked up along the way that will aid you in successfully building your own river table.
What Is a River Table?
A river table is a table built from a slab or multiple slabs of wood. Ideally, live edge slabs are used. A filler is used to fill the space between the slabs, which in turn, creates a river effect.
River tables are commonly filled with a pourable material, like epoxy resin or concrete. The filler will then harden and can be used as part of the tabletop.
In this particular tutorial, I will be using concrete to create the “river” aspect of the table.
In addition to tables, other smaller projects that have the river effect can charcuterie wooden boards and a side epoxy resin table or coffee table.
Materials and Tools Needed for a DIY River Table
Materials
- Wood slab or slabs. Length of the slab needs to be the whole length of the desired table length
- large melamine board
- Butterfield brand concrete
- rebar, if using concrete as a filler
- caulking
- screws
- wood to build the table base
- wood glue
- casters for wood base
- sealer
Tools
- Circular saw or table saw
- planer
- jointer (optional)
- drill
- concrete grinder or sander
- Kreg jig (optional to build the table base)
Step 1: Cut the Slabs to Size
The first step in building a DIY river table is to gather your slab material. You can read about what wood is best to use for kitchen tables if you’d like a couple of tips on choosing high quality wood species for a dining table. Choosing the right materials for the table is such an important part of this river table project.
You will want to search for a piece of wood that is a live edge slab. Preferably, it will be double live edge, meaning it has live edges on both sides. The live edge is what gives a river table its unique character.
Make sure that the slab is long enough to span the length of your whole dining table.
You can source wood slabs from online sales like Facebook marketplace or Craigslist. I have had a lot of luck with local garage sales of retired wood workers. I have made tables out of pine, black walnut, pecan, and mesquite.
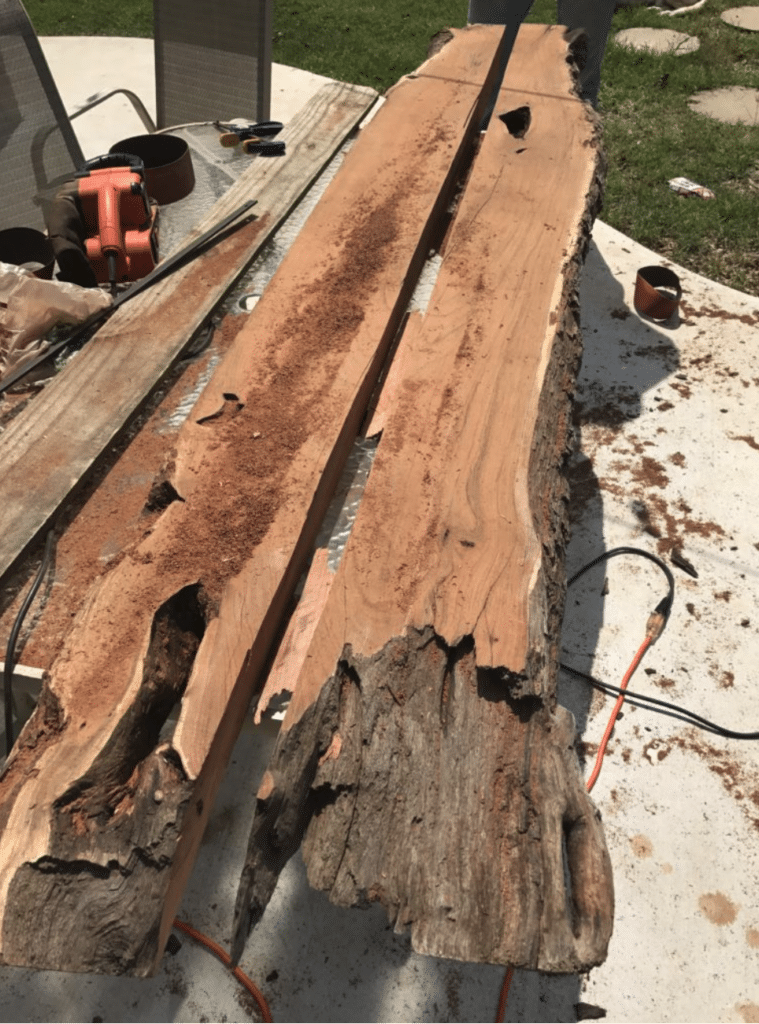
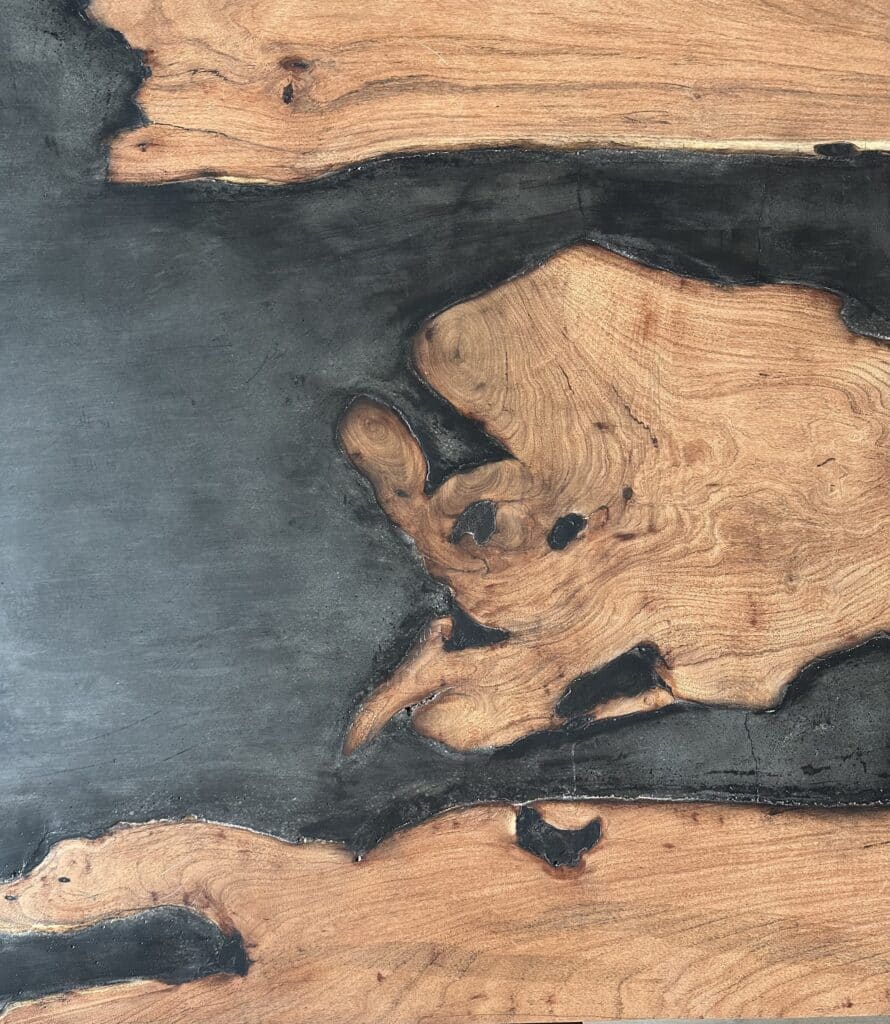
This particular table that I’m going to show you is made out of mesquite. It had been sitting in a barn for years, but I have a feeling it would clean up nicely.

The first thing to do is to cut the end of the slab off in order to make a clean end. Cut both ends to the desired length of your table.
You will now cut the slab down the middle, long way. This is called re-sawing the slab. Once cut, you will have two lengths of slabs that will serve as the outer edge of your table.
You can make multiple shallow passes, instead of trying to cut through the slab all at once. This will help protect your saw and could be useful if you have an particularly thick slab. Flip your slab over if needed to cut from the other side. Use a fence if possible.
Another great way to do this is to use a bandsaw.
There are a couple of other ways to make this straight cut. My recommendation is to make the straightest cut possible with a circle saw, since you can’t run a live edge slab along the fence of a tablesaw.
If you have a system like the Kreg Adaptive Cutting System, you will be able to make a straight cut. You can also use a straight edge, clamped to the slab, and run the edge guide on the circle saw against it.
Once the slab is cut into 2 pieces, you can edge joint the newly cut edges. These newly cut edges will be the edge of your table, so it’s important that they are straight. Ideally, you would do this with a jointer. However, if you don’t have a jointer like myself, check out this post on how to edge joint long wood boards without a jointer.
Now that the slab is cut down the middle, it is a good idea to run both slabs through a thickness planer.
This will create great results for a couple of reasons. First, it will make the surface of the slabs perfectly flat. This is very important so that concrete doesn’t seep through any gaps. The second reason is to ensure that both slabs are the exact same thickness as each other, which will create a flat surface. Using a planer will give you the best results.
Disclaimer: This site contains product affiliate links. We may receive a commission if you make a purchase after clicking on one of these links.
I love my Dewalt planer. I recommended doing this after you rip-cut the wooden planks so that each piece can fit through common planers found in home shops.
The pieces of wood will be flipped over and will make up the edges of the table, mirroring each other. The natural edge will be in the middle and will touch the concrete.
If you don’t have access to a planer, you can use a belt sander to get it as smooth and flat as possible.
Oftentimes, the live edge portion of the slabs will have bark on them. It can be tricky to remove this, but it is very important to get as much off as possible. If you don’t, it could compromise the strength of the tabletop if some of the pieces flake off. To remove the bark, you can use a wire brush and elbow grease. I have also used a wire brush attachment for my drill, which made the process a little easier as well.
Step 2: Assemble the Table Form
In this next step, you will cut a large melamine board in order to build a form to pour the filler.
Melamine is the perfect material for both concrete and epoxy resin river tables. Neither the epoxy or the concrete will stick to melamine. So, the filler can be poured, allowed to harden, then remove the form without it sticking. If you are using epoxy resin, you can first spray a release agent just to ensure that the resin doesn’t stick. However, this isn’t needed for a cement pour.
Use a table saw to cut the melamine in order to build the sides and a base for the table. Connect the sides to the base using wood screws and pre-drill holes first. Remember, you are building it upside down. The inside size of the form will be the size of your table. The correct size of the dimensions of the form will be dependent on the size of the slabs and your desired size of the table.
Once the box of the form is built, apply silicone caulk around the inside edges of the form. Allow it to fully dry. Try to make this as smooth as possible, since this is what will be touching the concrete in some areas. It will create the edge of the concrete portion of the tabletop.
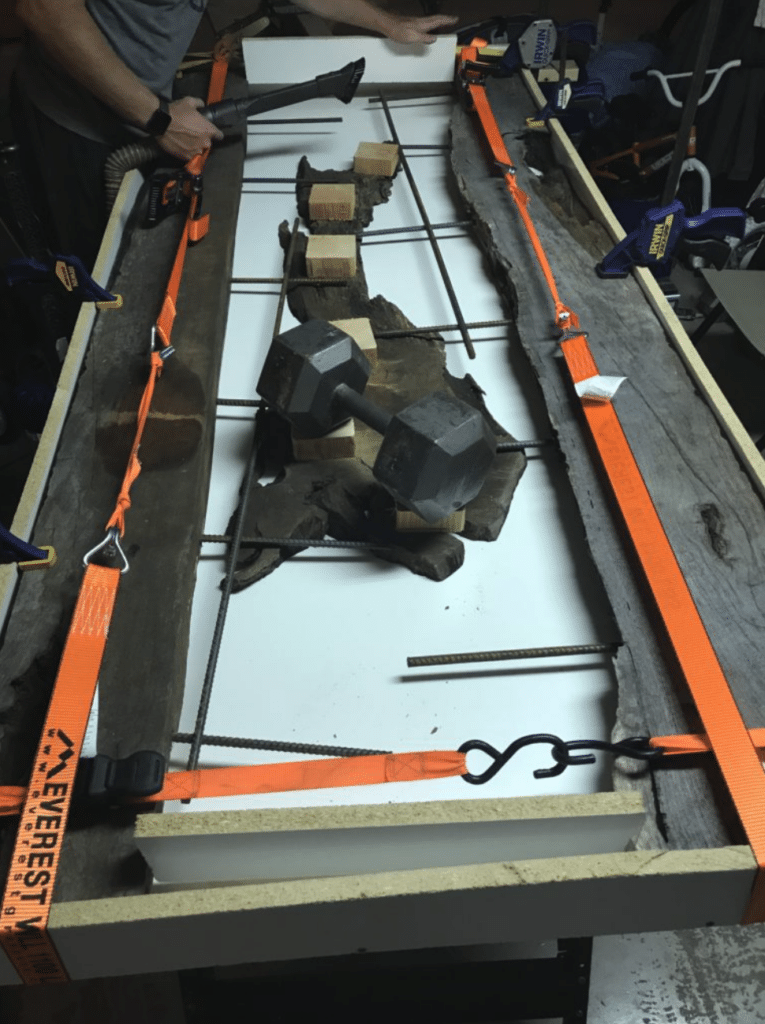
Place the wood slabs inside of the form. Remember to place the slabs upside down, since you are building the table top upside down.
To ensure that the slabs didn’t move, we applied weights and clamps to all of the slabs. This made sure that when the concrete was poured, everything stayed in place.
We also drilled holes in the live edge part of the slabs for rebar to fit into. This helps reinforce the concrete, making it very strong and sturdy.
As you can see below, we also applied ratchet straps around the form, just to make sure it didn’t break under the weight of the concrete pour.
Step 3: Mix and Pour the Concrete Filler
In this step, you will pour the filler in the river table. You could make an epoxy resin river table, which is very popular. However, I am making a concrete river table.
I used Butterfield concrete for this. That type of concrete is meant for countertops, can be tinted to various colors, and is very smooth when it is polished.
I’m sure this goes without saying, but I’ll say it anyway. This table is heavy. Like, very, very heavy. Mesquite wood itself is a very dense and heavy wood. Then, when you throw in rebar and concrete a few inches thick, it makes for an extremely heavy table. This is just something to think about when you are deciding where to build the table.
Thoroughly mix the concrete according to instructions. Add in any colorant or metallic pigment desired. We were going for a dark, almost black table. In the end, we didn’t add enough colorant and it came out more of a gray. However, we fixed this in future steps, so keep reading for that.
Slowly pour the concrete. As you do so, shake the table with something like a sander hitting the bottom of the melamine board. This will help all of the air bubbles to rise to the top, ensuring a smooth tabletop (since it’s built upside-down). Follow the instructions for the concrete for proper drying times.
Step 4: Remove the Table Form
Once the concrete is completely dried, you can remove the melamine form. It will probably take a few people to flip the tabletop over due to its weight.
You can pry it off with a crowbar, just be sure not to hurt the finish on the wood.
Step 5: Sand the Tabletop and Apply the Finish
You might find a couple imperfections when you take the melamine form off. You can grind the entire surface of the concrete with a concrete grinder in order to smooth out the top of the table.
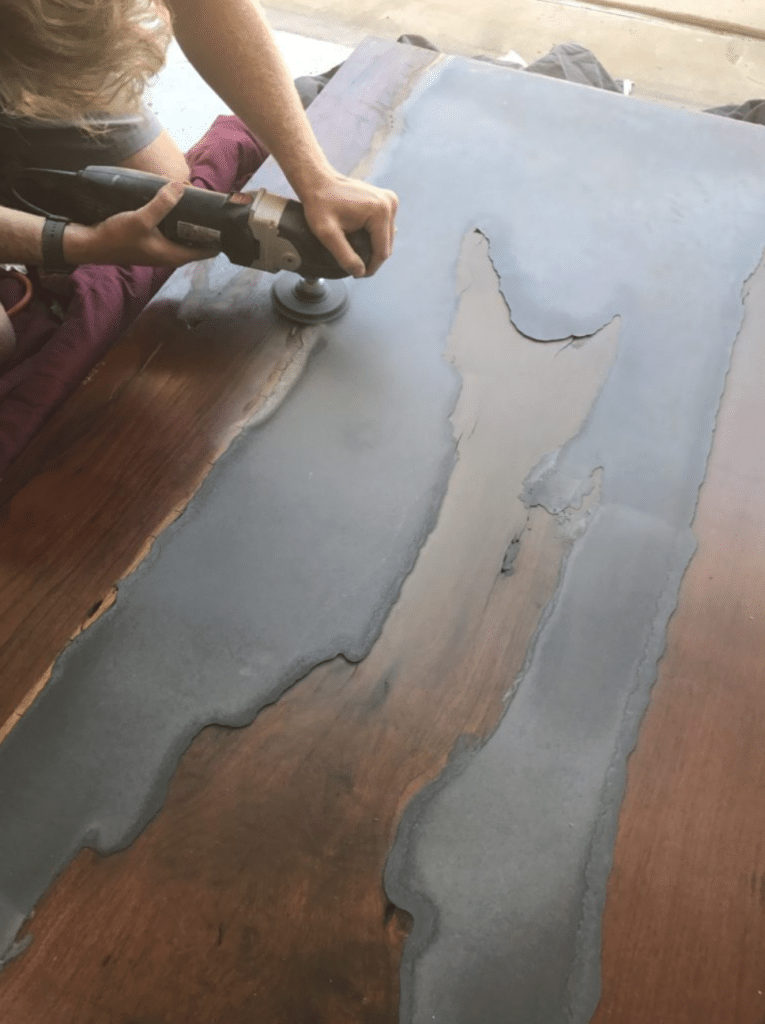
Right out of the form, the concrete will be fairly smooth, so hopefully you don’t need to grind any of that.
You can also sand the wood portion of the river table if it is needed. The goal is to get the whole surface as smooth as possible.
This is also when I filled small pockholes with black CA glue. This is the same product I use to fill almost all small imperfections in projects that I make. It dries very hard and sands super smooth. It’s a great product!
I wanted the concrete to be more of a black, rather than the gray it turned out to be. So I use Rub n Buff wax and massaged it into the surface of the wood. I then buffed it out with a drill buffer attachment. In the end, I’m very happy I did this, as I much prefer black over gray.
Sand the wood until the desired texture is achieved. Start with 80 grit sandpaper if the surface is rough. Then, you can move to a finer grit, like 120. Once you have done this, spray water on the surface of the wood. This will cause it to be rough again. Allow it to dry and sand again with 120 grit. This will make a super smooth surface for your tabletop. This process is called water popping the surface.
My favorite sealer for kitchen tables is this matte finish. You can read all about why I love this finish in this post on the best finish for a wood kitchen table. The final result is a beautiful, protective matte sheen on the table. Additionally, it brings out the gorgeous grain on your wood slab. It’s also durable and works great on tables.
Another great and very popular option to seal the table is called Odie’s Oil. I use this all the time on cutting boards, including epoxy river boards.
Step 6: Build the Table Base
Like I mentioned earlier, this table will be extremely heavy. So, a very strong and sturdy base is imperative.
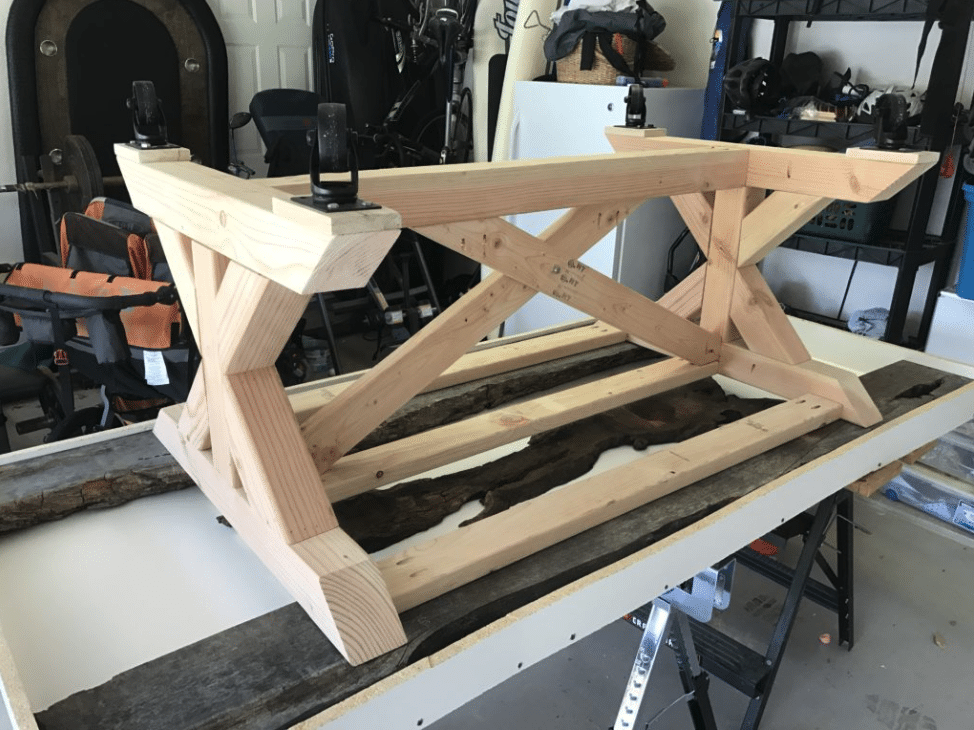
Also, it has been incredibly helpful to add casters to the base I built. Since this table is so heavy, it’s very helpful to be able to roll the table where it is needed.
There are a lot of available plans for table bases, so be sure to choose one that is very sturdy. Another great option would be to buy metal table legs like these, although you would be forfeiting the option of casters.
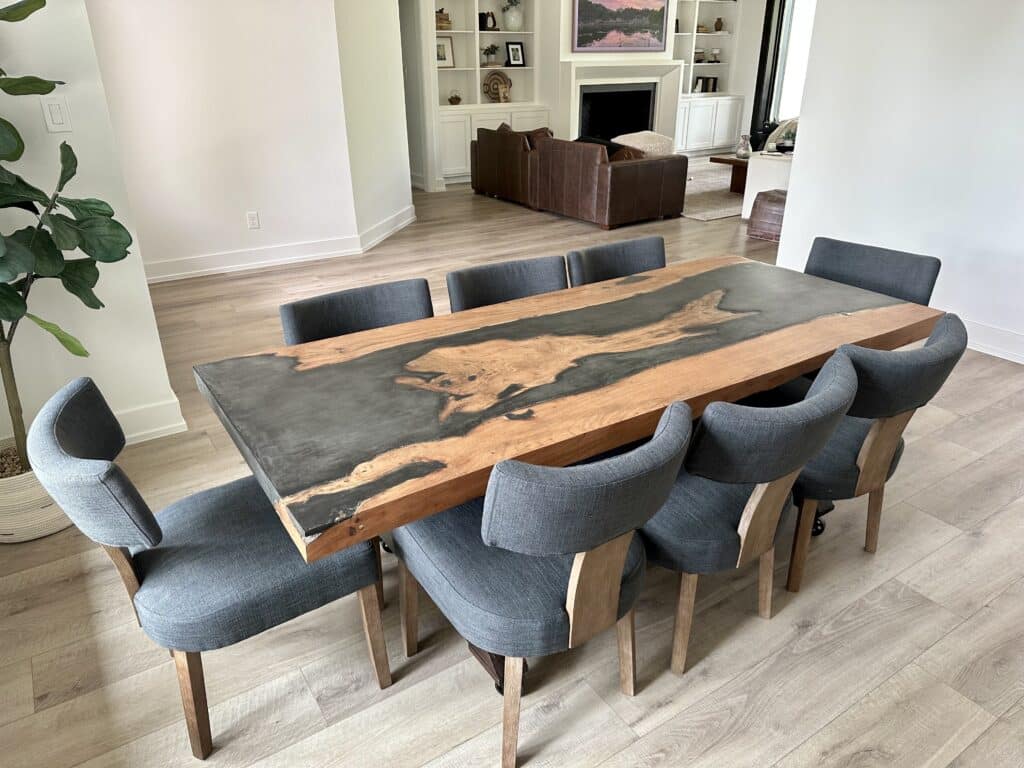
And that’s it! If you end up making your own DIY live edge river table, be sure to send a picture to me. I’d love to see it!
If you found this article helpful, be sure to check out the following articles:

Suzie Wible
Suzie has shared her knowledge for over 10 years about building furniture, painting techniques, how to build your dream home, and basic to advanced woodworking skills. Through this blog, readers will feel empowered to create a home and products they love too.