How to Edge Joint Long Wood Boards without a Jointer
In this article, I will share a method of creating a straight board, with a straight edge when you don’t have a jointer. You will learn how to edge joint wood by hand with a router. It is a great way to true lumber, especially if you are trying to create a square edge on a board that is wider than a jointer. Keep reading to find out!
Jointing boards. Not to sounds too dramatic, but it was the bane of my existence for every table build (ok, maybe a little dramatic). I had such a hard time straightening the long boards. So, I set out to learn how to joint boards without a jointer – and use a router instead!
I have finally found an easy, foolproof way to joint long boards for a tabletop. I recently did this when I built a round tabletop top for a side table, this benchtop for this sitting bench, and this DIY River Table. And I’m going to tell you all about how to get those perfect seams when you don’t have a jointer!
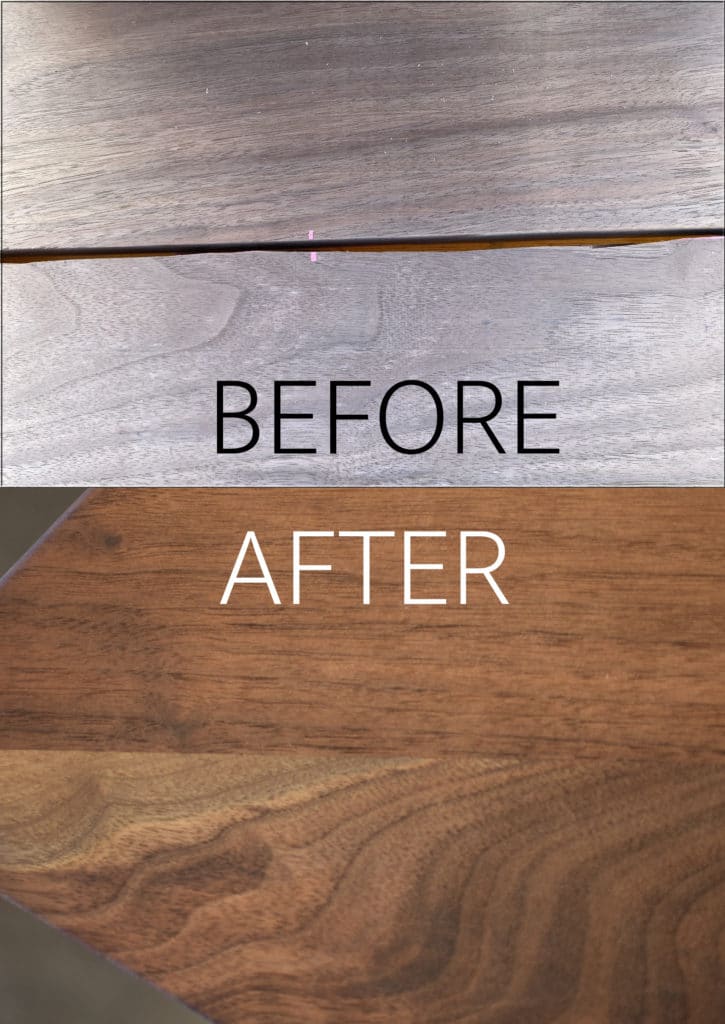
For those of you wondering what jointing a board even means, it is when you make the edges of boards straight and square – a technique that’s imperative when creating a quality tabletop, cutting board, etc with no gaps in the top.
In the past, I have attempted to joint boards with a track saw, table saw, even my old jointer. Since I never had any luck, I thought I’d share with you all this effective method since it uses something you might have on hand: a router![]() .
.
Disclaimer: This site contains product affiliate links. We may receive a commission if you make a purchase after clicking on one of these links.
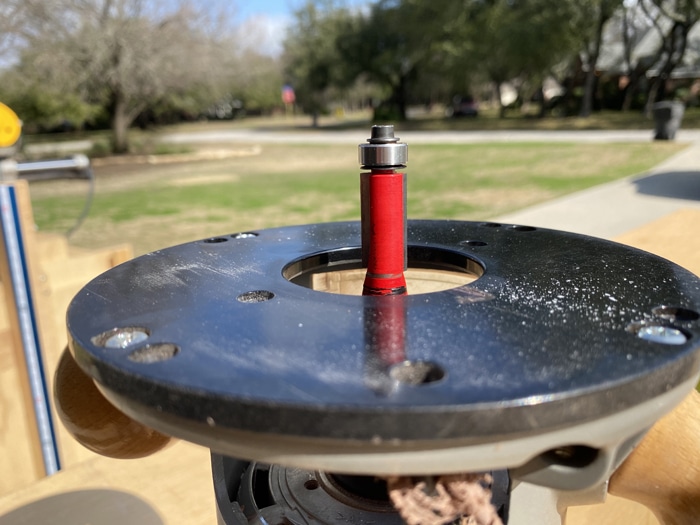
I started with this flush trim routing bit.
Now, let me show you the setup: I bought an MDF shelf found in the closet section of Home Depot. It has a factory-made edge and it’s the straightest I could find. Make sure to find one longer than the stock you are jointing. The router bearing of the flush trim bit runs along this straight edge of the MDF.
Tip: You can also joint edges of a board by using Kreg’s Adaptive Cutting System like I did in this DIY Outdoor Wood Mosaic Doormat!
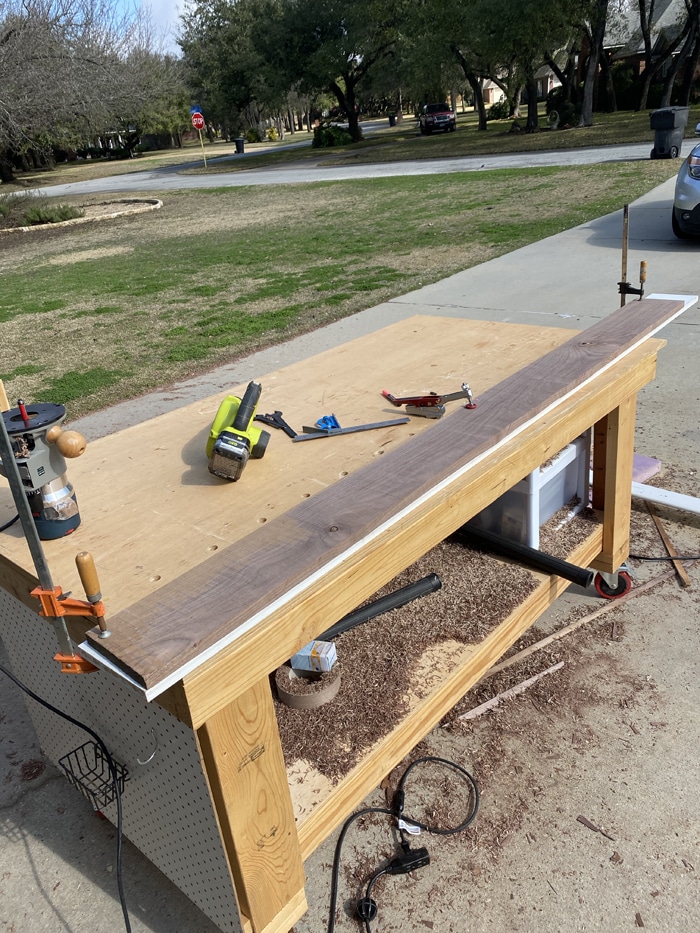
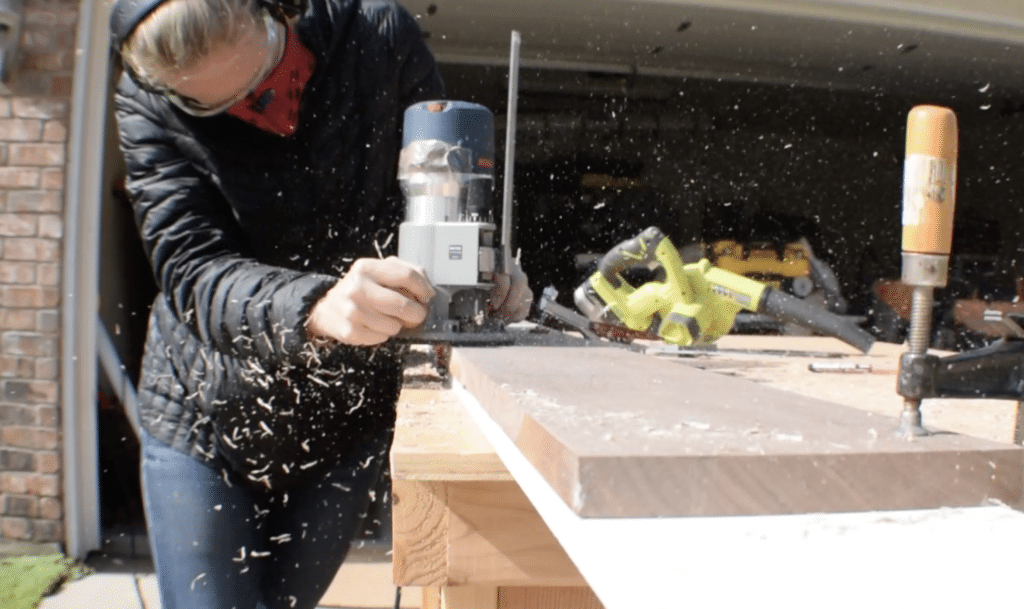
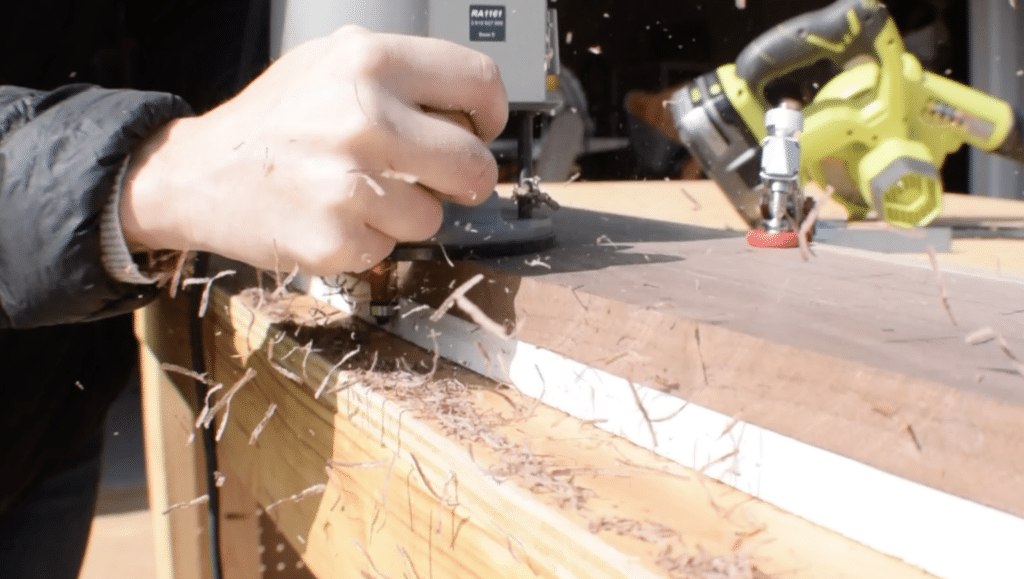
You will then place your stock on top of the MDF board, with the edge that you want to joint with a slight overhang. Clamp it well!
RELATED: Ever wonder how to flatten a slab with a router? Check out this DIY Wood Slab Flattening Router Jig.
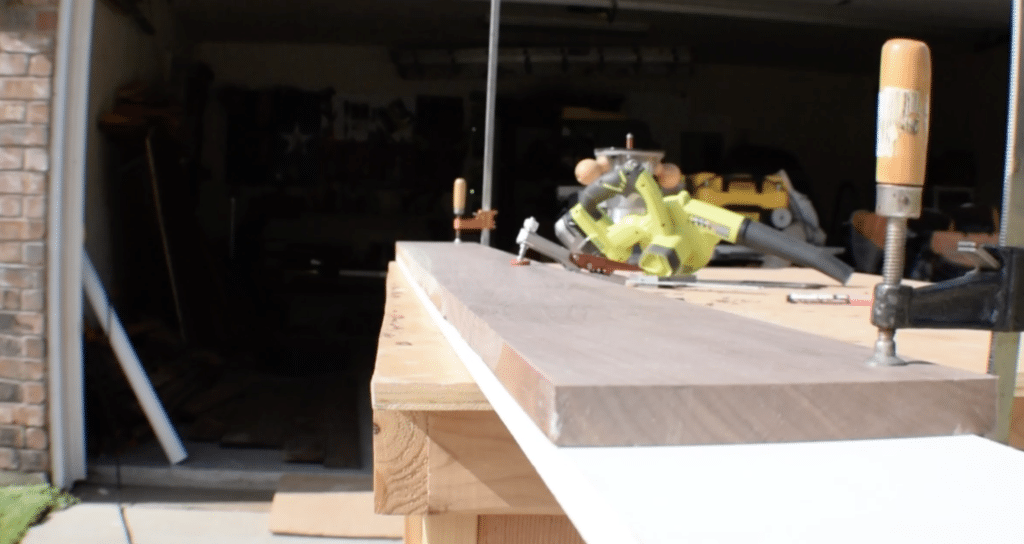
Adjust the depth of the flush trim bit to where the bearing runs along the straight edge and the blades trim the board sitting on top.
It’s important to make sure your boards are flat on the top and bottom for the router to run on. If it’s off square, you’re edge won’t be square either. I ran these through my planer before I jointed the edges.
RELATED: For another 3 methods of jointing boards, check out this post for 3 ways to joint long boards without a jointer.
I found it helpful to mark all of my boards as I completed jointing them. When you’re building a tabletop with about 6 boards, two edges each, you will be repeating this process quite a few times.
So, there you have it! A quick method for getting perfectly straight and square edges, jointed with a router. Perfect for when you don’t have a jointer!
Check out the web story for how to straighten long boards without a jointer here!
If you found this article helpful, be sure to check out the following article: Best Wood to Use for a Kitchen Dining Table.

Suzie Wible
Suzie has shared her knowledge for over 10 years about building furniture, painting techniques, how to build your dream home, and basic to advanced woodworking skills. Through this blog, readers will feel empowered to create a home and products they love too.
Awesome! Thanks for the tip! Seems like a very doable solution to get great results. As always, I appreciate the tips. Keep em coming!
For sure! Glad you found it useful!
Brilliant. Never would have thought to use a router, and your solution is cost-effective, too. Also, can I second your recommendation for Odie’s Oil? Used it for 3 large Lazy Susan’s, top-notch results.
Cordially,
Dave
Absolutely – the cost of the bit is juuuuuust a bit more affordable than a 10″ jointer, not to mention a space saver in the shop!
Glad you like to oil! Definitely the best I’ve found.