Layout Designs for the Master Bedroom, Bathroom, and Closet
Now that we have lived in our new home for a few months, I wanted to provide an update on our primary suite. I will be covering the layout of the master bedroom, master bathroom, and the master closet.
The relation of these 3 rooms to each other have worked very well with the flow of our house. They are spacious and functional and I’m very happy with how it all turned out.
My goal for this post is to provide you with ideas for how to layout your own master suite. I will provide our floor plan and design ideas so you can complete the design of your space.
Designing a custom home can be overwhelming at times and seeing examples of actual spaces and homes can be very helpful. It can be challenging to imagine how measurements on floor plans translates to real life. I hope you find the answers to those questions here!
Floor Plan Example of Master Bedroom, Bathroom, and Closet
Our master bedroom, bathroom, and closet layout altogether make a large square. So, if you’re going to use any of the layout ideas, it will hopefully be easy to incorporate into your new home construction plans.
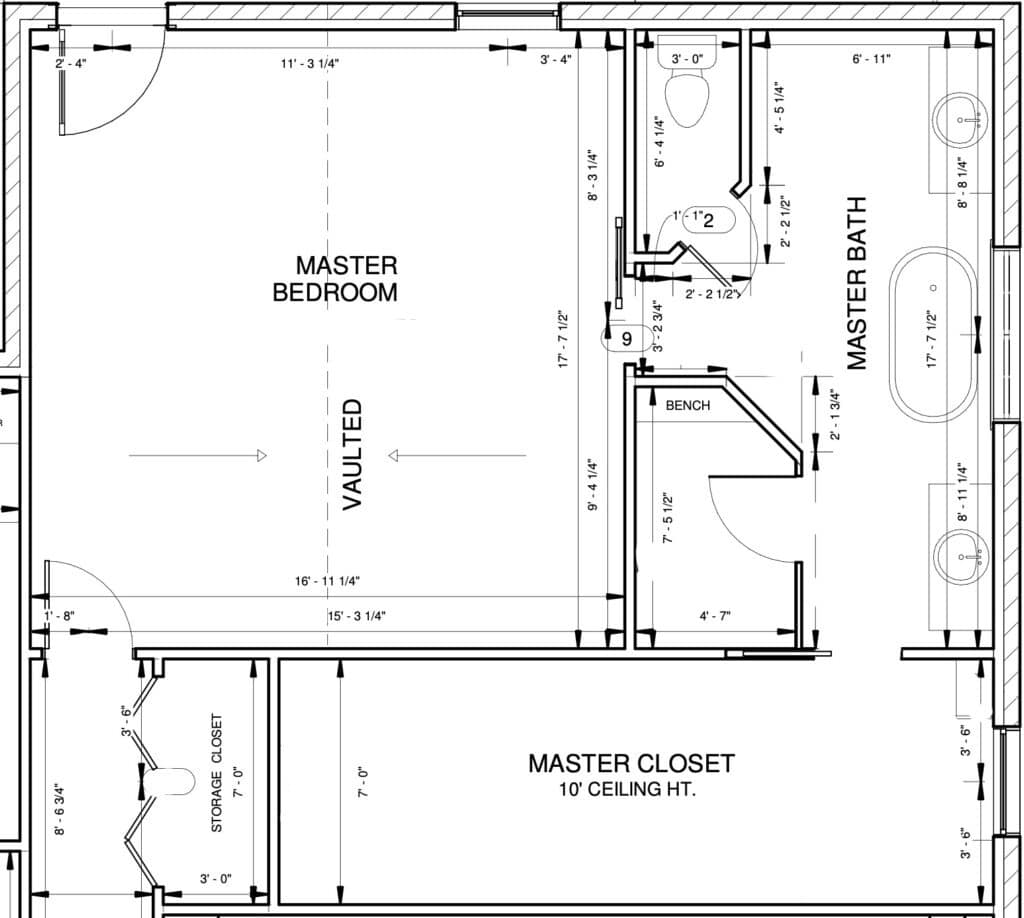
Our original plan had the north wall of the bedroom and bathroom 2 feet further out. However, we reduced that space when we were tweaking our plans in order to cut down on square footage. I’m so glad we did! Our room and bathroom are plenty big and we were able to save some money in the process.
It’s amazing how shaving off a couple feet in a room can save so much money. Most subcontractors charge per square foot. We reduced our square footage by around 54 square feet when we moved that wall 2 feet in. New homes can easily be around $250 a square foot now, so that ended up saving us over $13,000.
Details of the Master Bedroom
As you can see in the plans, the primary bedroom has a vaulted ceiling. It starts at 10 feet tall, then is vaulted to 19 feet and the peak.
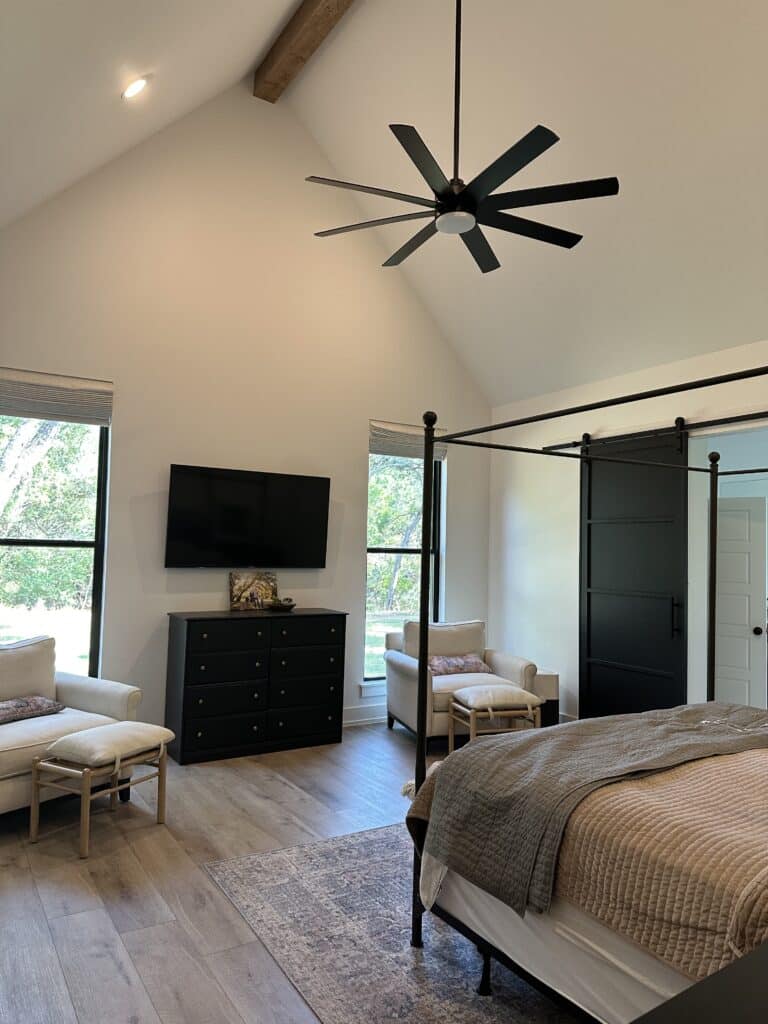
Being that we live in Texas, a ceiling fan was a must. However, design-wise, I would have loved a chandelier.
There are two windows that look out into the backyard. They are pretty tall, coming in at 8 feet tall. They are a foot off the ground, so the top of the windows are 9 feet tall. I love the natural sunlight these allow!
We also chose to have an 8 foot tall door to access the master bedroom from the hall and I’m so glad we did! Tall doors really take the design aesthetic up a notch and is worth the added cost in my opinion.
You’ll notice that the original plans had a door going out onto a private patio. We decided to take the patio off the plan, so we didn’t have a need for a door anymore. Hence, we have two matching windows.
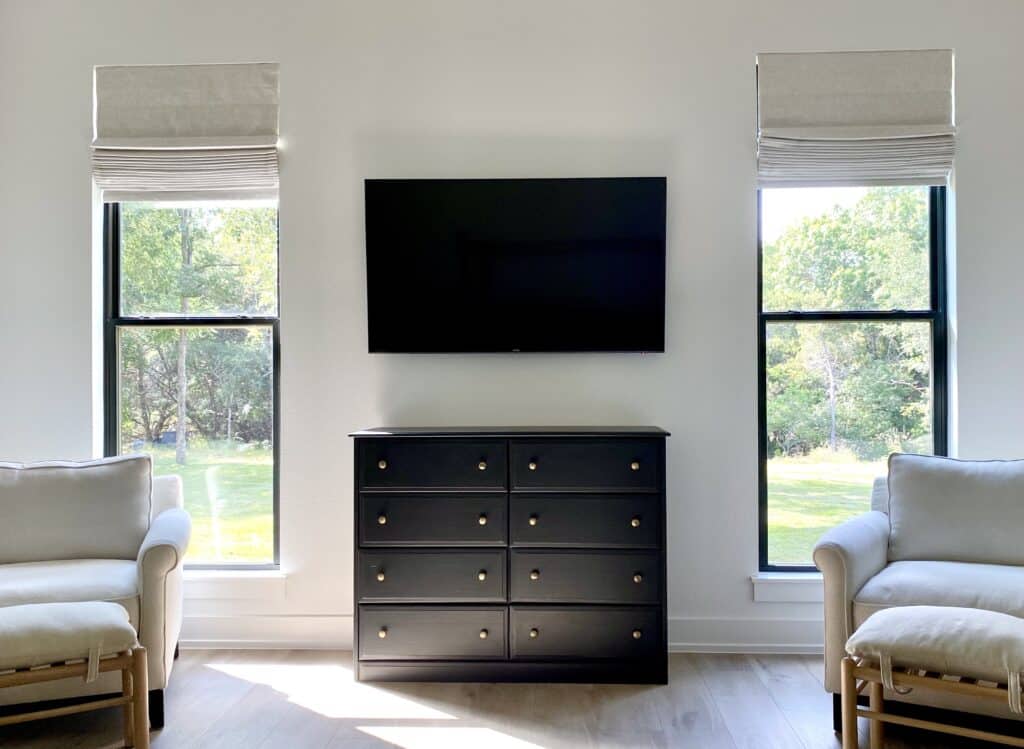
You can read all about how I painted that dresser in the picture in this post on how to paint a dresser black!
In the future, we will add an electric fireplace between the two windows. We will also build a mantle or DIY fireplace surround, so stay tuned for that!
We have LVP on our floors in our primary bedroom and I’m so happy we went with that. We do have a rug partially under the bed, which makes the immediate space around the bed soft underfoot. But, I love how easy it is to clean the remaining vinyl plank floors.
Details of the Master Bathroom
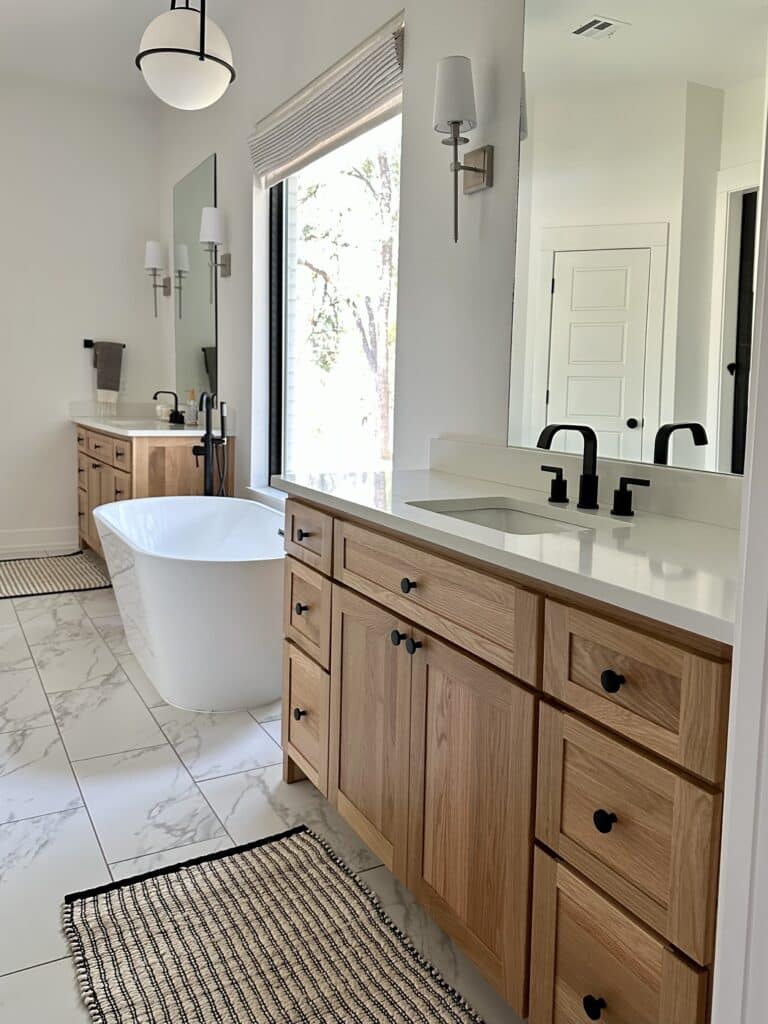
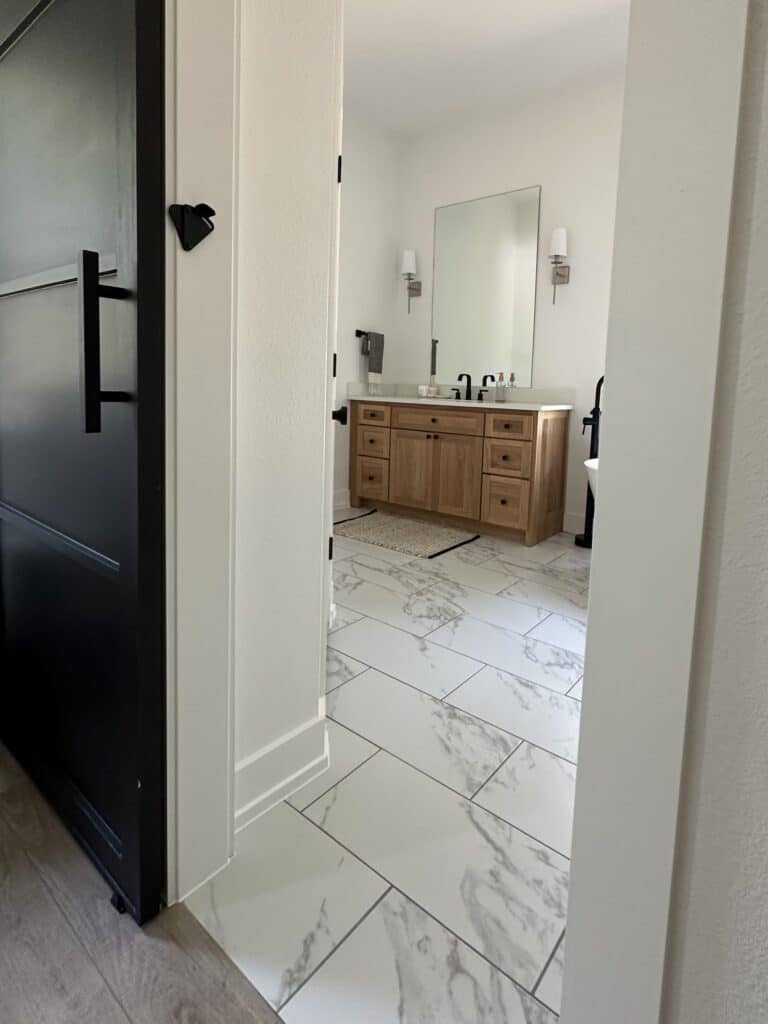
Our master bath has two separate vanities, with a bathtub in the middle of the two vanities. These are white oak vanities that I designed and assembled myself. I purchased them from a company called Cabinet Joint. You can read all about that process of purchasing RTA (ready-to-assemble) Cabinets Made the USA here!
The bathroom is accessed from the bedroom through a black sliding door. The height of this matches the other door in the room – 8 feet tall.
We considered a double vanity, but in the end, we decided to do separate vanities, with a free standing tub and window in the middle.
There is a private toilet room directly to the left when you walk in the bathroom. The master bathroom layout is the width of the master bedroom.
We have marble lookalike porcelain flooring. This was another choice that I was very happy with. I love how they look, they’re easy to clean, and they’re very budget friendly.
There is a large window above the freestanding tub. I purchased electric roman shades to cover that window when needed. I could have spent a little more to make the shades wifi enabled, but that wasn’t in the budget. But in the end, I’m very happy with our remote controlled roman shades! The big window allows for tons of natural light, which is huge added bonus. It also creates a beautiful focal point when you walk in the bathroom.
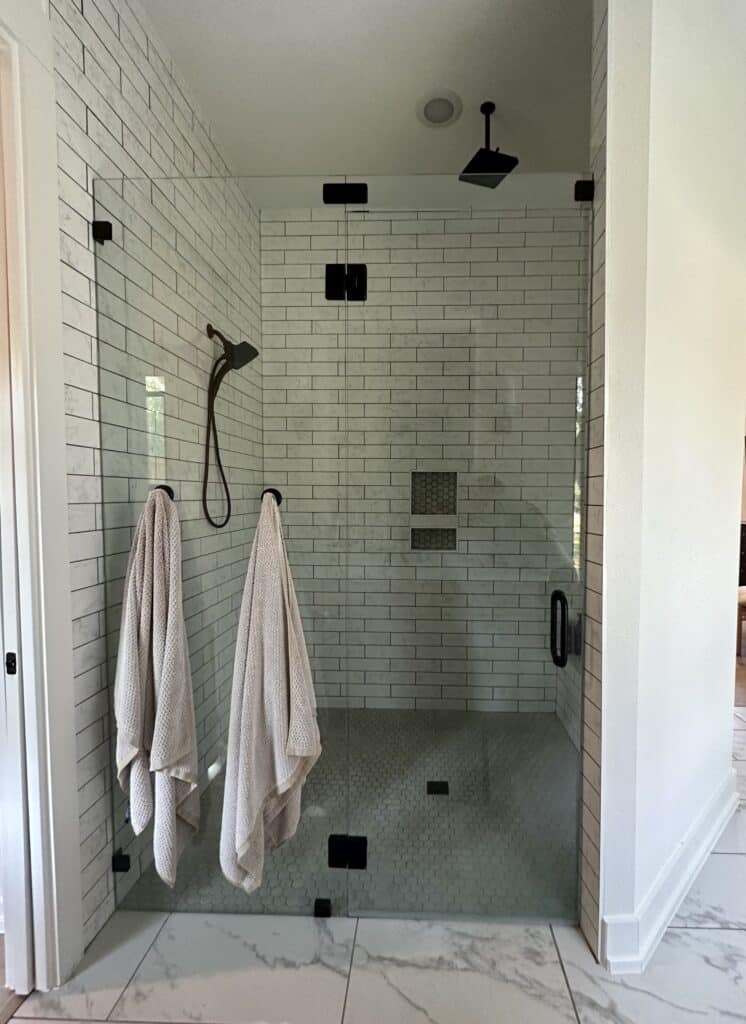
The walk-in shower in our master bathroom has a rain shower head and also a main shower head. We went with slightly darker grout, and I’m so glad we did. It’s so much easier to keep clean than white!
Details of the Master Closet
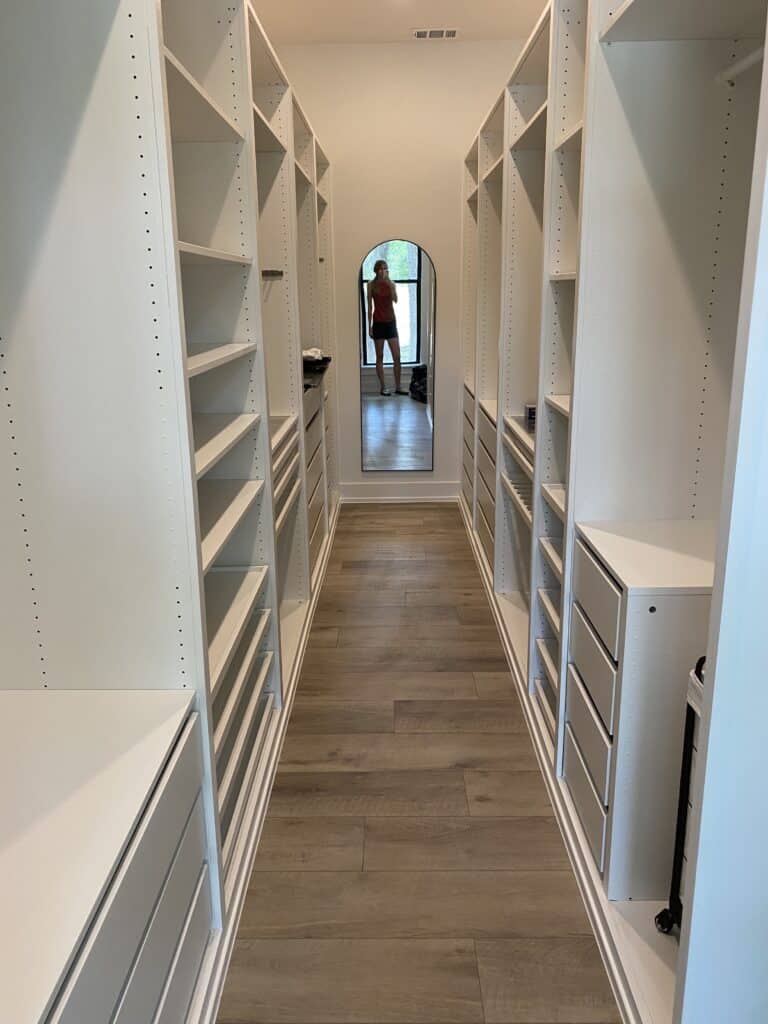
Our master closet is a very long and narrow walk-in closet. The length spans the bathroom and the bedroom walls. I was a little worried about it being too narrow. However, now that we have the built ins in our closet completed, I’m happy with how the layout is. There is ample closet space to move around and access our clothes.
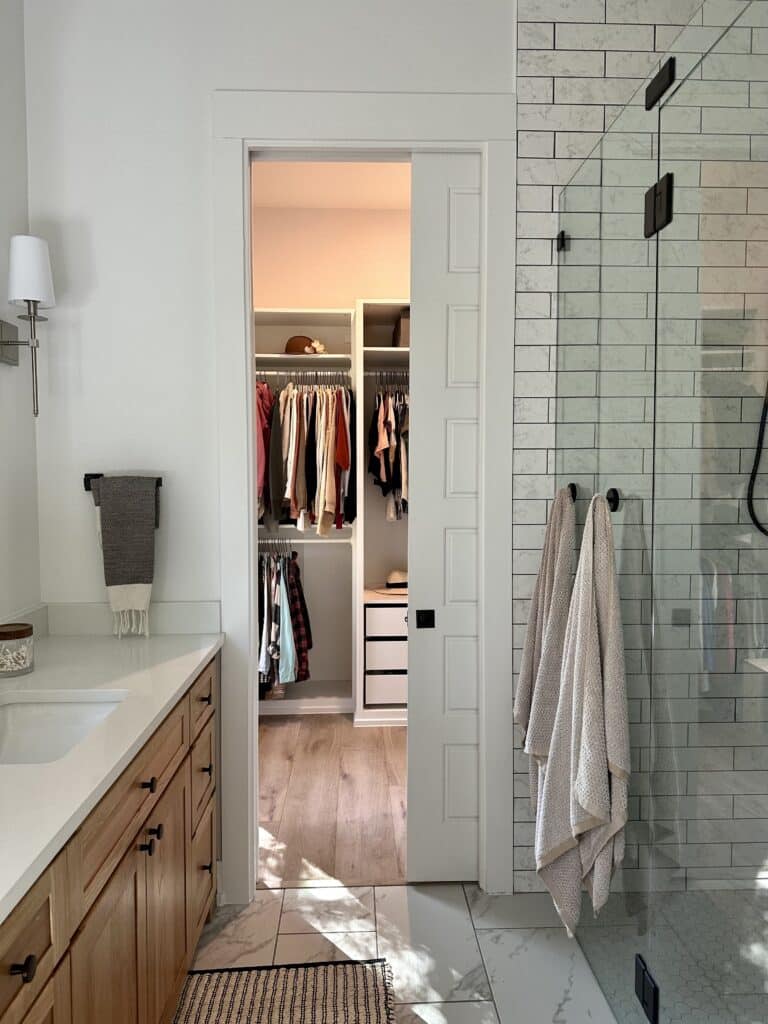
We access the master closet from the bathroom through a pocket door.
We used LVP for the flooring in there as well and I’m happy we did. It’s easy to keep clean and a simple runner softens the space quite a bit.
Our custom closet is made up of Ikea Pax units and outfitted with the Ikea Komplement accessories. I trimmed out the units with wood, which completed the built-in look. I covered all of the details in this post on DIY Custom Closet on a Budget, so be sure to check that out!
The main gist of it is this: install however many Ikea Pax units fit in your space. Then, install all of the modules to each wardrobe that will give you an organized closet. Lastly, trim out the units with wood trim to give it the custom, built-in look.
Ikea also provides optional closet doors to close the Pax wardrobes, but you can leave them off, which is what we did.
The organization modules that we added to the Ikea Pax units provides easy access to often used items.
Outfitting a closet with Pax units would also work great for a small space. When designed correctly, there should be plenty of space to store items once the organization modules are in.
We also put an ottoman in the closet. The ottoman creates a seating area for putting on shoes since there wasn’t an option for a bench with the Ikea Pax wardrobes. The ottoman is also useful to stand on when I need to access items stored up high, as it is lightweight enough to easily move around.
The ceilings in the closet are 10 feet tall. This height allows for extra storage space above the Pax units to store rarely used or off-season items.
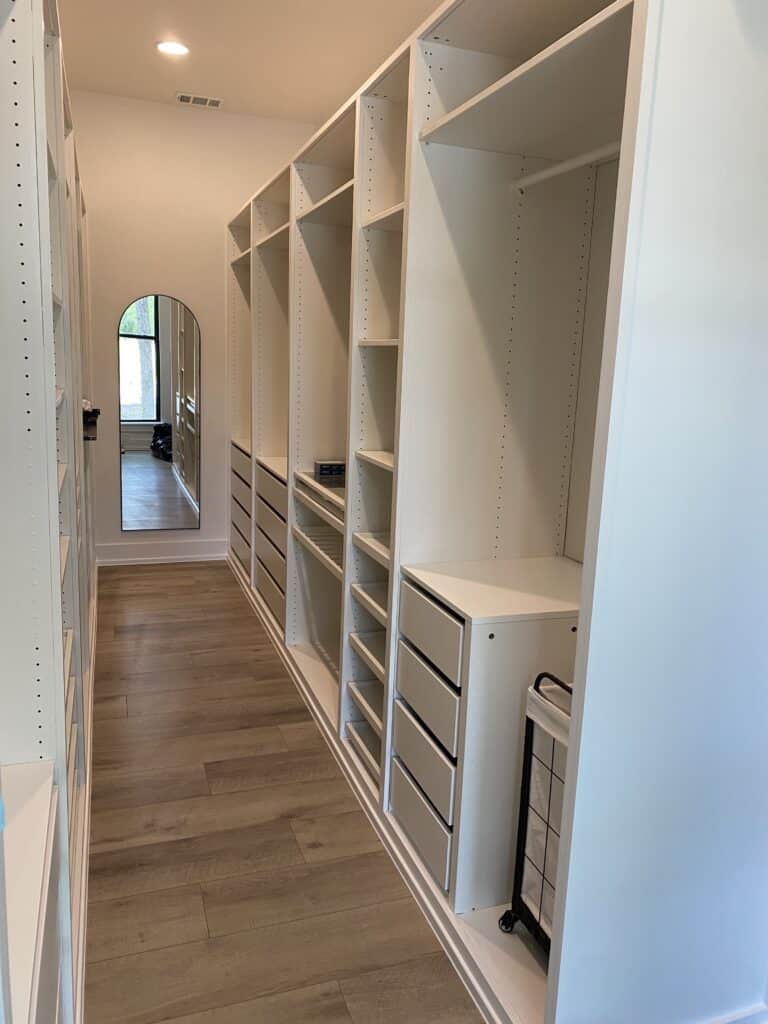
Since one wall is an exterior wall, we were able to put a window in the closet. This helps a lot to bring in natural light. It is a fairly large window, coming in at 8 feet tall.
Having a large walk-in closet was a dream come true. We have shared a small closet for so long and it’s been so nice to have ample space to store everything in our new walk-in closet.
Master Bedroom, Bathroom, and Closet Details
The total square footage of these rooms altogether is a little less than 650 square feet. It works great in a floor plan with an isolated master suite.
Something else to consider is the proximity of your master suite to the laundry room. I have seen many new home builds with the laundry room directly off the master suite, or even part of it. Ours is in a different area of the house. In the end, it’s not a big deal, however, it might be a feature that you want to consider incorporating into your plans.
One other consideration when designing your master bedroom floor plans is a linen closet. We will probably add one on the wall opposite the toilet room and right behind one of the master vanities. It would be a shallow linen closet, but still should be ample storage. Since it’s somewhat shallow, it shouldn’t encroach into the bathroom space too much. It might be a better option than leaving the linen closet off of the new plans that are drawn up.
Hopefully this article helps give you an idea of how to design the layout of your new master bedroom, bathroom, and closet. If it does, I’d love to hear about it!
If you found this article helpful, be sure to check out these other articles:

Suzie Wible
Suzie has shared her knowledge for over 10 years about building furniture, painting techniques, how to build your dream home, and basic to advanced woodworking skills. Through this blog, readers will feel empowered to create a home and products they love too.