How to Make a Live Edge Charcuterie Board
Charcuterie boards have made a splash recently and for good reason. The process to build your own charcuterie board out of wood is actually really simple, so I create a step-by-step guide for you to make your own! This project is fairly simple and great for beginners. Follow along for the whole process below.
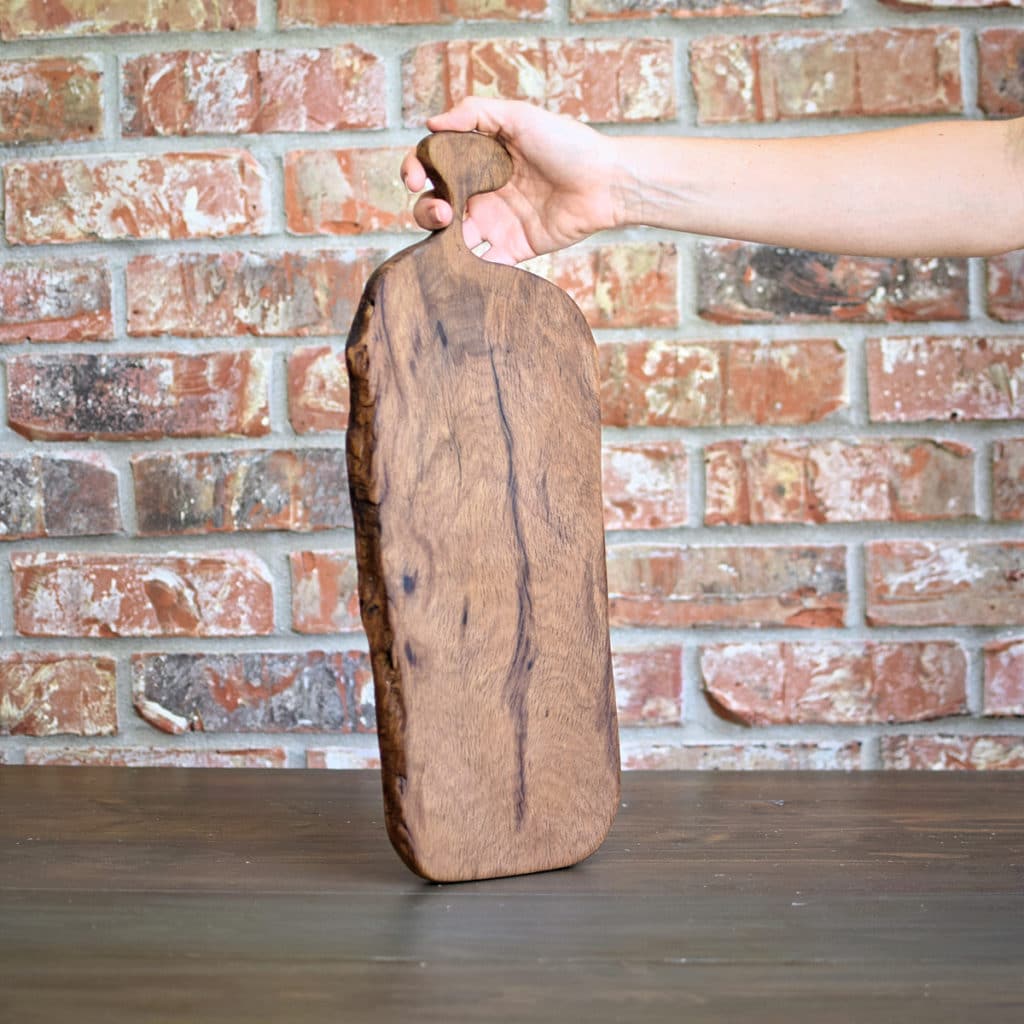
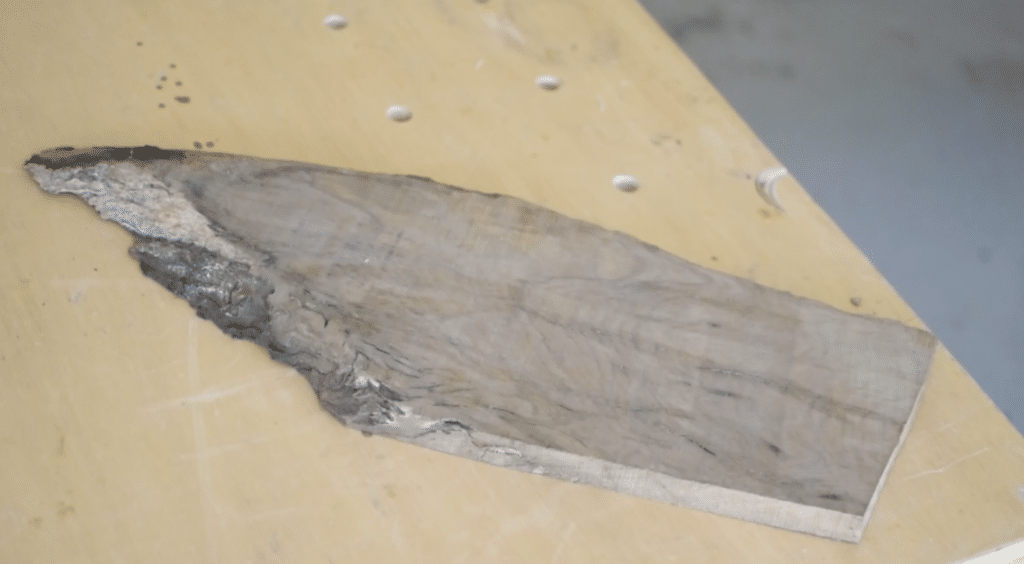
I received this live oak slab awhile back and finally decided that I wanted to make a charcuterie board. When they’re styled well, they can be so beautiful!
RELATED: If you have a bigger live edge slab, check out this live edge wood and concrete table!
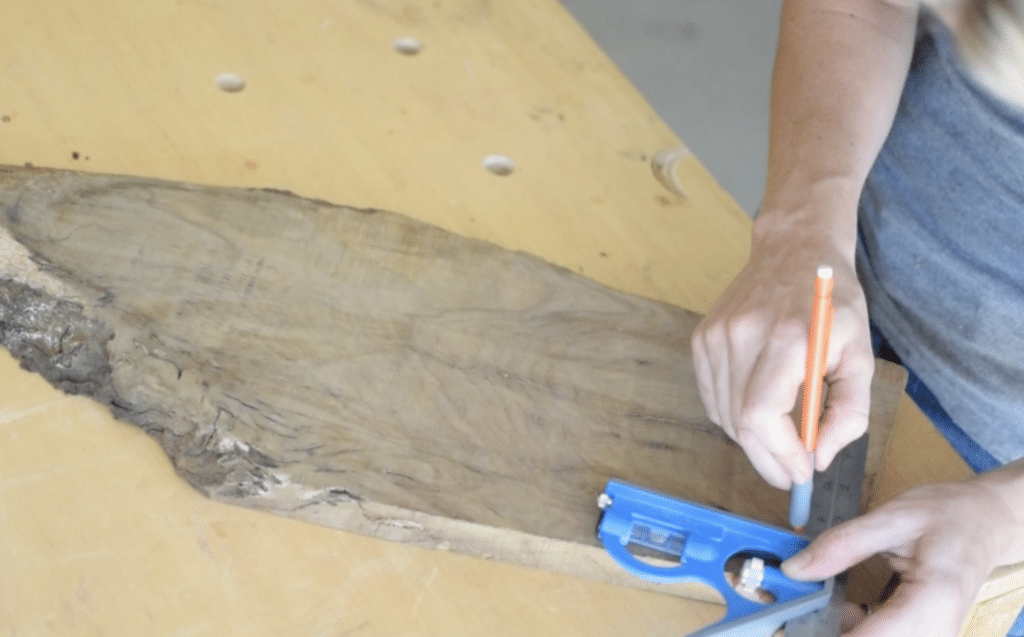
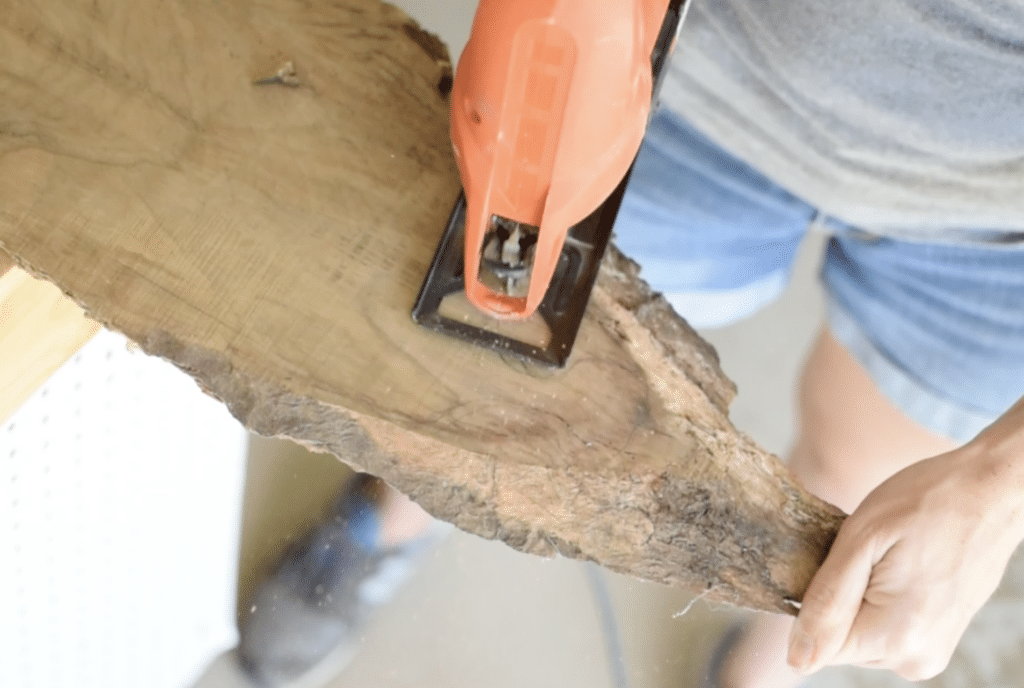
Step 1: Create the handle
I started by sketching out the handle.
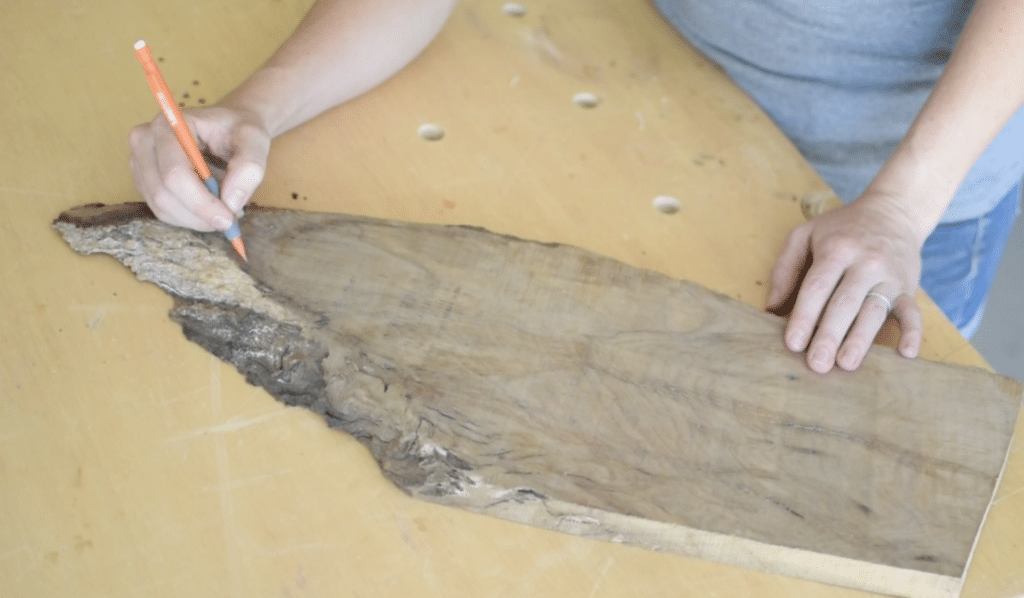
And squaring off the bottom, curving out the edges.
Disclaimer: This site contains product affiliate links. We may receive a commission if you make a purchase after clicking on one of these links.
I used this![]() jigsaw with these
jigsaw with these![]() blades to cut out the handles that I drew.
blades to cut out the handles that I drew.
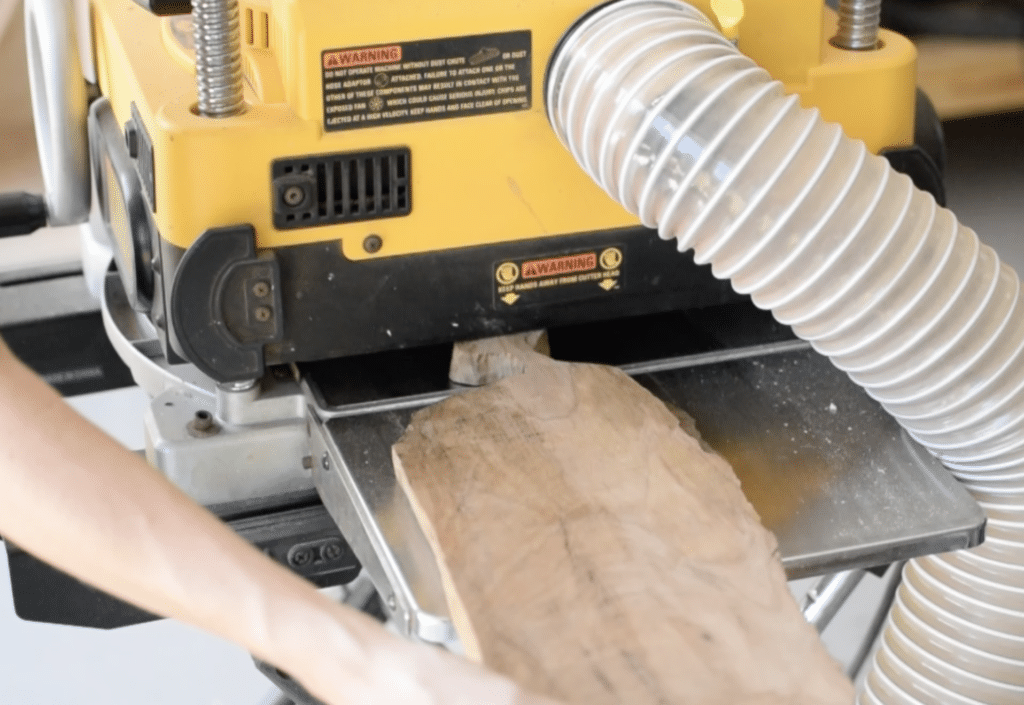
Step 2: Smooth and Sand
I then ran them through my planer![]() . Which by the way, this
. Which by the way, this![]() was a new purchase for me and I can’t recommend it enough. It’s a big purchase, but it will take the quality of things you can make up a couple notches. Seriously, a game changer for me.
was a new purchase for me and I can’t recommend it enough. It’s a big purchase, but it will take the quality of things you can make up a couple notches. Seriously, a game changer for me.
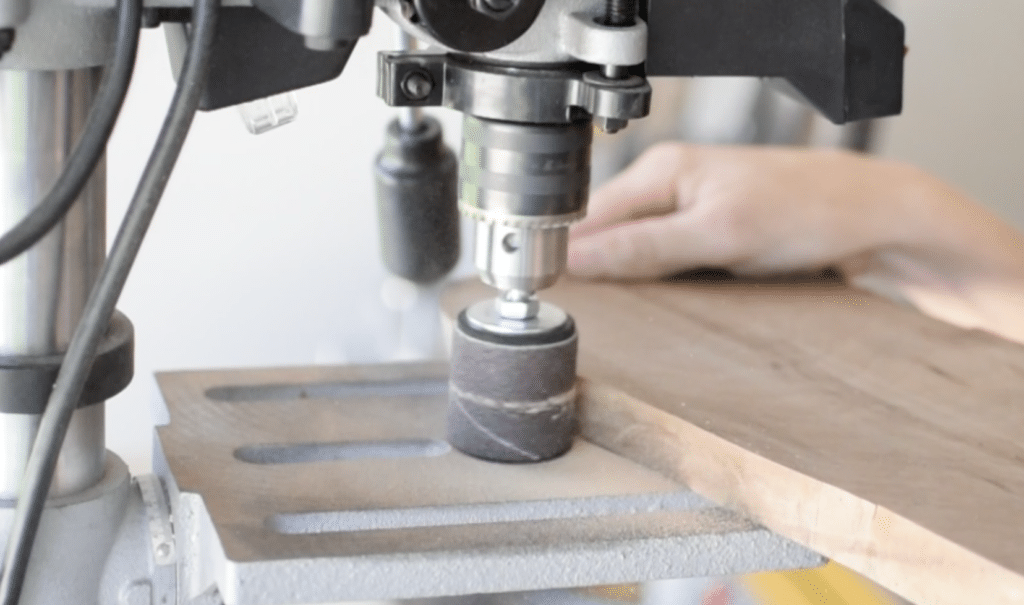
I then sanded the edges of the wooden charcuterie board using these![]() sanding drums. When they’re put on a drill press, it makes sanding vertical surfaces a breeze.
sanding drums. When they’re put on a drill press, it makes sanding vertical surfaces a breeze.
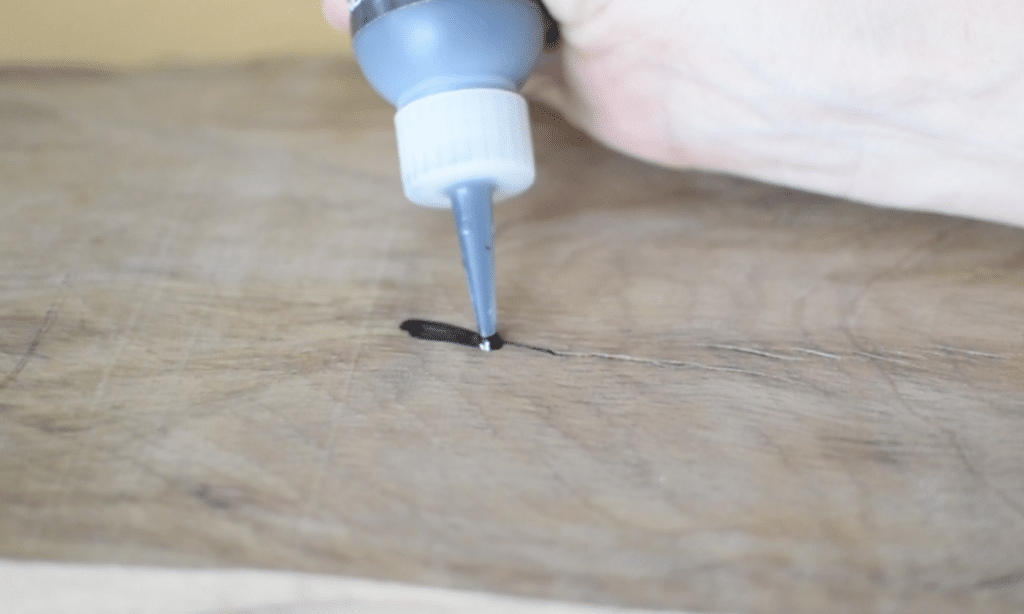
And now to fill the cracks. I have used this![]() stuff for awhile now and it’s the best I’ve found to fill small holes/cracks.
stuff for awhile now and it’s the best I’ve found to fill small holes/cracks.
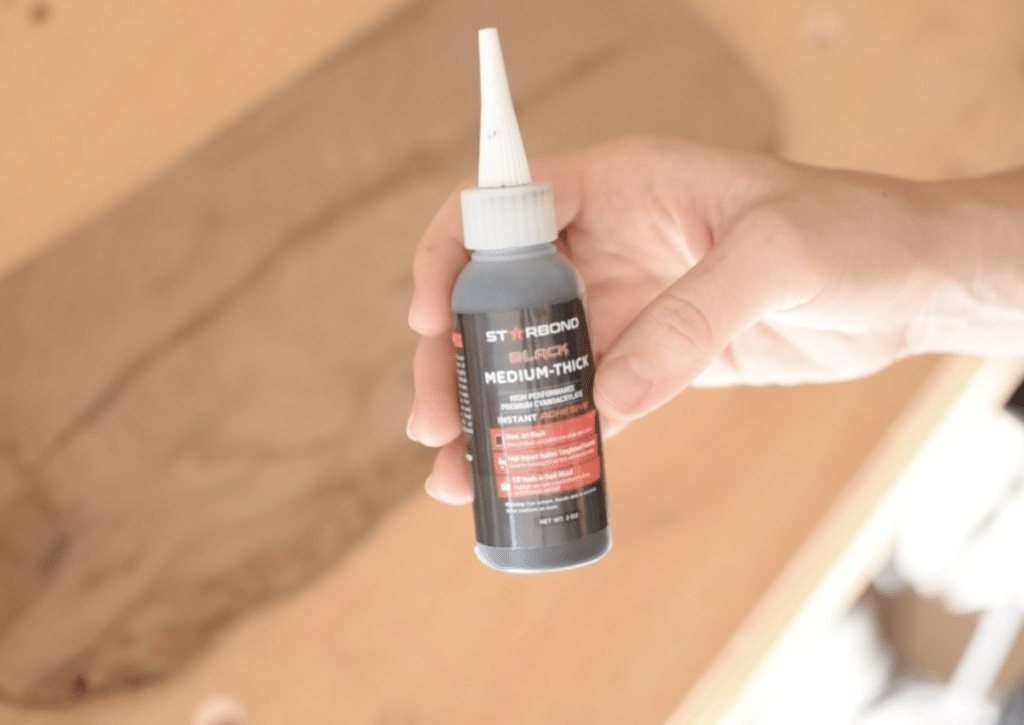
It goes on quickly, then when you spray it with this accelerator, it can be sanded in 15 minutes!
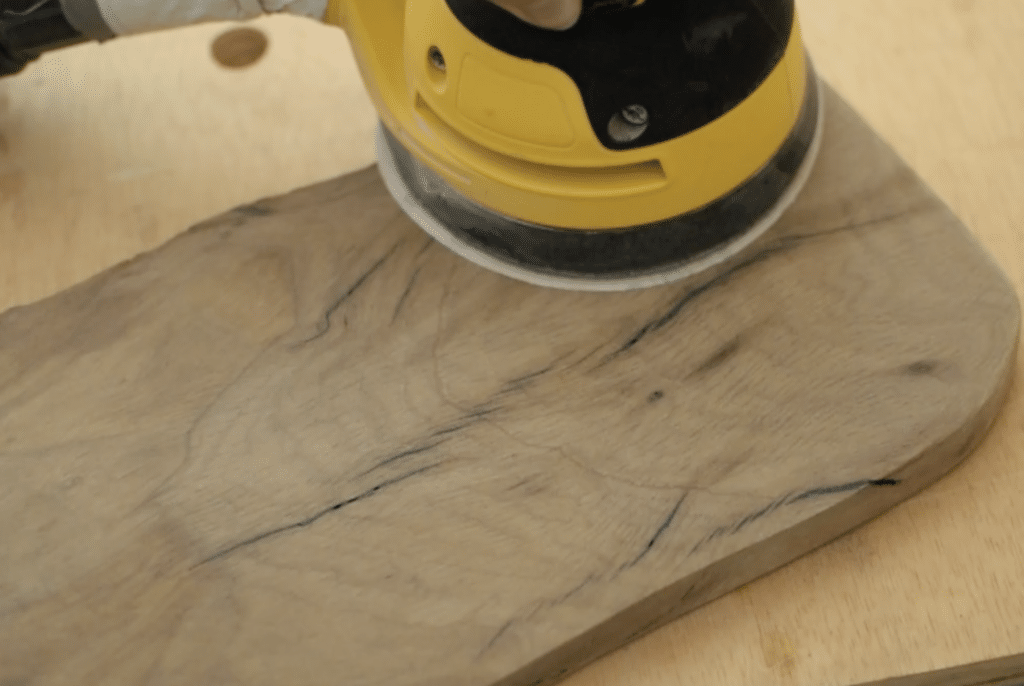
The glue sands pretty easily. I use this![]() orbital sander and I love it as well. I start with 80 grit, then 120, then 220.
orbital sander and I love it as well. I start with 80 grit, then 120, then 220.
Also – a note about sanding. After I sand it down until it is smooth, I water pop it, then sand it again. This means that I spray it with water and let it dry. This causes some wood grain to “pop” and the piece becomes rough again. When you sand this down a second time, it makes it perfectly smooth. Just a quick sanding trick for you! This is a must for making your own charcuterie board out of wood, since it will be used for serving, you will want it as smooth as possible.
Step 3: Apply Finish
I finished it with my favorite – Odie’s Oil. It is food safe, protects it the best I have found, and smells so good!
I go into all the reasons why Odie’s is the best finish for things like charcturie and cutting boards here.
I made a similar project recently; it is an antique-looking wooden riser that would make a really cute display stand. I also think that these would make great small woodworking items that sell. Another idea for that would be these wooden cigar ashtrays!
If you’d like to try a different version of this, check out the basics of how to make a DIY cutting board here!
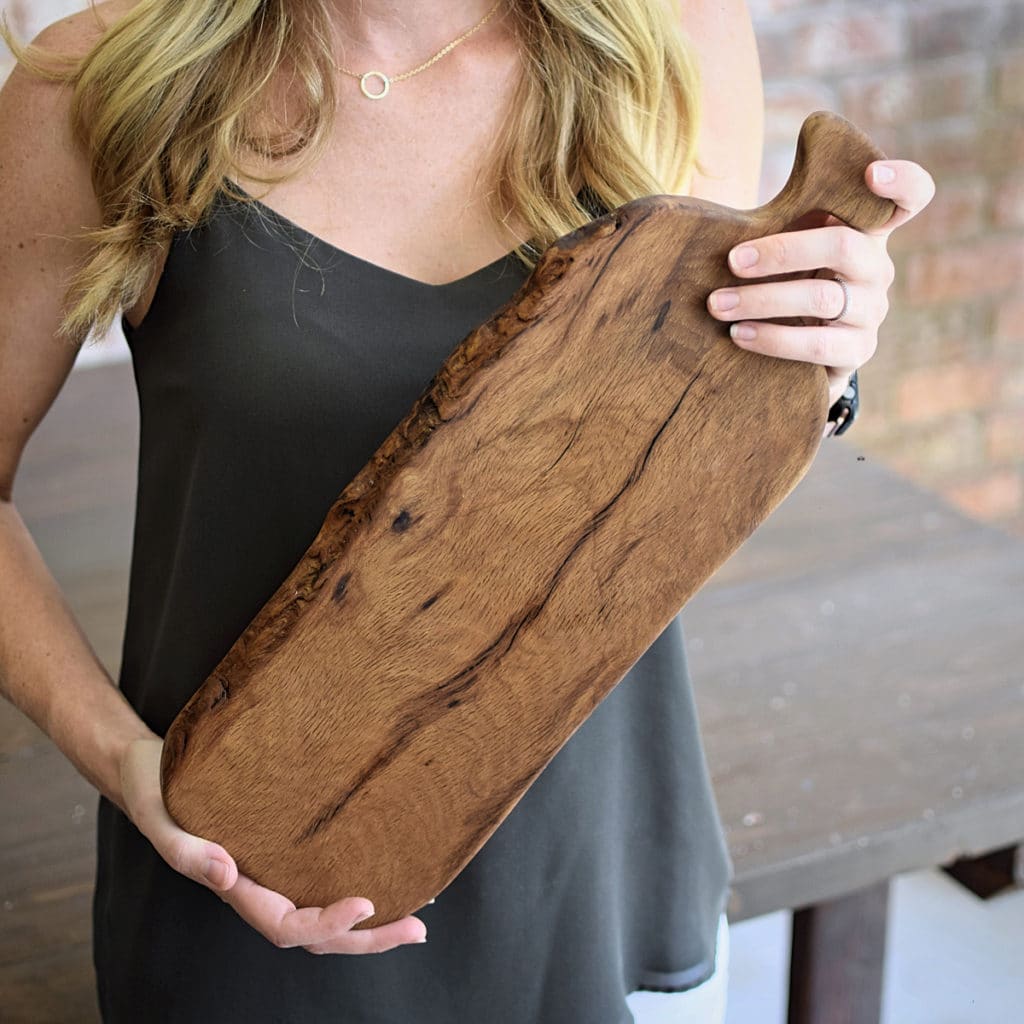
Step 4: Style It!
There are lots of great ideas out there for how to style your cheese board.
I definitely have the bug to make many many more of these unique charcuterie boards now. I’m picturing a huge one for appetizers, or even to decorate the middle of our dining table with! I would love to see you create your own charcuterie board out of wood – so if you make one, send me a picture!
Check out the Web Story for this Live Edge Charcuterie Board!

Suzie Wible
Suzie has shared her knowledge for over 10 years about building furniture, painting techniques, how to build your dream home, and basic to advanced woodworking skills. Through this blog, readers will feel empowered to create a home and products they love too.
Looks awesome Suzie! I have to admit that I just learned what these boards were called. Not only is this a beautiful piece but it’s also a fun word to say! Keep up the great work!
Beautiful as always, both the photos and the finished “accent piece” are beautiful! I love everything you do!!