End Grain Cutting Board from Scrap Wood with a Juice Groove
I always love finding ways to repurpose scrap wood into something beautiful and useful. I am one to hesitate to throw out off-cuts, (especially hardwoods!) so I decided it was time to cull down the pile and make a homemade DIY wooden face grain (also known as end grain) cutting board.
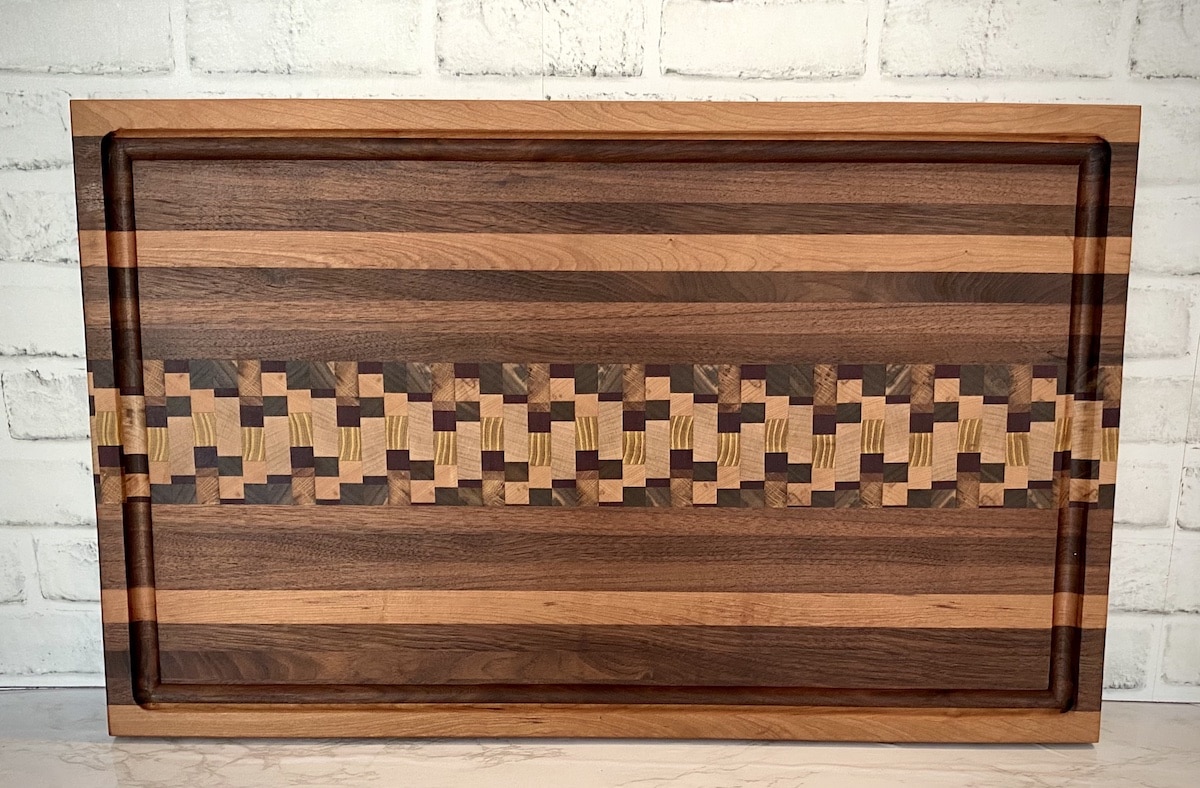
The cutting board I made is specifically designed to fit a large brisket, which we cook often, so it is fairly large in size. It measures 17×27 inches and is 1 inch thick. I decided to do a mixture of end grain design and traditional wood slats on this board, so I will be covering how to make both of those styles in this step by step tutorial.

Best Woods for End Grain Cutting Boards
I also used a variety of wood that is good for cutting boards – walnut, mesquite, osage, purple heart, white oak, and maple. That is the beauty of a cutting board made from scrap wood – use whatever hardwoods you have on hand!

This step by step guide is good for beginners who are just getting started into making cutting boards and would like to add some visual interest with end grain design. Adding the end grain detail really only adds a couple extra steps, so it’s totally doable for an easy upgrade.
Keep reading to find step by step plans for how to DIY an end grain cutting board made from scrap wood and also has a juice groove and finger groove handles!
Step 1: Gather Materials
To make a scrap wood cutting board, you will need the following supplies:
Disclaimer: This site contains product affiliate links. We may receive a commission if you make a purchase after clicking on one of these links.
- Scrap Wood. Scraps used for the wood slat portion should be long enough to fill the entire length of your board. This way, you don’t have any butt joints on the long wooden slats
- Planer
- Table Saw
- Clamps
- Router with Edge Guide
- Router bits: chamfer and round nose bit
- Belt Sander
- Orbital Sander and 120 & 80 grit sand paper
- Wood Glue
- Odie’s Oil and Microfiber Cloth
Step 2: Create the End Grain Strip Detail for the Cutting Board
2a: Gather the Scraps
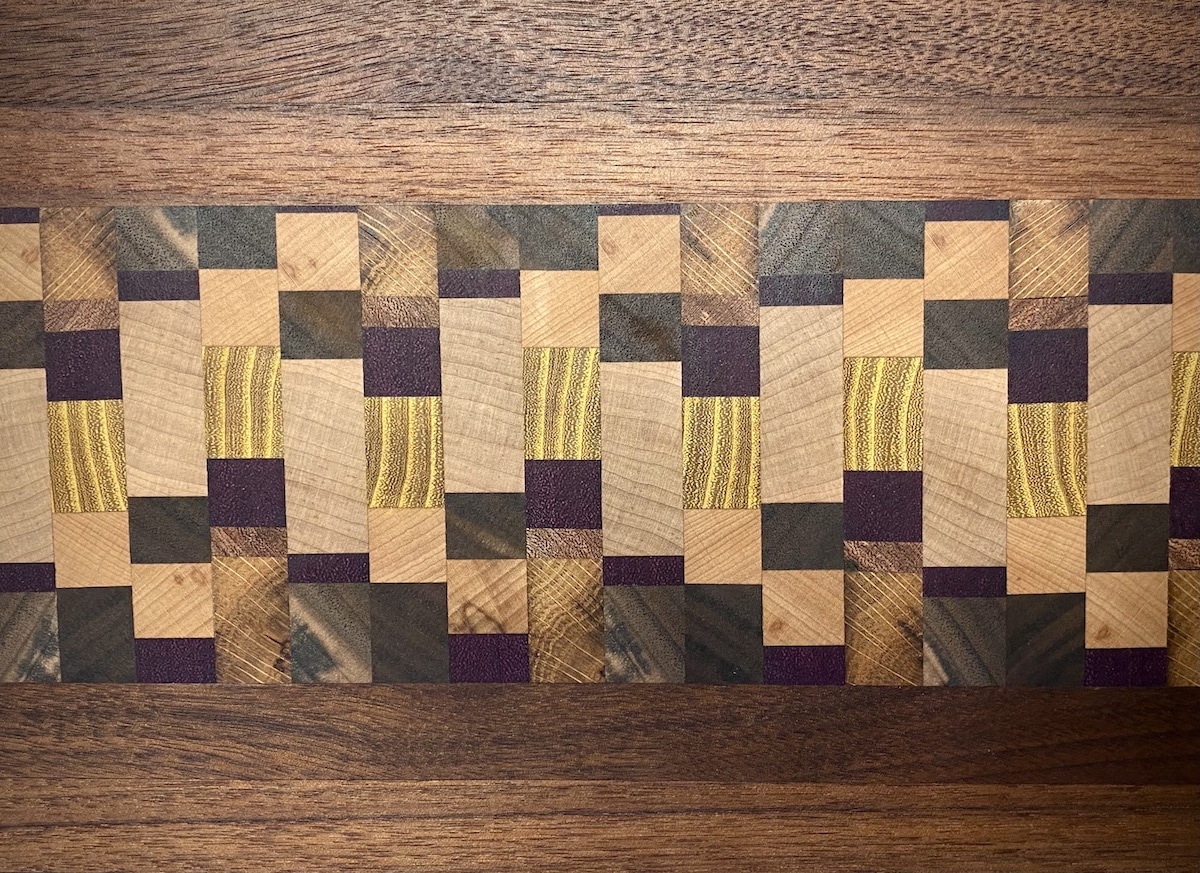
Collect the scraps you would like to be in the end grain design portion of the cutting board (mine is the strip in the middle).
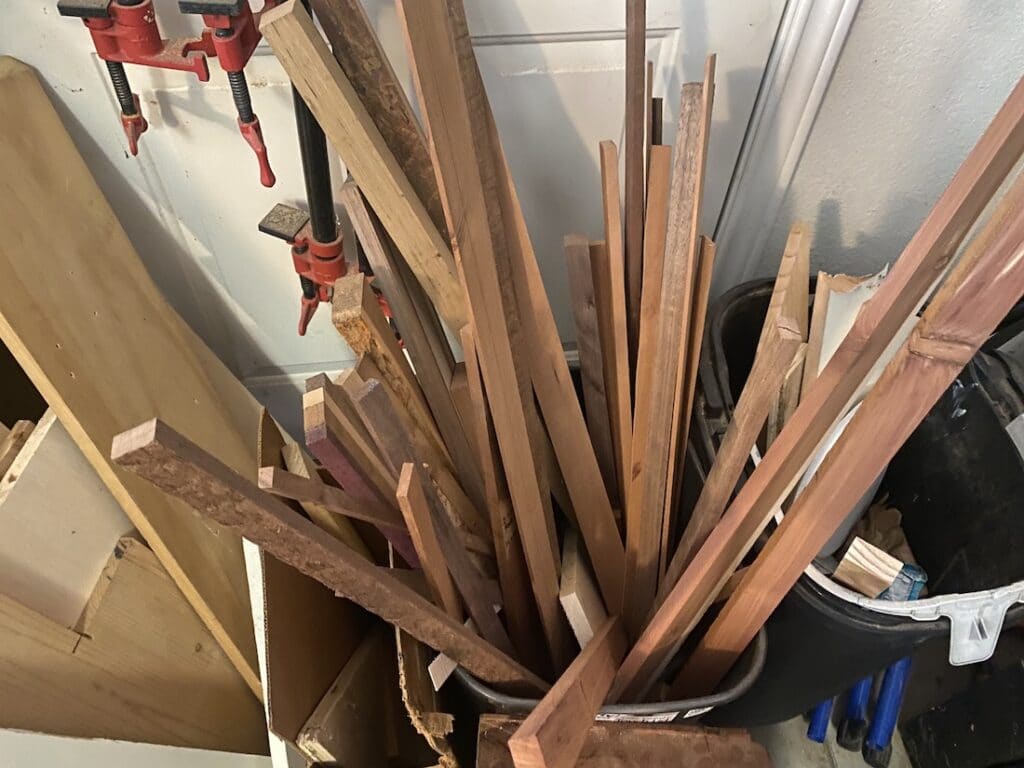
A note on choosing wood – be sure to use a hardwood that is good for cutting boards. I chose walnut, mesquite, osage, purple heart, white oak, and maple.
2b: Plane, Glue, and Clamp the Wood Strips
Plane down all of the pieces until they are the same thickness. Glue them together to make a solid strip. I made two strips and they each measure around 4 inches deep.
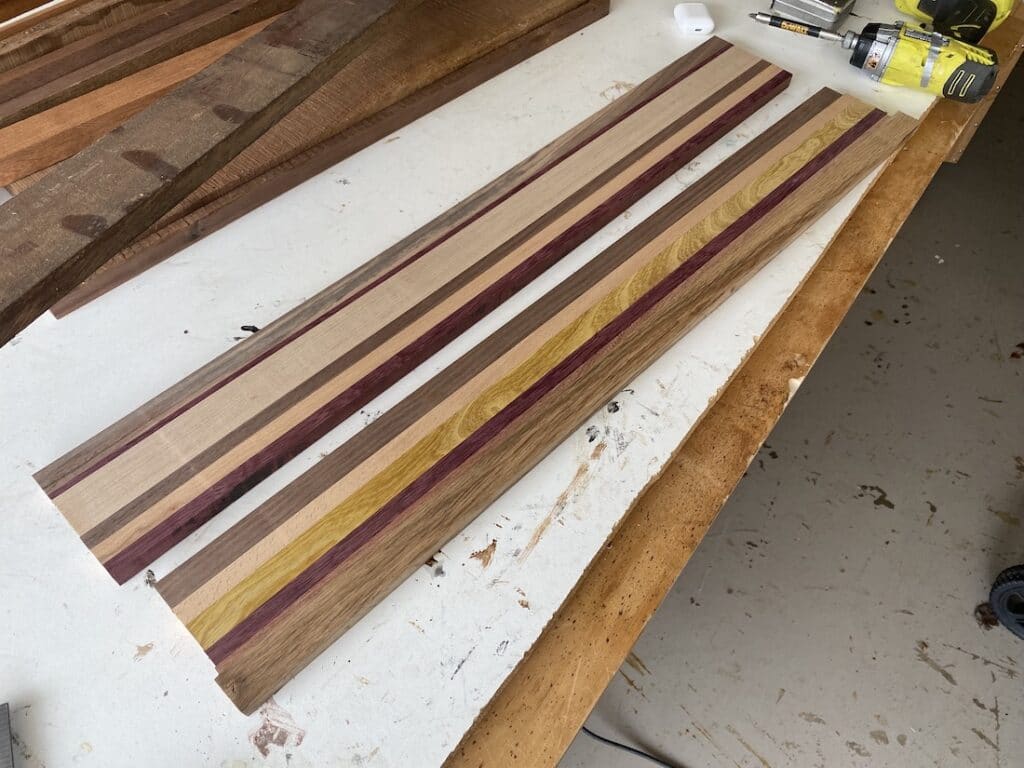
Allow the glue to dry, then remove the clamps. Run them through the planer so that they are flat and surfaced.
You will now trim these down to create the end grain design.
2c: Trim the Wood
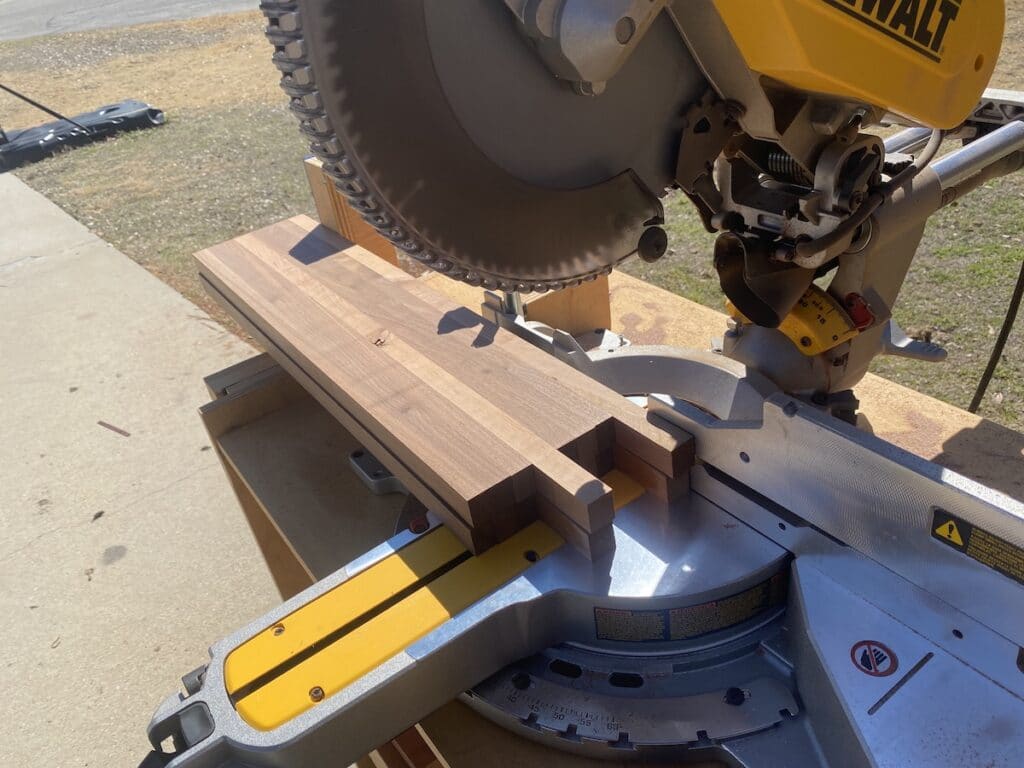
This can be done on a table saw, or a miter saw. I am personally more comfortable on my miter saw, so that’s what I used. If you do this on a table saw, I recommend building a table saw sled and using that.
For a deep dive into how to safely use a miter saw, check out this post!
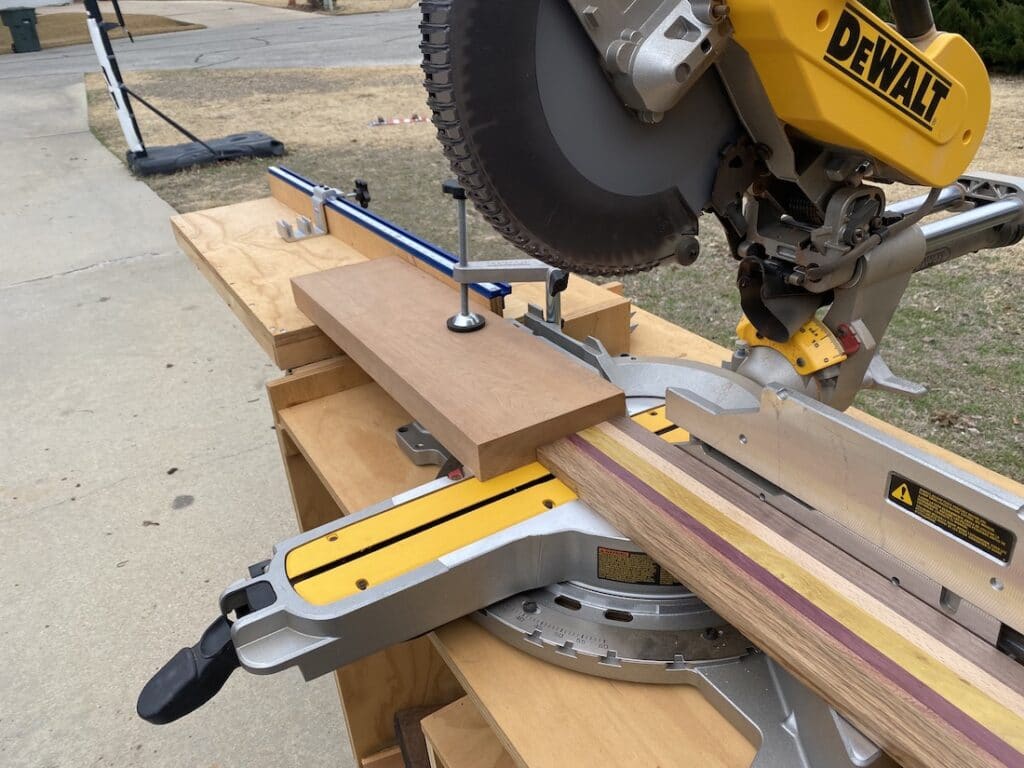
I used a clamped piece of wood to create a stop block on the miter saw. I butt the end grain strips against the stop blocks and made the cuts 1″ thick. This created 48 pieces.
End Grain Cutting Board Designs
Check out this post for tips and tricks of making a DIY cutting board and you can also find ideas of how to upgrade your board as well!
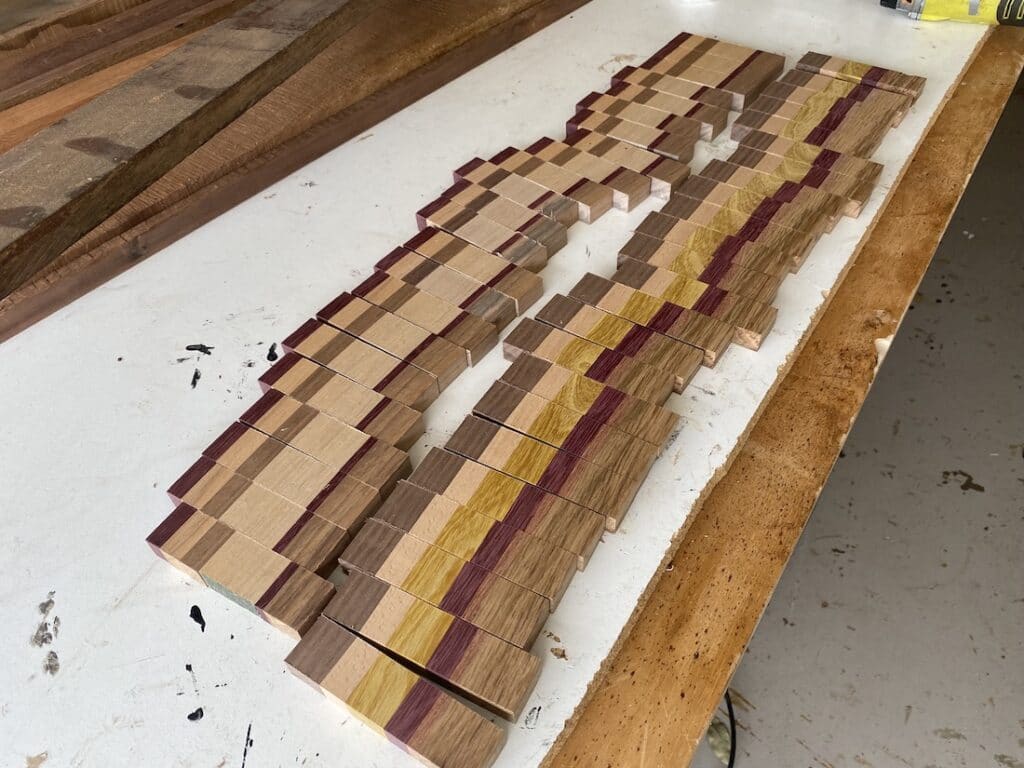
Rotate each piece to make the end grain face up.
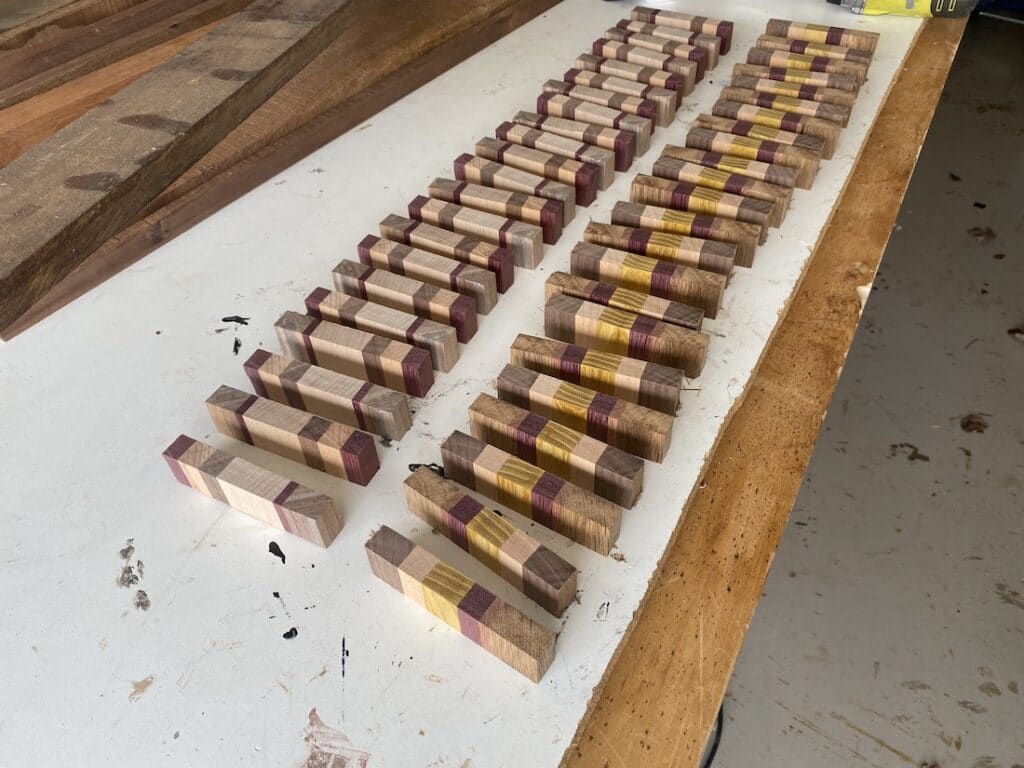
I alternated a piece from each strip, and flipped over every other one to create more of a ‘chaos cutting board’ look for this end grain design.
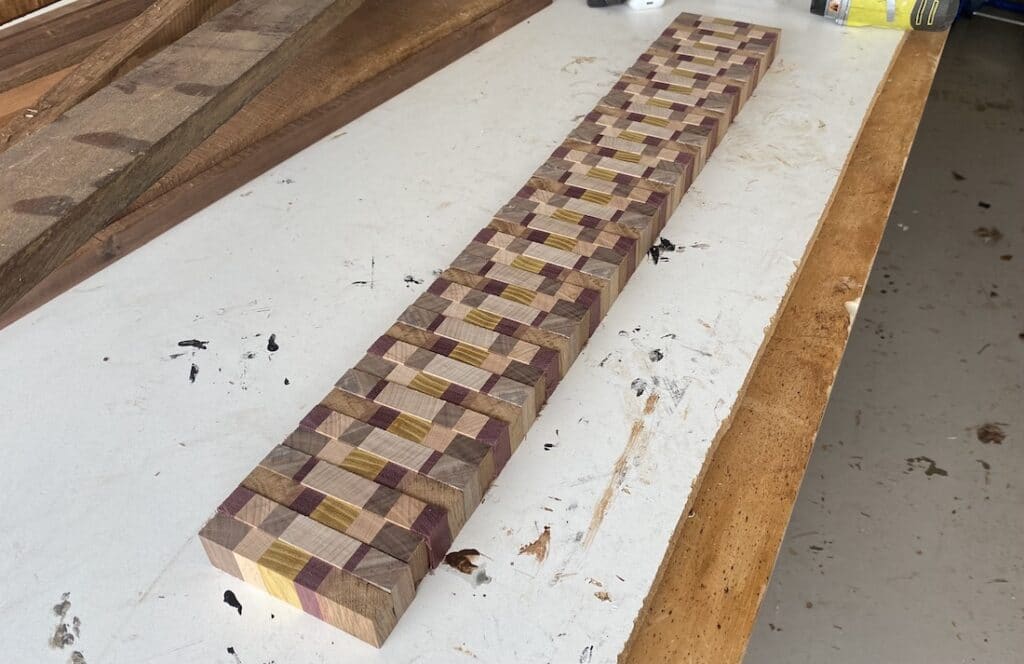
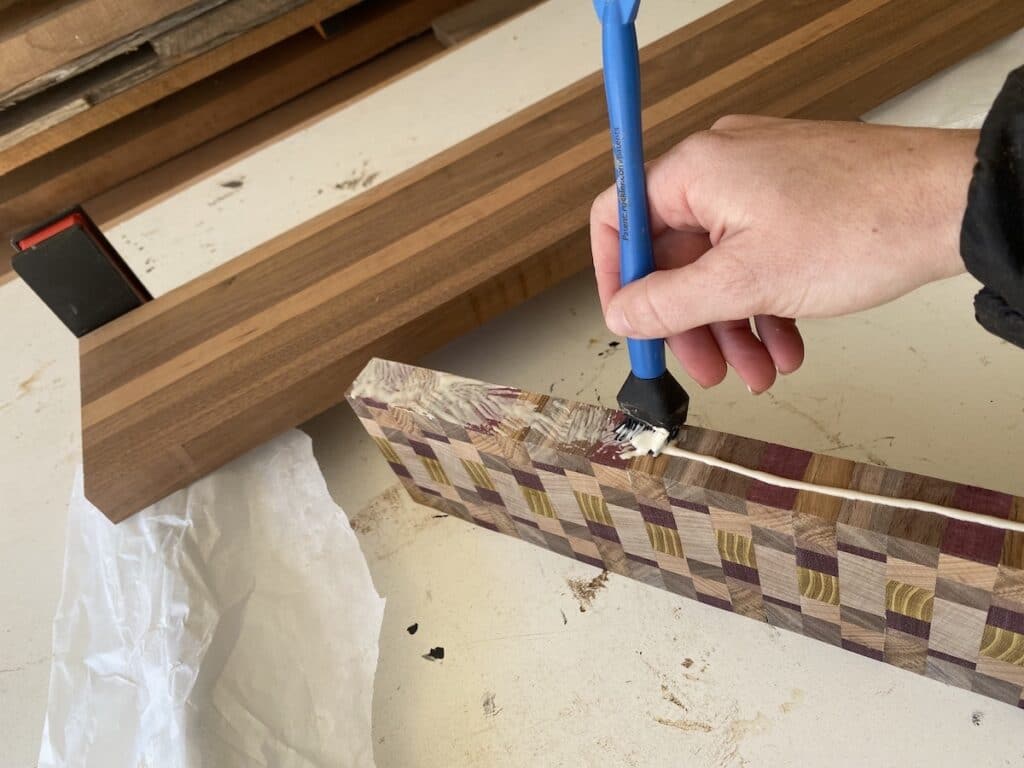
2d: Glue and Clamp
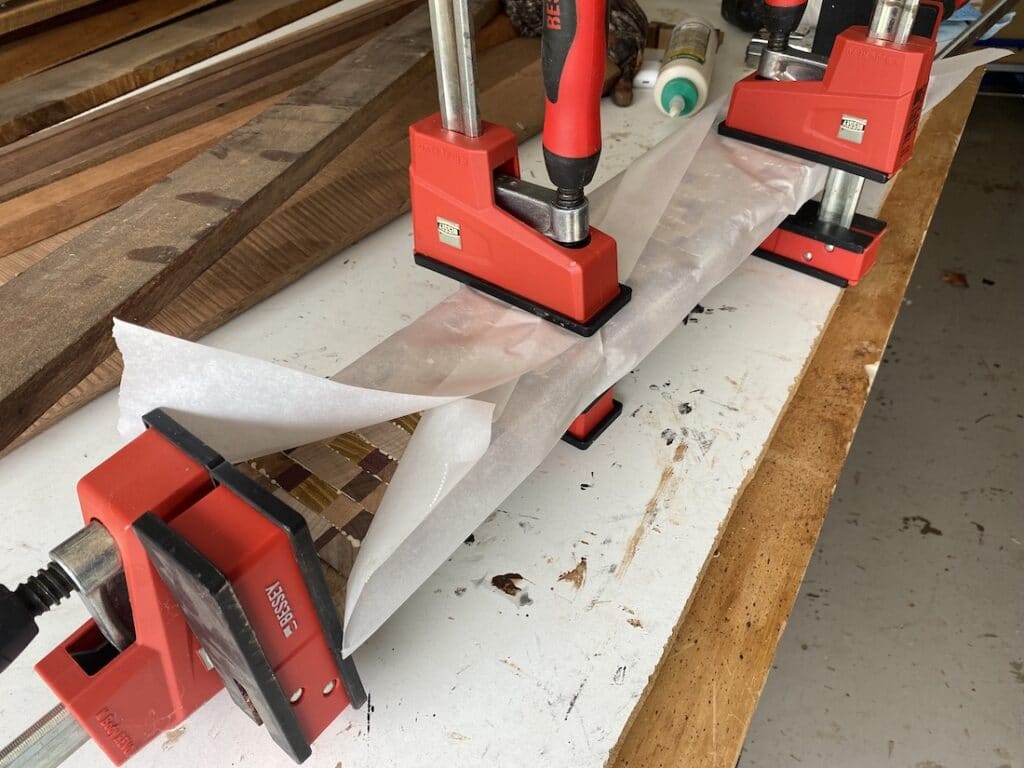
Once you have the desired design laid out, apply wood glue to all of the edges and clamp them together.
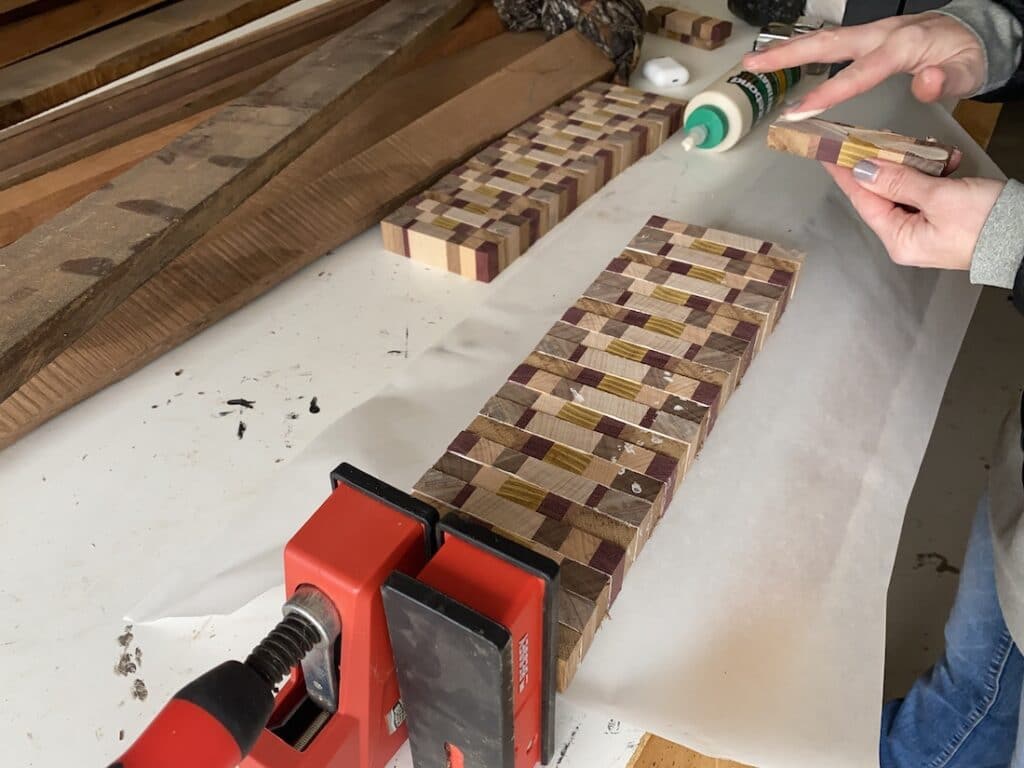
Allow it to completely dry. Wax paper works well in keeping the glue off of your clamps.
2e: Sand and Trim
Once the wood has dried, you will need to make the surface smooth.
End Grain Cutting Board Through Planer
Important: NEVER run an end grain cutting board through a thickness planer. I have heard of and read SO many disaster stories, it’s just not worth the risk. A planer is not built to plane face grain and you can get seriously hurt. Not worth it. Even if you don’t get hurt, the chance of tear out is high, so the piece might get ruined anyway.
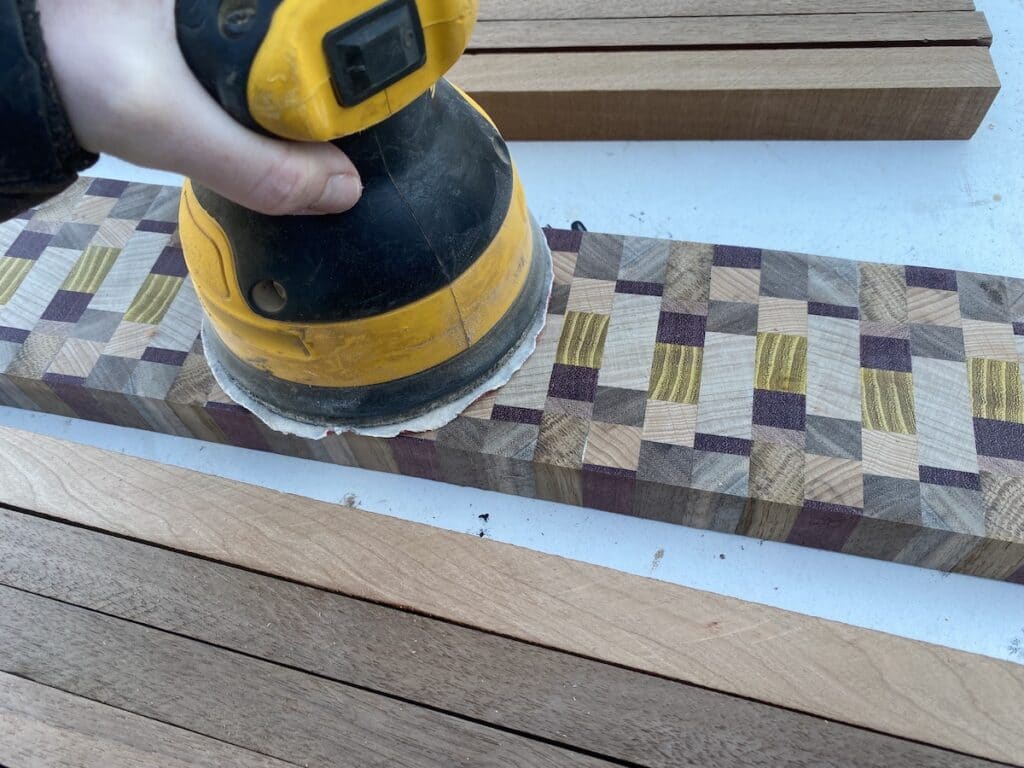
It takes much longer, but sand this strip smooth. Use a drum sander if you have access to one, or use a belt sander or orbital sander.
Trim the edges to create straight edges. This can be done on a track saw like the Adaptive Cutting System or on a table saw. I used a table saw for this step. Just make sure all of the edges are square.
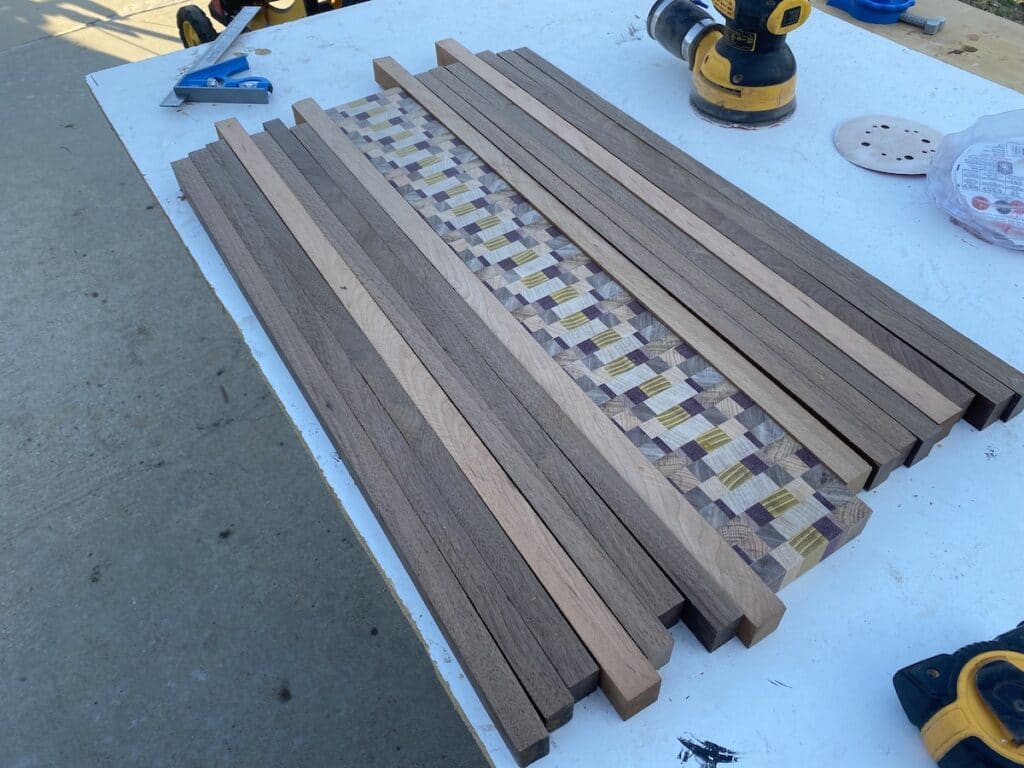
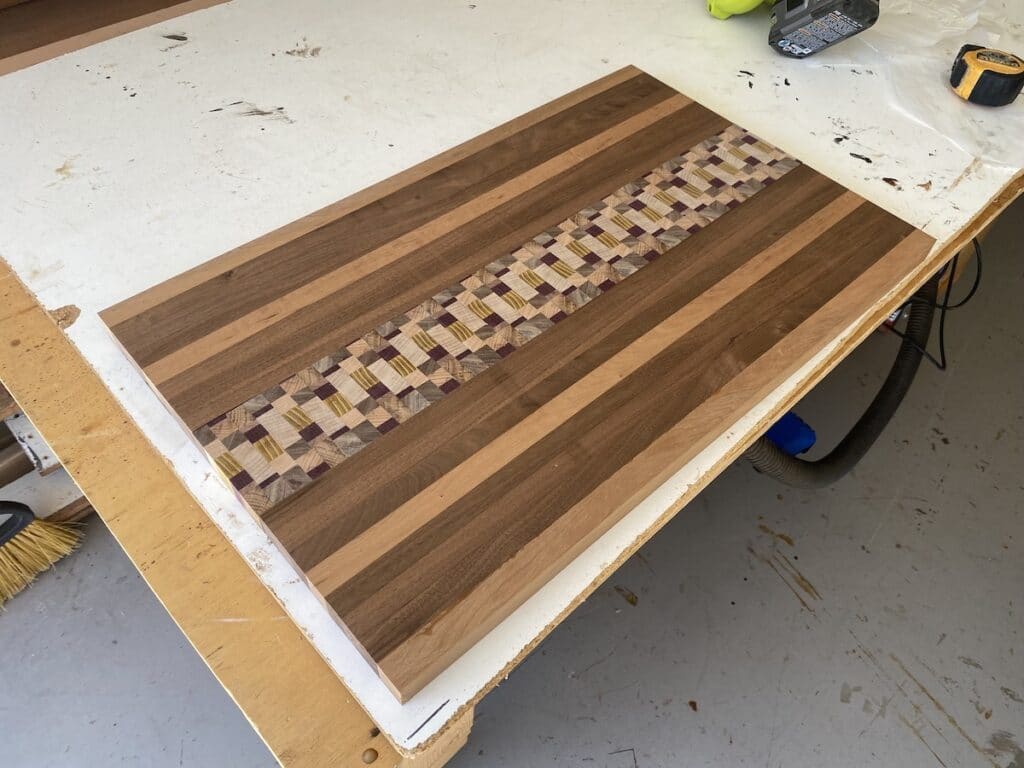
Step 3: Rip the Boards for the Wood Slat Portion of the Cutting Board
Now that I knew exactly how deep the end grain middle strip of my cutting board would be, I was able to do the math to figure out how much would need to be added in order to get the desired dimensions of my board. I need 6.5 inches added to the top and 6.5 inches added to the bottom in order to make it 17″ deep.
Using a table saw, rip down additional scrap boards. I wanted these wooden strips to be uniform to offset the busy design in the middle.
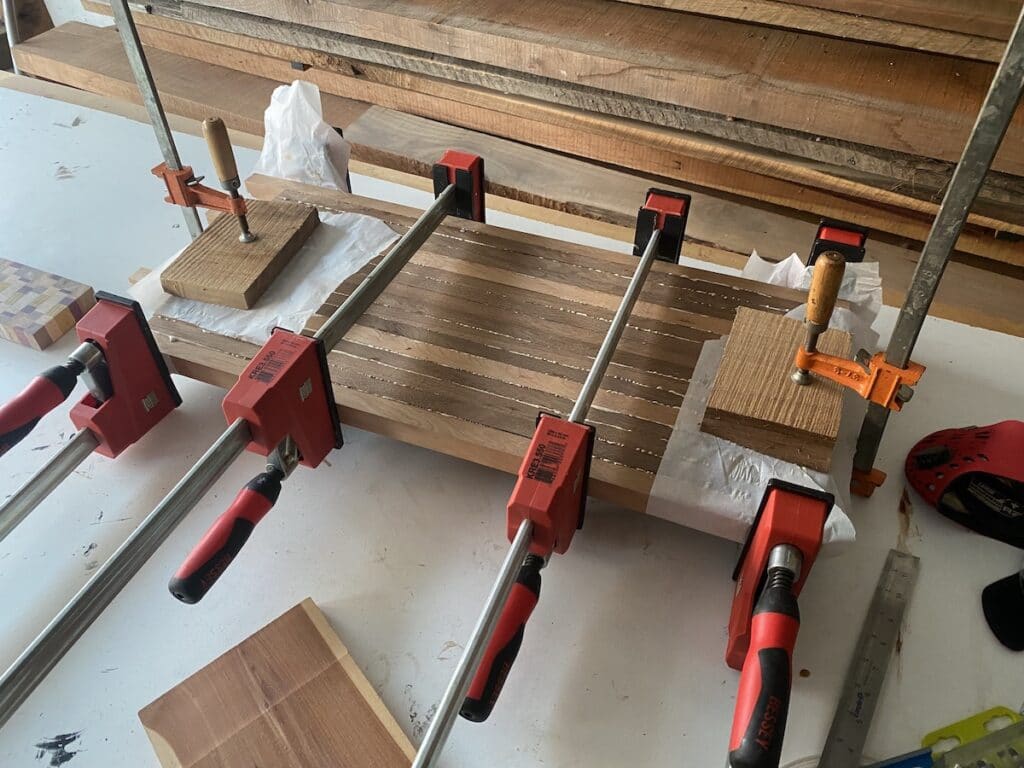
Step 4: Glue the Cutting Board
Since these pieces will need to be run through the planer again, glue two separate pieces, instead of all of them together. This will ensure that both sections can fit through the planer.
The picture below is actually two separate pieces, I just utilized the clamps to clamp both at the same time.
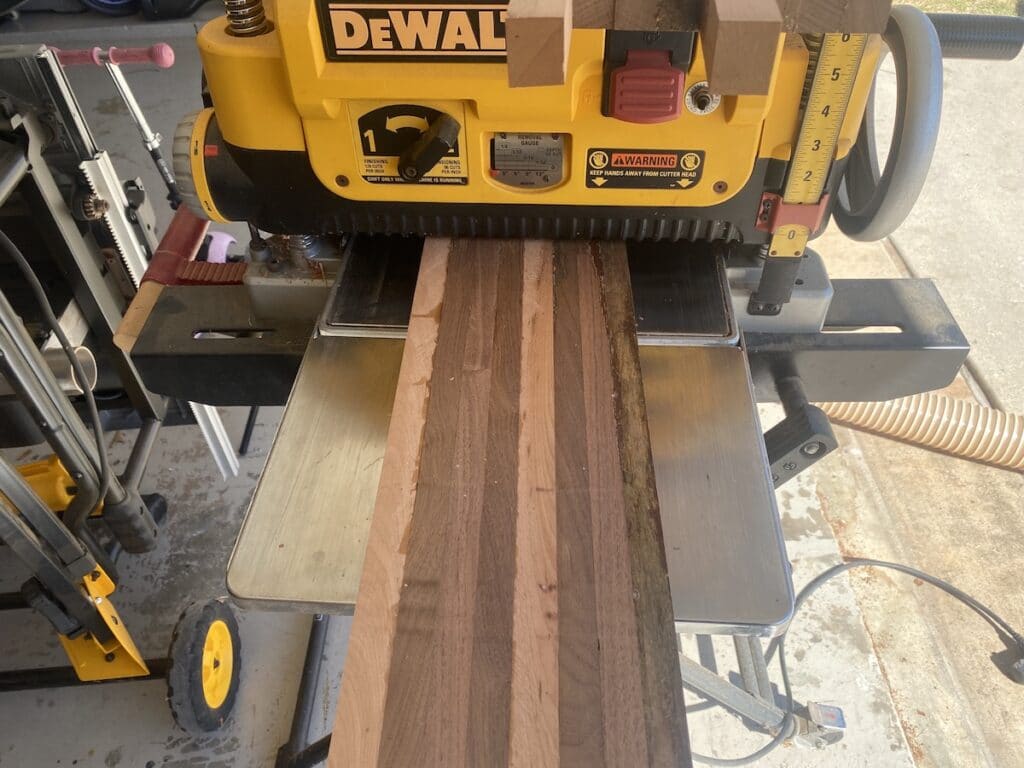
Allow it to fully dry, then surface plane the pieces again, making sure they are the same thickness as each other and the center end grain strip.
You can now trim the 3 pieces to the same length on the miter saw.
Glue the 3 pieces together. Be sure to clean up the excess glue while it’s still wet since you most likely won’t be able to fit this large cutting board through a planer. Allow the cutting board to fully dry.
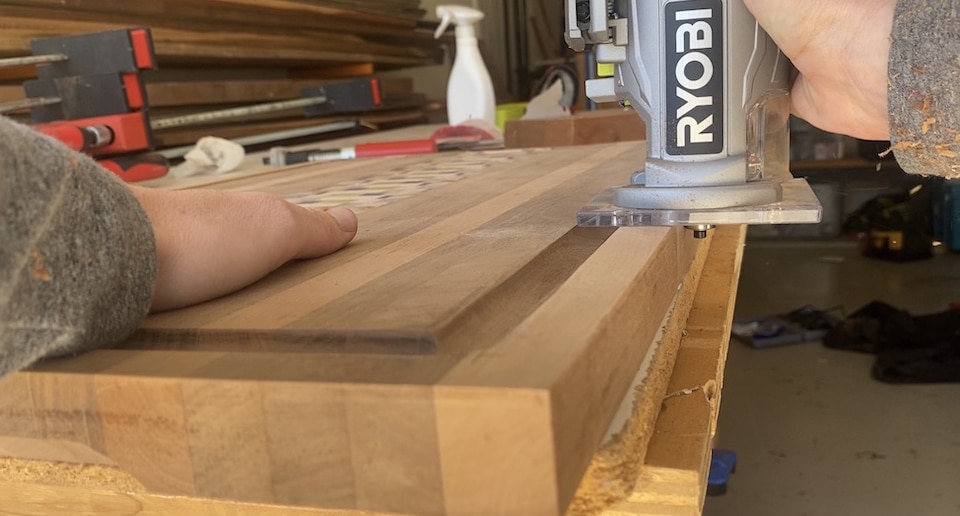
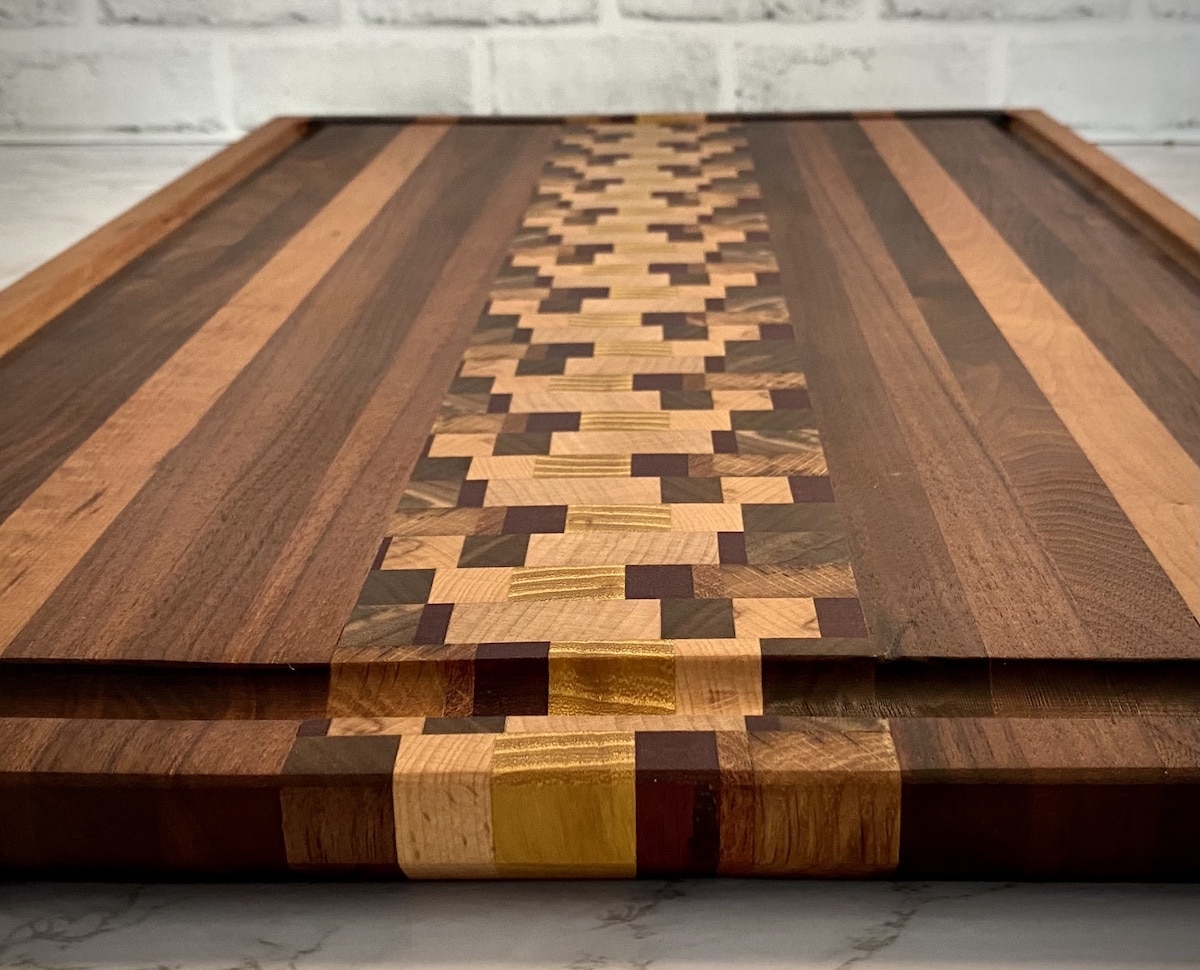
Step 5: Add a Juice Groove and Finger Groove Handles
I took a deep dive into my method of how to add a juice groove to a cutting board in this post. This method doesn’t require a CNC, a jig, or a router table. It’s my favorite way to add a juice groove because of the simplicity! Use your router with a round nose bit and edge guide to do this.
I love using this budget wood router to make the juice groove.
I also outlined exactly how to route cutting board finger groove handles in this post. Use a router and chamfer bit to do this.
I also added a small chamfer to the edge to soften it a bit.
Step 6: Sand and Seal the Cutting Board
First, sand the cutting board with 80 grit sandpaper. Then, move to 120 grit sandpaper.
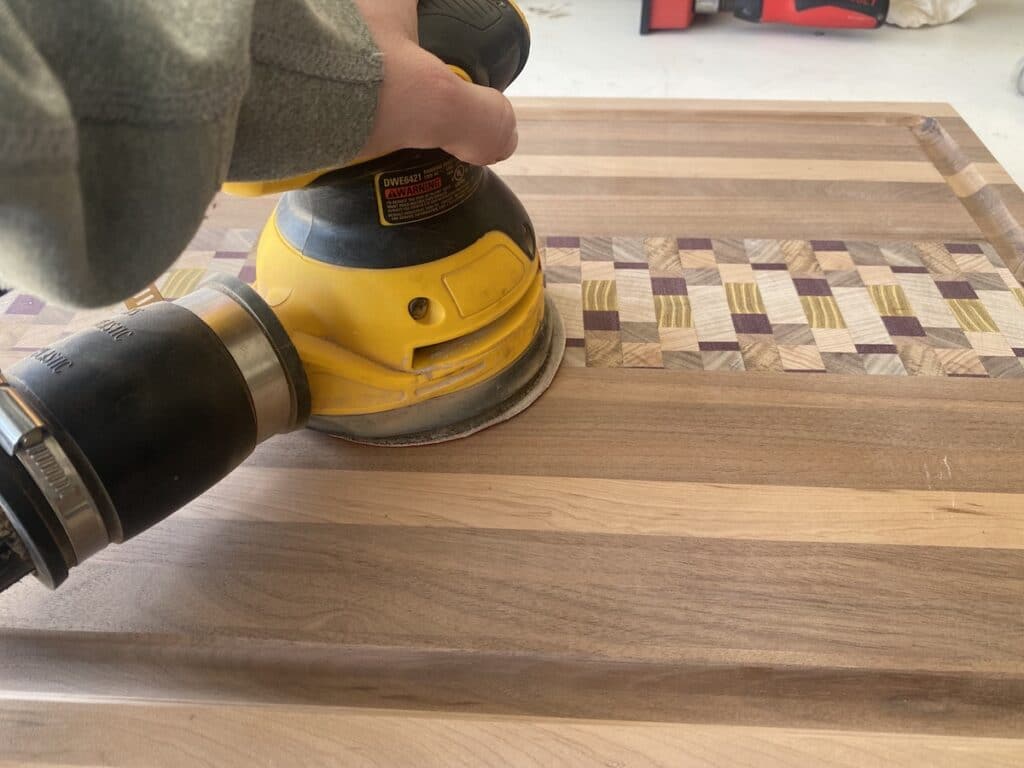
Once you have done that, spray the board with water and allow it to dry. This will make the board rough again. Sand once more with 120 grit. This is the best way to get a super smooth board (that stays smooth!).
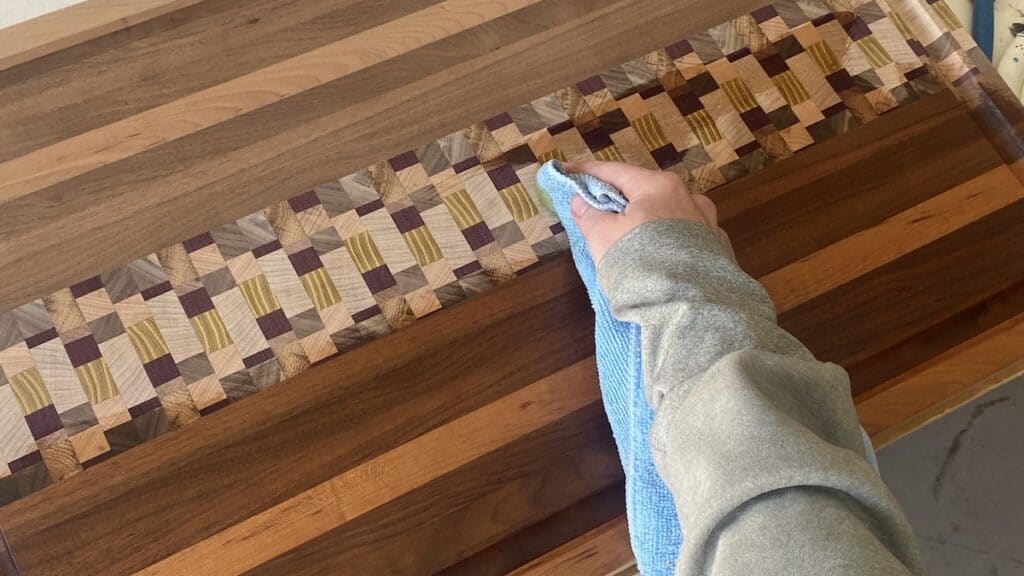
Now that you are done sanding, you can treat to board for use. There are many methods to making cutting boards food safe while coating them, but I will just cover my favorite way: Odie’s Oil!
Check out this post on why I believe Odie’s Oil is the best finish for a cutting board.
I use this on so many wood pieces. It is a great way to season a cutting board, while making it food safe. It’s like a one stop shop for treating cutting boards.
And that’s it! I can’t wait to see what huge cutting board you make! If you have any questions, be sure to reach out and I’ll do my best to answer you. Happy Building!

Find the web story for how to make an end grain cutting board from scrap wood here!
If you found this article helpful, be sure to check out the following articles:

Suzie Wible
Suzie has shared her knowledge for over 10 years about building furniture, painting techniques, how to build your dream home, and basic to advanced woodworking skills. Through this blog, readers will feel empowered to create a home and products they love too.