How to Cut a Wood Waterfall Edge Corner Joint
Creating a waterfall edge joint in wood furniture is a great way to add interest and beauty when building your own furniture. It can be done on a kitchen island, cabinetry, dining table, coffee table, or side table. Cutting this type of waterfall miter joint is a fairly simple process if you have the correct tools and method.
In this article, I will cover the basics of how to make a wood waterfall edge in a slab or wood piece, how to strengthen the joint, and the basics for connecting wood at a 90 degree angle.

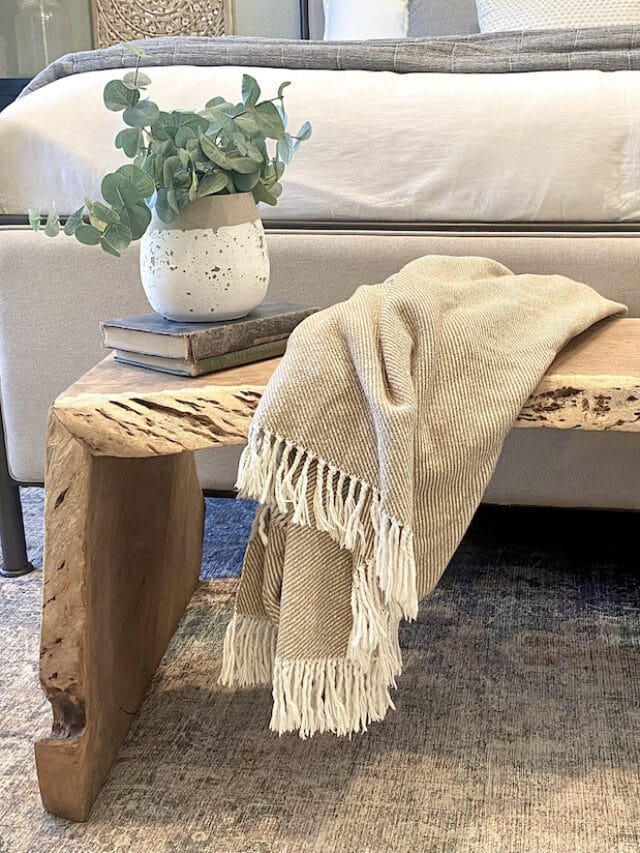
I recently made this type of edge joint on a live edge waterfall bench made out of a 7 foot mesquite slab. That particular slab was long enough to have two mitered waterfall edge corner joints, so both legs of the bench carried the same wood grain pattern down the sides.
I learned quite a bit in that process, so I wanted to share what I learned with you today by taking a deeper dive into what is involved with creating that kind of 90 degree wood joint, made out of two 45 degree angles.
Q: What is a waterfall miter joint?
A: A waterfall miter joint is a method of joining two wood pieces cut from the same piece together in a 90 degree angle. There are two 45 degree angle cuts that, when joined together, create a 90 degree angle. The wood grain typically flows around the 90 degree angle in a continuous way.
Examples of Wood Waterfall Edge Joinery
Waterfall edges make beautiful coffee tables, like this one from Williams Sonoma.

Similar to a coffee table, you can also create a live edge waterfall bench.
This type of joinery is also common in kitchen islands, console tables, or dining tables.
What Saw to Use to Cut a Waterfall Edge
I will cover 3 popular ways to cut the angles in wood to create a waterfall edge.
Track Saw
My personal favorite way to cut an edge like this is to use a track saw like the Adaptive Cutting System.
The main reason is because you can clamp the piece down while you are cutting. Depending on the thickness of your wood, you will most likely need to make multiple shallow passes. If you do that, it is imperative to keep the wood from shifting in order to make sure the seam in the angle is a tight fit when joined together.
In my opinion, a track saw creates the most precise cuts when cutting a 45 degree angle. You will essentially have to make (4) 45 degree angles if you have two waterfall legs in your piece, so it’s important to have an accurate method.
Miter Saw
Miter saws can be a great option if the width of the piece you are cutting fits on your miter saw. My miter saw can make cuts up to 12″.
Like a track saw, it is very important to clamp your work piece when making a cut like this, especially if you are making multiple shallow passes.
If you’re just getting started, you can find a beginner’s guide to using a miter saw here.
Table Saw
This type of mitered cut can be done on a table saw as well. I would only recommend this if you are working with a smaller piece to create a waterfall edge.
This is because, just by the nature of table saws, you are moving the wood, not the saw. For example, it wouldn’t have been feasible to make this cut on the 7 ft 8/4 mesquite slab I was working with the create a live edge bench.
But if you are making a small wooden box, for example, a table saw will give you an accurate result as well.
How to Cut a Wood Waterfall Edge Corner Joint
Ok, now for the basics of how to make this type of 90 degree miter joint.
Typically, the grain in a waterfall miter edge flows around the angle. So, you will want to make to cuts perpendicular to the wood grain flow. This isn’t an absolute necessity, but for aesthetic’s sake, this is a great way to add to the “waterfall” look of this particular type of joinery.
Step 1: Cut the First 45-degree Angle
The location of this cut will be at the desired height of the leg of your piece.
Take the kerf into account, and make a 45-degree cut.
Step 2: Cut the 2nd 45 degree Angle in the Opposite Direction
This cut will be made because 45+45=90 and we are going for a 90 degree angle here.
Tip: If your slab isn’t perfectly flat, you can flatten it with a slab flattening jig for your router.
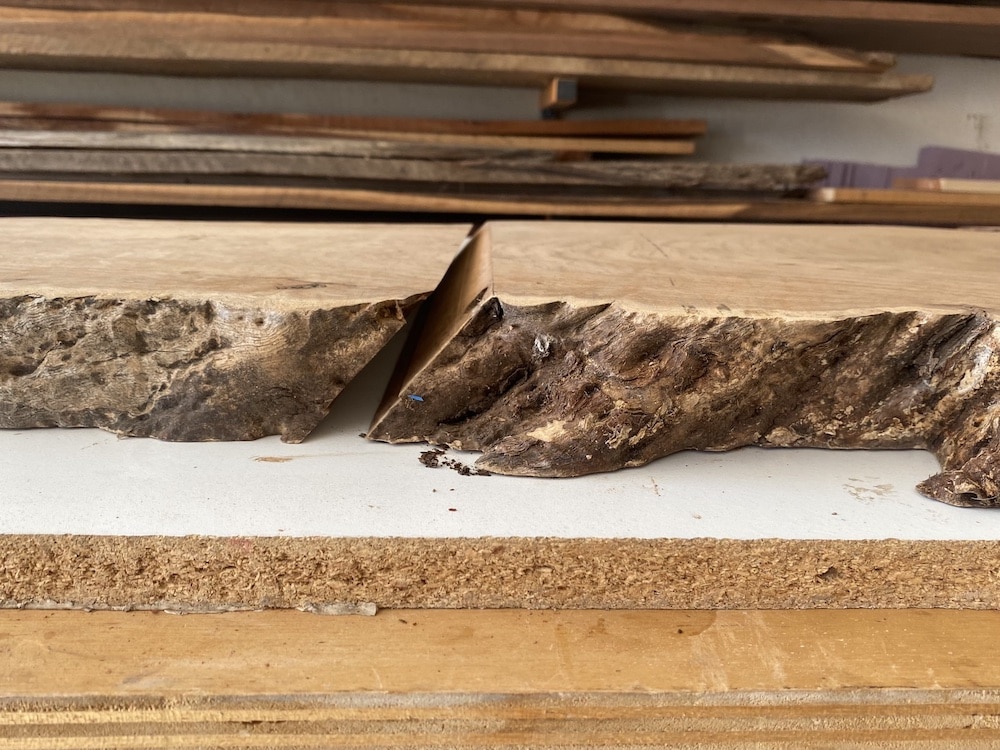
Cut your piece in the angle shown on the straight edge below.
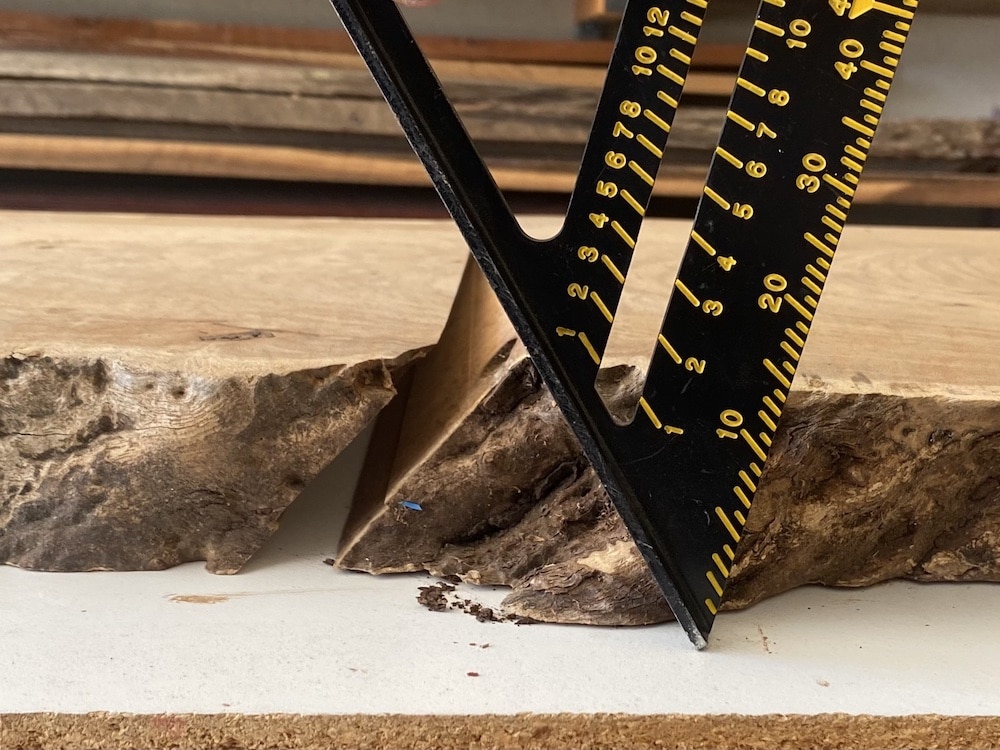
Get as close to your original cut line as possible. The less surface of the top that is cut off, the better. This will allow the wood grain to flow seamlessly down the angle.
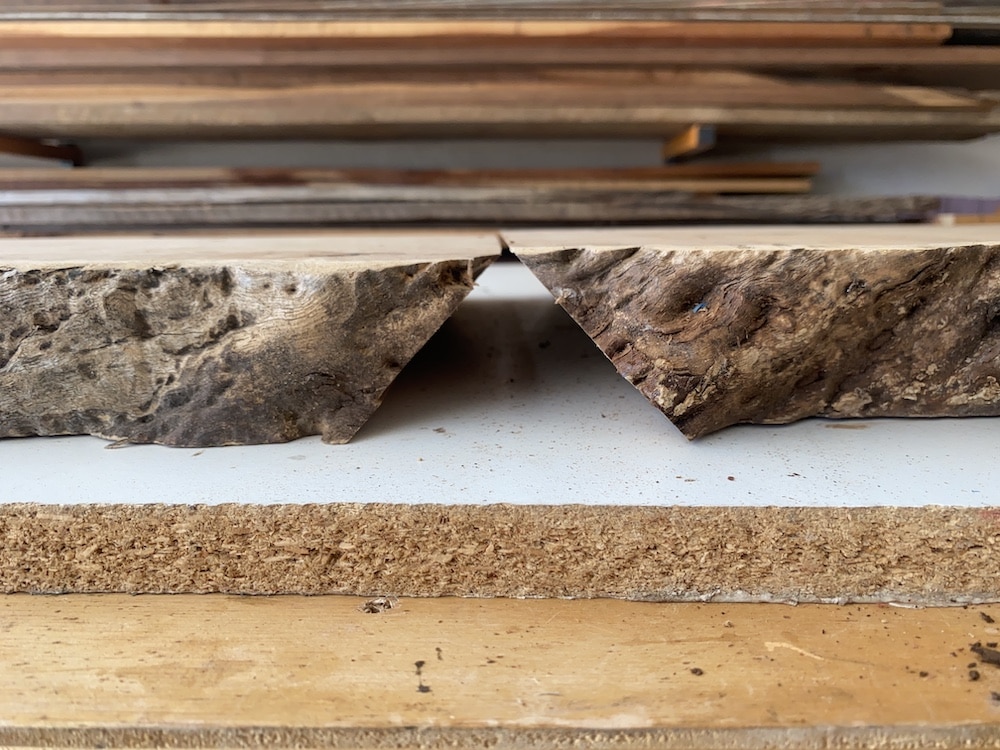
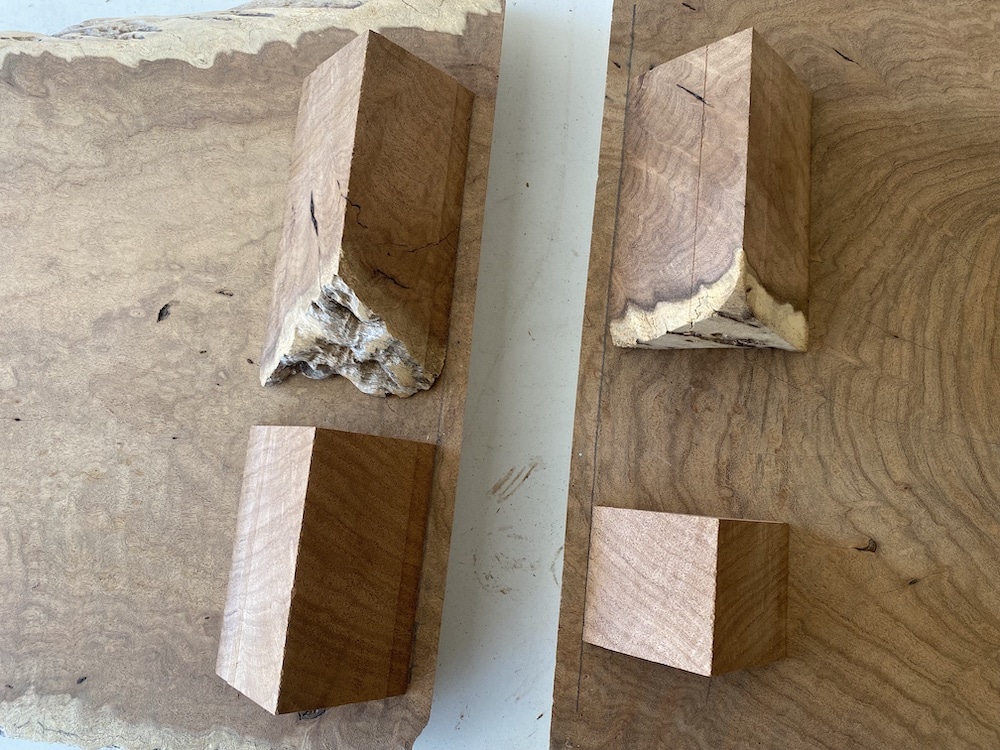
Once cut, your wood pieces will look like this.
Be sure the save your offcuts! You will use these to strengthen the miter joint when clamping.
Step 3: Reinforce the Two 45 degree Angles Together to Create one 90 degree Angle
There are a few ways to reinforce a waterfall edge from within the joint.
Domino Joiner
The most secure way is to use a domino joiner. This particular tool can be cost-prohibitive (it’s on my “would be nice” list too) but if you have one, then consider yourself lucky! This tool is also mainly useful for thicker pieces, like 8/4 stock. It would be too deep of a cut for a piece of wood that is thinner.
Biscuit Joiner
Another way to add strength to this joint is to use a biscuit. Being that this tool is much more affordable than a domino joiner, I have and use one. It gets the job done and created a very strong joint in this live edge waterfall bench.
Dowel Joinery
A third way to reinforce a waterfall wood joint with with dowels. The method of drilling is the same as with a domino or biscuit joinery. I have this dowel jig kit and highly recommend it, especially for the price.
Wood Glue
Yes, this one is a bit obvious. But it’s worth mentioning because a quality wood glue can make or break a project like this.
You will want to find a wood glue that has ample work time. And, if it will be outside furniture, be sure to use a wood glue rated for outdoor use.
My favorite glue that covers both of these concerns is Titebond III.
Once you pick your method of reinforcement, drill the holes in the edge of the wood. Make sure they mirror each other and are aligned correctly, as seen below.
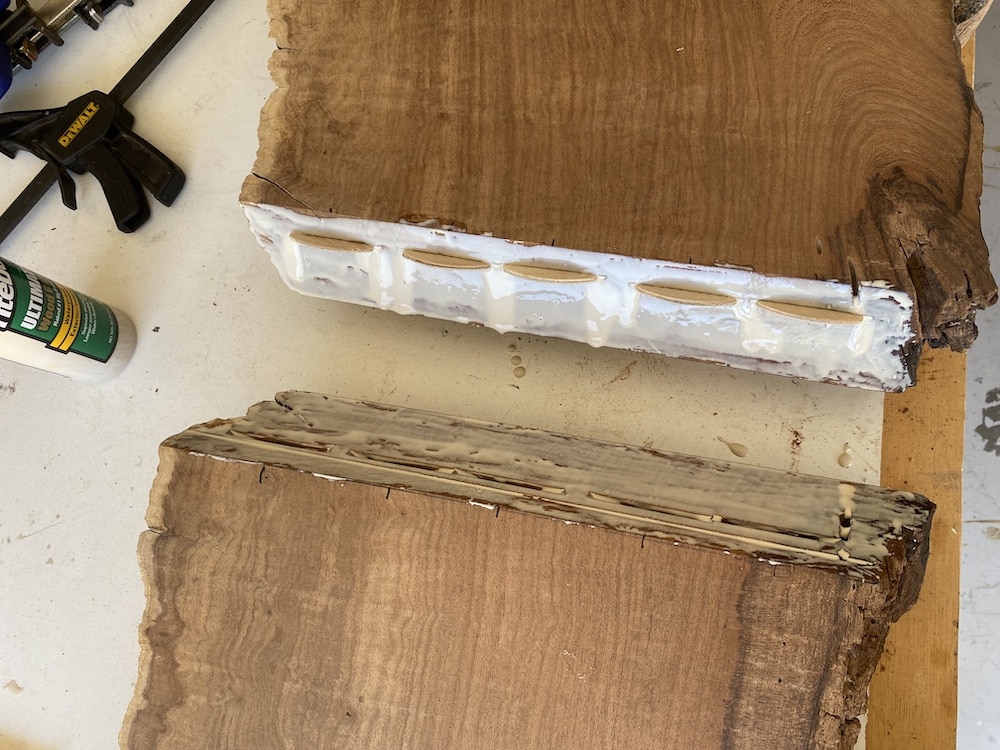
Use ample glue, spread on both sides of the wood with a glue brush.
Step 4: Clamp the 45 degree Angles Together
This is where the offcuts from your 45 degree angle cuts will come in handy.
Use a miter saw to cut them into individual blocks. These will be repurposed into cauls for clamping.
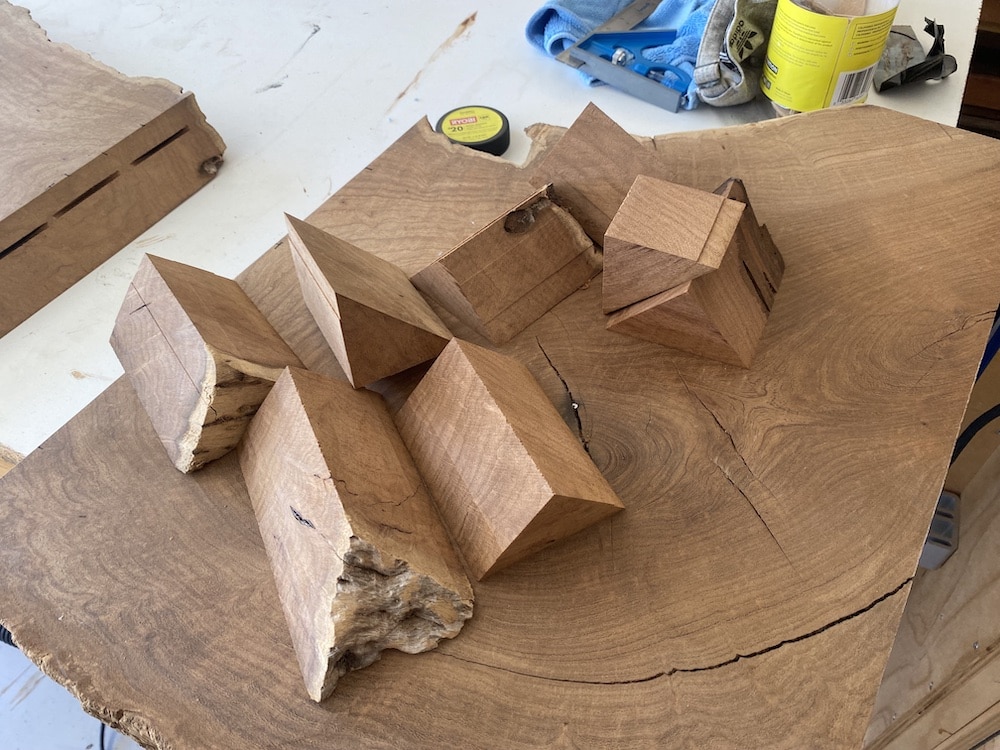
Glue them down with CA glue on the surface of each slab.
Note: Do not use wood glue to attach these. Using CA glue will allow you to knock the pieces off when you’re done clamping without damaging the wood. The remainder of the glue will sand off. Wood glue is much stronger and will be very hard to remove.
When joined at a 90 degree angle, you will have the perfect angles to clamp the edges together.
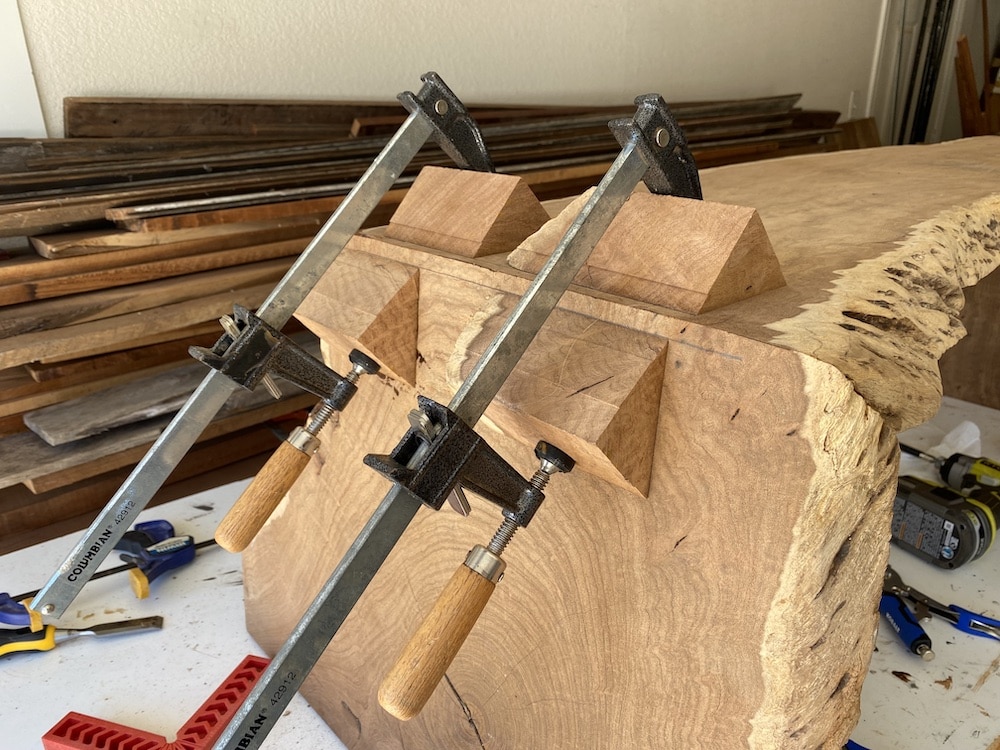
Once the glue has dried, remove the clamps. Using a mallet, knock the sides of the cauls until they come off. Sand off the remaining CA glue off.
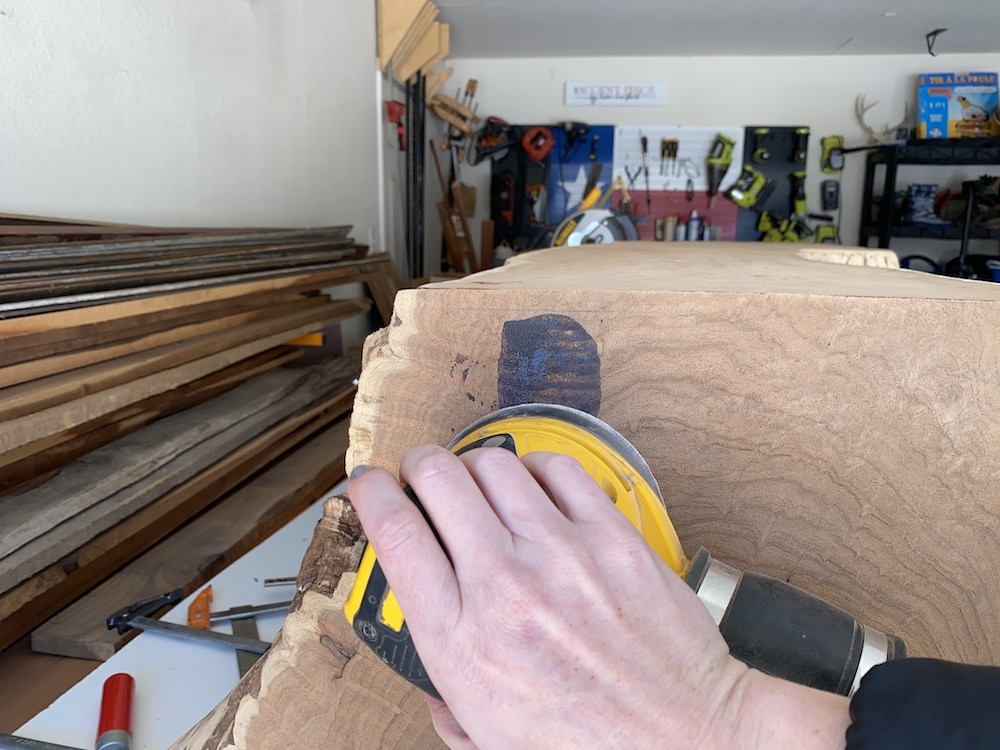
And that’s it! Depending on the piece you are making, you can now sand, stain, or seal it. As always, let me know if you have any questions and I will do my best to answer!
Find the web story for how to cut a wood waterfall edge corner joint here!

Suzie Wible
Suzie has shared her knowledge for over 10 years about building furniture, painting techniques, how to build your dream home, and basic to advanced woodworking skills. Through this blog, readers will feel empowered to create a home and products they love too.