Part 3: Ikea Billy Bookcase DIY Built In Hack
If you missed the first part, check it out here and the second part here.
In those posts, I talked about how I’m building built in bookshelves on either side the french doors in our home by doing an Ikea billy bookcase hack. I’m going for the custom built-in look with Ikea Billy Bookshelves as a starting point.
In those posts, I explained how to paint Ikea billy bookcase built ins, how to assemble them, and what color I painted the MDF sheet on the back of the bookcases.
This post will be all about how to attach a built-in bookcase to the wall, and how to assemble Ikea bookcases. This is such a great built-in hack that uses basic Ikea furniture to create a beautiful library wall or built-in shelves.
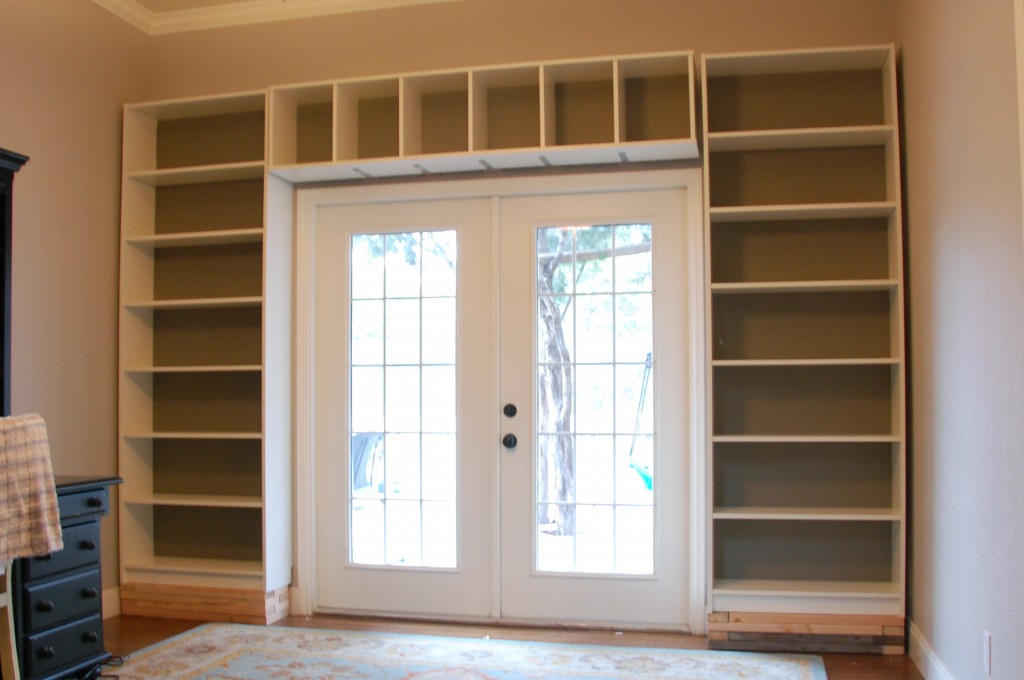
Progress! The custom DIY built ins are now installed and secured to the back wall. These babies aren’t going anywhere.
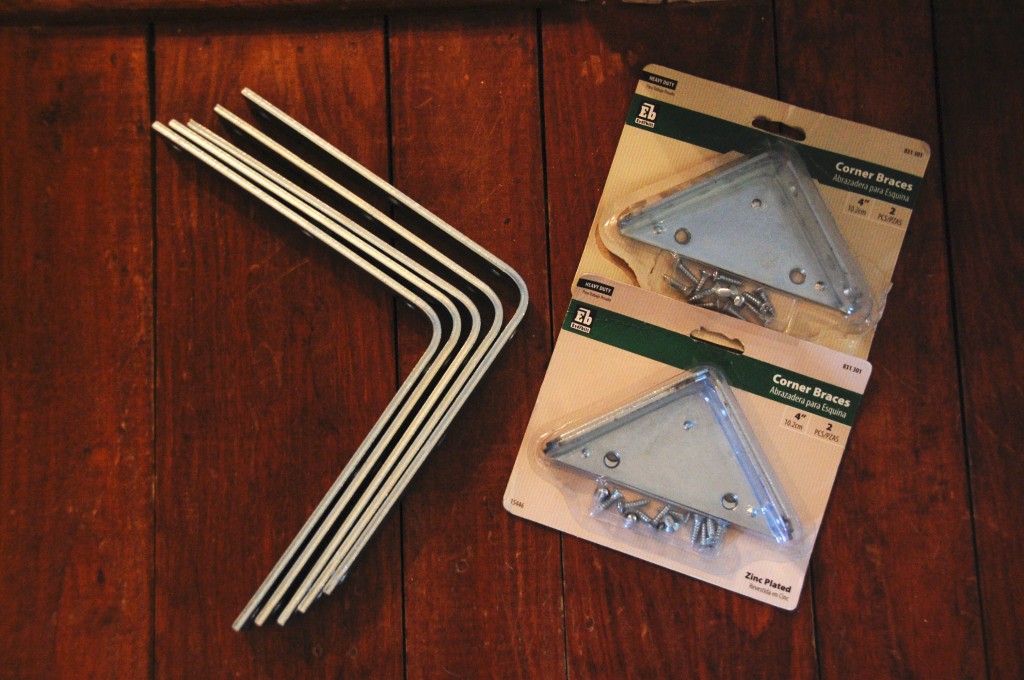
To install the overhang, I bought 5 of these L brackets and two corner braces. I found them at Home Depot.
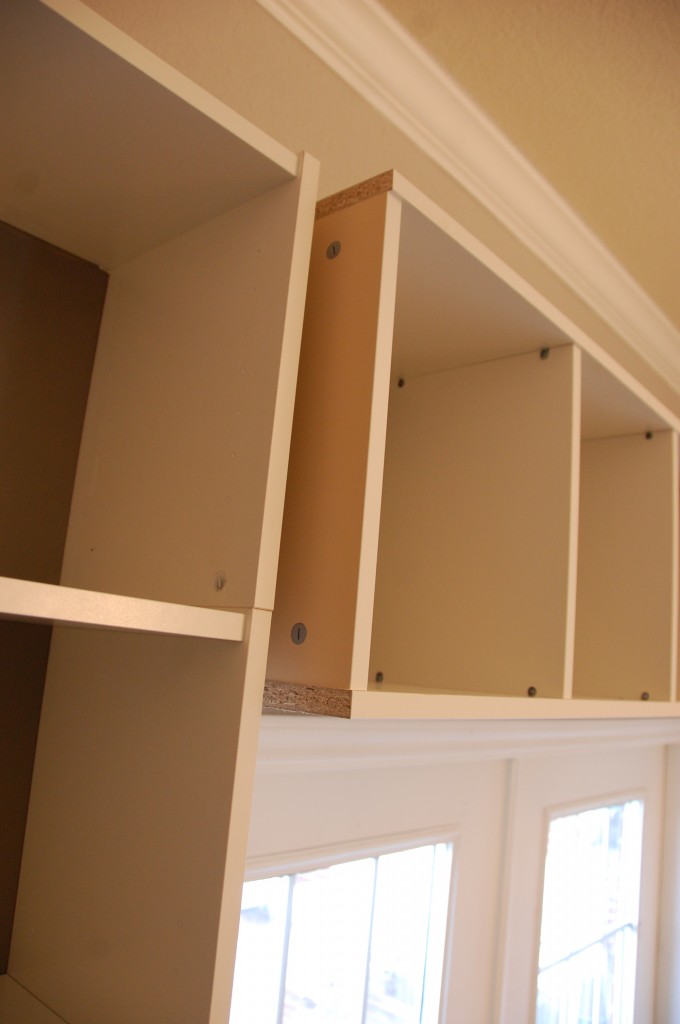
For the next step, we wanted the overhang of the front of the bookcases to sit further off the wall than the tall vertical shelves. This will give the whole bookshelf built in some dimension.
To make the overhang sit further out, we screwed some 2×4’s into the studs. I trimmed these with the miter saw, and you could also use a circular saw. TIP: for tips on how to use a miter saw for beginners, check out this post!
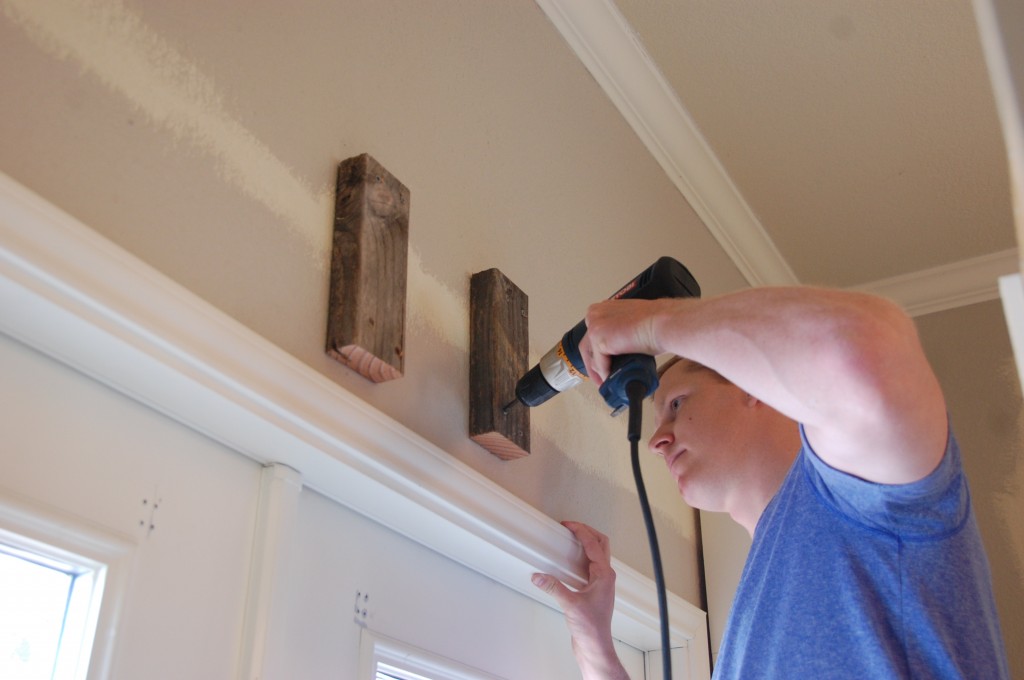
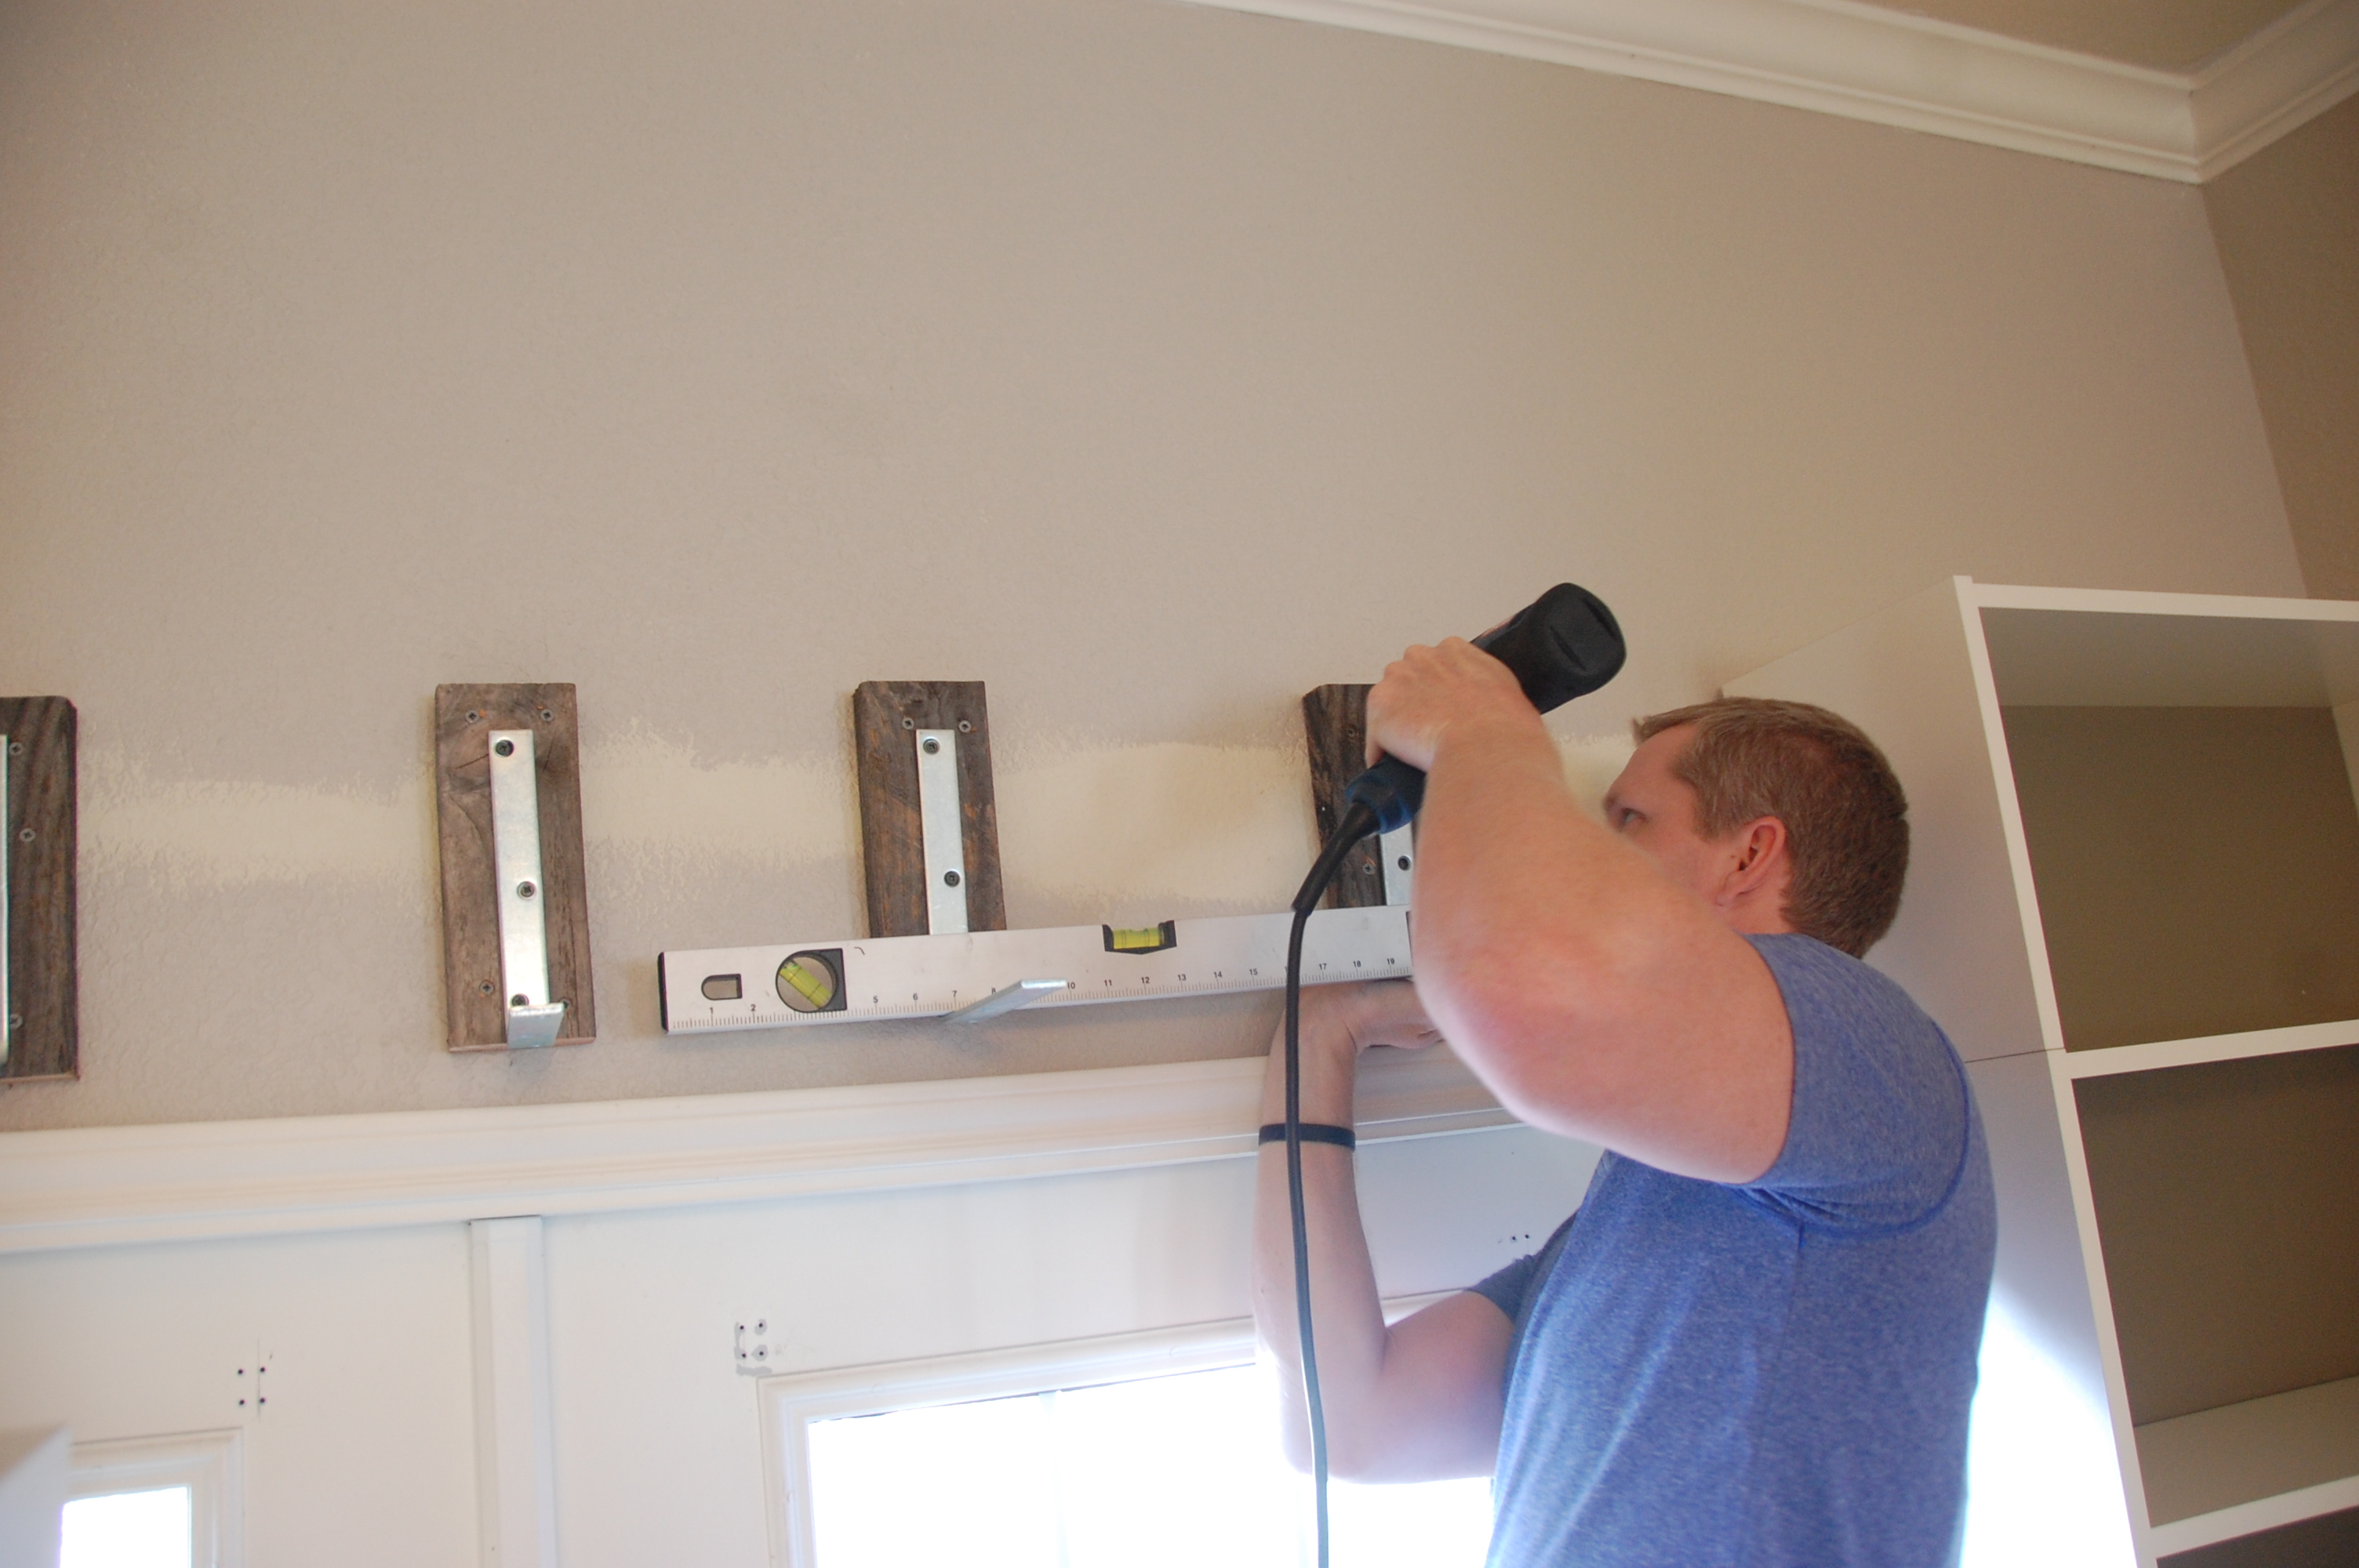
Then we added the L brackets to the studs (leveling as we went) so the overhang can sit on them.

We then screwed the bottom of the overhang into the L brackets in order to support the bottom of the unit. (These brackets will be covered up with a thin sheet of wood, more on that later).
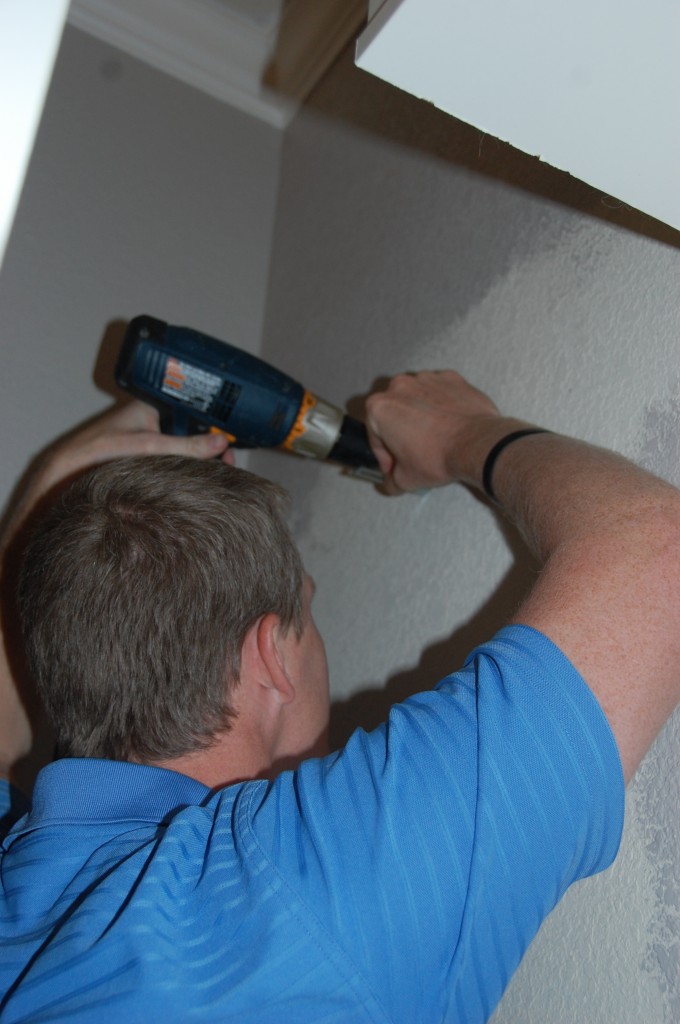
Q: How do you attach a built in bookcase to the wall?
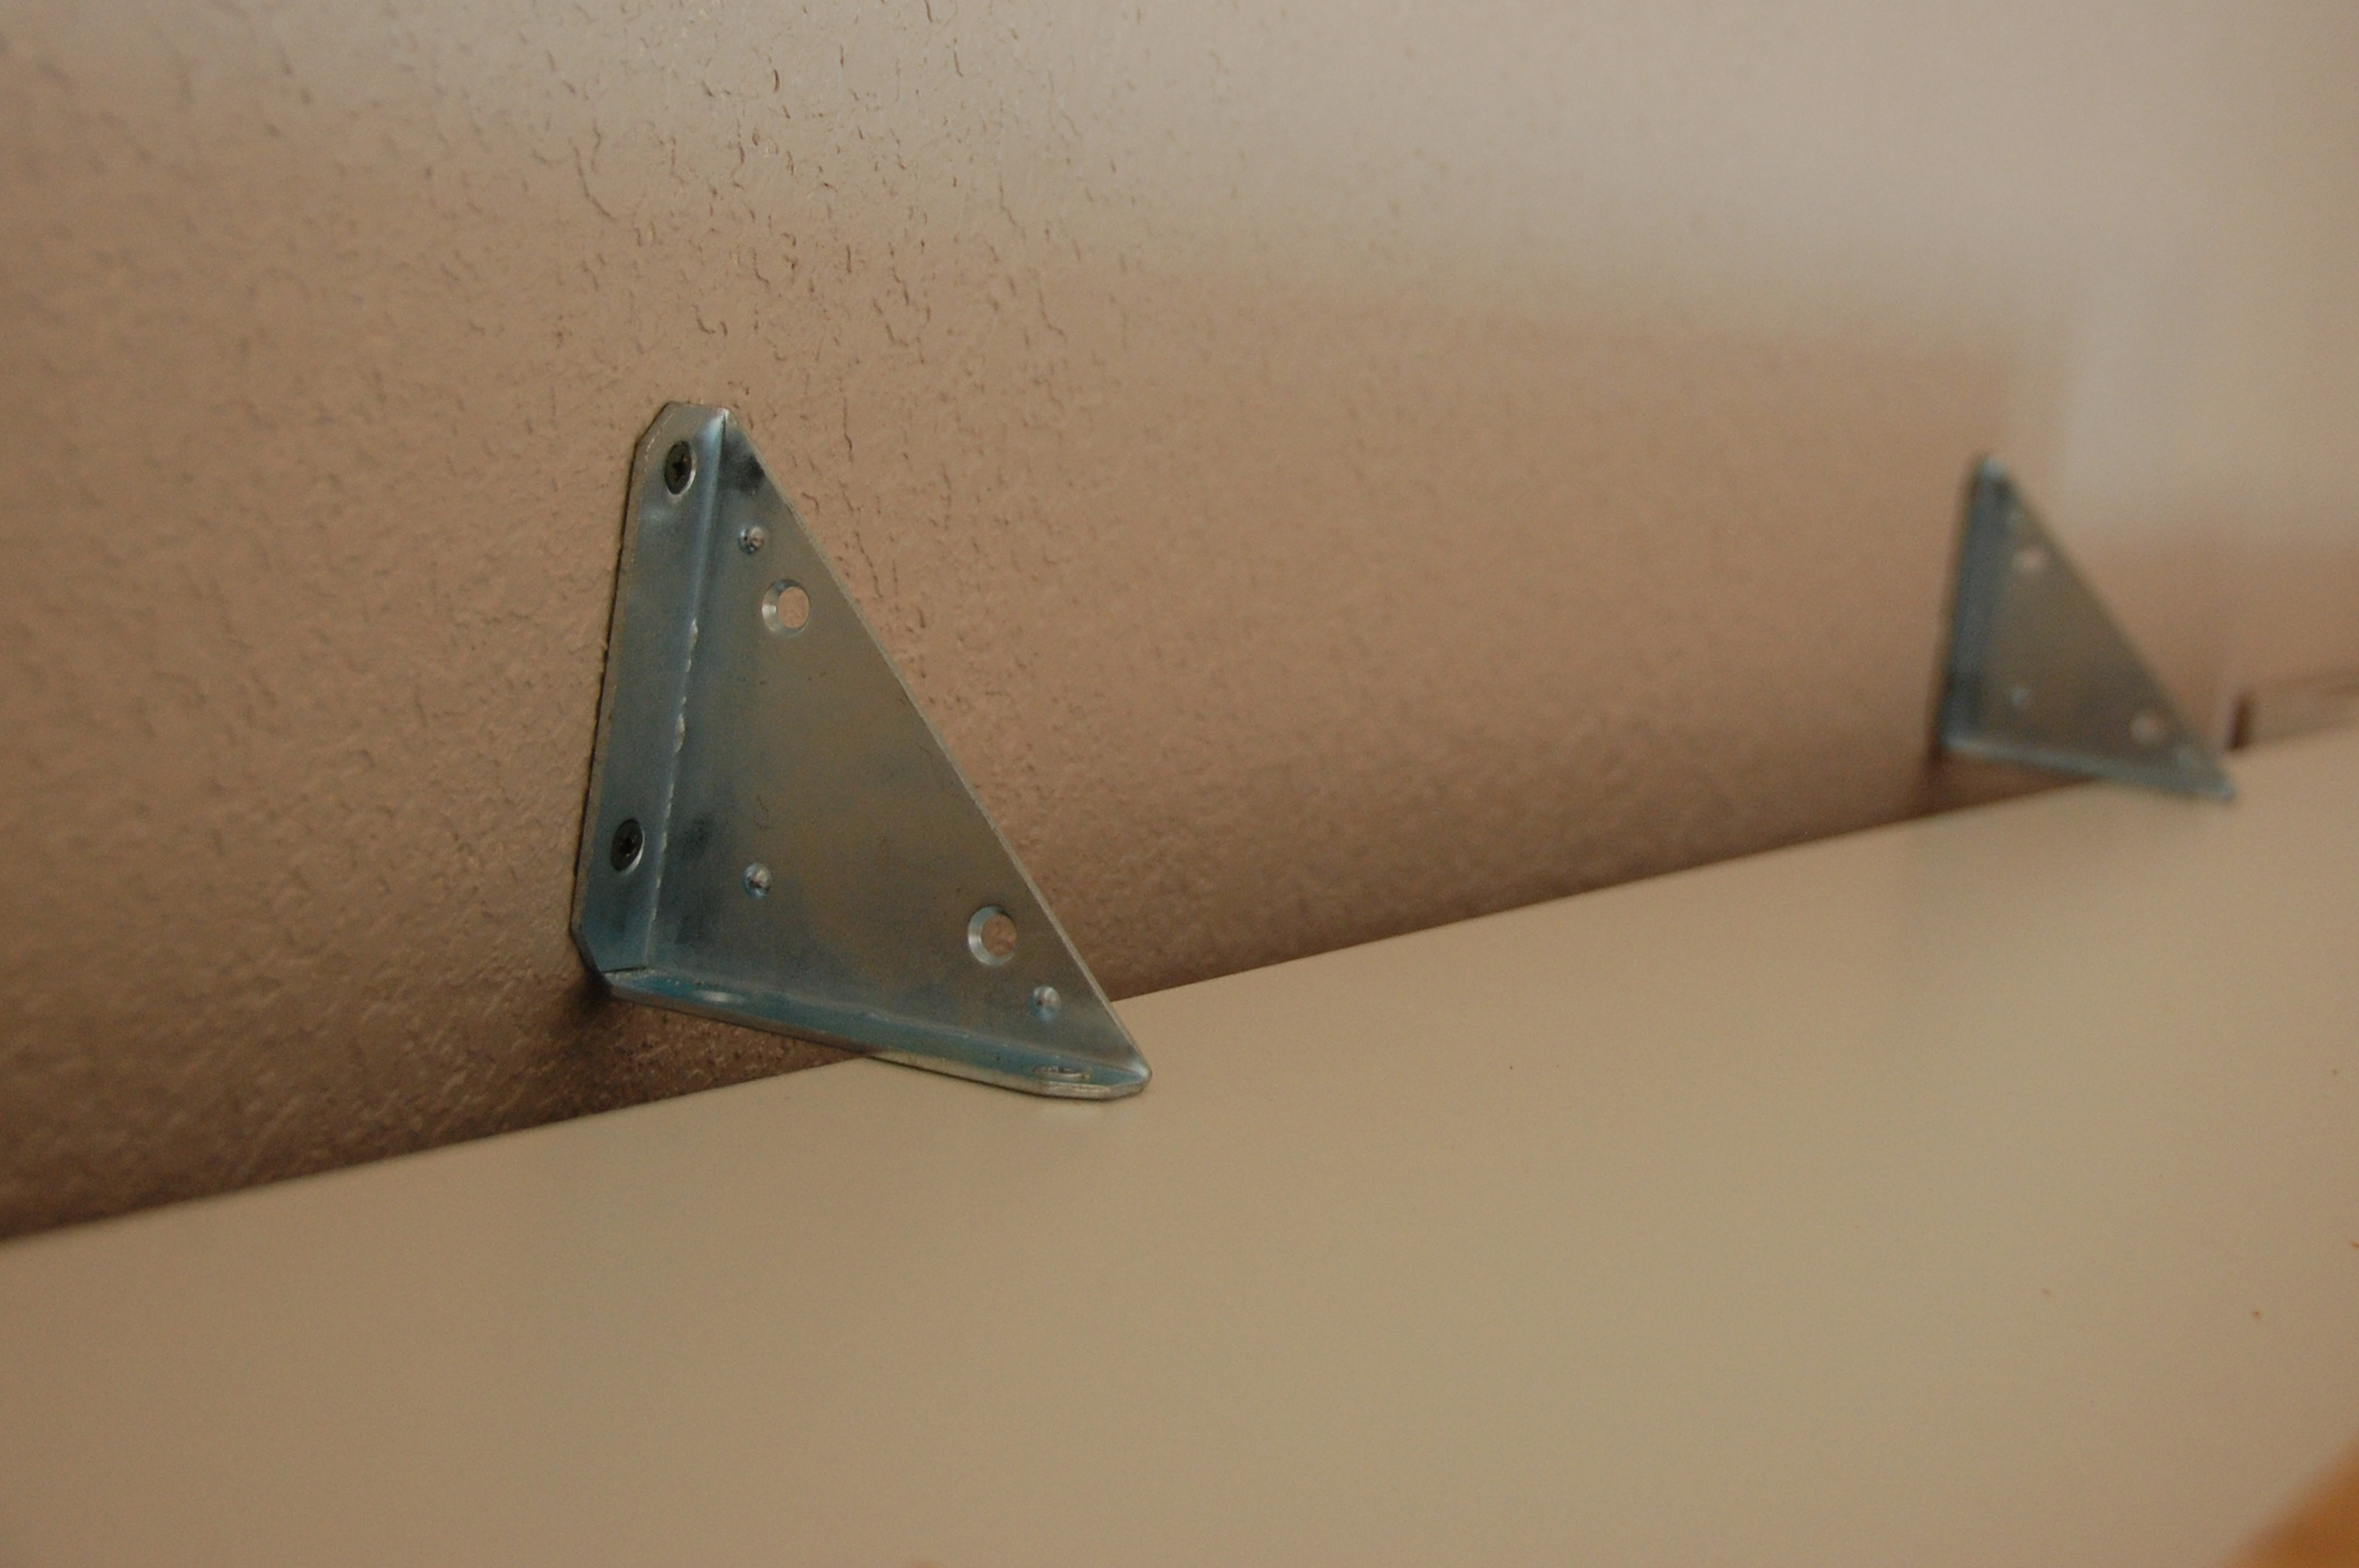
A: For some added security, we used two corner brackets to secure the top of the bookcase overhang to the wall. If you aren’t able to screw them into studs, be sure to use dry wall anchors.
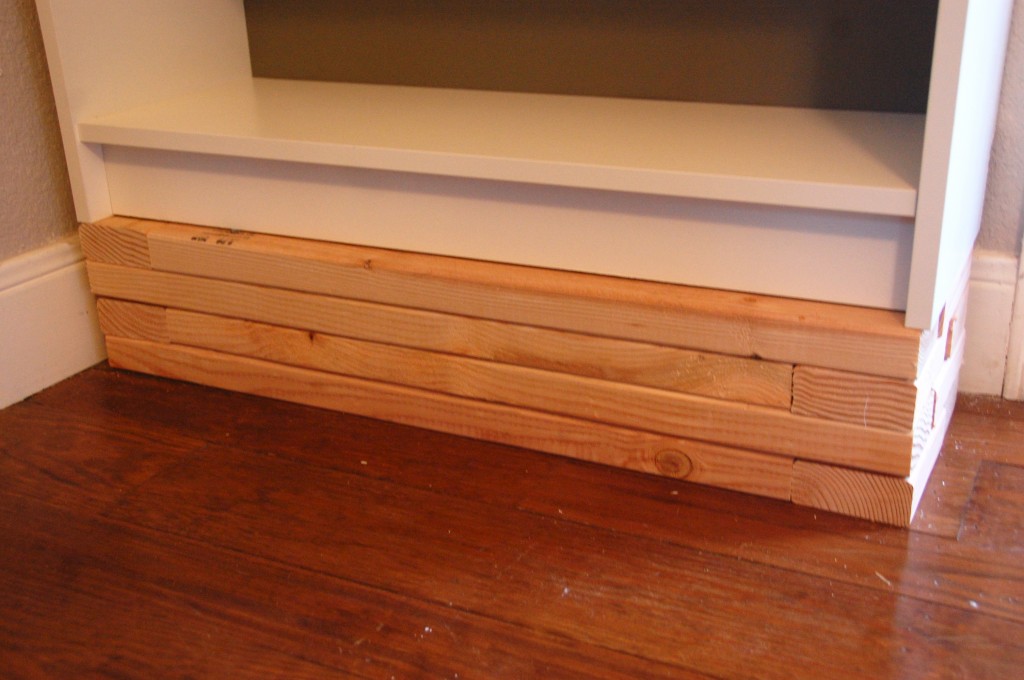
We needed a base to raise up the tall vertical shelves so that they would be level with the top of the overhang . The first layer was secured with my new Kreg Jig (this thing is the icing to my DIY cake…can’t wait to use it again).
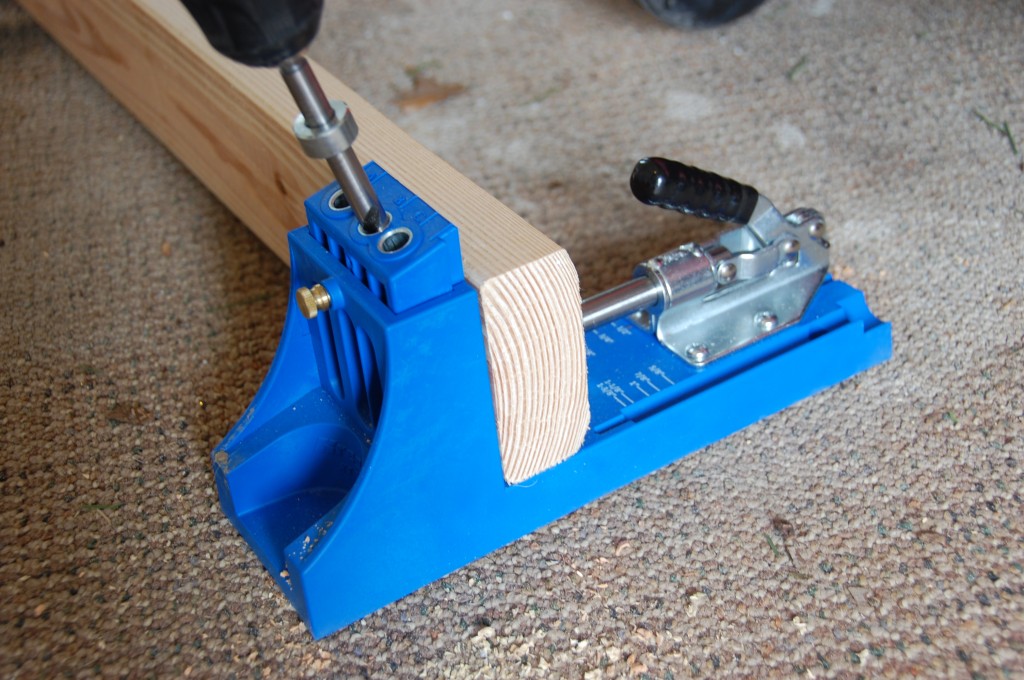
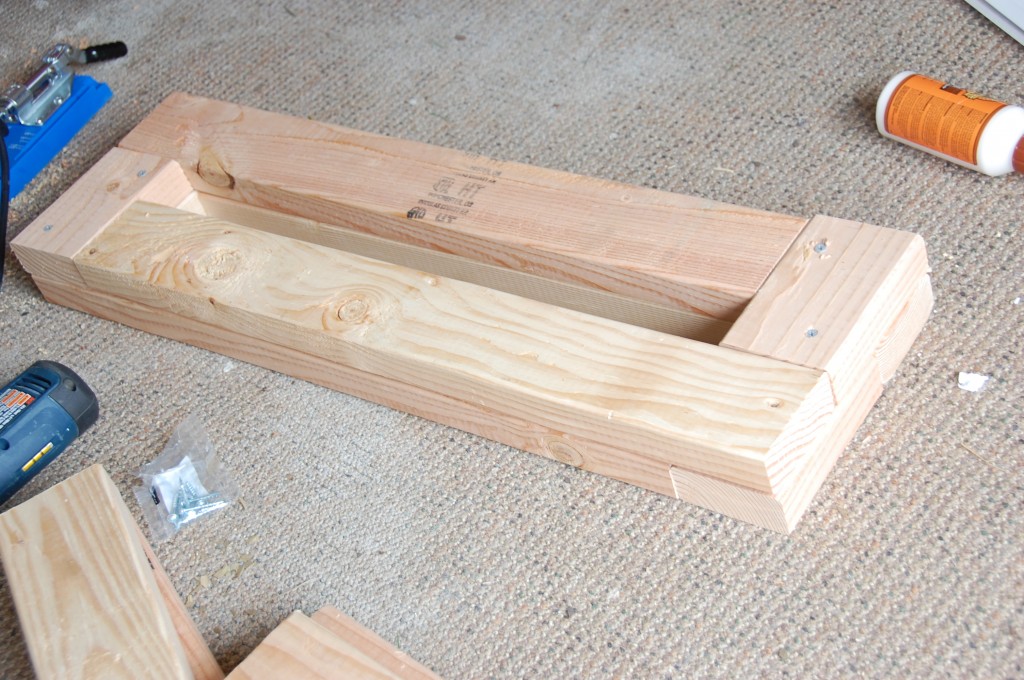
In order for the top of the billy bookcase built-ins to be level, the base needed to be 4 layers of 2×4’s high. This was a quick way to achieve height extensions for the side pieces.
Although it looks unsightly right now, they will be covered later with trim pieces and baseboards and sealed with paintable caulk for a truly custom look.
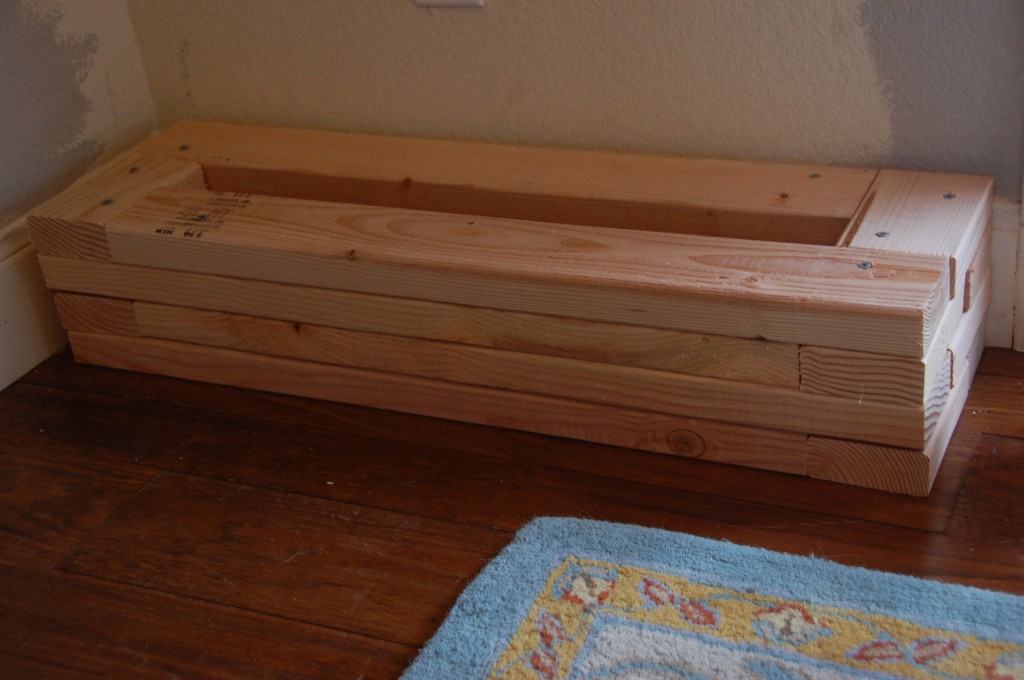
Now the tops are all level and the overhang sits out a bit for the dimension we wanted!
RELATED: For another Ikea hack project, check out this Ikea Rast Hack here.
This is when we attached the side of the built in bookcases to the wall again. We used the brackets that came with the Billy bookcase system to attach it to studs in the wall.
This step is incredibly important in securing the bookcase to the wall in order to prevent it from tipping over, so be sure to no skip this step.
There is a small gap under the extender shelves that we slid the brackets into. We attached the brackets to the actual shelves instead of the extender shelves since it will be more secure…just in case a certain little dude decides to go all Spiderman on us and scale the bookshelves.

So here we are now! I’m starting to see the tall custom wall bookshelves in our living room coming to life with this custom look! I opted for no cabinet doors for this DIY project, but you could easily add them with this post on how to install Euro hinges on face frame cabinets!
For tips on how to get a smooth paint finish when painting built-in bookshelves without a paint sprayer, check out that post as well!
The sides pieces are now set on height extenders so that the side pieces are level with the center pieces. The size of your extenders will all depend on your ceiling height.
Next, we will be updating this basic billy bookcase with a trim piece like crown molding and baseboards to give it the seamless look! The look will be completed with wood filler for the nail holes and paintable caulk for the seams. I will cover the easy way to quickly install and the crown moulding with a brad nailer. That’s why I love this project – it can be completed with minimal tools!
To view the rest of this built-in billy bookcase hack check out and check out our built-in library, Part 1 | Part 2 | Part 4
Check out the web story for how to make custom built-ins using Ikea Billy bookcases here!

Suzie Wible
Suzie has shared her knowledge for over 10 years about building furniture, painting techniques, how to build your dream home, and basic to advanced woodworking skills. Through this blog, readers will feel empowered to create a home and products they love too.
How did you secure your base to the wall? I am looking to do something similar and need a base about that high but I’m not sure how to go about doing it. Super impressed with yours it looks great!
Thanks so much!