How to Create Perfect Wooden Bowtie and Butterfly Inlays
When I first got into woodworking, I admired bow tie inlays from afar, but was never brave enough to attempt them myself. I figured it was more of a fine woodworking skill that I shouldn’t even bother to mess with. Then, I started making my husband a desk with some pecan slabs. The slabs had pretty substantial cracks in them and needed something to keep them from cracking further. About this time, I heard of Slab Stitcher.
The Slab Stitcher kit provides a template to make perfect wood inlays in minutes with just a router, chisel, and the Slab Stitcher kit. It was so easy to learn how to do it and I’ll provide a couple tips I picked up along the way. I can’t recommend this product enough!
Disclaimer: This site contains product affiliate links. We may receive a commission if you make a purchase after clicking on one of these links.
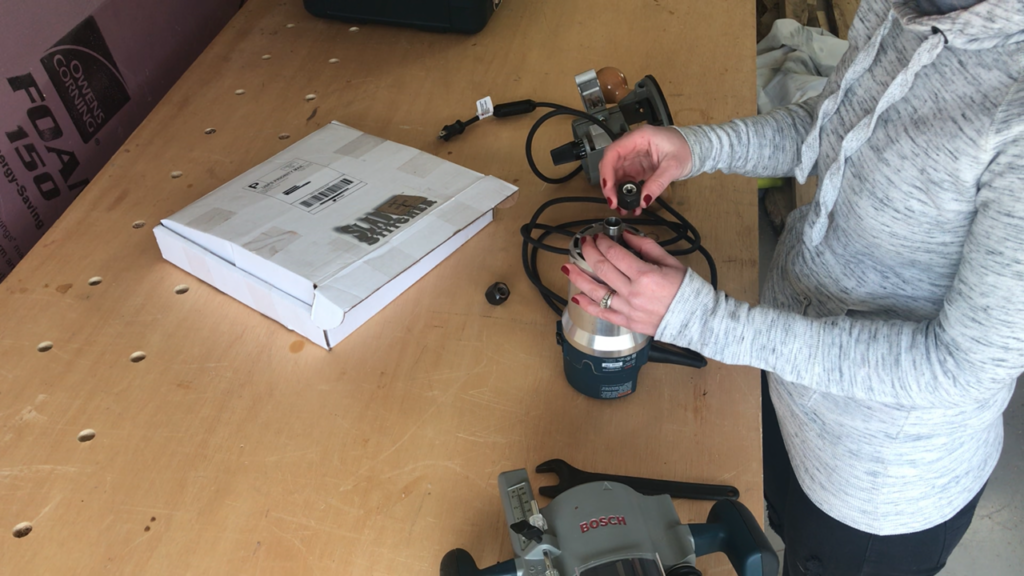
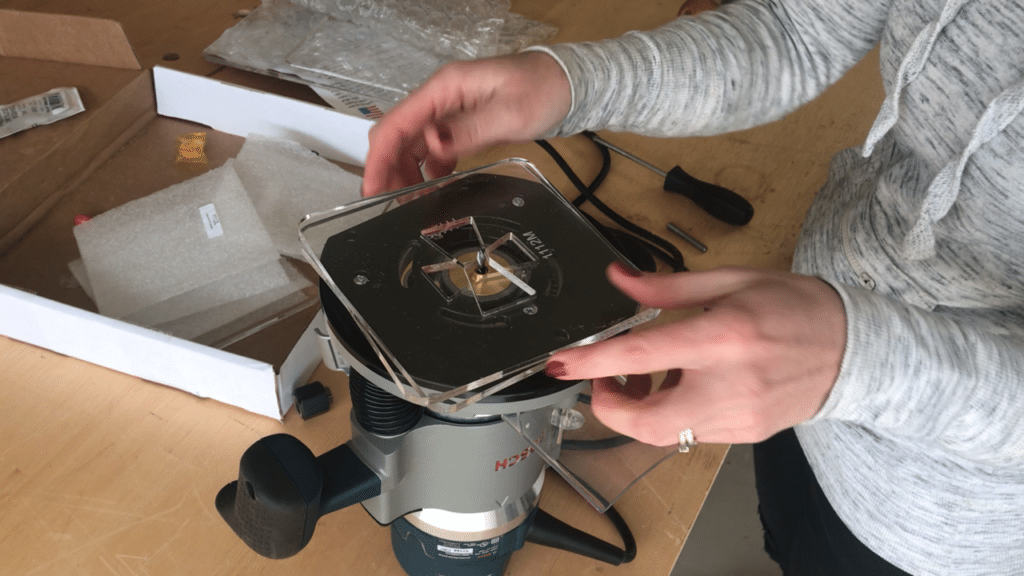
Each kit requires a sub base for your router that will accept the guide bushing that comes with the kit. The particular router I used is this one and I bought this template guide. If you’re having trouble finding the specific sub base you need for your router, check out their website. They sell custom sub bases for common routers.
Disclaimer: Slab Stitcher sent me their product to try out, but all opinions are my own.
RELATED: Check out this tutorial to make a Texas Wooden Cigar Ashtray using the Slab Stitcher kit!
Once you have the right sub base, you can install the centering pin provided with the kit. This is used to make sure the butterfly inlays come out perfect.
Once you have your centering pin in, you can attach the guide bushing to the sub base plate
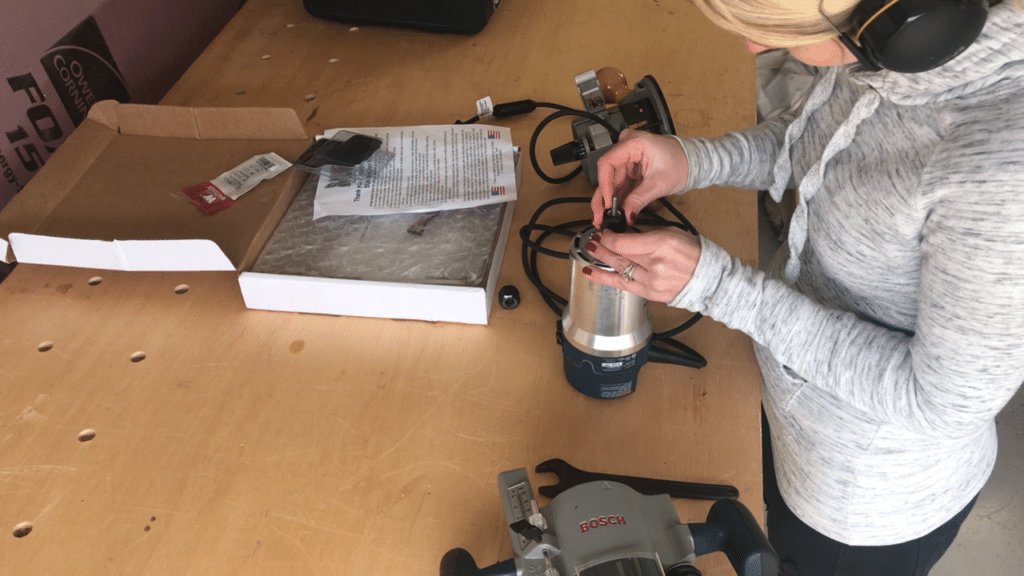
After everything is centered, remove the centering guide pin.

Each kit comes with a Whiteside spiral down cut bit that is perfect for routing the wood in lays.
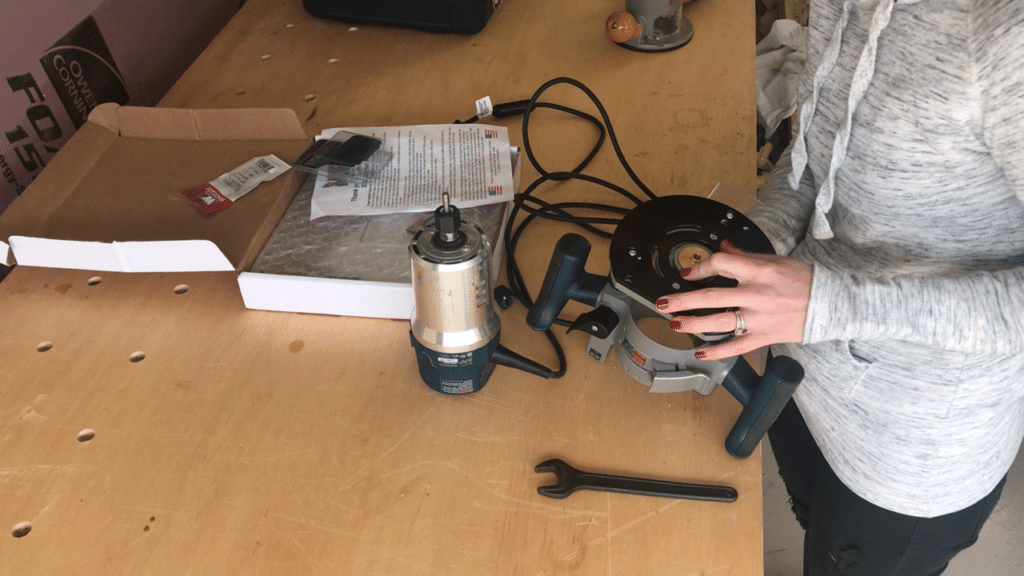
You will want to set the depth to where it’s not too proud or too shallow. You can place two inserts on top of each other and set the depth of your router bit to the depth of both of those inserts.
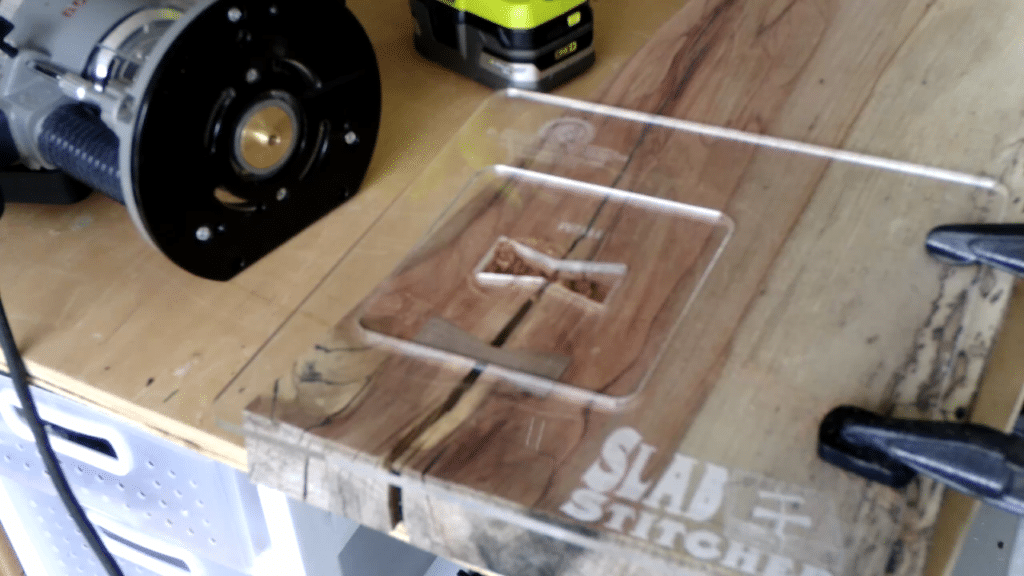
Make sure you put the mainframe and the template with Slab Stitcher logo facing up on whatever surface you want to add the inlay to. Clamp it down so that it’s secure.
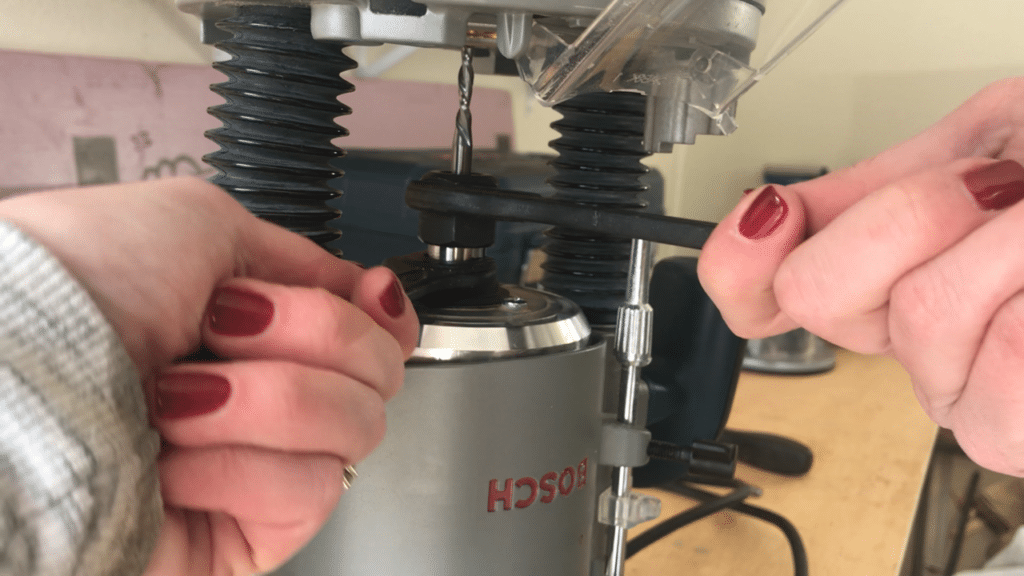
From here, you can begin to route out the waste. Make sure to insert the router into the middle of where you want the inlay so you don’t accidentally hit the template.
From there, route to the edge of the template, then work clockwise. After you have routed the edges, you can then remove the rest of the waste using sweeping motions until it is all removed.
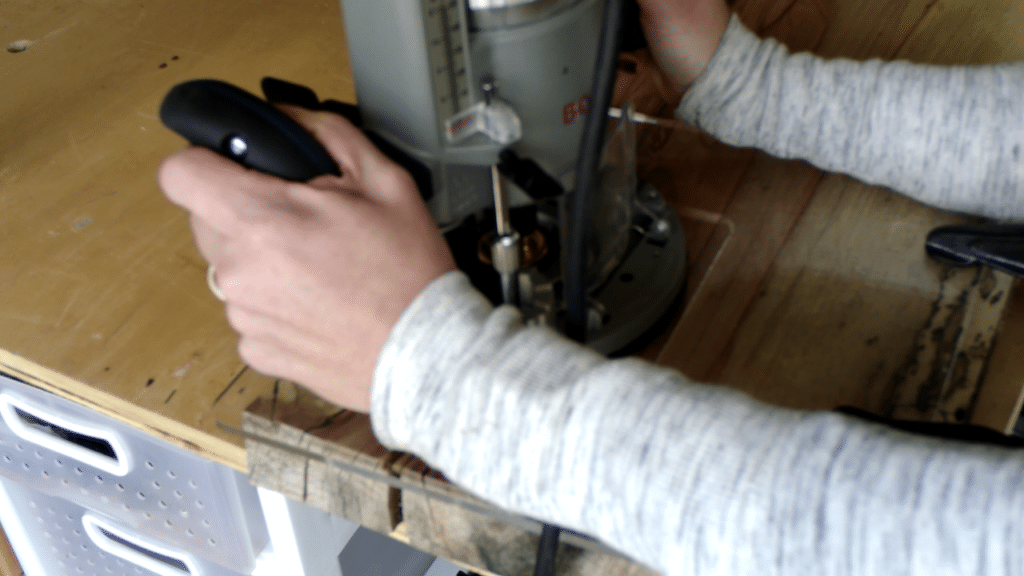
When you are finished, allow router to come to a complete stop so you don’t accidentally hit the template, then remove the router.
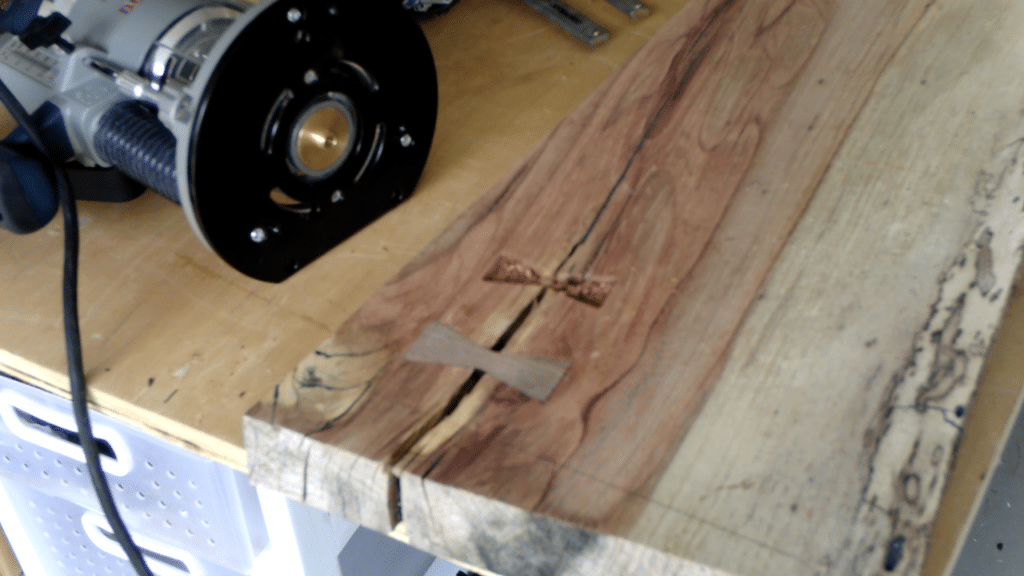
Now, all you have to do is clean up the corners with a chisel. I recommend sharpening your chisels beforehand – the bowtie inlay edges will come out much better.
Slab Stitcher also sells other insert shapes, like Texas. I have used these to inlay cutting boards. If you’re interested in making your own, check out this post on all the best tips and tricks for making your own cutting board!
Another great way to upgrade your cutting boards is to add a juice groove and handles. Check out how to route a juice groove here and how to route finger groove handles in a cutting board here!
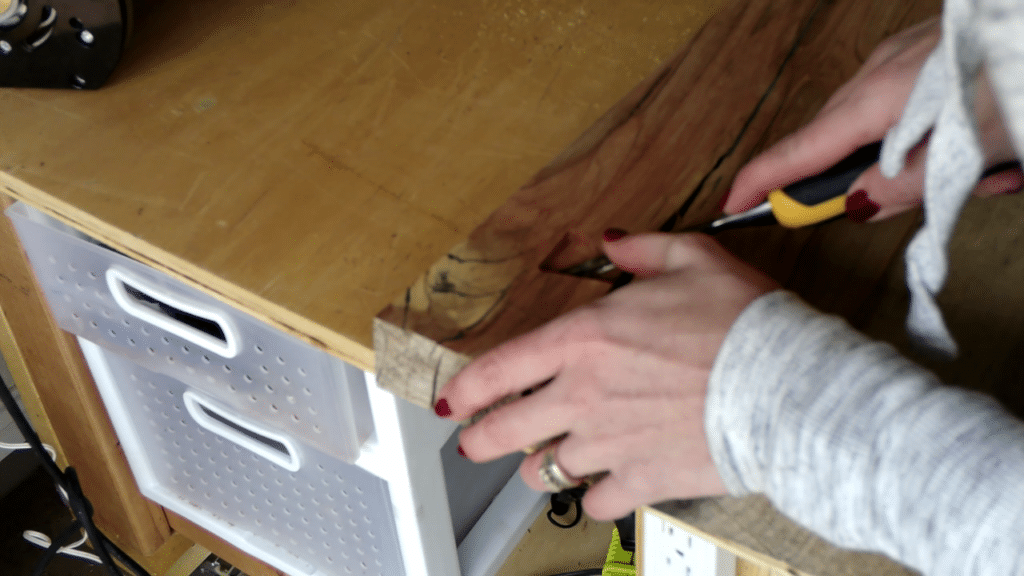
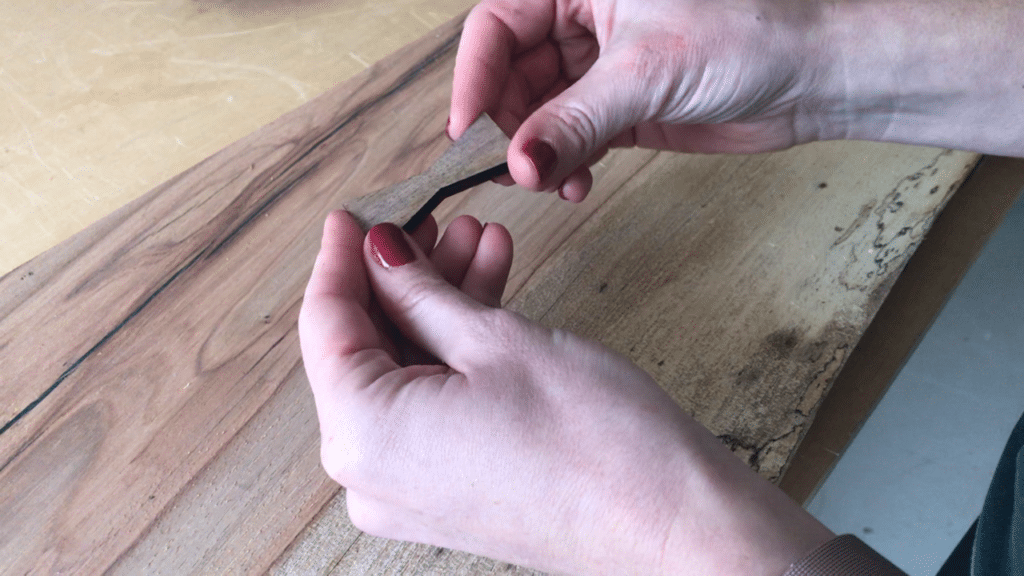
Every inlay that Slab Stitcher provides comes with a line on one side. That designates the bottom. The sides are tapered slightly to fit into what you just routed.
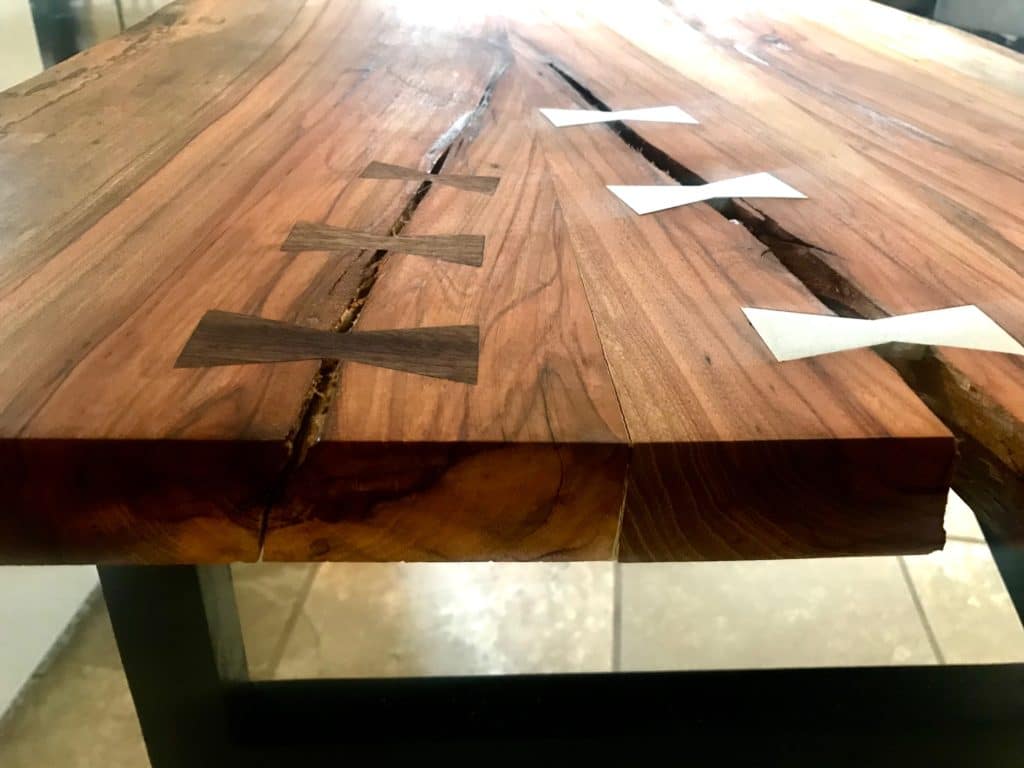
A quick note on the inlays – Slab Stitcher offers tons of different species and inlay shape options.
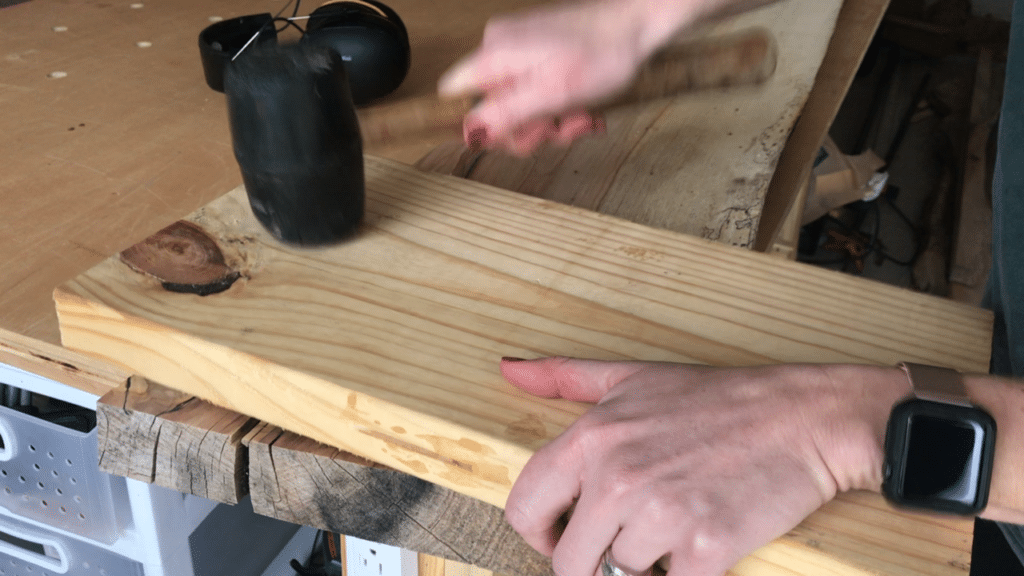
You will want to cover the bottom and sides of the inlay with glue and place in the routed area. Place a board over the inlay and use a mallet to hammer it in.
Slab Stitcher creates the crispest inlay corners at a fraction of the time.

I love how Slab Stitcher makes perfect inlays accessible to beginner woodworkers and makes the inlay process easier and quicker for experienced woodworkers. Be sure the follow them on instagram to keep up to date with what they are coming out with (@slabstitcher).
Slab Stitcher was nice enough to offer a discount code to anyone wanting to buy a kit: use code Accent15 to get 15% off your total purchase (excludes gift cards, copper, brass, and shirts).
Check out the web story for how to create perfect bowtie inlays here!
If you found this article helpful, be sure to check out the following:

Suzie Wible
Suzie has shared her knowledge for over 10 years about building furniture, painting techniques, how to build your dream home, and basic to advanced woodworking skills. Through this blog, readers will feel empowered to create a home and products they love too.